
Popular categories
Looking for a yarn?


Comments / Questions (99)
![]() Minttu wrote:
Minttu wrote:
Hei, haluaisin tehdä paidan eri langasta, jos osasin käyttää "Voinko käyttää lankavaihtoehtoja?" -sivua oikein, voisin vaihtaa langan esimerkiksi Drops Air:iin. Voinko edelleen tehdä paidan ohjeen mukaisella silmukkamäärällä, vai täytyykö ottaa jotakin huomioon?
29.08.2023 - 20:20DROPS Design answered:
Mikäli käytät DROPS Air-lankaa tähän puseroon, sinun tulee lisätä työhön toinen lanka (lankaryhmästä A). Tarkista, että neuletiheytesi on sama kuin ohjeessa annettu tiheys. Jos tiheys on sama, voit neuloa ohjeen mukaisesti.
18.09.2023 - 17:17
![]() CLAIRE GORKIEWER wrote:
CLAIRE GORKIEWER wrote:
Je souhaiterais avoir une vidéo pour les mailles raccourci. Comment faire pour le restant du tricot
09.08.2023 - 14:00DROPS Design answered:
Bonjour Mme Gorkiewer, cette vidéo montre comment tricoter ces rangs raccourcis (pensez à bien suivre en même temps les indications pour votre taille). Dans cette vidéo mais aussi dans cette leçon, nous montrons comment tricoter un pull standard de haut en bas, mais suivez bien les indications de votre modèle. Bon tricot!
09.08.2023 - 16:58
![]() Maria wrote:
Maria wrote:
Hej! Har fastnat vid slutet på oket vid hur maskorna ska delas upp till ärmar och fram/bakstycke. Jag stickar storlek L och och om jag gör som det står alltså stickar 35, lägger upp 43 till ärm, stickar 67, lägger upp 43 till nästa ärm och sedan 32 så blir uppdelningen lite skev? Alltså att det inte blir riktigt lika på båda sidor och att det inte följer den ”naturliga” raglanuppdelningen. Vet inte riktigt hur jag ska förklara. Väldigt tacksam för svar!
30.07.2023 - 17:13DROPS Design answered:
Hej Maria, Jo om du delar upp enligt beskrivningen får du 67 på bakstycket och 67 på framstycket + 12 maskor i varje sida, några av raglanmaskorna vill gå till bolen :)
07.08.2023 - 11:17
![]() Mette Buer wrote:
Mette Buer wrote:
Hei! På Blueberry cream oppfatter jeg det sånn at minste størrelse er lengst når man måler lengden på bolen. Stemmer det? Mvh Mette Buer
17.07.2023 - 14:56DROPS Design answered:
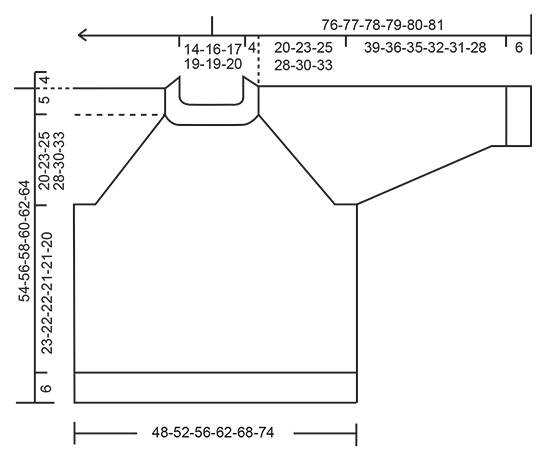
Hei Mette. Om du ser på målene på målskissen skal den minste str ha en lengde på 54 cm, mens den største str. ha en lengde på 64 cm på bolen. Mens ermlengden er lengre på den minste str. enn den største str. (pga større overvidde på de største str.). mvh DROPS Design
25.07.2023 - 08:21
![]() Josefa wrote:
Josefa wrote:
Hi! I'm new at knitting, so i dont really understand the raglan, after how many stitches do i have to increase? I'm knitting a size L. Thank you in advance.
11.06.2023 - 07:02DROPS Design answered:
Dear Josefa, you will increase 8 sts for the raglan a total of 2 times on the short rows for neckline, then increase a total of 8 sts for the raglan 10 more times on every other round, then increase alternately 4 and 8 sts: increase on body on every other round a total of 8 times and at the same time on every 4th round, increase for sleeves too. In this video , we show how to work the short rows and increase for raglan and how to increase in the round afterwards. Happy knitting!
12.06.2023 - 08:42
![]() Astrid wrote:
Astrid wrote:
Hallo, mit welcher Nadel wird denn die Maschenprobe gestrickt? Und sollte die gewaschene Maschenprobe die richtige Maschenanzahl ergeben oder ungewaschen? Viele Grüße Astrid M.
11.04.2023 - 15:52DROPS Design answered:
Liebe Astrid, die Maschenprobe wird mit Nadeln Nr 6 gestrickt - einige Strickerinnen spannen jede Strickstück, andere machen das nie, wir spannen nicht, aber sollten Sie einen Unterschied vor/danach erwarten, dann waschen Sie sie am besten davor. Gerne kann Ihnen damit Ihr DROPS Händler (auch per Telefon oder per E-Mail) helfen. Viel Spaß beim stricken!
11.04.2023 - 16:57
![]() Nöm wrote:
Nöm wrote:
Guten Tag Gemäss Anleitung müsste ich für grösse M am Ende der Passe 200m auf der Nadel haben. Ich habe aber rund 224m… gemäss meiner brechnung sollte dies auch stimmen: 80m + 16m (verkürzte reihen) + 72 (rumpf) + 56 (ärmel)= 224 —> stimmt die angabe auf der anleitung nicht? Zudem: wenn ich anschliessend die Aufteilung ärmel und rumpfteil lese, dann geht es auch mit diesen 200m gemäss anleotung nicht auf? Wie muss ich also mit meinen 224m weitermachen damit es am schluss stimmt?
02.04.2023 - 23:56DROPS Design answered:
Guten Tag, die Angabe von 200 M stimmt. Sie haben direkt nach der Halsblende 72 M. Dann nehmen Sie 10 x 8 Maschen zu (die Zunahmen, die nach der Halsblende angegeben werden, wenn Sie dann auf 80 M kommen, sind dort mit eingerechnet, d.h. Sie nehmen insgesamt 80 M zu = 152 M). Danach nehmen Sie am Rumpfteil 8 x zu = 8 x 4 M = 32 M und nehmen gleichzeitig an den Ärmeln 4 x zu = 4 x 4 M = 16 M. 152 M + 32 M + 16 M = 200 M. Gutes Gelingen!
11.04.2023 - 10:10
![]() Murksi wrote:
Murksi wrote:
Eine Frage habe ich leider noch. :-D Wie wird die Länge der Passe genau gemessen? Auf der Skizze sieht es so aus, als würde man den halben Halsausschnitt vorne mit einrechnen. Oder messe ich vorne erst unterhalb des Halsausschnittes? Danke!
04.03.2023 - 13:20DROPS Design answered:
Liebe Frau Murksi, ja genau, die Passe wird an der mitteren Vorne gemessen - dh ohne die verkürzten Reihen von dem Halsauschnitt. Viel Spaß beim stricken!
06.03.2023 - 09:18
![]() Murksi wrote:
Murksi wrote:
Wie ist bei den Kurzreihen "3 Maschen VOR dem 3. Markierer" gemeint? Nehme ich die Maschen vom Rundenbeginn also bis 3 Maschen links vom Markierer (diesseits) oder rechts vom Markierer (jenseits) zurück? Letztere Variante wäre dann ja wie im Video. Starte ich also rechts vom Markierer oder links davon (wenn ich draufschaue).
01.03.2023 - 14:06DROPS Design answered:
Liebe Murksi, den Faden sollen Sie zuerst abschneiden, dann vor dem 3. Markierer anfangen - siehe Video - dann nach den verkürtzen Reihen schneiden Sie Faden und Runden beginnen dann wieder in der hintere Mitte. Viel Spaß beim stricken!
01.03.2023 - 17:15
![]() Murksi wrote:
Murksi wrote:
Hallo, ich bin irritiert über eine Antwort in den Kommentaren: "(beachten Sie nur, daß die Raglanzunahmen bei dem Video unterschiedlich gestrickt werden)". Muss ich bei dieser Anleitung bei den Kurzreihen also NUR in den rechten Reihen Zunahmen arbeiten und in den Rückreihen (links) dann nur die Umschläge links verschränkt stricken?
28.02.2023 - 20:46DROPS Design answered:
Liebe Murksi, das Video zeigt die Technik, aber je nach dem Modell wird es unterschiedlich gestrickt - bei diesem Pullover wird man bei den verkürzten Reihen nur bei den Hinreihen zunehmen, bei den Rückreihen wird es nicht zugenommen - die Umschläge werden dann ja links verschränkt gestrickt. Viel Spaß beim stricken!
01.03.2023 - 09:44
|
|
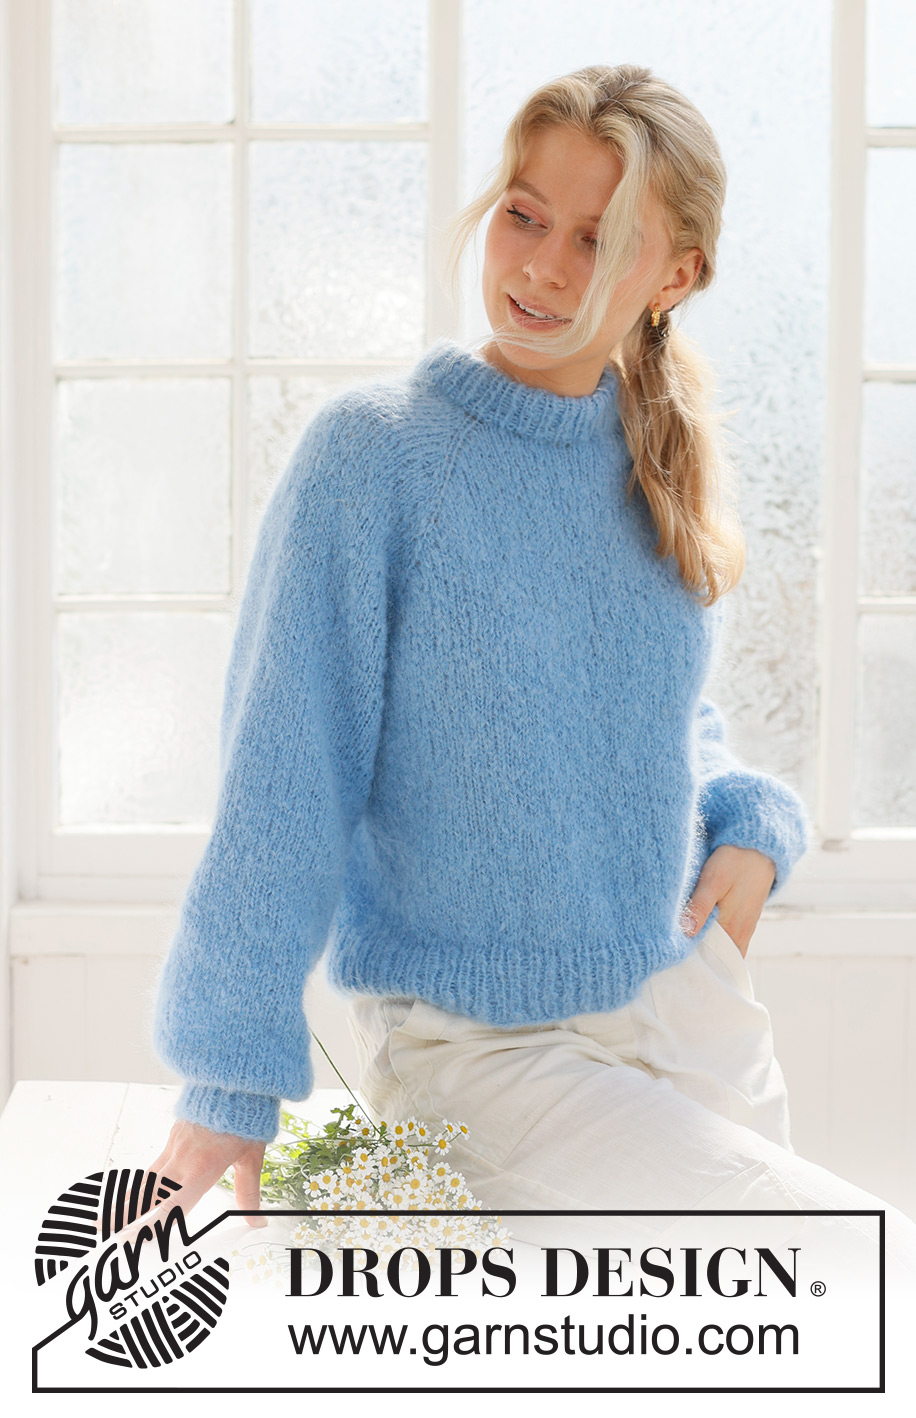
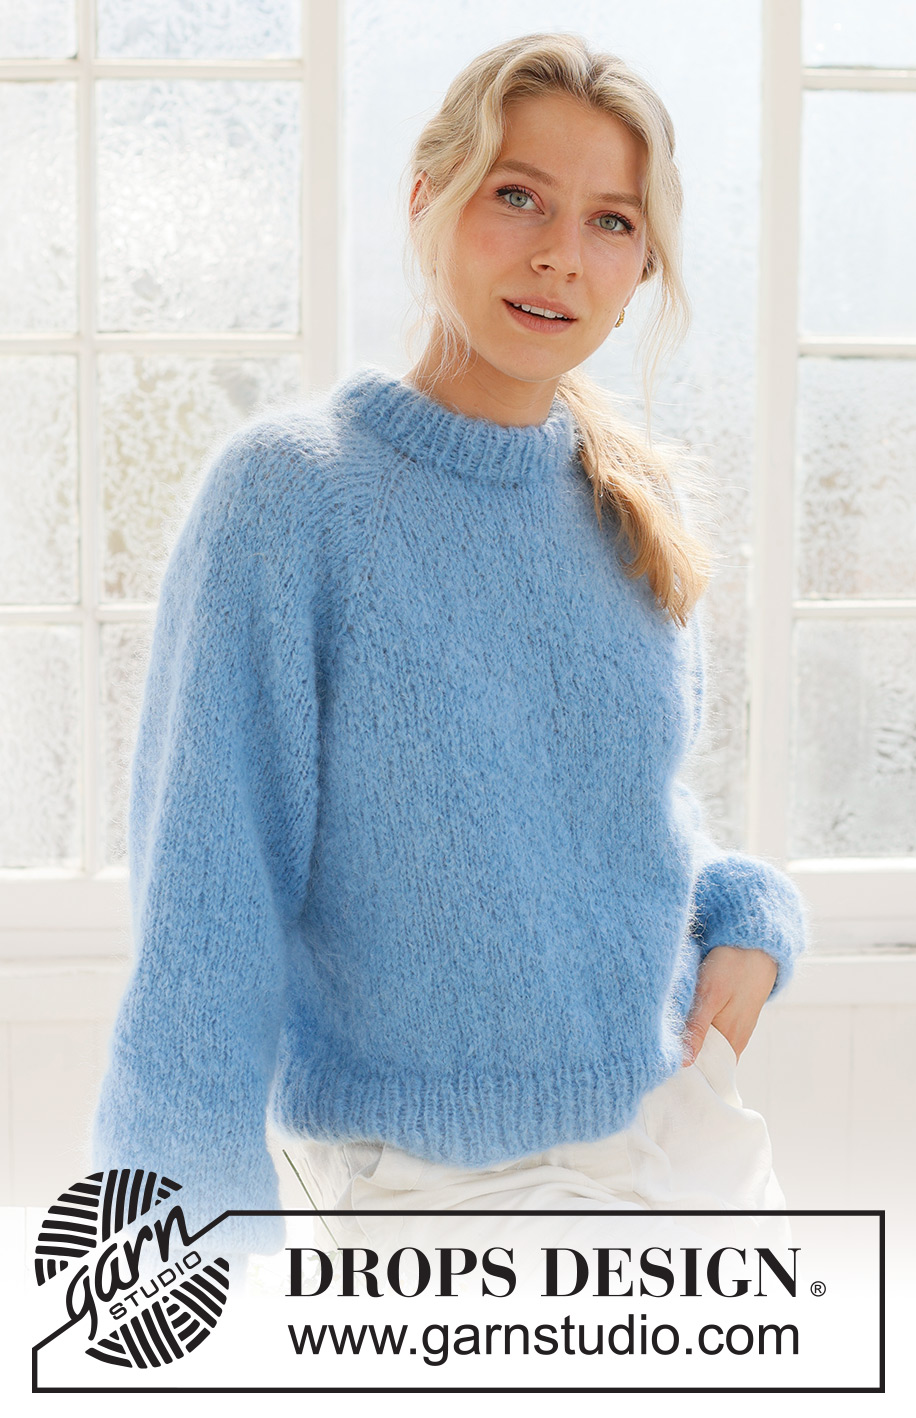
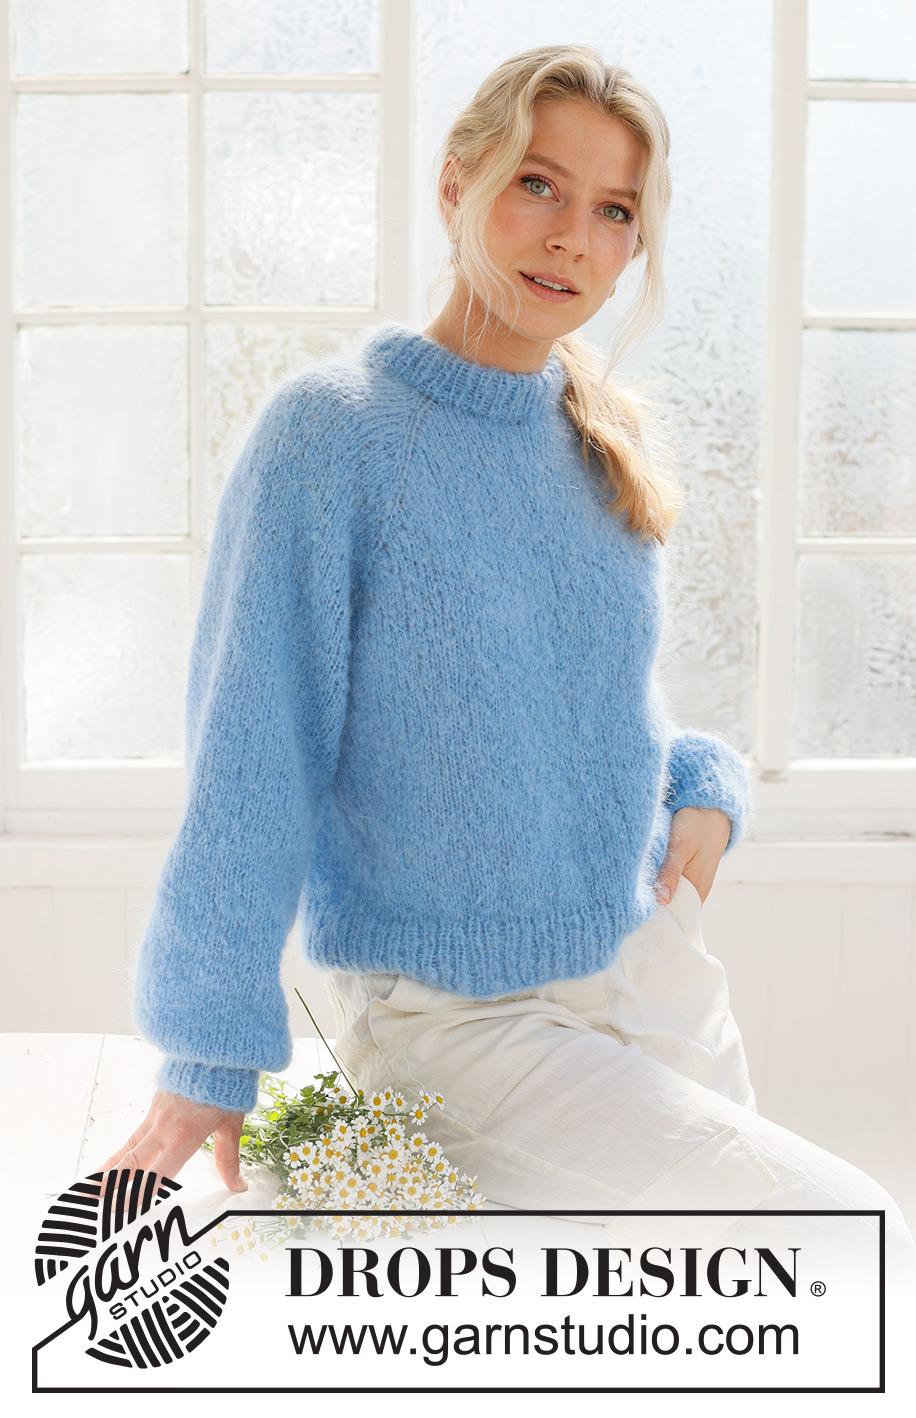
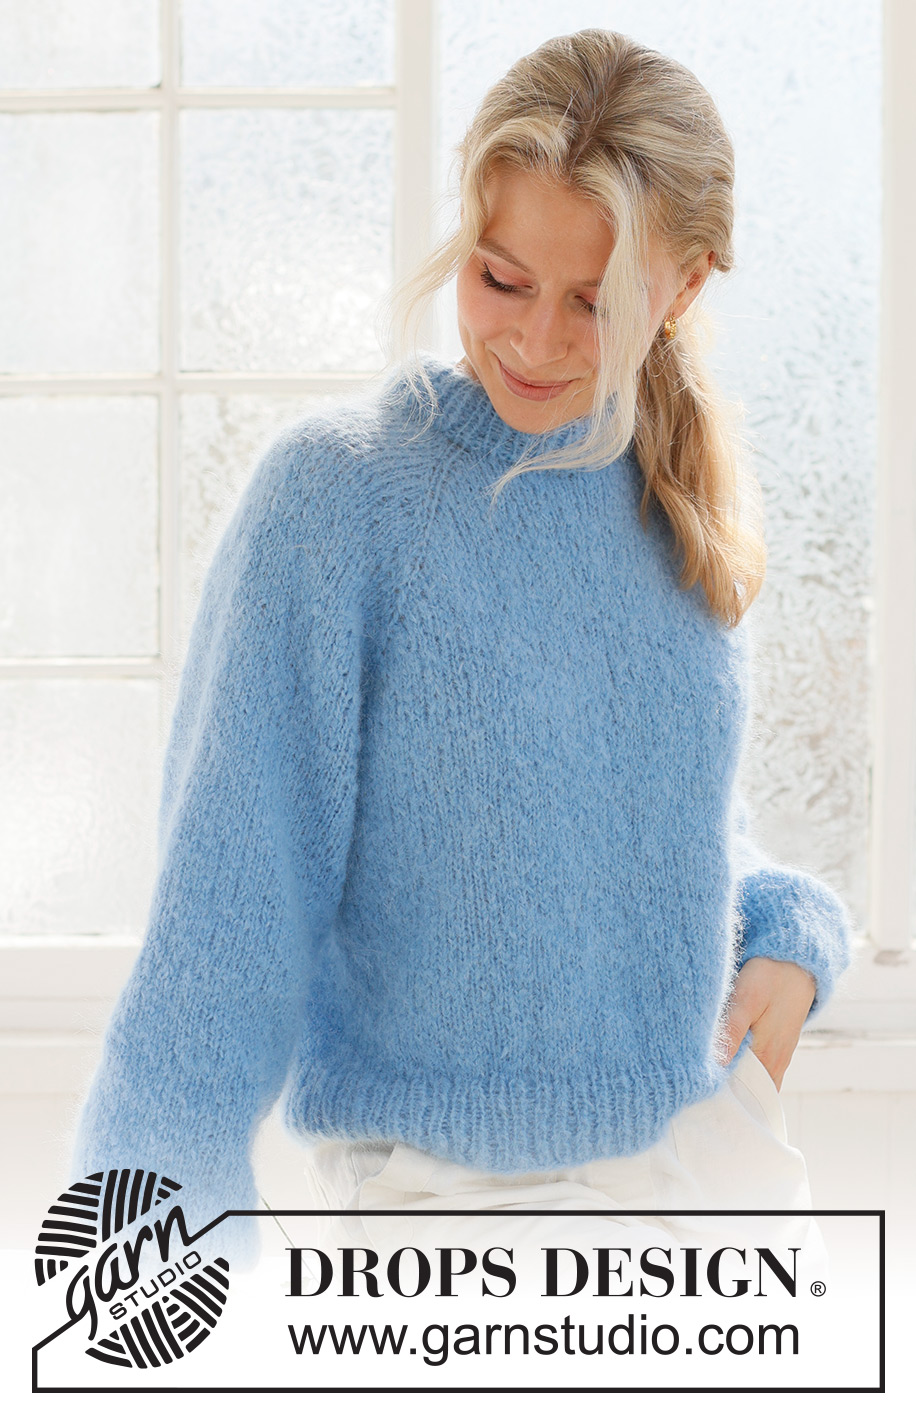
Blueberry Cream Sweater#blueberrycreamsweater |
|
 |
 |
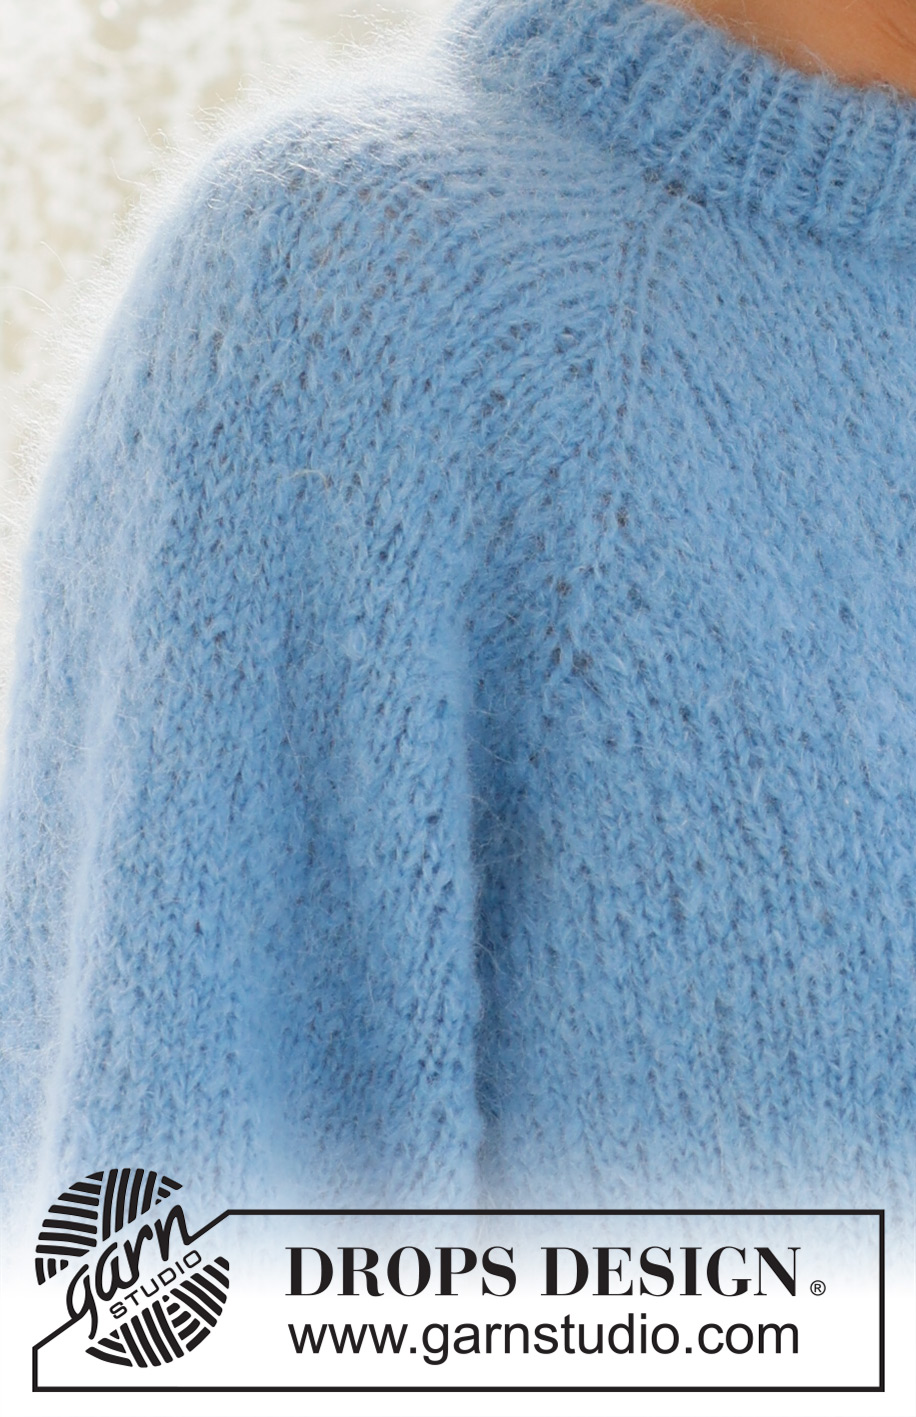
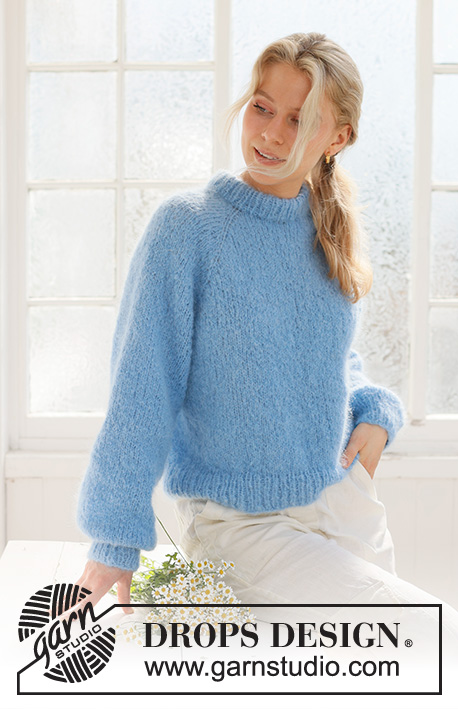
Knitted jumper in DROPS Melody. The piece is worked top down, with raglan and double neck. Sizes S - XXXL.
DROPS 231-57 |
|
|
------------------------------------------------------- EXPLANATIONS FOR THE PATTERN: ------------------------------------------------------- RAGLAN: Increase 1 stitch on each side of the stitches with a marker (8 stitches increased on the round). Increase 1 stitch by making 1 yarn over; on the next row/round work the yarn overs twisted to avoid holes. Then work the new stitches in stocking stitch. DECREASE TIP (mid-under sleeves): Start 3 stitches before the marker, knit 2 together, knit 2 (marker sits between these 2 stitches), slip 1 stitch as if to knit, knit 1 and pass the slipped stitch over the knitted stitch. ------------------------------------------------------- START THE PIECE HERE: ------------------------------------------------------- JUMPER - SHORT OVERVIEW OF THE PIECE: The neck and yoke are worked in the round with circular needle, top down. The yoke is divided for the body and sleeves and the body is continued in the round. The sleeves are worked in the round with double pointed needles/short circular needle. DOUBLE NECK: Cast on 68-72-76-80-80-84 stitches with DROPS Melody, using a short 4.5 mm and a short 6 mm circular needle held together. Pull out the needle size 6 mm and continue with size 4.5 mm (this makes the cast-on edge elastic). Work rib in the round (knit 1, purl 1) for 9 cm. Fold the neck double to the inside – work the next round of rib as before, working every other stitch together with every other stitch on the cast-on edge. Change to circular needle size 6 mm On the next round insert 4 markers as described below. Each marker is inserted in a knitted stitch and will be used when increasing to raglan. Insert a marker thread at the beginning of the round = approx. mid-back. Work the next round as follows from the marker thread: Knit 10-10-12-12-12-14, make 1 yarn over, insert marker 1 in the next stitch, knit this stitch, make 1 yarn over, knit 15 (sleeve), 1 yarn over, insert marker 2 in the next stitch, knit this stitch, 1 yarn over, knit 17-19-21-23-23-25 (front piece), 1 yarn over, insert marker 3 in the next stitch, knit this stitch, 1 yarn over, knit 15 (sleeve), 1 yarn over, insert marker 4 in the next stitch, knit this stitch, 1 yarn over, knit 7-9-9-11-11-11 = 76-80-84-88-88-92 stitches. Knit 1 round, with the yarn overs knitted twisted. Cut the strand. NECK-LINE: Now work a neck-line with short rows as follows. Start from the right side, 3 stitches before marker 3 (i.e. on the left-hand side of the front neck, when garment is worn), knit until you are 3 stitches past marker 2 (= right-hand side of the front neck) – AT THE SAME TIME on this row increase to RAGLAN – read description above. Turn, tighten the strand and purl back from the wrong side to 7 stitches past marker 3. Turn, tighten the strand and knit to 7 stitches past marker 2 – remember to increase to raglan. Turn, tighten the strand and purl to 3 stitches past marker 3. Cut the strand and work the yoke as described below. YOKE: Start at the marker thread mid-back and work stocking stitch in the round over all stitches. AT THE SAME TIME continue to increase to raglan every 2nd round until you have increased a total of 8-10-12-14-20-22 times (including the increases on the short rows). Continue with stocking stitch and increases to raglan, but every second increase, increase only on the body (4 increased stitches); i.e. increase every 2nd round on the body and every 4th round on the sleeves. Increase like this 8-8-8-8-4-4 times on the body (4-4-4-4-2-2 times on the sleeves). It has been now increased a total of 16-18-20-22-24-26 times on the body and 12-14-16-18-22-24 times on the sleeves. After the final increase there are 180-200-220-240-264-284 stitches. The piece measures approx. 20-23-25-28-30-33 cm measured mid-front; continue working, if necessary, to the correct length. On the next round divide for the body and sleeves as follows: Work 29-31-35-37-41-45 stitches as before (approx. ½ back piece), place the next 35-39-43-47-51-55 stitches on a thread for the sleeve, cast on 12-12-12-14-14-16 stitches (in side under sleeve), work 55-61-67-73-81-87 stitches (front piece), place the next 35-39-43-47-51-55 stitches on a thread for the sleeve, cast on 12-12-12-14-14-16 stitches (in side under sleeve), work the last 26-30-32-36-40-42 stitches (approx. ½ back piece). The body and sleeves are finished separately. The body is measured from here! BODY: = 134-146-158-174-190-206 stitches. Work stocking stitch in the round for a further 23-22-22-21-21-20 cm. Change to circular needle size 4.5 mm. Work rib (knit 1, purl 1) for 6 cm. Cast off. The jumper measures approx. 54-56-58-60-62-64 cm from the shoulder down. SLEEVES: Place the 35-39-43-47-51-55 stitches from the thread on the one side of the piece on double pointed needles/short circular needle size 6 mm and knit up 1 stitch in each of the 12-12-12-14-14-16 stitches cast on under the sleeve = 47-51-55-61-65-71 stitches. Insert a marker in the middle of the new stitches under the sleeve. Allow the marker to follow your work onwards; it is used when decreasing under the sleeve. Start at the marker and work stocking stitch in the round. SIZES XL-XXL-XXXL: When the sleeve measures 4-4-4 cm from the division, decrease 2 stitches under the sleeve – read DECREASE TIP. Decrease like this every 15-10-10 cm a total of 2-3-3 times (do not decrease in sizes S, M and L) ALL SIZES: = 47-51-55-57-59-65 stitches. Work until the sleeve measures 39-36-35-32-31-28 cm from the division. Knit 1 round where you decrease 15-17-19-19-19-23 stitches evenly spaced = 32-34-36-38-40-42 stitches. Change to double pointed needles size 4.5 mm. Work rib (knit 1, purl 1) for 6 cm. Cast off. The sleeve measures approx. 45-42-41-38-37-34 cm. Work the other sleeve in the same way. |
|
 |
|
Have you finished this pattern?Tag your pictures with #dropspattern #blueberrycreamsweater or submit them to the #dropsfan gallery. Do you need help with this pattern?You'll find 30 tutorial videos, a Comments/Questions area and more by visiting the pattern on garnstudio.com. © 1982-2026 DROPS Design A/S. We reserve all rights. This document, including all its sub-sections, has copyrights. Read more about what you can do with our patterns at the bottom of each pattern on our site. |
|


With over 40 years in knitting and crochet design, DROPS Design offers one of the most extensive collections of free patterns on the internet - translated to 17 languages. As of today we count 324 catalogues and 12252 patterns translated into English (UK/cm).
We work hard to bring you the best knitting and crochet have to offer, inspiration and advice as well as great quality yarns at incredible prices! Would you like to use our patterns for other than personal use? You can read what you are allowed to do in the Copyright text at the bottom of all our patterns. Happy crafting!
Post a comment to pattern DROPS 231-57
We would love to hear what you have to say about this pattern!
If you want to leave a question, please make sure you select the correct category in the form below, to speed up the answering process. Required fields are marked *.