
Popular categories
Looking for a yarn?


Comments / Questions (24)
![]() Katleen wrote:
Katleen wrote:
Hallo, Zou ik deze trui kunnen breien met brushed alpaca silk en alpaca bouclé ? 2 x C … Thanks !
18.11.2023 - 19:29DROPS Design answered:
Dag Katleen,
Ja, dat zou kunnen, deze garens vallen beide in garengroep C en kunnen dus als vervanging gebruikt worden.
21.11.2023 - 23:16
![]() Alina wrote:
Alina wrote:
Is it correct that there is no difference between back and front? It seems that the front side will go up on the neck... otherwise there should be more rows on the back...
23.11.2022 - 19:58DROPS Design answered:
Dear Alina, that's right, both front and back piece will be the same. Happy knitting!
24.11.2022 - 09:31
![]() Barbara Linders wrote:
Barbara Linders wrote:
Ik heb een vraag ben aangekomen bij verdeling lijf en armen. Staat er eerst deel van t achterpand breien. Dan de steken voor de mouw op de hulp draad. Én dan “zet 6 (maat M) steken op. Voor de zijkant mouw. Hier is mijn vraag over. Hoe doe je dat?
22.11.2022 - 08:44DROPS Design answered:
Dag Barbara,
In deze video kun je zien hoe je steken opzet aan het eind van de naald. Dit kun je ook toepassen voor die 6 steken.
22.11.2022 - 21:01
![]() Barbara Linders wrote:
Barbara Linders wrote:
Ik gebruik een andere wol en naaldikte dan in het patroon. Ik heb alles omgerekent naar mijn wol en naalddikte . En A1 lukt mij ook. Maar het omrekenen van A2 en A3 lukt nog niet. Mijn vraag is hoe jullie in het patroon op de verhouding A2 en A3 zijn gekomen?. Als ik die weet kan ik het omzetten naar mijn eigen “patroon”. Ben erg benieuwd. Hoor graag van jullie
13.11.2022 - 09:28DROPS Design answered:
Dag Barbara,
Het is voor ons helaas niet mogelijk om patronen aan te passen naar persoonlijke wensen. De telpatronen zijn op elkaar afgestemd en voor A.2 zul je een meervoud van 6 steken op de naalden moeten hebben.
13.11.2022 - 18:25
![]() Lisbeth wrote:
Lisbeth wrote:
Strikker halskant - retten vender mod mig - er det korrekt ? Når jeg skal montere halskanten vender jeg vrangen udad og får en række meget grimme indtagninger i vrang - hvad er galt ?
11.09.2022 - 16:24DROPS Design answered:
Hei Lisbeth. Brett vrangborden øverst i halsen ned på INNSIDEN av plagget. Altså rettsiden av vrangborden / begynnelsen av vrangborden brettes innover. Sy deretter vrangborden fast slik at det blir en dobbel halskant. mvh DROPS Design
12.09.2022 - 13:29
![]() Kat wrote:
Kat wrote:
Hei, hvilken størrelse har modellen på seg?
09.08.2022 - 20:47DROPS Design answered:
Hej Kat, modellen har M på sig, men du finder målene i måleskitsen nederst i opskriften. Vælg den størrelse med de mål som passer dig :)
10.08.2022 - 07:37
![]() Ulrika wrote:
Ulrika wrote:
Hej! Första gången jag stickar en tröja med ert mönster.Jättesvårt att förstå mönstret!Sen stämmer inte maskantalet överens med hur ni beskriver att man ska öka och när?Ska ökningarna göras under ett eller flera varv framgår inte heller.Vad innebär A1,A2 å A3? Väldigt luddigt diagram för en nybörjare. Tacksam för hjälp. Mvh Ulrika
12.06.2022 - 21:01DROPS Design answered:
Hei Ulrika. Husk å oppgi hvilken str. du strikker, så kan vi hjelpe deg best mulig. Hvor er det du mener at maskenantallet ikke stemmer? Når du strikker etter diagrammene, ser du hvor du skal øke (oval sirkel på 1.rad i diagrammene) og i oppskriften står det forklart / hvor mange cm fra merket det skal være før du skal øke, og hvilken diagram du skal strikke. mvh DROPS Design
13.06.2022 - 13:39
![]() Nadine wrote:
Nadine wrote:
Hi. I made this pattern in Drops Andes size S. It was my first pattern knitted in the round, and I found it very easy to follow. However, having followed all the instructions on tension and getting the right gauge, the jumper is too small. I tried to find on your website what measurements size S corresponds to, but haven’t found anything. It would be helpful to know if, say for example, size S fits bust measurement of 32 inches etc. I want to make this pattern again but not sure of size.
09.03.2022 - 17:07DROPS Design answered:
Dear Nadine, to choose the appropriate size, always measure a similar garment you have and like the shape and compare them to the measurements in the chart (in cm). Read more here. And remember, in this kind of pattern, always remember to check your tension in height to get the correct height; Happy knitting!
09.03.2022 - 19:00
![]() Marie wrote:
Marie wrote:
Vore trevligt om ni tog tydligare bilder på detaljer o inte låter håret hänga ner. Jag vill se hur plagget sitter. Gäller många mönster. Tack
17.02.2022 - 08:55
![]() Jutta Rieper wrote:
Jutta Rieper wrote:
Ich wollte eigentlich den Pullover Monteverde ( Drops Wish und Kid Silk) stricken und habe schon das Garn bestellt. Brauche ich für diesen Pullover mehr Garn, auch wenn ich ihn Mit Wish und Kid Silk stricke?
06.02.2022 - 11:15DROPS Design answered:
Liebe Frau Rieper, dann brauchen Sie diesselbe Lauflänge in Kid-Silk ask in Wish. Gerne wird Ihnen Ihr DROPS Laden damit helfen, wenn Sie Hilfe brauchen. Dann wie immer, Maschenprobe beachten. Viel Spaß beim stricken!
07.02.2022 - 10:22
|
|||||||
First Rain#firstrainsweater |
|||||||
 |
 |
||||||
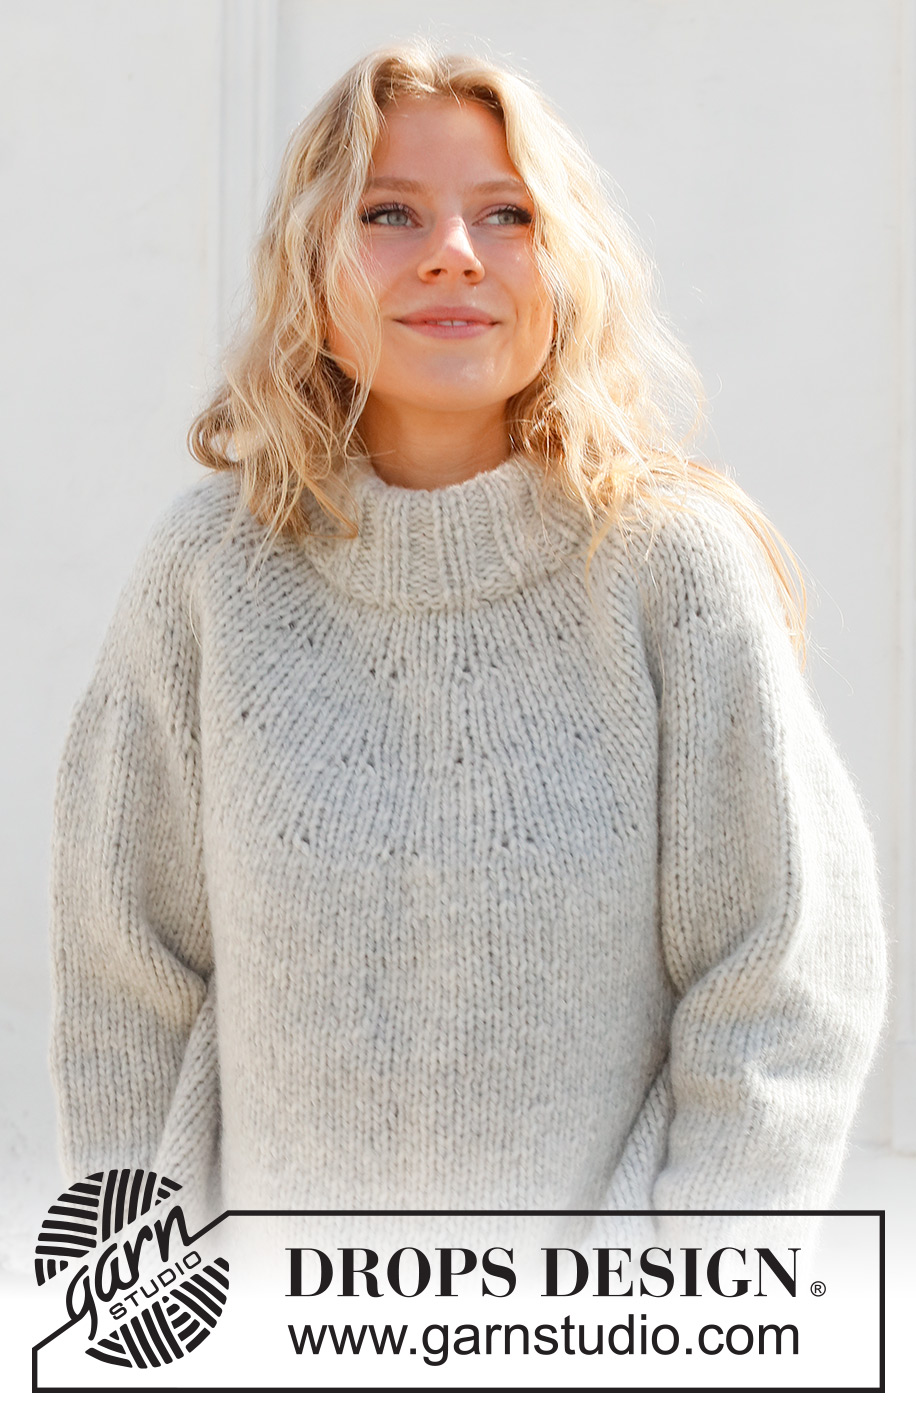
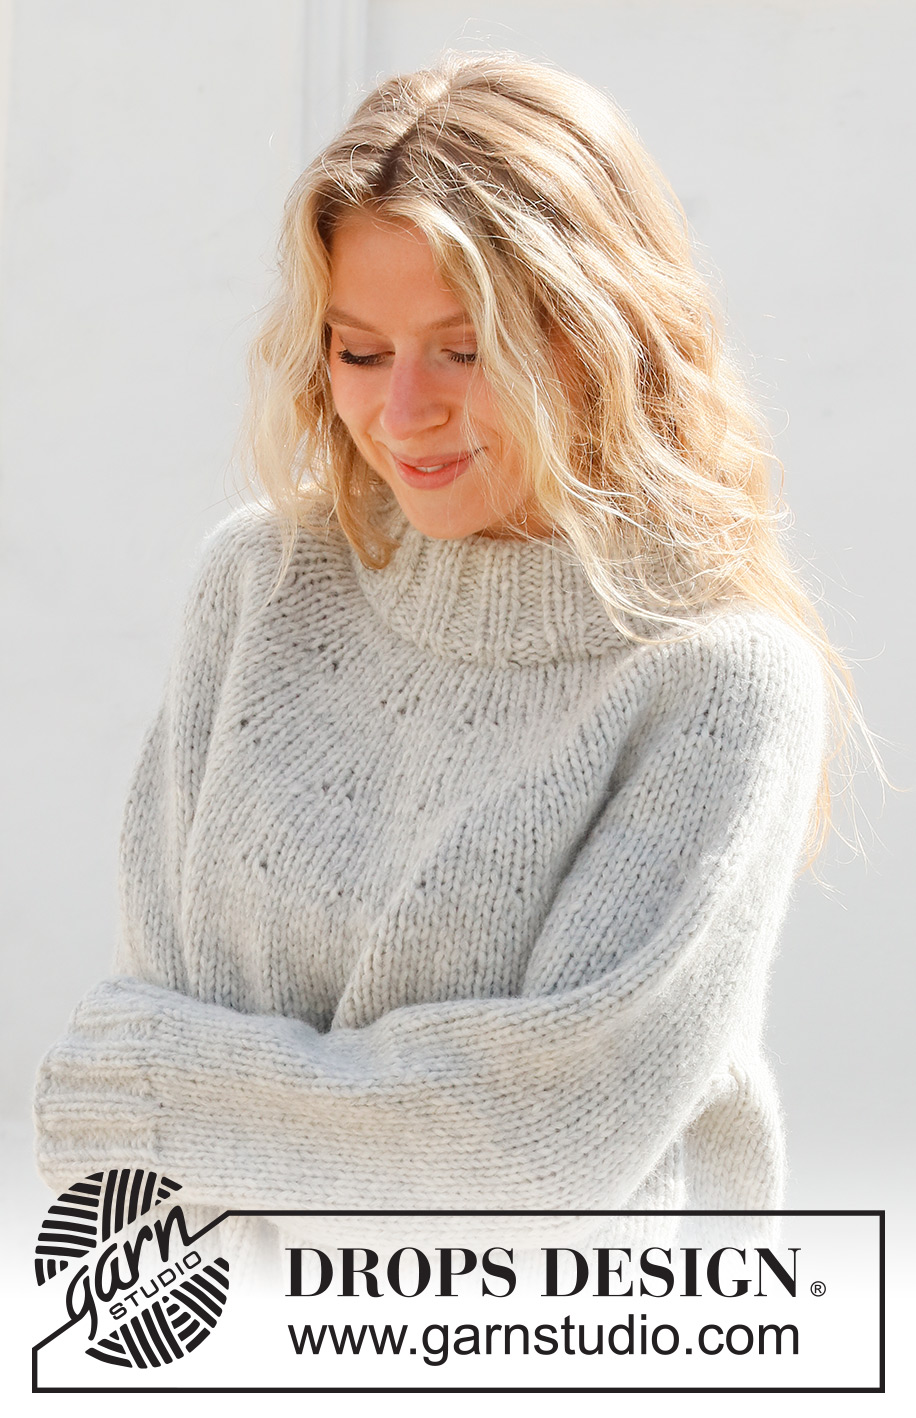
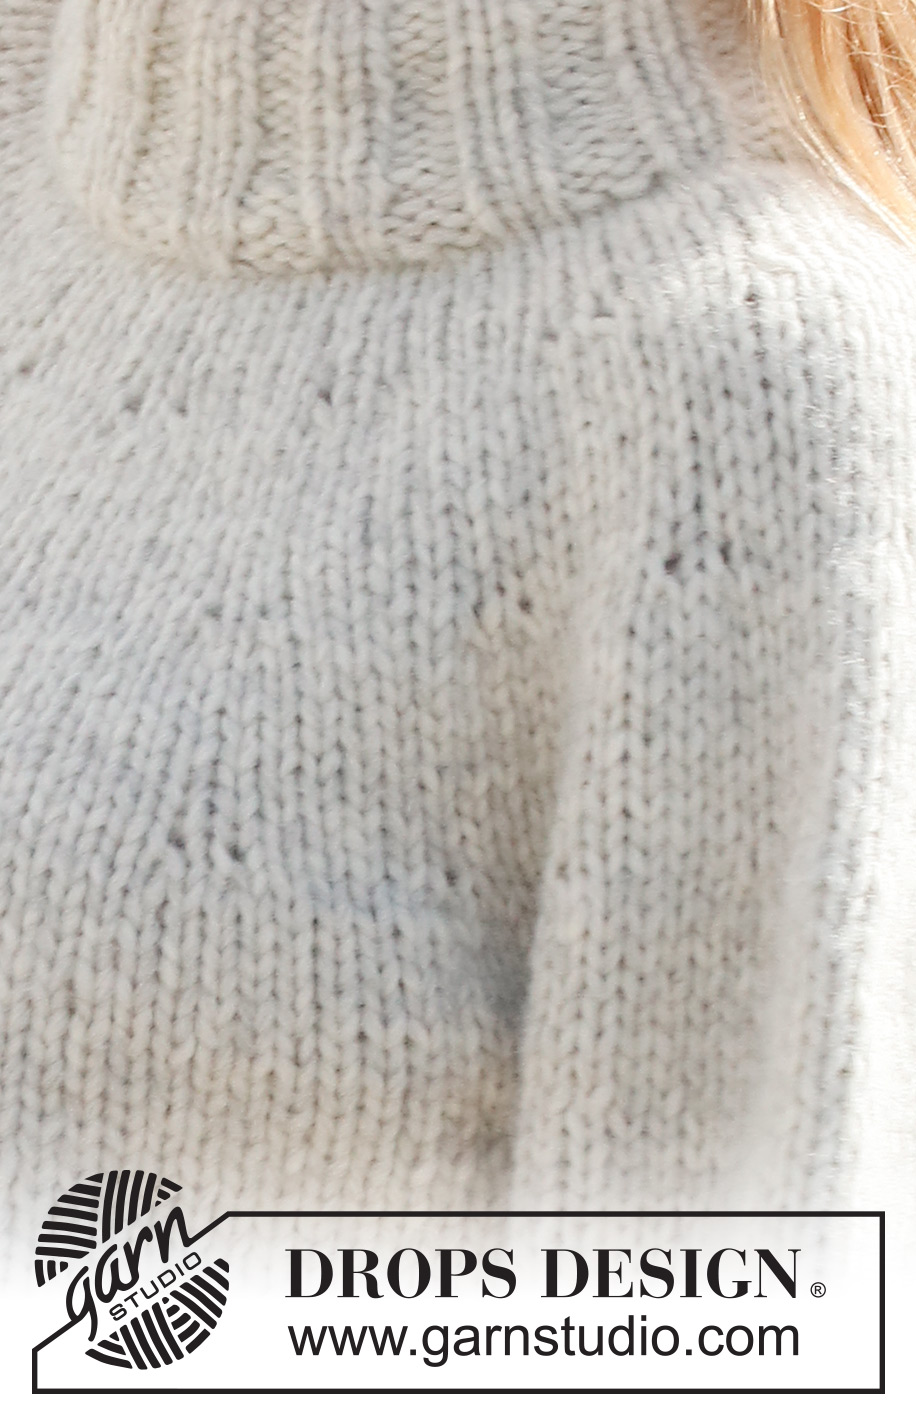
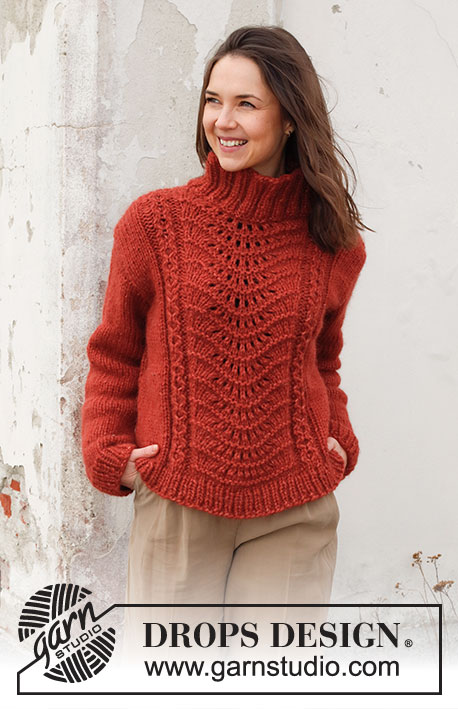
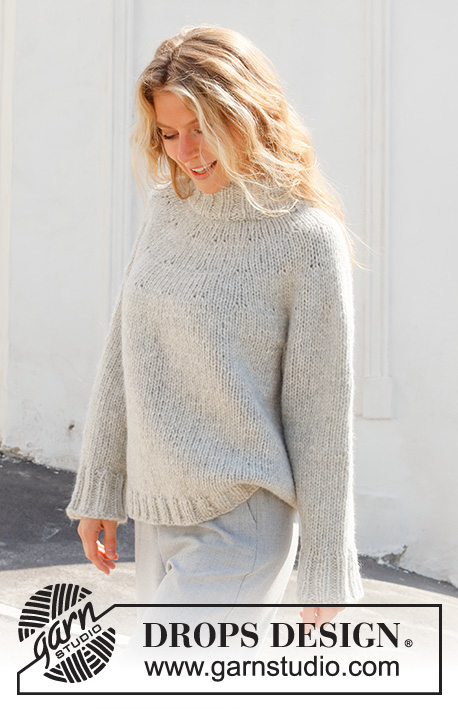
Knitted jumper in DROPS Wish or DROPS Andes. The piece is worked top down, with round yoke and double neck. Sizes S - XXXL.
DROPS 228-7 |
|||||||
|
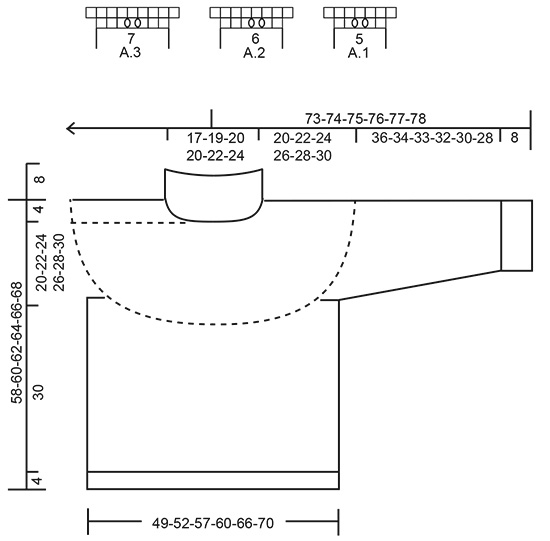
------------------------------------------------------- EXPLANATIONS FOR THE PATTERN: ------------------------------------------------------- PATTERN: See diagrams A.1 to A.3. INCREASE TIP (evenly spaced): To work out how to increase evenly, count the total number of stitches on the needle (e.g. 60 stitches) and divide by the number of increases to be made (e.g. 5) = 12. In this example, increase by making 1 yarn over after each 12th stitch. On the next round knit the yarn overs twisted to avoid holes. DECREASE TIP (for sleeves): Decrease 1 stitch on either side of the marker thread as follows: Work until there are 3 stitches left before the marker thread, knit 2 together, knit 2 (marker thread sits between these 2 stitches), slip 1 stitch as if to knit, knit 1 and pass the slipped stitch over the knitted stitch (2 stitches decreased). CASTING-OFF TIP: To avoid the cast-off edge being tight you can cast off with a larger size needle. If the edge is still tight, make 1 yarn over after approx. each 6th stitch at the same time as casting off; the yarn overs are cast off as normal stitches. ------------------------------------------------------- START THE PIECE HERE: ------------------------------------------------------- JUMPER – SHORT OVERVIEW OF THE PIECE: The neck and yoke are worked in the round with circular needle, from mid back and top down. The yoke is divided for body and sleeves and the body is continued in the round with circular needle. The sleeves are worked with double pointed needles, top down. DOUBLE NECK: Cast on 75-80-85-85-90-95 stitches with short circular needle size 6 mm and DROPS Wish or DROPS Andes. Knit 1 round, then work rib in the round (knit 2, purl 3) for 4 cm. Now decrease all purl-3 to purl-2 = 60-64-68-68-72-76 stitches. Continue the new rib until the neck measures 16 cm. Knit 1 round where you increase 5-6-7-12-13-14 stitches evenly spaced – read INCREASE TIP = 65-70-75-80-85-90 stitches. Knit 1 round. Insert a marker at the beginning of the round; the yoke is measured from this marker! YOKE: Change to circular needle size 8 mm and work stocking stitch. REMEMBER THE KNITTING TENSION! When the piece measures 4 cm from the marker increase as follows: INCREASE 1: Work A.1 for the whole round (= 13-14-15-16-17-18 repeats of 5 stitches). When A.1 has been completed there are 91-98-105-112-119-126 stitches. Continue with stocking stitch until the piece measures 9-10-10-11-12-13 cm from the marker. INCREASE 2: Work A.3 over the first 0-7-7-14-14-0 stitches (= 0-1-1-2-2-0 repeats of 7 stitches), A.2 over the next 42-42-42-42-42-60 stitches (= 7-7-7-7-7-10 repeats of 6 stitches), A.3 over the next 7-0-7-0-7-0 stitches, A.2 over the next 42-42-42-42-42-66 stitches (= 7-7-7-7-7-11 repeats of 6 stitches), A.3 over the last 0-7-7-14-14-0 stitches. When the diagrams have been completed there are 121-130-139-148-157-168 stitches. Continue with stocking stitch until the piece measures 14-16-17-19-20-22 cm from the marker. INCREASE 3: Work A.3 over the first 0-7-0-7-0-0 stitches, A.2 over the next 54-48-66-60-78-84 stitches (= 9-8-11-10-13-14 repeats of 6 stitches), A.3 over the next 7-14-7-14-7-0 stitches (= 1-2-1-2-1-0 repeats of 7 stitches), A.2 over the next 60-54-66-60-72-84 stitches (= 10-9-11-10-12-14 repeats of 6 stitches), A.3 over the last 0-7-0-7-0-0 stitches. When the diagrams have been completed there are 161-172-185-196-209-224 stitches. Continue with stocking stitch until the piece measures 20-22-24-26-28-30 cm from the marker Now divide for the body and sleeves as follows: Work the first 24-25-27-29-32-34 stitches (= half back piece), place the next 33-35-38-40-40-43 stitches on 1 thread for the sleeve, cast on 6-6-8-8-8-8 stitches (= in side under sleeve), work 47-51-55-58-65-69 stitches (= front piece), place the next 33-35-38-40-40-43 stitches on 1 thread for the sleeve, cast on 6-6-8-8-8-8 stitches (= in side under sleeve), work the remaining 24-26-27-29-32-35 stitches (= half back piece). The body and sleeves are finished separately. THE PIECE IS NOW MEASURED FROM HERE! BODY: = 107-114-125-132-145-154 stitches. Continue with stocking stitch in the round for 30 cm. Try the jumper on and work to desired length – there is approx. 4 cm left to finished length. Knit 1 round and increase 21-22-23-24-27-34 stitches evenly spaced = 128-136-148-156-172-188 stitches. Change to circular needle size 6 mm and work rib (knit 2, purl 2) for 4 cm. Cast off with knit over knit and purl over purl – read CASTING-OFF TIP. The jumper measures approx. 58-60-62-64-66-68 cm from the shoulder down. SLEEVES: Place the 33-35-38-40-40-43 stitches from the thread on the one side of the piece on double pointed needles/short circular needle size 8 mm and knit up 1 stitch in each of the 6-6-8-8-8-8 stitches cast on under the sleeve = 39-41-46-48-48-51 stitches. Insert a marker thread in the middle of the new stitches under the sleeve. Allow the thread to follow your work onwards; it will be used when decreasing. Start at the marker thread and work stocking stitch in the round for 4 cm. Now decrease 2 stitches under the sleeve – read DECREASE TIP. Decrease like this every 6-5-3½-3-3-2 cm a total of 6-6-8-9-9-10 times = 27-29-30-30-30-31 stitches. Continue working until the sleeve measures 36-34-33-32-30-28 cm (shorter measurements in larger sizes due to wider neck and longer yoke). Try the jumper on and work to desired length – approx. 8 cm to finished length. Knit 1 round and increase 5-7-6-10-10-9 stitches evenly spread = 32-36-36-40-40-40 stitches. Change to double pointed needles size 6 mm and work rib (knit 2, purl 2) for 8 cm. Cast off with knit over knit and purl over purl – remember CASTING-OFF TIP. The sleeve measures approx. 44-42-41-40-38-36 cm from the division. Work the other sleeve in the same way. ASSEMBLY: Fold the neck double to the inside and sew down. To avoid the neck being tight and rolling outwards, it is important that the seam is elastic. |
|||||||
Diagram explanations |
|||||||
|
|||||||
 |
|||||||
Have you finished this pattern?Tag your pictures with #dropspattern #firstrainsweater or submit them to the #dropsfan gallery. Do you need help with this pattern?You'll find 30 tutorial videos, a Comments/Questions area and more by visiting the pattern on garnstudio.com. © 1982-2026 DROPS Design A/S. We reserve all rights. This document, including all its sub-sections, has copyrights. Read more about what you can do with our patterns at the bottom of each pattern on our site. |
|||||||


With over 40 years in knitting and crochet design, DROPS Design offers one of the most extensive collections of free patterns on the internet - translated to 17 languages. As of today we count 324 catalogues and 12290 patterns translated into English (UK/cm).
We work hard to bring you the best knitting and crochet have to offer, inspiration and advice as well as great quality yarns at incredible prices! Would you like to use our patterns for other than personal use? You can read what you are allowed to do in the Copyright text at the bottom of all our patterns. Happy crafting!
Post a comment to pattern DROPS 228-7
We would love to hear what you have to say about this pattern!
If you want to leave a question, please make sure you select the correct category in the form below, to speed up the answering process. Required fields are marked *.