
Popular categories
Looking for a yarn?


Comments / Questions (44)
![]() Olga Spies wrote:
Olga Spies wrote:
Danke für die Antwort und Ihren Rat. Ich werde es versuchen.
07.02.2016 - 20:29
![]() Olga Spies wrote:
Olga Spies wrote:
Ich möchte den Pullover von unten nach oben stricken, so ist mir leiber, was muss ich bei Raglan Abnahmen beachten. Danke und liebe grüße.
06.02.2016 - 11:30DROPS Design answered:
Leider können wir Ihnen hier keine detaillierte Anleitung für die "umgedrehte" Strickweise geben. Beachten müssen Sie generell, dass alle Zunahmen zu Abnahmen werden und umgekehrt. Dort, wo M abgekettet werden, werden M angeschlagen und umgekehrt. Vielleicht versuchen Sie sich aber auch einfach mal daran, von oben nach unten zu stricken, das hat auch Vorteile, da Sie den Pullover zwischendurch gut anprobieren können.
06.02.2016 - 14:22
![]() Alexa wrote:
Alexa wrote:
Hallo, wieviel cm soll das erste Stück in hell seegrün werden? Finde dazu keine Angabe
05.02.2016 - 08:04DROPS Design answered:
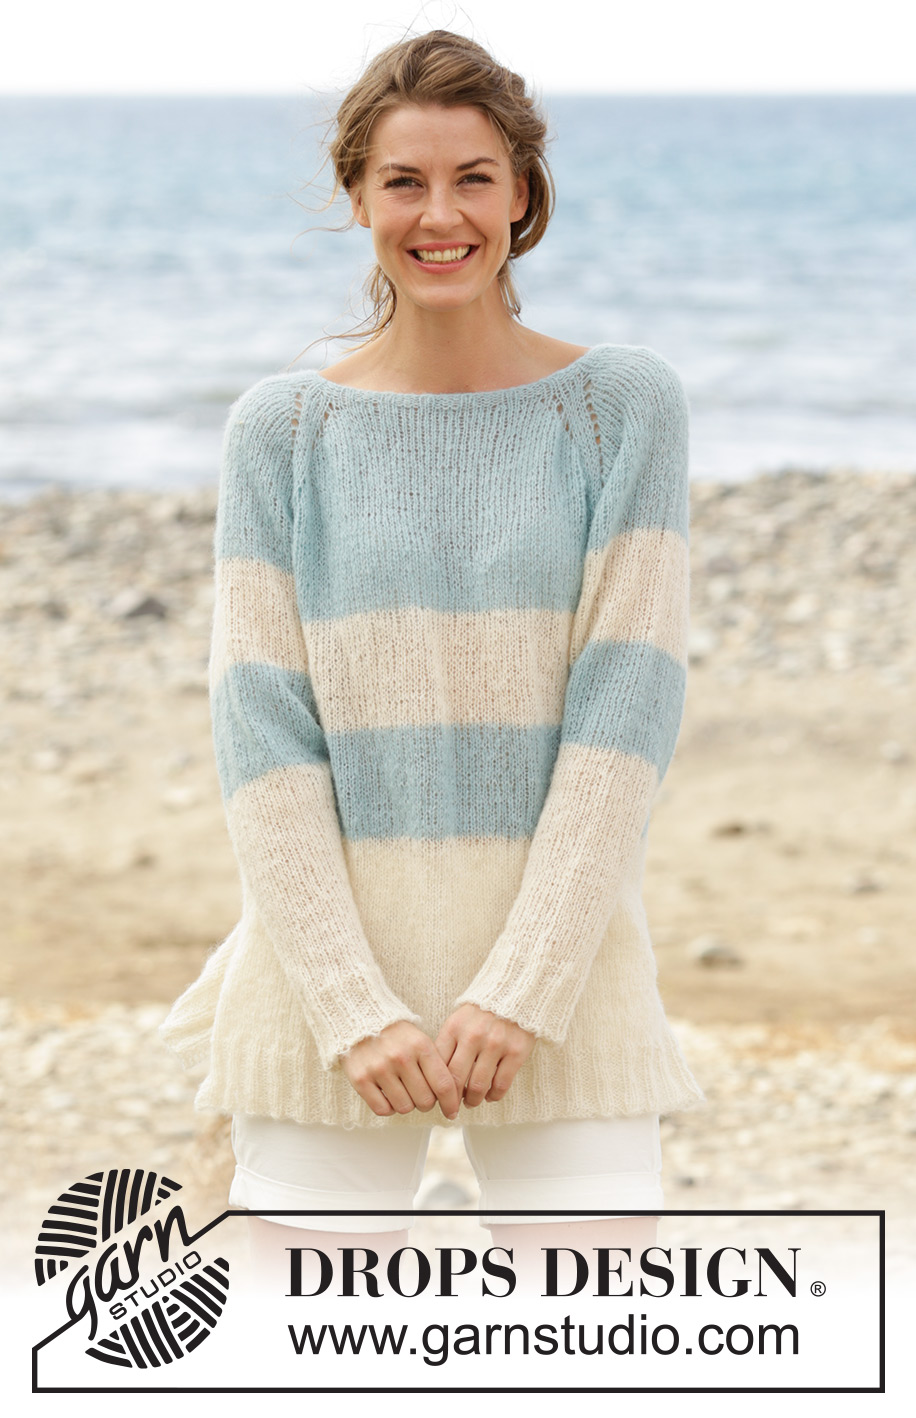
Die Passe wird komplett in hell seegrün gestrickt. Beim Rumpfteil stricken Sie dann in Streifen wie beschrieben, d.h. hier wechseln Sie dann zu natur.
06.02.2016 - 14:27
![]() Becca wrote:
Becca wrote:
Hi Are you able to provide UK size equivalents? E.g medium = 12? Thanks!
02.02.2016 - 16:34DROPS Design answered:
Dear Becca, you will find at the bottom of the pattern a measurement chart with measurements for each size taken flat from side to side - compare these to a similar garment you have and like the shape to find out the matching size - read more about sizing here. Happy knitting!
03.02.2016 - 10:13
|
|
Weekend Getaway#weekendgetawaysweater |
|
|
|
|
Knitted DROPS jumper with raglan, vent in the sides and stripes, worked top down in ”Brushed Alpaca Silk”. Size S-XXXL.
DROPS 169-7 |
|
|
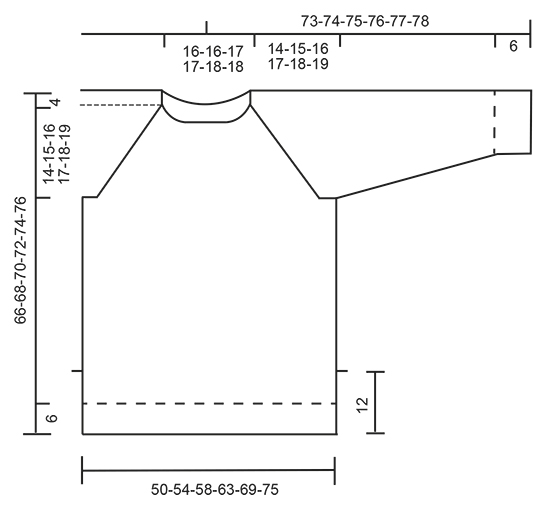
GARTER ST (worked in the round): 1 ridge = 2 rounds. * K 1 round and P 1 round *, repeat from *-*. GARTER ST (back and forth): K all rows. 1 ridge = 2 rows K. STRIPES: Work stripes as follows on body and sleeves: Work 9-9-10-10-11-11 cm with off white. Work 9-9-10-10-11-11 cm with light sea green. Then work with off white until finished measurements. RAGLAN BODY: NOTE: K all YOs on next round to make holes. Inc 2 sts as follows: Before 1st and 3rd marker: Work until 3 sts remain before marker, K 2 in next st, 1 YO, K 2. After 2nd and 4th marker: K 2, 1 YO, K 2 in next st. Then inc 1 st as follows: Before 1st and 3rd marker: Work until 2 sts remain before marker, 1 YO, K 2. After 2nd and 4th marker: K 2, 1 YO. RAGLAN SLEEVE: Inc 1 st after 1st and 3rd marker as follows: K 2, 1 YO. Inc 1 st before 2nd and 4th marker as follows: Work until 2 sts remain before marker, 1 YO, K 2. On next round K the YO to make hole. DECREASE TIP: Dec as follows before marker: Work until 3 sts remain before marker, K 2 tog, K 1. Dec as follows after marker: K 1, slip 1 st as if to K, K 1, psso ---------------------------------------------------------- JUMPER: Worked in stocking st in the round, from the top and down to vent on body. Then divide the piece in front and back piece and continue back and forth until finished measurements. NOTE: Beg round = mid back. YOKE: Cast on 80-80-85-85-90-90 sts on circular needle size 4.5 mm with light sea green. K 1 round. Then work 4 rounds rib (= K 2/P 3). Switch to circular needle size 5 mm and work 1 round in stocking st while inc 18-20-21-25-24-30 sts evenly = 98-100-106-110-114-120 sts. Now insert 4 markers in the piece as follows: Work the first 15-16-16-16-17-18 sts (= half back piece), insert 1st marker, work the next 18-18-20-22-22-24 sts (= sleeve), insert 2nd marker, work the next 31-32-33-33-35-36 sts (= front piece), insert 3rd marker, work the next 18-18-20-22-22-24 sts (= sleeve), insert 4th marker, work the remaining 16-16-17-17-18-18 sts (= half back piece). On next round beg inc for raglan. NOTE: Inc differently on sleeves and body - READ RAGLAN BODY and RAGLAN SLEEVE. Inc as follows: Work until 3 sts remain before 1st marker, K 2 in next st, 1 YO, K 4 (marker is in the middle of these sts), 1 YO, work until 2 sts remain before 2nd marker, 1 YO, K 4 (marker is in the middle of these sts), 1 YO, K 2 in next st, work until 3 sts remain before 3rd marker, K 2 in next st, 1 YO, K 4 (marker is in the middle of these sts), 1 YO, work until 2 sts before 4th marker, 1 YO, K 4 (marker is in the middle of these sts), 1 YO, K 2 in next st, work the remaining sts on round. REMEMBER THE KNITTING TENSION Repeat inc on every other round as follows: On sleeves 14-15-16-17-19-20 more times (= 15-16-17-18-20-21 times in total), on body with 2 sts 7-9-11-14-16-20 more times (= 8-10-12-15-17-21 times in total) and then on body with 1 st 7-6-5-3-3-0 times. When all inc are done, there are 250-268-290-314-342-372 sts on round and piece measures 14-15-16-17-18-19 cm from the neck mid front and down. Now work as follows: Work the first 38-42-45-49-54-60 sts (= half back piece) slip the next 48-50-54-58-62-66 sts on a stitch holder (= sleeve), cast on 8 sts under sleeve, work the next 77-84-91-99-109-120 sts (= front piece), slip the next 48-50-54-58-62-66 sts on a stitch holder (= sleeve), cast on 8 sts under sleeve, work the remaining 39-42-46-50-55-60 sts on needle (= half back piece). NOW MEASURE THE PIECE FROM HERE. BODY: There are now 170-184-198-214-234-256 sts on round. Continue in the round in stocking st and STRIPES - see explanation above. When piece measures 35-36-37-38-39-40 cm, work as follows: Work 39-43-46-50-55-61 sts in stocking st, work 6 sts in GARTER ST - see explanation above, work 79-86-93-101-111-122 sts in stocking st, work 6 sts in garter st, work stocking st over the remaining 40-43-47-51-56-61 sts. Continue like this until 2 ridges have been work over the 6 sts in each side (= over vents). Now divide the piece into front and back piece as follows: Work the first 42-46-49-53-58-64 sts as before (i.e. stocking st with 3 sts in garter st in the side), turn and work back over 85-92-99-107-117-128 sts (work the first and last 3 sts in garter st) = back piece. Slip the remaining 85-92-99-107-117-128 sts on a stitch holder for front piece. Continue back and forth over sts on needle until piece measures 42-43-44-48-46-47 cm. On next row from RS switch to circular needle size 4.5 mm and inc 13-16-19-21-21-25 sts evenly (but not over the 3 outermost sts) = 98-108-118-128-138-153 sts. Work 1 row from WS as before, then work rib (K 2/P 3) with 3 sts in garter st in each side. NOTE: Beg and end with K 2 inside the 3 sts in garter st in each side. When rib measures 6 cm, cast off with K over K and P over P. Piece measures 66-68-70-72-74-76 cm in total from shoulder. Slip sts from stitch holder back on needle and work as back piece. SLEEVE: Work sleeve in stocking st in the round on double pointed needles. There are 48-50-54-58-62-66 sts for each sleeve. Slip sts from stitch holder back on double pointed needles size 5 mm and cast on 8 new sts under sleeve = 56-58-62-66-70-74 sts. Work in stocking st and stripes as on body in the round, AT THE SAME TIME insert a marker in the middle of the new sts under sleeve (i.e. 4 new sts on each side of marker). NOW MEASURE THE PIECE FROM HERE. When piece measures 4 cm, dec 1 st on each side of marker - READ DECREASE TIP. Repeat dec approx. every 4-4-3-3-2½-2½ cm 10-10-12-13-14-15 more times = 34-36-36-38-40-42 sts. When sleeve measures 45-45-45-45-44-44 cm (NOTE: Shorter measurements in the larger sizes because of longer yoke), switch to double pointed needles size 4.5 mm and inc 6-4-9-7-5-8 sts evenly on next round = 40-40-45-45-45-50 sts. Work rib = K 2/P 3 for 6 cm. When sleeve measures 51-51-51-51-50-50 cm, cast off with K over K and P over P. Work the other sleeve the same way. ASSEMBLY: Sew the openings under the sleeves. |
|
 |
|
Have you finished this pattern?Tag your pictures with #dropspattern #weekendgetawaysweater or submit them to the #dropsfan gallery. Do you need help with this pattern?You'll find 27 tutorial videos, a Comments/Questions area and more by visiting the pattern on garnstudio.com. © 1982-2026 DROPS Design A/S. We reserve all rights. This document, including all its sub-sections, has copyrights. Read more about what you can do with our patterns at the bottom of each pattern on our site. |


With over 40 years in knitting and crochet design, DROPS Design offers one of the most extensive collections of free patterns on the internet - translated to 17 languages. As of today we count 324 catalogues and 12290 patterns translated into English (UK/cm). 12290
We work hard to bring you the best knitting and crochet have to offer, inspiration and advice as well as great quality yarns at incredible prices! Would you like to use our patterns for other than personal use? You can read what you are allowed to do in the Copyright text at the bottom of all our patterns. Happy crafting!
Post a comment to pattern DROPS 169-7
We would love to hear what you have to say about this pattern!
If you want to leave a question, please make sure you select the correct category in the form below, to speed up the answering process. Required fields are marked *.