
Popular categories
Looking for a yarn?


Comments / Questions (44)
![]() Paulina Khan wrote:
Paulina Khan wrote:
Hei, det står strikk to masker rett i en maske.. Jeg forstod det slik at jeg tar to masker på pinnen og stikker begge rett .. men da får jeg 1 maske av 2.. så jeg skal ikke øke.. men det blir mindre masker på annen hver omgang.. Eller mener du lag 2 masker av 1 ?
05.07.2019 - 11:43DROPS Design answered:
Hej Paulina, hvor i opskriften er du? Når vi skriver: Strikk 2 m rett i neste m, så betyder det at du strikker 2 m rett i neste (samme) maske. Du øker 1 m på denne måde. God fornøjelse!
05.07.2019 - 14:36
![]() Anna O wrote:
Anna O wrote:
Also, under "RAGLAN BODY" it says "K all YOs on next round to make holes". What does it mean? That I make a round with YOs only, or follow instructions under "Inc 2 sts as follows"? Thank you from a knitting noob!
07.06.2019 - 14:20DROPS Design answered:
Hi Anna. There are supposed to be a row of holes along each side of the raglan line, you'll get this by working the yarn over normally on the next round - as opposed to working it twisted (no hole). Simply knit the yarn overs as a regular stitch. Happy knitting.
07.06.2019 - 14:47
![]() Anna O wrote:
Anna O wrote:
Hi. This it my first pattern, and I'm a bit lost. So far I've come to the line "On the next round beg inc for raglan". I don't get it, should I follow the instruction under "Inc as follows", or switch to increases under "RAGLAN BODY"? What order am I to read the instructions?
07.06.2019 - 14:19DROPS Design answered:
Hi Anna. The increase for raglan are explained both places. At the top of patter, where it says RAGLAN BODY you'll find the specific instructions for how to make the increase, both when you're supposed to increase 2 stitches, and when you're supposed to increase only 1 stitch. The instructions in pattern repeats this, along with number of stitches worked in between increase etc. Follow instructions in the pattern text. There are supposed to be a row of holes along each side of the raglan line, you'll get this by working the yarn over normally on the next round - as opposed to working it twisted (no hole). Simply knit the yarn overs as a regular stitch. Happy knitting
07.06.2019 - 14:44
![]() Ingrid wrote:
Ingrid wrote:
Warum werden bei der Raglanschräge im Rumpfteil pro Seite zwei Maschen zugenommen? Das ist doch eher ungewöhnlich. Falls ich die Anleitung richtig verstanden habe. Normalerweise werden doch pro Zunahme Reihe 8 Maschen zugenommen, oder? Inwiefern ändert sich dabei der Schnitt?
06.03.2019 - 17:40DROPS Design answered:
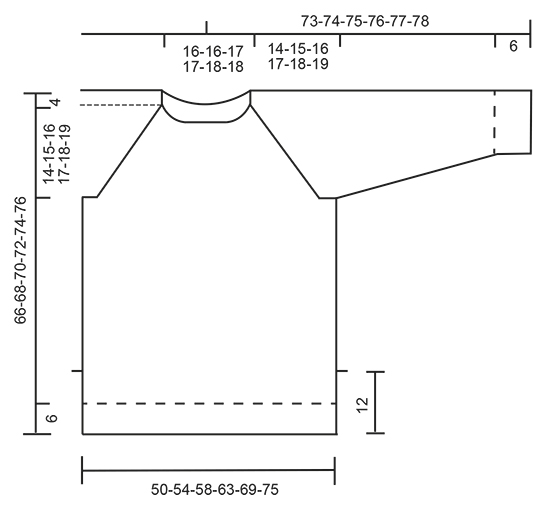
Liebe Ingrid, es wird 2 Maschen an jedem Ärmel zugenommen, aber es wird zuerst 4 M dann 2 M an Vorder- und Rückenteil zugenommen, so bekommt man die richtige Massen wie in der Skizze so wie den gewünschten Schnitt . Viel Spaß beim stricken!
07.03.2019 - 08:45Ana wrote:
Hello. It is my first Drop pattern and I am a little lost from the beginning. I have made the k2/p3 rib and now I have to increase 21 for my size L until 106 stitches, but I don't understand where and how. Have I to cast on, or knit front and back the firsts 21 st, or the lasts 21? Thanks from Spain.
30.11.2018 - 15:34DROPS Design answered:
Dear Anna, you will have to increase evenly 21 stitches on next round worked with knit stitches - this lesson explains how to increase evenly on a round. Happy knitting!
30.11.2018 - 15:41
![]() B. Van Halderen wrote:
B. Van Halderen wrote:
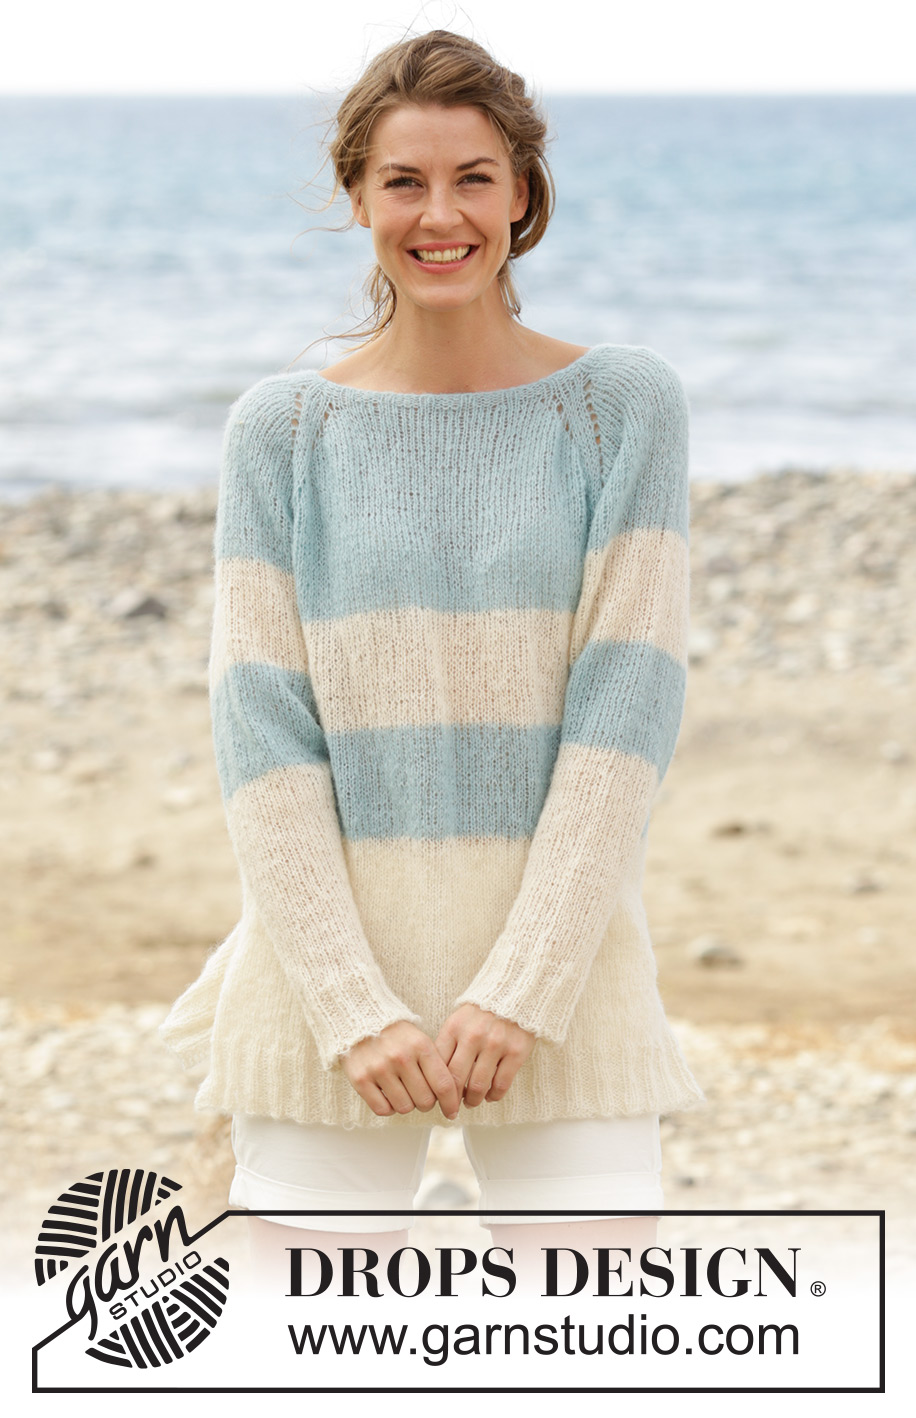
Klopt het patroon en de patroon tekening (hals 16 cm) wel met de foto? Op de foto ziet de nek er wijd uit. Dat is ook wat ik graag wil. Maar 16 cm komt daar niet mee overeen. Ik hoor het graag. Mvg Barbara
23.10.2018 - 19:52DROPS Design answered:
Dag B. Van Halderen
Als ik kijk naar het aantal op te zetten steken voor de hals, vermoed ik dat de tekening met de maten onderaan het patroon niet overeenkomt. Dat zal ik even na moeten vragen bij de ontwerpafdeling. Zodra ik antwoord heb kom ik bij je terug
24.10.2018 - 21:13
![]() Barbara wrote:
Barbara wrote:
Klopt het patroon en de patroon tekening (hals 16 cm) wel met de foto? Op de foto ziet de nek er wijd uit. Dat is ook wat ik graag wil. Maar 16 cm komt daar niet mee overeen. Ik hoor het graag. Mvg Barbara
06.10.2018 - 11:58
![]() Elizabeth Vanderstoop wrote:
Elizabeth Vanderstoop wrote:
On sleeves 14-15-16-17-19-20 more times (= 15-16-17-18-20-21 times in total), on body with 2 sts 7-9-11-14-16-20 more times (= 8-10-12-15-17-21 times in total) and then on body with 1 st 7-6-5-3-3-0 times. In these instructions I'm confused as to the meaning of " on body with 2 sts" and "on body with 1st" Thanks.
26.09.2018 - 03:50DROPS Design answered:
Dear Mrs Vanderstoop, you first increase 1 stitch (the round explained you have just worked). You continue working the increase for raglan 14-20 more times on sleeve (= 2 sts increased on each sleeve), and increase 2 sts 7-10 more times on body (=4 sts increased on front and on back piece), then increase only 1 st 7-0 times in total (= 2 sts increased on front and back piece). See RAGLAN BODY & RAGLAN SLEEVE. Happy knitting!
26.09.2018 - 08:06
![]() Petra Hefner wrote:
Petra Hefner wrote:
Hello ! I have always loved DROPS Design. I am trying to calculate how much yarn I will need for Drops 169-7. Instructions for one color say 200g. My Cascade Yarn Baby Alpaca Chunky is 100g which is 108 yards. So 216 yards? Normally a pullover requires approximately 1000 yards of yarn. Can you clarify total yardage required ? Thank you very much for your help.
15.04.2018 - 18:34DROPS Design answered:
Hi Petra, you're right, you need more than 1000 yards. In this case, we use Brushed Alpaca Silk, which has 306 yards in 25 grams, so of you take 8 balls of Alpaca silk (200 grs) = 306* 8 = 2448 yards.
15.04.2018 - 20:11
![]() Denise wrote:
Denise wrote:
Bonjour, Les mesures tombent parfaitement mais le résultat n'est pas une réussite!! Cela donne un tricot trop lâche, sans aucune tenue. Peut-être aurais-je dû tricoter une taille plus grande mais avec des aiguilles plus petites?..Des aig 5 ne semblent pas adapter pour ce modèle ,pourtant l'échantillon était bon!! Dommage. Cordialement
23.03.2018 - 15:44
|
|
Weekend Getaway#weekendgetawaysweater |
|
|
|
|
Knitted DROPS jumper with raglan, vent in the sides and stripes, worked top down in ”Brushed Alpaca Silk”. Size S-XXXL.
DROPS 169-7 |
|
|
GARTER ST (worked in the round): 1 ridge = 2 rounds. * K 1 round and P 1 round *, repeat from *-*. GARTER ST (back and forth): K all rows. 1 ridge = 2 rows K. STRIPES: Work stripes as follows on body and sleeves: Work 9-9-10-10-11-11 cm with off white. Work 9-9-10-10-11-11 cm with light sea green. Then work with off white until finished measurements. RAGLAN BODY: NOTE: K all YOs on next round to make holes. Inc 2 sts as follows: Before 1st and 3rd marker: Work until 3 sts remain before marker, K 2 in next st, 1 YO, K 2. After 2nd and 4th marker: K 2, 1 YO, K 2 in next st. Then inc 1 st as follows: Before 1st and 3rd marker: Work until 2 sts remain before marker, 1 YO, K 2. After 2nd and 4th marker: K 2, 1 YO. RAGLAN SLEEVE: Inc 1 st after 1st and 3rd marker as follows: K 2, 1 YO. Inc 1 st before 2nd and 4th marker as follows: Work until 2 sts remain before marker, 1 YO, K 2. On next round K the YO to make hole. DECREASE TIP: Dec as follows before marker: Work until 3 sts remain before marker, K 2 tog, K 1. Dec as follows after marker: K 1, slip 1 st as if to K, K 1, psso ---------------------------------------------------------- JUMPER: Worked in stocking st in the round, from the top and down to vent on body. Then divide the piece in front and back piece and continue back and forth until finished measurements. NOTE: Beg round = mid back. YOKE: Cast on 80-80-85-85-90-90 sts on circular needle size 4.5 mm with light sea green. K 1 round. Then work 4 rounds rib (= K 2/P 3). Switch to circular needle size 5 mm and work 1 round in stocking st while inc 18-20-21-25-24-30 sts evenly = 98-100-106-110-114-120 sts. Now insert 4 markers in the piece as follows: Work the first 15-16-16-16-17-18 sts (= half back piece), insert 1st marker, work the next 18-18-20-22-22-24 sts (= sleeve), insert 2nd marker, work the next 31-32-33-33-35-36 sts (= front piece), insert 3rd marker, work the next 18-18-20-22-22-24 sts (= sleeve), insert 4th marker, work the remaining 16-16-17-17-18-18 sts (= half back piece). On next round beg inc for raglan. NOTE: Inc differently on sleeves and body - READ RAGLAN BODY and RAGLAN SLEEVE. Inc as follows: Work until 3 sts remain before 1st marker, K 2 in next st, 1 YO, K 4 (marker is in the middle of these sts), 1 YO, work until 2 sts remain before 2nd marker, 1 YO, K 4 (marker is in the middle of these sts), 1 YO, K 2 in next st, work until 3 sts remain before 3rd marker, K 2 in next st, 1 YO, K 4 (marker is in the middle of these sts), 1 YO, work until 2 sts before 4th marker, 1 YO, K 4 (marker is in the middle of these sts), 1 YO, K 2 in next st, work the remaining sts on round. REMEMBER THE KNITTING TENSION Repeat inc on every other round as follows: On sleeves 14-15-16-17-19-20 more times (= 15-16-17-18-20-21 times in total), on body with 2 sts 7-9-11-14-16-20 more times (= 8-10-12-15-17-21 times in total) and then on body with 1 st 7-6-5-3-3-0 times. When all inc are done, there are 250-268-290-314-342-372 sts on round and piece measures 14-15-16-17-18-19 cm from the neck mid front and down. Now work as follows: Work the first 38-42-45-49-54-60 sts (= half back piece) slip the next 48-50-54-58-62-66 sts on a stitch holder (= sleeve), cast on 8 sts under sleeve, work the next 77-84-91-99-109-120 sts (= front piece), slip the next 48-50-54-58-62-66 sts on a stitch holder (= sleeve), cast on 8 sts under sleeve, work the remaining 39-42-46-50-55-60 sts on needle (= half back piece). NOW MEASURE THE PIECE FROM HERE. BODY: There are now 170-184-198-214-234-256 sts on round. Continue in the round in stocking st and STRIPES - see explanation above. When piece measures 35-36-37-38-39-40 cm, work as follows: Work 39-43-46-50-55-61 sts in stocking st, work 6 sts in GARTER ST - see explanation above, work 79-86-93-101-111-122 sts in stocking st, work 6 sts in garter st, work stocking st over the remaining 40-43-47-51-56-61 sts. Continue like this until 2 ridges have been work over the 6 sts in each side (= over vents). Now divide the piece into front and back piece as follows: Work the first 42-46-49-53-58-64 sts as before (i.e. stocking st with 3 sts in garter st in the side), turn and work back over 85-92-99-107-117-128 sts (work the first and last 3 sts in garter st) = back piece. Slip the remaining 85-92-99-107-117-128 sts on a stitch holder for front piece. Continue back and forth over sts on needle until piece measures 42-43-44-48-46-47 cm. On next row from RS switch to circular needle size 4.5 mm and inc 13-16-19-21-21-25 sts evenly (but not over the 3 outermost sts) = 98-108-118-128-138-153 sts. Work 1 row from WS as before, then work rib (K 2/P 3) with 3 sts in garter st in each side. NOTE: Beg and end with K 2 inside the 3 sts in garter st in each side. When rib measures 6 cm, cast off with K over K and P over P. Piece measures 66-68-70-72-74-76 cm in total from shoulder. Slip sts from stitch holder back on needle and work as back piece. SLEEVE: Work sleeve in stocking st in the round on double pointed needles. There are 48-50-54-58-62-66 sts for each sleeve. Slip sts from stitch holder back on double pointed needles size 5 mm and cast on 8 new sts under sleeve = 56-58-62-66-70-74 sts. Work in stocking st and stripes as on body in the round, AT THE SAME TIME insert a marker in the middle of the new sts under sleeve (i.e. 4 new sts on each side of marker). NOW MEASURE THE PIECE FROM HERE. When piece measures 4 cm, dec 1 st on each side of marker - READ DECREASE TIP. Repeat dec approx. every 4-4-3-3-2½-2½ cm 10-10-12-13-14-15 more times = 34-36-36-38-40-42 sts. When sleeve measures 45-45-45-45-44-44 cm (NOTE: Shorter measurements in the larger sizes because of longer yoke), switch to double pointed needles size 4.5 mm and inc 6-4-9-7-5-8 sts evenly on next round = 40-40-45-45-45-50 sts. Work rib = K 2/P 3 for 6 cm. When sleeve measures 51-51-51-51-50-50 cm, cast off with K over K and P over P. Work the other sleeve the same way. ASSEMBLY: Sew the openings under the sleeves. |
|
 |
|
Have you finished this pattern?Tag your pictures with #dropspattern #weekendgetawaysweater or submit them to the #dropsfan gallery. Do you need help with this pattern?You'll find 27 tutorial videos, a Comments/Questions area and more by visiting the pattern on garnstudio.com. © 1982-2026 DROPS Design A/S. We reserve all rights. This document, including all its sub-sections, has copyrights. Read more about what you can do with our patterns at the bottom of each pattern on our site. |


With over 40 years in knitting and crochet design, DROPS Design offers one of the most extensive collections of free patterns on the internet - translated to 17 languages. As of today we count 324 catalogues and 12290 patterns translated into English (UK/cm). 12290
We work hard to bring you the best knitting and crochet have to offer, inspiration and advice as well as great quality yarns at incredible prices! Would you like to use our patterns for other than personal use? You can read what you are allowed to do in the Copyright text at the bottom of all our patterns. Happy crafting!
Post a comment to pattern DROPS 169-7
We would love to hear what you have to say about this pattern!
If you want to leave a question, please make sure you select the correct category in the form below, to speed up the answering process. Required fields are marked *.