
Popular categories
Looking for a yarn?


Comments / Questions (42)
![]() Elisa wrote:
Elisa wrote:
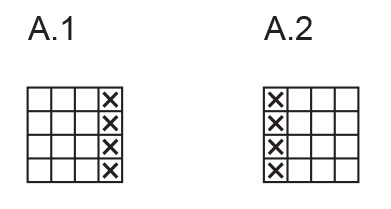
Bonjour, j’ai deux petites questions: Pouvez-vous me dire si le diagramme A1 correspond bien au devant droit et le A2 au devant gauche dans le patron? Et quand faut-il assembler le col? Avant ou après de joindre les devants avec la torsade? Merci d'avance pour vos réponses
14.06.2026 - 13:44DROPS Design answered:
Bonjour Elisa, oui A.1 = bordure devant droit et A.2 = bordure devant gauche (cf explications écrites). On tricote d'abord les bordures des devants, séparément, puis on monte les mailles de l'empiècement entre ces bordures, et on tricote l'empiècement (avec les augmentations du raglan et de l'encolure V); les bordures des devants seront attachées ensemble puis à l'encolure tout à la fin - retrouvez ici, en vidéo un exemple d'assemblage des bordures devant (pour un gilet, mais la technique sera la même pour un pull). Bon tricot!
15.06.2026 - 10:20
![]() Insa wrote:
Insa wrote:
Werden die V-Ausschnittzunahmen in der Randmasche gemacht, oder jeweils nach den Mustersätzen, also in der 5ten Masche?
09.06.2026 - 09:46DROPS Design answered:
Liebe Insa, die V-Auschnittzunahmen werden innerhalb 4 Maschen beidseitig gestrickt, siehe V-AUSSCHNITT-ZUNAHMEN:, dh am Anfang der Reihe nach den 4 ersten Maschen und am Ende der Reihe vor den 4 letzen Maschen. Viel Spaß beim Stricken!
09.06.2026 - 17:26
![]() Jessica wrote:
Jessica wrote:
Hallo, ich bin noch ganz am Anfang der Anleitung und habe die beiden Blenden fertig gestrickt und will nun die benötigten 76 neuen Maschen anschlagen. In der Anleitung steht, die Blende wie zuvor stricken. Stricke ich die Blende weiterhin mit drei rechten Maschen und einer linken Masche, schlage 76 neue Maschen an und stricke anschließend die 2. Blende an mit einer linken Masche und drei rechten? Oder stricke ich alle Maschen der Blenden rechts? Vielen Dank schon mal und schöne Grüße
03.06.2026 - 17:44
![]() Jessica wrote:
Jessica wrote:
Hallo, ich bin noch ganz am Anfang der Anleitung und habe die beiden Blenden fertig gestrickt und will nun die benötigten 76 neuen Maschen anschlagen. In der Anleitung steht, die Blende wie zuvor stricken. Stricke ich die Blende weiterhin mit drei rechten Maschen und einer linken Masche, schlage 76 neue Maschen an und stricke anschließend die 2. Blende an mit einer linken Masche und drei rechten? Oder stricke ich alle Maschen der Blenden rechts? Vielen Dank schon mal und schöne Grüße
03.06.2026 - 17:43DROPS Design answered:
Liebe Jessica, die Blenden stricken Sie genauso wie zuvor mit A.2 und A.1 (so mit 3 re, 1 li für die linke Blende und 1 li, 3 re für die rechte). Diese 4 Maschen beidseitig stricken Sie mit A.1 und A.2 bis V-Zunahmen fertig sind, dann wird die Arbeit in der Runde (mit einem Zopf in der Mitte voran) gestrickt. Viel Spaß beim Stricken!
04.06.2026 - 09:54
![]() Isabelle wrote:
Isabelle wrote:
Bonjour, est il possible de réaliser ce modèle sans aiguilles circulaires. Si oui comment dois-je faire ?
14.05.2026 - 17:20DROPS Design answered:
Bonjour Isabelle, probablement, vous trouverez ici quelques astuces pour adapter un modèle sur aiguilles droites, notez qu'il est parfois plus simple de tricoter en rond, n'hésitez pas à essayer, nombreuses sont celles qui les ont finalement adoptées. Bon tricot!
15.05.2026 - 09:41
![]() Thea wrote:
Thea wrote:
Ik brei maat L. De mouw begint met 18 steken en voor de raglan wordt er dan 2x 29 steken gemeerderd. Dat is 76 steken. Staat het het aantal van 74 fout vermeld in het patroon of heb ik iets gemist?
19.04.2026 - 17:11DROPS Design answered:
Dag Thea,
Nee, dit is niet fout, alleen bij het verdelen van de steken zet je 74 steken op een hulpdraad voor de mouw. Er gaat dus aan beide kanten van de mouw als het ware 1 steek naar elk pand.
29.04.2026 - 19:53
![]() Julia wrote:
Julia wrote:
Supongo que a la vez que se hace los aumentos del escote se une a los bordes que hemos tejidos antes de unir todo y tejer en circular, pero no veo claro como
25.02.2026 - 16:49DROPS Design answered:
Hola Julia, primero trabajamos la cenefa izquierda y derecha, como dos cintas separadas. Después las unimos al comenzar el canesú, montando puntos entre ellas. Ahora dividimos la labor en 4 secciones, con los marcapuntos y comenzamos los aumentos para el raglán y el escote-en-V.
18.04.2026 - 20:52
![]() Ulli wrote:
Ulli wrote:
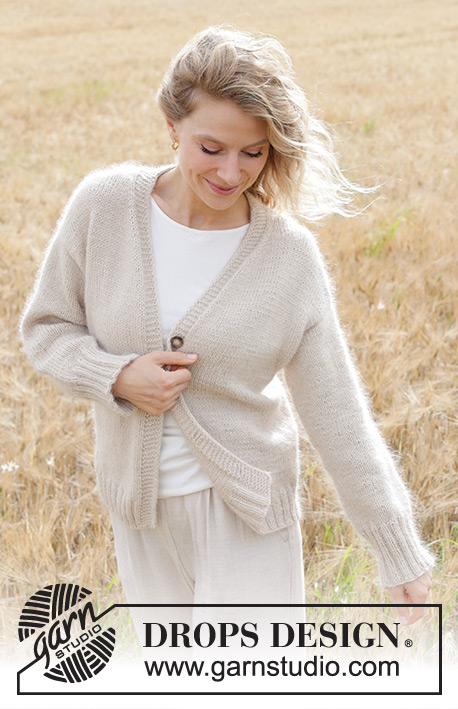
Ich habe den Eindruck, dass hier etwas durcheinander geraten ist. Das ist doch nicht die Anleitung für den Pullover, sondern für die Jacke aus dem Garn oder? Wo finde ich denn die richtige Anleitung für den Pullover?
05.02.2026 - 13:01DROPS Design answered:
Liebe Ulli, die Anleitung ist korrekt, es ist die Anleitung für den Pullover. Durch den V-Ausschnitt haben Sie ja auch 2 Blenden am Vorderteil, daher liest es sich vielleicht anfangs wie die Jacke. Viel Spaß beim Stricken!
05.02.2026 - 23:10
![]() Christine Mogan wrote:
Christine Mogan wrote:
Bonjour, mon échantillon fait 2cm de trop dans les 2 sens. Si , comme vous le dites, je ne réduis pas le nombre de mailles mais prends des aiguilles plus grosses, j'obtiendrai un échantillon plus petit ? comment est ce possible ? C'est plutôt l'inverse non ?
24.10.2025 - 18:43DROPS Design answered:
Bonjour Mme Mogan, si votre échantillon mesure 12 x 12 cm, c'est que vos mailles sont trop grandes, vous devez essayez avec des aiguilles plus petites pour les réduire et augmenter vos chances d'avoir les 10 x 10 cm. Retrouvez ici plus d'infos sur l''échantillon. Bon tricot!
29.10.2025 - 14:52
![]() Esmée wrote:
Esmée wrote:
Dag, klopt het dat ik bij het breien van de pas, de voorbiezen aan elke kant volgens patroon A1 en A2 blijf breien? Dank alvast!
17.09.2025 - 20:46DROPS Design answered:
Dag Esmée,
Ja, klopt, de biezen blijf je gewoon op dezelfde manier breien.
17.09.2025 - 21:26
|
|||||||
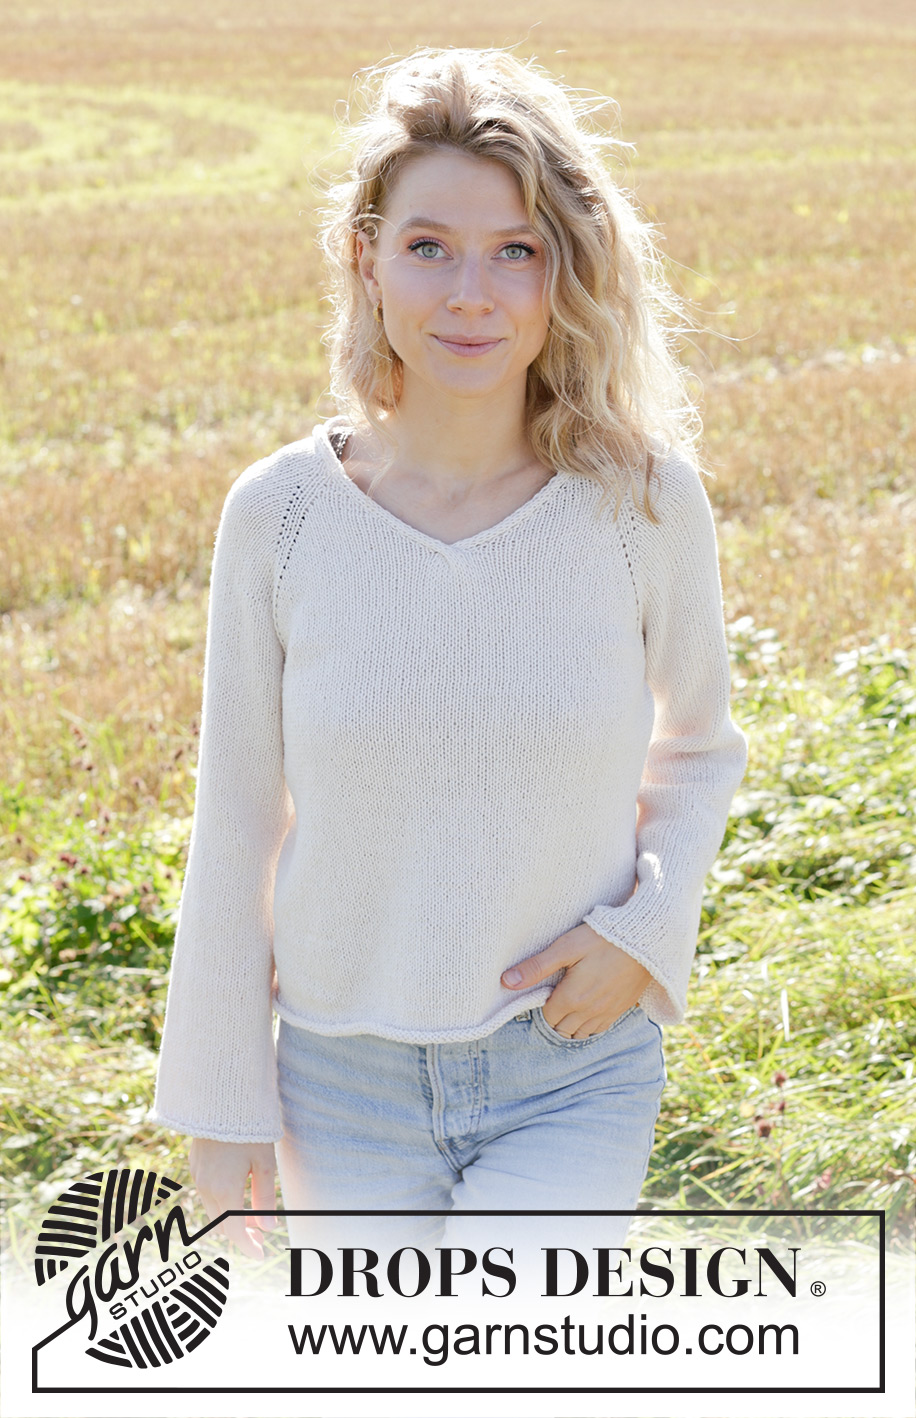
Morning Moon#morningmoonsweater |
|||||||
 |
 |
||||||
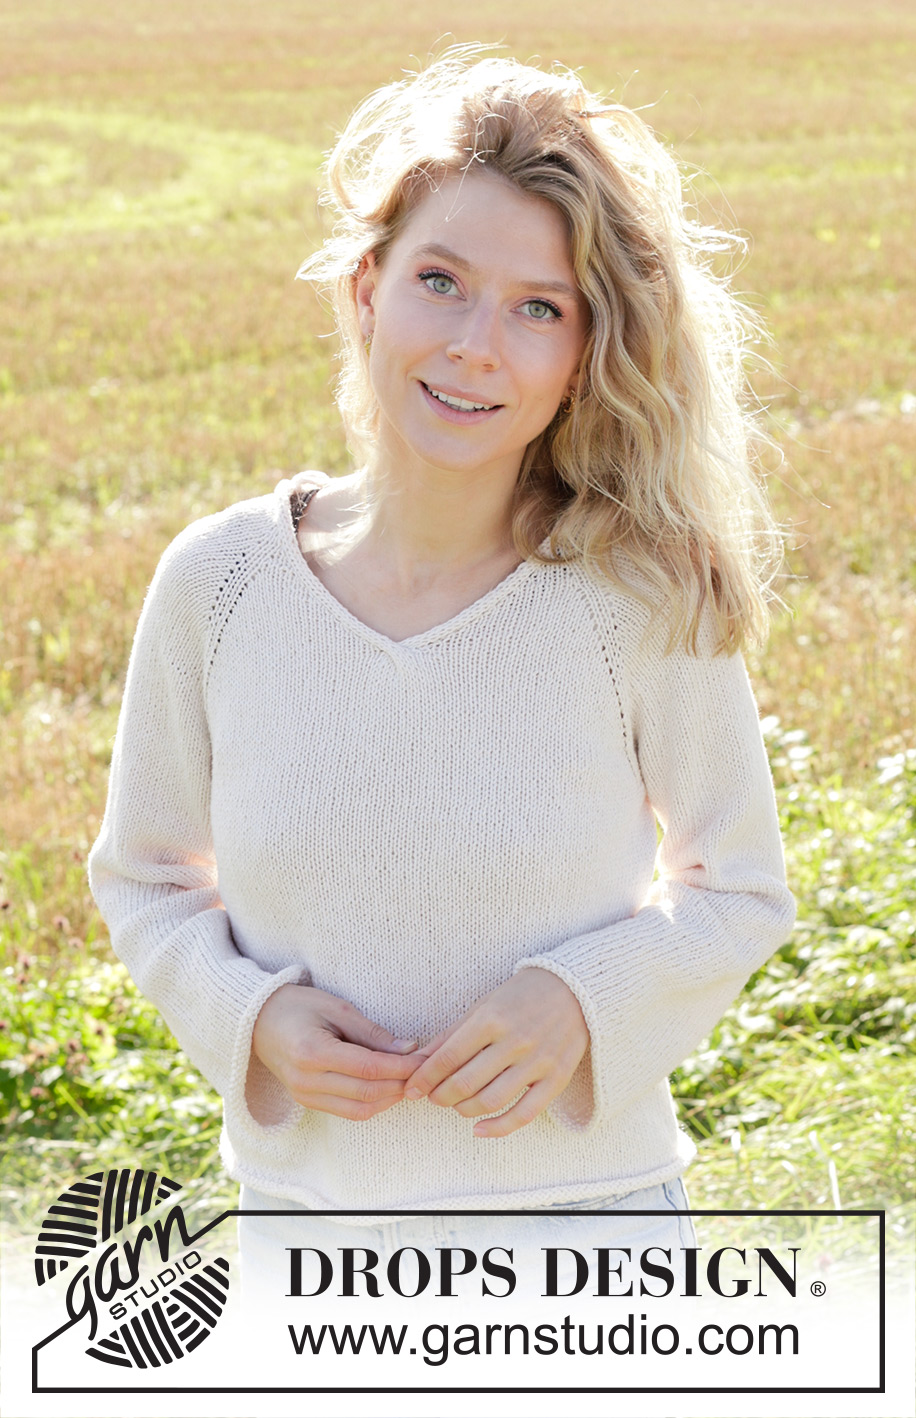
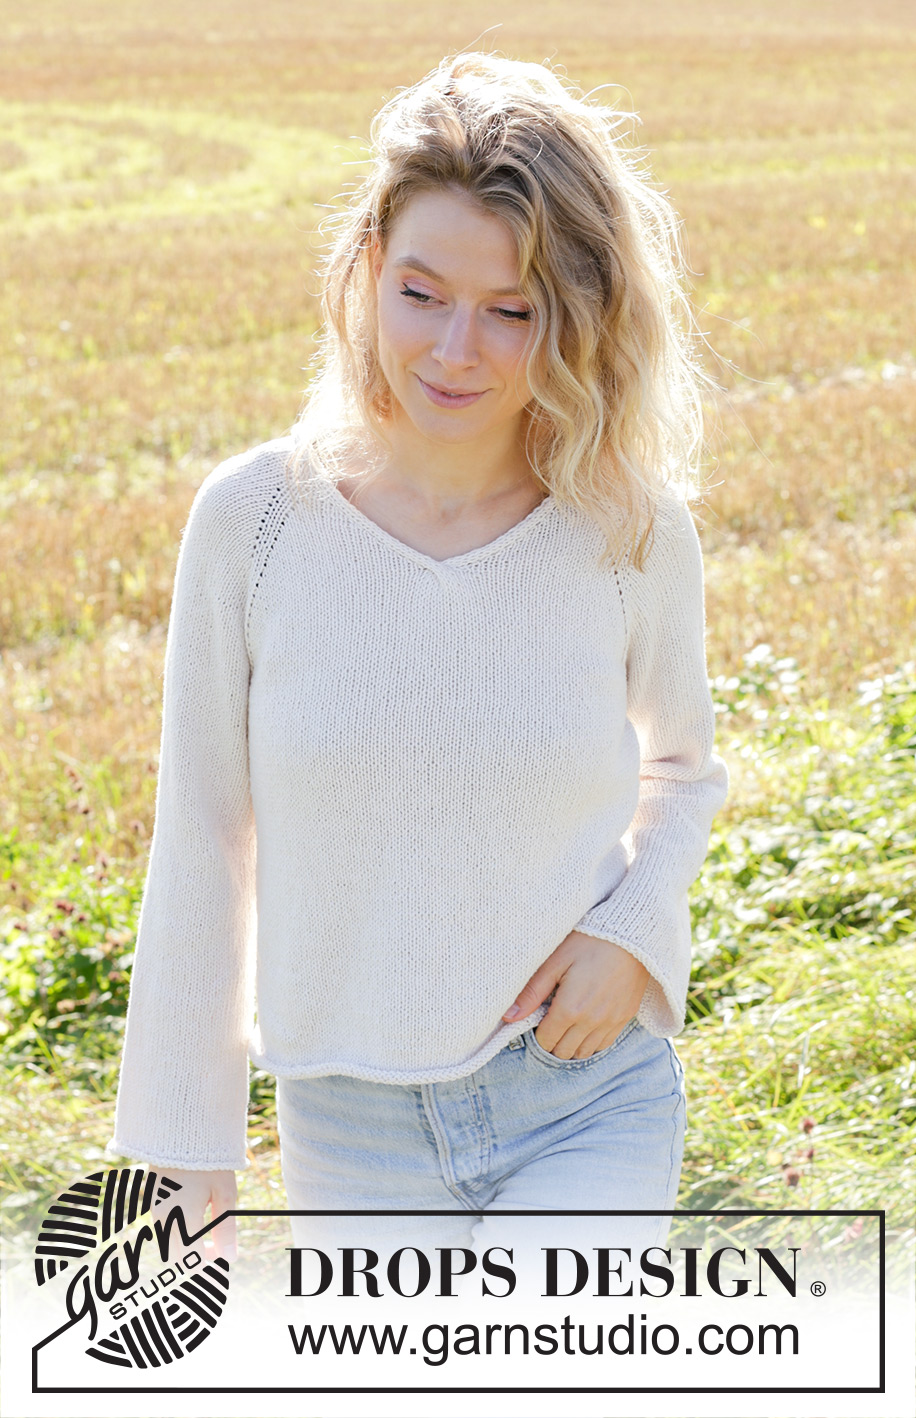
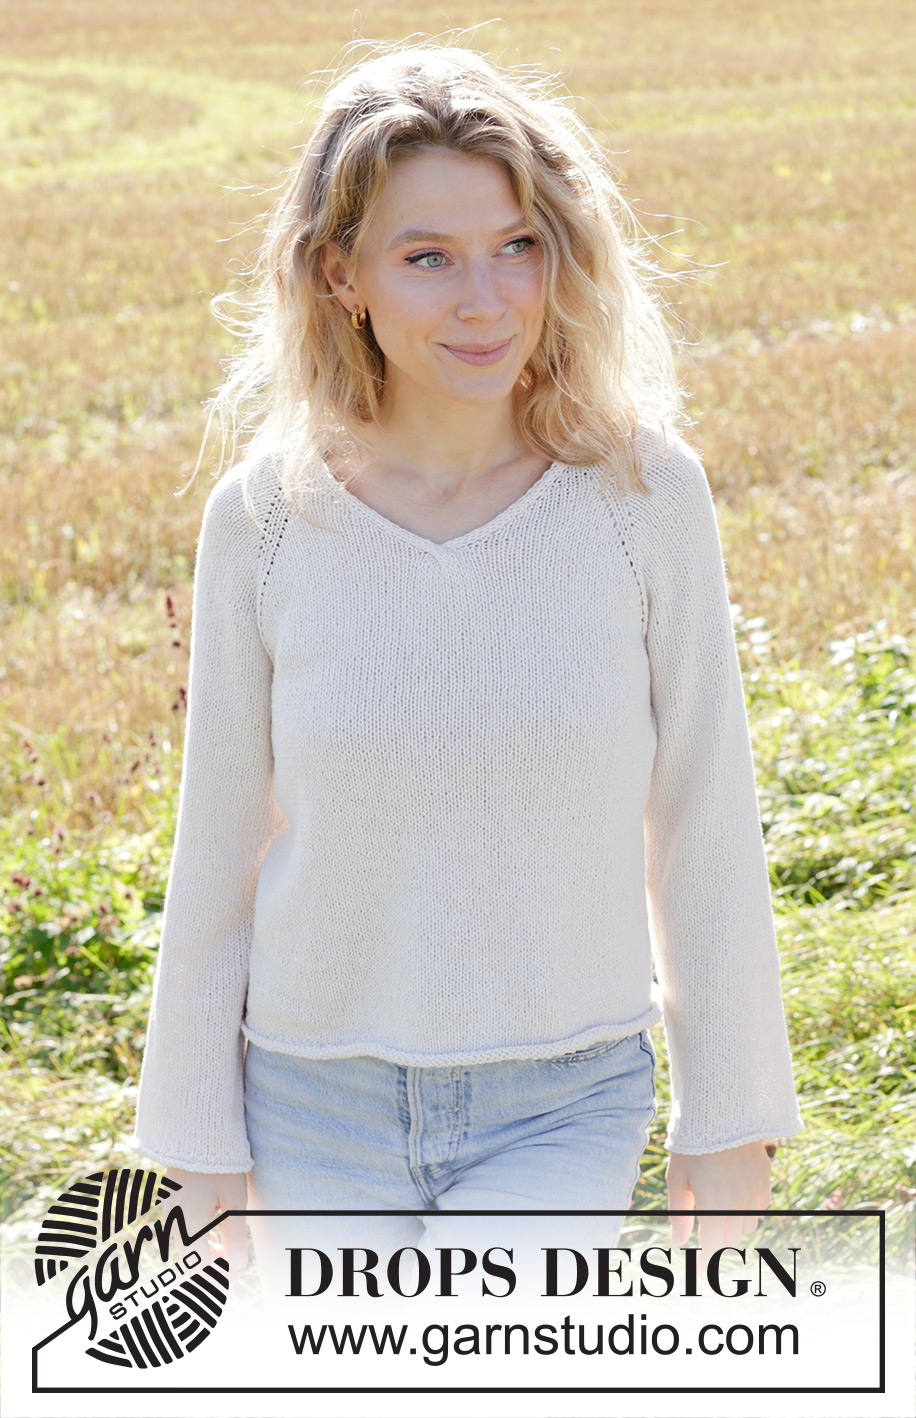
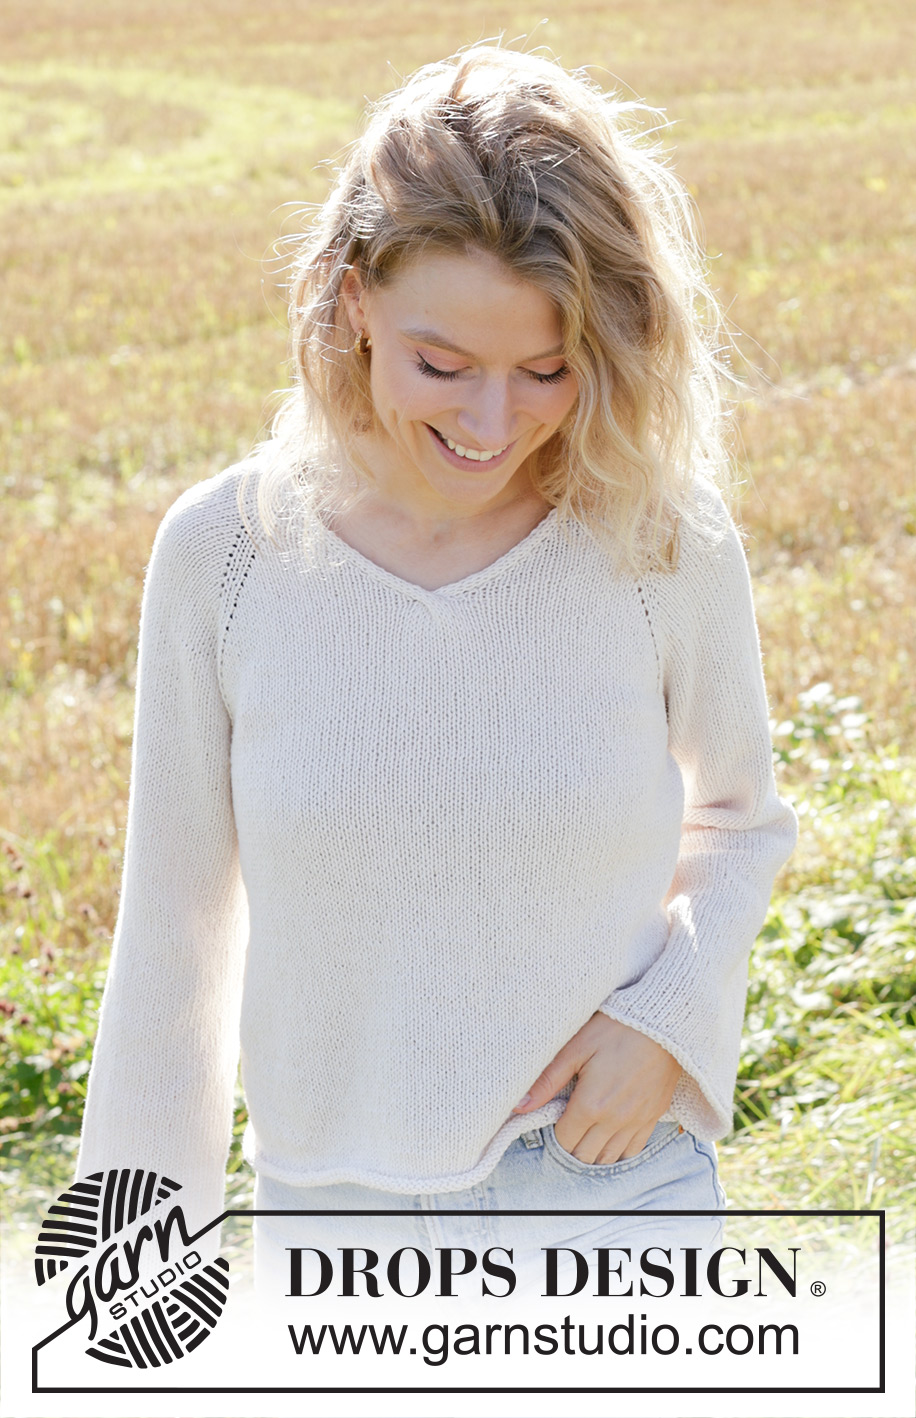
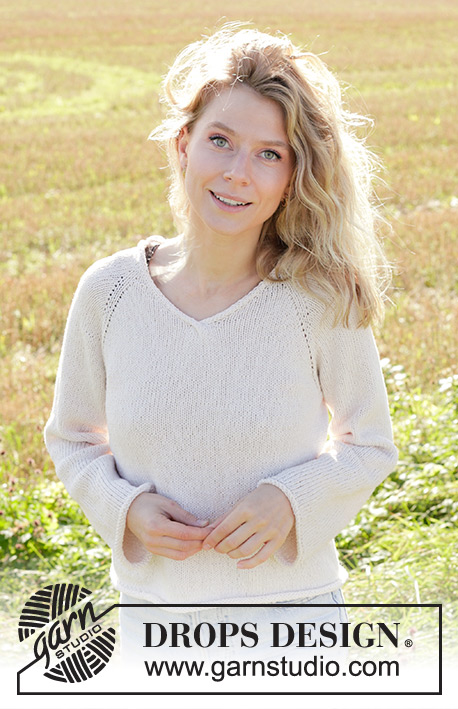
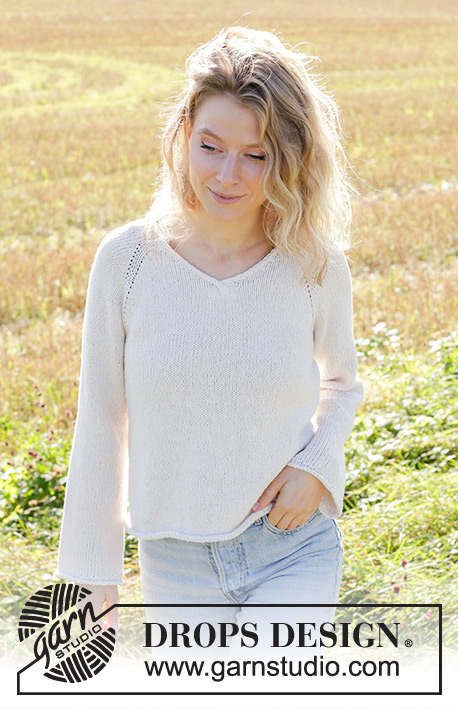
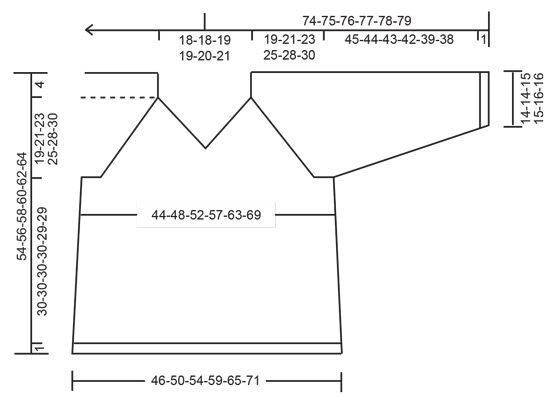
Knitted jumper in DROPS Belle. The piece is worked top down with stocking stitch, raglan, V-neck and rolled edges. Sizes S-XXXL.
DROPS 249-15 |
|||||||
|
------------------------------------------------------- EXPLANATIONS FOR THE PATTERN: ------------------------------------------------------- PATTERN (for bands): See diagrams A.1 and A.2. The diagrams show all rows in the pattern from the right side. RAGLAN: All increases are worked from the right side! Increase for raglan before/after the marker-thread as follows: Work until there is 1 stitch left before the marker thread, make 1 yarn over, knit 2 (marker thread sits between these 2 stitches) make 1 yarn over. YARN OVERS THEN WORKED AS FOLLOWS: Working back and forth: BEFORE MARKER-THREAD: Purl the back loop. AFTER MARKER-THREAD: Slip the yarn-over off the left needle and replace it the other way round (insert left needle through back when replacing it). Purl the front loop. Working in the round: BEFORE MARKER-THREAD: Slip the yarn-over off the left needle and replace it the other way round (insert left needle through back when replacing it). Knit the front loop. AFTER MARKER-THREAD: Knit the back loop. V-NECK: All increases are worked from the right side! Increase as follows: Work the left band as before, make 1 yarn over, work until there are 4 stitches left, make 1 yarn over, work the right band as before. On the next row (= wrong side) work the yarn overs as follows: AFTER RIGHT BAND: Slip the yarn-over off the left needle and replace it the other way round (insert left needle through back when replacing it). Purl the front loop. BEFORE LEFT BAND: Purl the back loop. DECREASE TIP (for sleeves): Decrease 1 stitch on each side of the marker-thread as follows: Work until there are 3 stitches left before the marker-thread, knit 2 together, knit 2 (marker-thread sits between these 2 stitches), slip 1 stitch knit-wise, knit 1 and pass the slipped stitch over the knitted stitch. INCREASE TIP (for body): Increase 1 stitch on each side of the marker-thread: Work until there are 2 stitches left before the marker thread, make 1 yarn over, knit 4 (marker thread sits between these 4 stitches) make 1 yarn over. On the next round work the yarn overs as follows: BEFORE MARKER-THREAD: Slip the yarn-over off the left needle and replace it the other way round (insert left needle through back when replacing it). Knit the front loop (stitch twists towards the right). AFTER MARKER-THREAD: Knit the back loop (stitch twists towards the left). ------------------------------------------------------- START THE PIECE HERE: ------------------------------------------------------- JUMPER – SHORT OVERVIEW OF THE PIECE: The pattern uses both long and short needles; start with the length which fits the number of stitches and change when necessary. The bands are worked first, then stitches are cast on between them and the yoke is worked with circular needle, back and forth from mid-front and top down. When the V-neck is finished, the front pieces are joined and the yoke is continued in the round. When the yoke is finished, it is divided for the body and sleeves. The body is continued in the round, while the sleeves wait. The sleeves are worked in the round. RIGHT BAND: Cast on 4 stitches with double pointed needles size 4 mm and DROPS Belle. Work A.1 back and forth for 17-17-17½-17½-18-18½ cm. Cut the strand and lay the band to one side. LEFT BAND: Cast on 4 stitches with double pointed needles size 4 mm and DROPS Belle. Work A.2 back and forth for 17-17-17½-17½-18-18½ cm. The last row is from the wrong side. Now cast on stitches as follows: YOKE: Change to circular needle size 4 mm. Work the left band as before from the right side, cast on 76-76-78-78-80-82 stitches, work the right band as before from the right side = 84-84-86-86-88-90 stitches. Purl 1 row from the wrong side with 4 band-stitches worked as before on each side. Insert 4 marker-threads, without working the stitches: Count 6 stitches (= front piece), insert 1 marker-thread, count 18 stitches (= sleeve), insert 1 marker-thread, count 36-36-38-38-40-42 stitches (= back piece), insert 1 marker-thread, count 18 stitches (= sleeve), insert 1 marker-thread, there are 6 stitches left on the row (= front piece). Work stocking stitch back and forth with 4 band stitches on each side, AT THE SAME TIME increase for both RAGLAN and V-NECK – read description above. Therefore, read the next section before continuing. REMEMBER THE KNITTING TENSION! Increase for raglan before and after all 4 marker-threads, every 2nd row (= 8 increased stitches) 22-26-29-34-35-36 times. Then only increase on the front and back pieces (= 4 increased stitches) 0-0-0-0-3-6 times. A total of 176-208-232-272-292-312 increases for raglan. Increase for the V-neck on both sides (mid-front) every 4th row 1 time, then every 2nd row 11-11-12-12-13-14 times. A total of 12-12-13-13-14-15 increases for the V-neck on each front piece. When the V-neck increases are finished, purl 1 row from the wrong side, then join the front pieces from the right side as follows: Knit until there are 4 stitches left, place these 4 stitches on a cable needle held behind the piece, knit the first 4 stitches on the other front piece, insert 1 marker (the round starts here), knit the 4 stitches from the cable needle. Continue with stocking stitch in the round and finish the increases for raglan. When all the increases are finished there are 284-316-344-384-408-432 stitches. Continue in the round without further increases, until the yoke measures 19-21-23-25-28-30 cm mid-back. DIVIDE FOR BODY AND SLEEVES: Start mid-front, knit 41-45-49-54-59-64 (= half front piece), place the next 60-68-74-84-86-88 stitches on 1 thread for the sleeve, cast on 10-10-12-12-14-16 stitches (in side under sleeve), knit 82-90-98-108-118-128 (= back piece), place the next 60-68-74-84-86-88 stitches on 1 thread for the sleeve, cast on 10-10-12-12-14-16 stitches (in side under sleeve), knit the last 41-45-49-54-59-64 stitches (= half front piece). The body and sleeves are finished separately. The piece is now measured from here! BODY: = 184-200-220-240-264-288 stitches. Insert 1 marker-thread in the middle of the cast-on stitches under each sleeve, with 92-100-110-120-132-144 stitches on both the front and back pieces. Continue with stocking stitch in the round until the body measures 10-10-10-10-9-7 cm from the division. Increase 2 stitches in each side – read INCREASE TIP. Increase like this a total of 2-2-2-2-2-3 times every 10-10-10-10-10-7 cm = 192-208-228-248-272-300 stitches. Continue with stocking stitch until the body measures 30-30-30-30-29-29 cm from the division. Now work a rolled edge. Start the round under one sleeve and work rib (knit 1, purl 1) for 1 round. Knit 3 rounds. Cast off. The jumper measures approx. 54-56-58-60-62-64 cm from the shoulder. SLEEVES: Place the 60-68-74-84-86-88 stitches from the thread on the one side of the piece on short circular needle/double pointed needles size 4 mm and knit up 1 stitch in each of the 10-10-12-12-14-16 stitches cast on under the sleeve = 70-78-86-96-100-104 stitches. Insert a marker-thread in the middle of the new stitches under the sleeve. This is used when decreasing under the sleeve. The round starts here. Work stocking stitch in the round for 3-4-3-4-2-4 cm. Now decrease 2 stitches under the sleeve – read DECREASE TIP. Decrease like this every 6-4-3-2-2-1½ cm a total of 6-9-12-16-17-18 times = 58-60-62-64-66-68 stitches. Work until the sleeve measures 45-44-43-42-39-38 cm from the division (with 1 cm left to finished length). Work rib for 1 round (knit 1, purl 1), then knit 3 rounds. Cast off. The sleeve measures approx. 46-45-44-43-40-39 cm. ASSEMBLY: Sew together the bands from the front pieces = mid-back, then sew the bands to the neckline. |
|||||||
Diagram explanations |
|||||||
|
|||||||
 |
|||||||
 |
|||||||
Have you finished this pattern?Tag your pictures with #dropspattern #morningmoonsweater or submit them to the #dropsfan gallery. Do you need help with this pattern?You'll find 26 tutorial videos, a Comments/Questions area and more by visiting the pattern on garnstudio.com. © 1982-2026 DROPS Design A/S. We reserve all rights. This document, including all its sub-sections, has copyrights. Read more about what you can do with our patterns at the bottom of each pattern on our site. |
|||||||


With over 40 years in knitting and crochet design, DROPS Design offers one of the most extensive collections of free patterns on the internet - translated to 17 languages. As of today we count 325 catalogues and 12298 patterns translated into English (UK/cm). 12298
We work hard to bring you the best knitting and crochet have to offer, inspiration and advice as well as great quality yarns at incredible prices! Would you like to use our patterns for other than personal use? You can read what you are allowed to do in the Copyright text at the bottom of all our patterns. Happy crafting!
Post a comment to pattern DROPS 249-15
We would love to hear what you have to say about this pattern!
If you want to leave a question, please make sure you select the correct category in the form below, to speed up the answering process. Required fields are marked *.