
Popular categories
Looking for a yarn?


Comments / Questions (47)
![]() Jj wrote:
Jj wrote:
How to increase only sleeves and front and back? where to increase and which marker?
16.03.2026 - 09:33DROPS Design answered:
Dear Jj, see RAGLAN to know how to increase; you will increase for sleeves, front and back piec on each side of the 2 sts with a marker thread in between = 8 sts on each round, then increase alternately 4 sts (front and back piece only = after 2nd marker thread + before 3rd marker thread and after 4th marker thread + before first marker thread) and 8 sts (as before). Happy knitting!
16.03.2026 - 16:09
![]() Suse wrote:
Suse wrote:
Hallo! Eine Frage: Braucht man die Zunahmen vorm Bündchen ganz am Ende des Rumpfteils unbedingt? Wozu dienen diese? Damit der Bund nicht zu eng sitzt am Ende? Vielen Dank!
09.03.2026 - 14:05DROPS Design answered:
Liebe Suse, ja genau, ohne die Zunahmen wird das Bündchen zusammenziehen, das will man nicht, deshalb wird man regelmäßig verteil vor dem Bündchen zunehmen. Viel Spaß beim Stricken!
09.03.2026 - 16:41
![]() Florence wrote:
Florence wrote:
Bonjour Y a t il.une vidéo en français ? Je vous remercie.
12.02.2026 - 17:42
![]() Florence wrote:
Florence wrote:
Bonjour Y a t il une vidéo en français ? Je vous remercie.
12.02.2026 - 17:41DROPS Design answered:
Bonjour Florence, nos vidéos ont les explications en français, comme les explications - pour changer la langue, cliquez sur le menu déroulant si besoin. Et n'hésitez pas à utiliser cet espace pour poser votre question. Bon tricot!
13.02.2026 - 16:11
![]() Meg wrote:
Meg wrote:
This pattern is as clear as mud!
22.01.2026 - 01:59
![]() Marina wrote:
Marina wrote:
Kann ich für schöneren Halsausschnitt eine Anleitung mit verkürzten Reihen bekommen?
11.01.2026 - 20:14DROPS Design answered:
Liebe Marina, in diesem Video finden Sie Tipps, wie man eine Erhöhung für einen Raglanpullover stricken kann. Viel Spaß beim Stricken!
13.01.2026 - 08:30
![]() Annamaria wrote:
Annamaria wrote:
Inesperta, ma anziana, ho seguito il vostro modello con piccole variazioni, ottenendo due maglioncini di colori e taglie diversi con ottimi risultati ! Grazie!
29.12.2025 - 22:59
![]() Ulrika Jahn wrote:
Ulrika Jahn wrote:
Det saknas uppgift on sticknummer i avsnittet gällande: "STICKFASTHET: 21 maskor på bredden och 28 varv på höjden med slätstickning = 10 x 10 cm."
25.12.2025 - 15:20
![]() Shelley wrote:
Shelley wrote:
Hello I am just beginning this pattern. Can you please explain how to do the yoke increases? I am confused on when to add in the 6 increase stitches for each section because it says knit 26 then add in 6 evenly. I’m making size 7-8 so calls for 6 each section. Is this all in one round? Thank you for clarifying!
25.10.2025 - 06:31
![]() Sonia wrote:
Sonia wrote:
Al hacer uso de la calculadora le digo que tengo 22 puntos y quiero aumentar 4 meses hace unos cálculos completamente erróneos.
30.09.2025 - 16:32
|
|
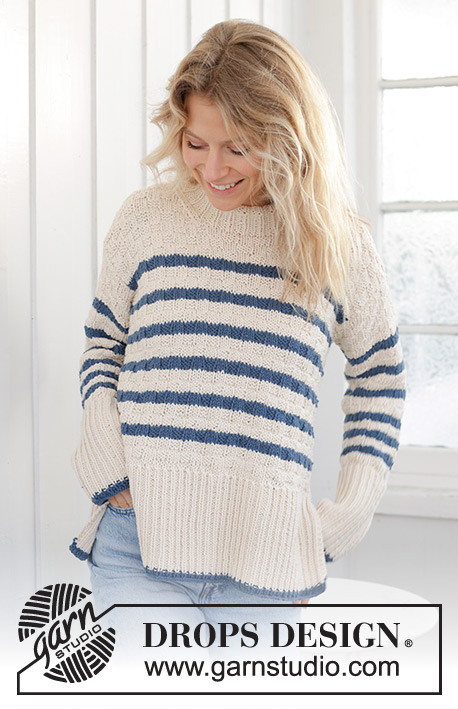
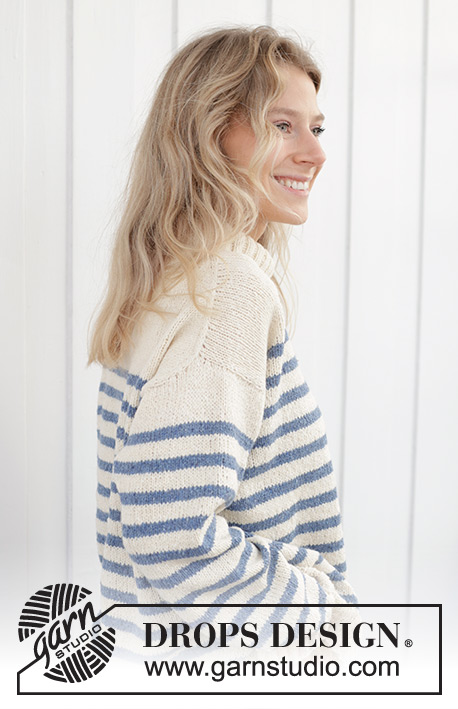
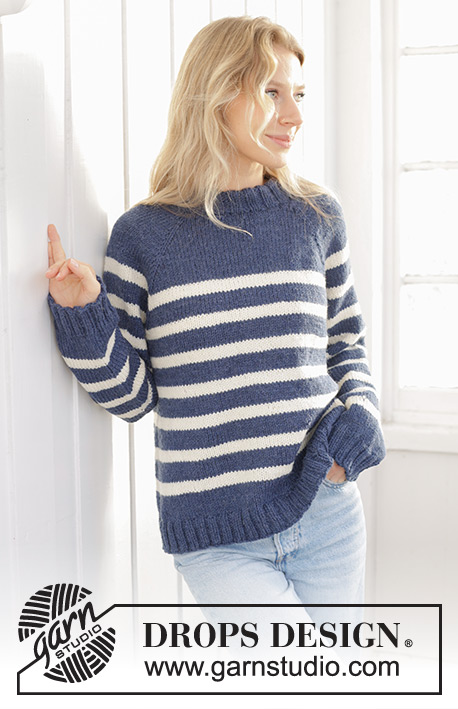
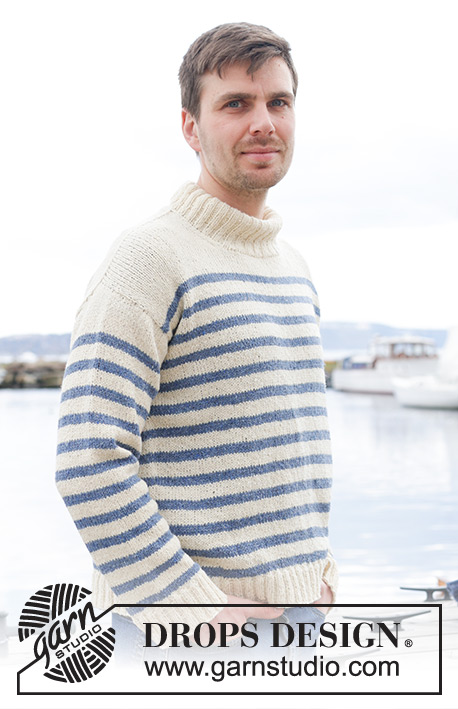
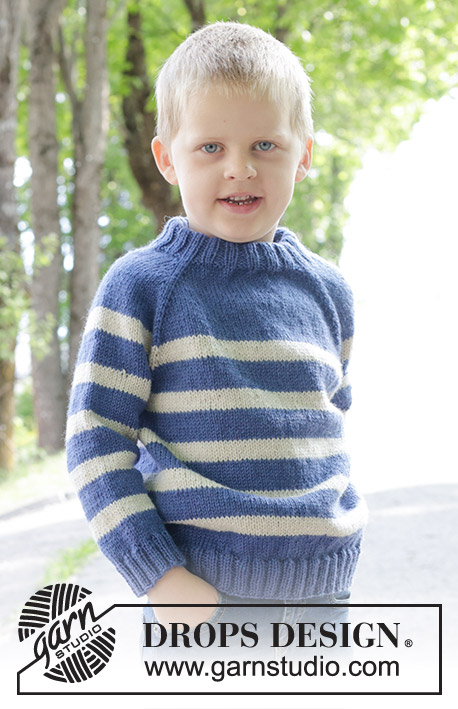
Meet the Captain#meetthecaptainsweater |
|
 |
 |
Knitted jumper for children in DROPS Karisma. The piece is worked top down with double neck, stripes and raglan. Sizes 2 – 12 years.
DROPS Children 47-5 |
|
|
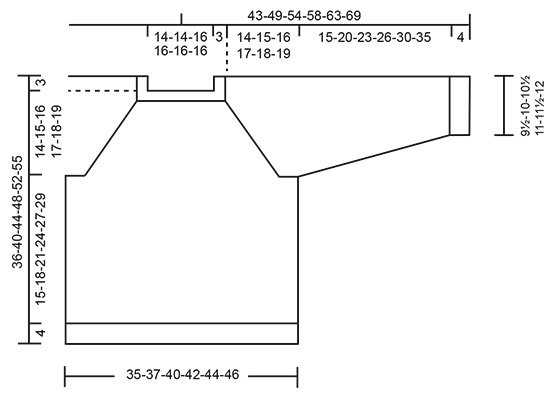
------------------------------------------------------- EXPLANATIONS FOR THE PATTERN: ------------------------------------------------------- INCREASE TIP (evenly spaced): Increase 1 stitch by making 1 yarn over which is worked twisted on the next round to avoid a hole. RAGLAN: Increase 1 stitch before/after 2 knitted stitches in each transition between body and sleeves. Marker-threads sit between these 2 stitches. Increase 1 stitch by making 1 yarn over, which is knitted twisted on the next round to avoid a hole. Then work the new stitches in stocking stitch. STRIPES: Work with colour denim blue until the yoke measures 9-10-11-12-13-14 cm (from the neck). Then work stripes: * 6 rounds colour light beige (approx. 2 cm), 9 rounds colour denim blue (approx. 3 cm) *, work from *-*. DECREASE TIP (for sleeves): Decrease 1 stitch on either side of the marker-thread as follows: Work until there are 3 stitches left before the marker-thread, knit 2 together, knit 2 (marker-thread sits between these 2 stitches), slip 1 stitch knit-wise, knit 1 and pass the slipped stitch over the knitted stitch. ------------------------------------------------------- START THE PIECE HERE: ------------------------------------------------------- JUMPER – SHORT OVERVIEW OF THE PIECE: The neck and yoke are worked in the round with circular needle, top down. The yoke is divided for body and sleeves and the body is continued in the round with circular needle. The sleeves are worked in the round with short circular needle/double pointed needles. DOUBLE NECK: Cast on 80-80-88-88-88-88 stitches with colour denim blue DROPS Karisma, using short circular needles size 3.5 and 4 mm held together. Remove the needle size 4 mm keeping stitches on the needle size 3.5 mm (this gives you an elastic cast-on edge). Work rib in the round (knit 2, purl 2) for 7 cm. Fold the neck double to the inside and work 1 more round of rib, working every 4th stitch together with its corresponding stitch on the cast-on edge. You now have a double neck. The yoke is measured from here. YOKE: Change to circular needle size 4 mm. Insert 4 marker-threads and increase evenly as described below. NOTE: Each marker-thread is inserted between 2 knitted stitches and marks the raglan-line. (Begin of the round is between back piece and right sleeve). Knit 2, insert marker-thread 1 between these 2 stitches, knit 14 (right sleeve), knit 2, insert marker-thread 2 between these 2 stitches, knit 22-22-26-26-26-26 and increase 4-4-6-6-6-8 stitches evenly over these stitches - read INCREASE TIP (= 26-26-32-32-32-34 stitches on the front piece), knit 2, insert marker-thread 3 between these 2 stitches, knit 14 (left sleeve), knit 2, insert marker-thread 4 between these 2 stitches, knit 22-22-26-26-26-26 and increase 4-4-6-6-6-8 stitches evenly over these stitches (= 26-26-32-32-32-34 stitches on the back piece) = 88-88-100-100-100-104 stitches. Work stocking stitch in the round and increase for raglan as well as working stripes – read the next 2 sections before continuing! RAGLAN: Increase for RAGLAN on each side of all 4 marker-threads – read description above, every 2nd round a total of 9-9-9-8-8-7 times = 160-160-172-164-164-160 stitches. Continue to increase every 2nd round but every 2nd increase is only on the front and back pieces (4 stitches increased), i.e., increase on the front and back pieces every 2nd round and on the sleeves every 4th round. Increase like this 10-12-12-14-16-18 times on the front and back pieces (5-6-6-7-8-9 times on the sleeves). REMEMBER THE KNITTING TENSION! STRIPES: When the piece measures 9-10-11-12-13-14 cm from the neck, work STRIPES – read description above. After the last increase there are 220-232-244-248-260-268 stitches (66-70-76-78-82-86 stitches between the marker threads on the front and back pieces and 44-46-46-46-48-48 stitches between the marker threads on each sleeve). Continue with stocking stitch and stripes but without further increases until the yoke measures 14-15-16-17-18-19 cm from the neck mid-front. Now divide for the body and sleeves as follows: Knit 1 as before, place the next 44-46-46-46-48-48 stitches on a thread for the sleeve, cast on 8-8-8-10-10-10 stitches (in side under sleeve), knit 66-70-76-78-82-86 (front piece), place the next 44-46-46-46-48-48 stitches on a thread for the sleeve, cast on 8-8-8-10-10-10 stitches (in side under sleeve), knit to end of round (= 66-70-76-78-82-86 back piece). The body and sleeves are finished separately. The piece is now measured from here! BODY: = 148-156-168-176-184-192 stitches. Continue with stocking stitch and stripes until you have worked 4-5-5-6-7-7 beige stripes. Finish the piece with colour denim blue. When the body measures 15-18-21-24-27-29 cm from the division, knit 1 round and increase 20-24-24-28-28-28 stitches evenly spaced = 168-180-192-204-212-220 stitches. Change to circular needle size 3.5 mm. Work rib (knit 2, purl 2) for 4 cm. Cast off a little loosely. The jumper measures approx. 36-40-44-48-52-55 cm from the shoulder. SLEEVES: Place the 44-46-46-46-48-48 stitches from the thread on the one side of the piece on short circular needle/double pointed needles size 4 mm and knit up 1 stitch in each of the 8-8-8-10-10-10 stitches cast on under the sleeve = 52-54-54-56-58-58 stitches. Insert a marker-thread in the middle of the new stitches under the sleeve. Start at the marker-thread and continue stocking stitch and stripes in the round. When the sleeve measures 2-2-3-3-3-3 cm, decrease 1 stitch on each side of the marker-thread – read DECREASE TIP. Decrease like this every 2-3-4-5-6-9 cm a total of 6-6-5-5-5-4 times = 40-42-44-46-48-50 stitches. When there are the same number of stripes on the sleeve as on the body, finish with colour denim blue. Work until the sleeve measures 15-20-23-26-30-35 cm from the division (or to desired length, there is approx. 4 cm left). Knit 1 round and increase 8-6-8-6-8-6 stitches evenly spaced = 48-48-52-52-56-56 stitches. Change to double pointed needles size 3.5 mm and work rib (knit 2, purl 2) for 4 cm. Cast off a little loosely. The sleeve measures approx. 19-24-27-30-34-39 cm from the division. Work the other sleeve in the same way. |
|
 |
|
Have you finished this pattern?Tag your pictures with #dropspattern #meetthecaptainsweater or submit them to the #dropsfan gallery. Do you need help with this pattern?You'll find 29 tutorial videos, a Comments/Questions area and more by visiting the pattern on garnstudio.com. © 1982-2026 DROPS Design A/S. We reserve all rights. This document, including all its sub-sections, has copyrights. Read more about what you can do with our patterns at the bottom of each pattern on our site. |
|


With over 40 years in knitting and crochet design, DROPS Design offers one of the most extensive collections of free patterns on the internet - translated to 17 languages. As of today we count 325 catalogues and 12298 patterns translated into English (UK/cm). 12298
We work hard to bring you the best knitting and crochet have to offer, inspiration and advice as well as great quality yarns at incredible prices! Would you like to use our patterns for other than personal use? You can read what you are allowed to do in the Copyright text at the bottom of all our patterns. Happy crafting!
Post a comment to pattern DROPS Children 47-5
We would love to hear what you have to say about this pattern!
If you want to leave a question, please make sure you select the correct category in the form below, to speed up the answering process. Required fields are marked *.