
Popular categories
Looking for a yarn?


Comments / Questions (91)
![]() Elaine wrote:
Elaine wrote:
Could you please advise of the final measurements of the various sizes. I'm usually a UK size 14-16 but not sure if that would be a medium or large? Thank you
28.10.2025 - 11:19DROPS Design answered:
Hi Elaine, please see the lesson Drops HERE. Happy knitting!
18.11.2025 - 11:04
![]() Anubha wrote:
Anubha wrote:
Hello, I'm a beginner knitter, used to knitting with straight needles. Is it possible to knit this with straight needles only? Thank you.
20.09.2025 - 16:45DROPS Design answered:
Hi Anubha, the vest can be knitted with straight needles, but it is much easier to make sleeve edges and neck with circular of double pointed needles. Happy knitting!
20.09.2025 - 20:43
![]() Ruthie wrote:
Ruthie wrote:
Hello I just wanted to know if this can be knit holding one strand of Air? Many thanks Ruth
17.09.2025 - 13:20DROPS Design answered:
Hi Ruthie, this model is designed for the Yarn group C, so you will need 2 strands of DROPS Air or another yarn from this group. Happy knitting!
17.09.2025 - 13:35
![]() Susan wrote:
Susan wrote:
I am a bit confused about finishing the shoulders. The pattern instructs to finish each shoulder separately then cast off at the neck. Am I using a stitch holder on one shoulder? Only casting off 1 stitch on each side on the front at the neck at the back?
03.09.2025 - 08:21DROPS Design answered:
Dear Susan, yes, the stitches from the shoulder not being worked are slipped to a thread or stitch holder. The neck edge in the back piece isn't deep, so you simply cast off 1 stitch after casting off the middle stitches for the neck and the neck edge will be finished. In the front piece the neck edge is deeper, so we cast off more stitches from the neck, few by few, in order to get a longer and deeper neck edge. Happy knitting!
15.09.2025 - 00:46
![]() Catharina wrote:
Catharina wrote:
Kan man använda ”vanliga” tjocka stickor nr 8 till mönstret eller måste rundstickor användas?
01.09.2025 - 15:59DROPS Design answered:
Hej Catharina. Ja så länge du får plats med alla maskor på vanliga stickor så går det fint att använda det istället för rundsticka 8. Mvh DROPS Design
02.09.2025 - 08:28
![]() Anne wrote:
Anne wrote:
Kan jag använda Big Merino? Hur många gram Big Merino går det åt till storlek XL?
06.08.2025 - 21:08DROPS Design answered:
Hej Anne. DROPS Big merino tillhör garngrupp C så det går att sticka detta mönster med det garnet, men tänk på att plagget kommer bli tungt om du använder det garnet. Du kan använda vår garn konverterare för att hitta alternativa garn. Mvh DROPS Design
21.08.2025 - 14:23
![]() Willemiek wrote:
Willemiek wrote:
Ik zou graag het patroon met gewone breipennen willen maken. Is dat mogelijk.? Ik ben een beginner en zou het zeer op prijsstellen een Nederlandse versie hiervoor te ontvangen als het kan… Bij voorbaat dank!
11.07.2025 - 16:18DROPS Design answered:
Dag Willemiek,
Om een patroon aan te passen om op rechte naalden te breien hebben we een instructie gemaakt. Deze vind je hier.
11.07.2025 - 19:35
![]() Heike wrote:
Heike wrote:
So ein schöner Pullunder. Ich habe ihn mir vor längerer Zeit gestrickt. Bin mit der Anleitung sehr gut zurecht gekommen.
02.06.2025 - 07:18
![]() Brenda Graham wrote:
Brenda Graham wrote:
Is it possible to knit this vest top in straight needles? If so can you give me instructions. Thanks.
31.05.2025 - 13:06DROPS Design answered:
Dear Brenda, yes, you can adapt this pattern to straight needles; you can follow the steps specified here . However the rib edges in the armholes and neck may be too difficult to work with straight needles; you may need to use double pointed needles for them, if you don't want to use circular needles. Happy knitting!
31.05.2025 - 22:44
![]() Julia wrote:
Julia wrote:
Hej. Kan ni förtydliga hur jag ska maska av vid ärmhålen? ”När arbetet mäter 24-25-26-27-28-29 cm, maskas det av till ärmhål på vartannat varv (i början av varje varv) i varje sida så här: Maska av 3 maskor 1-1-1-1-1-2 gånger, 2 maskor 0-1-2-2-3-3 gånger och 1 maska 5-4-3-5-6-5 gånger = 36-38-40-42-44-48 maskor.” Vad står ”1-1-1-1-1-1-2 gånger” för i beskrivningen?
14.02.2025 - 16:24
|
|
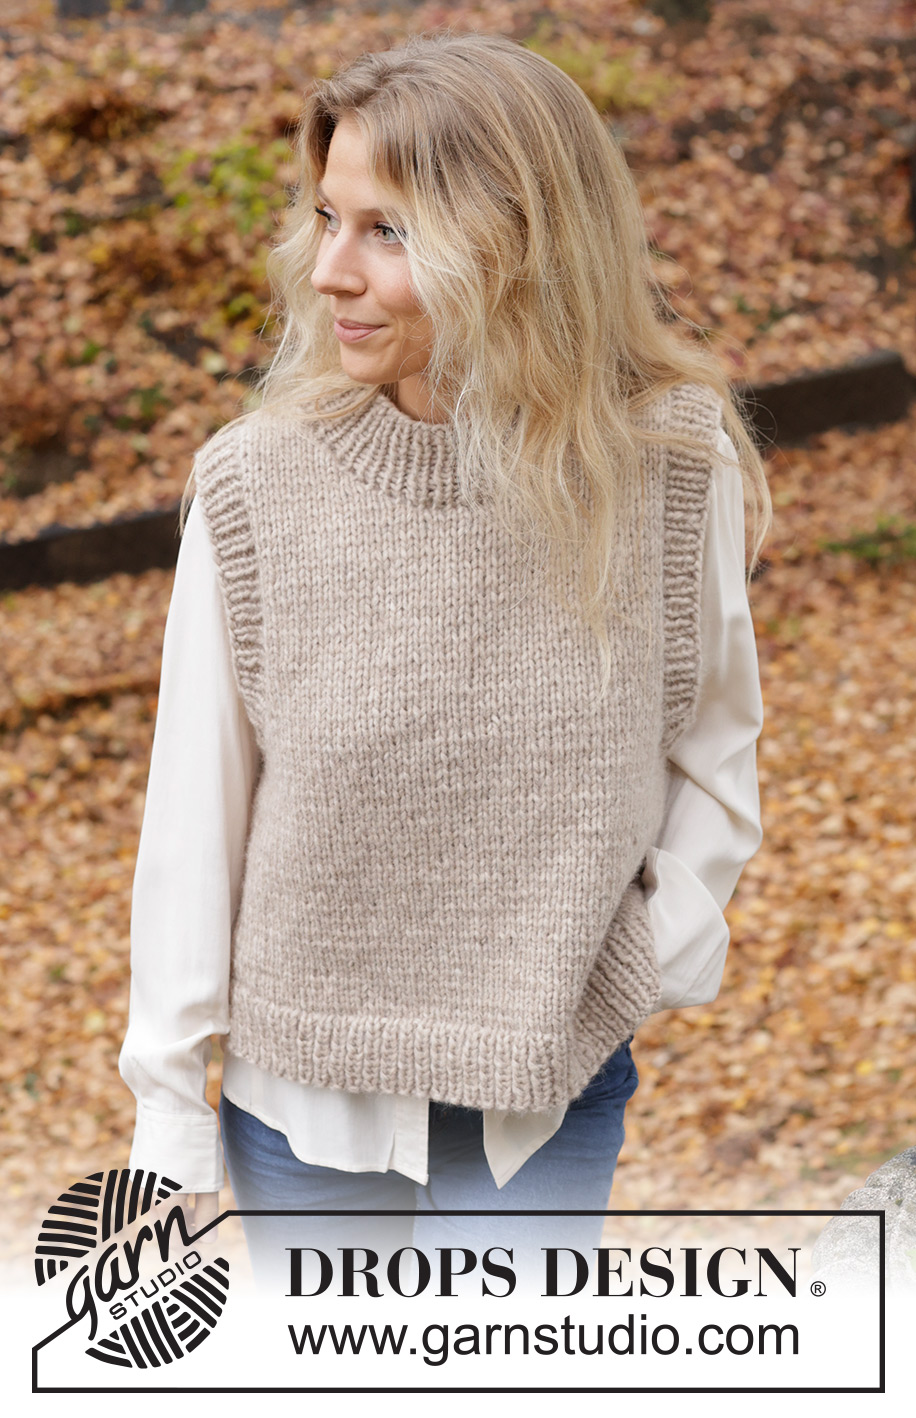
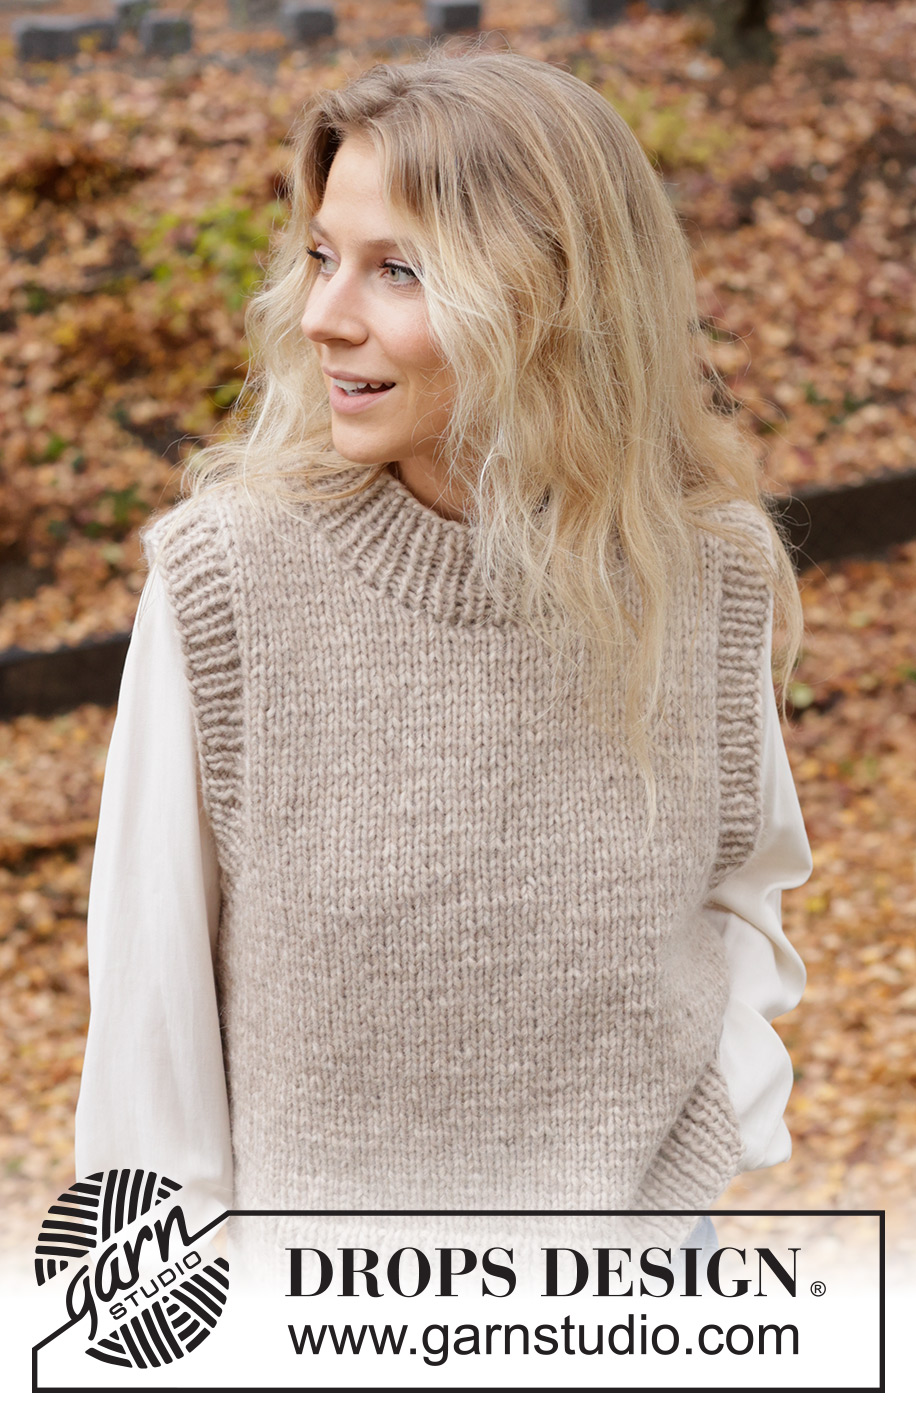
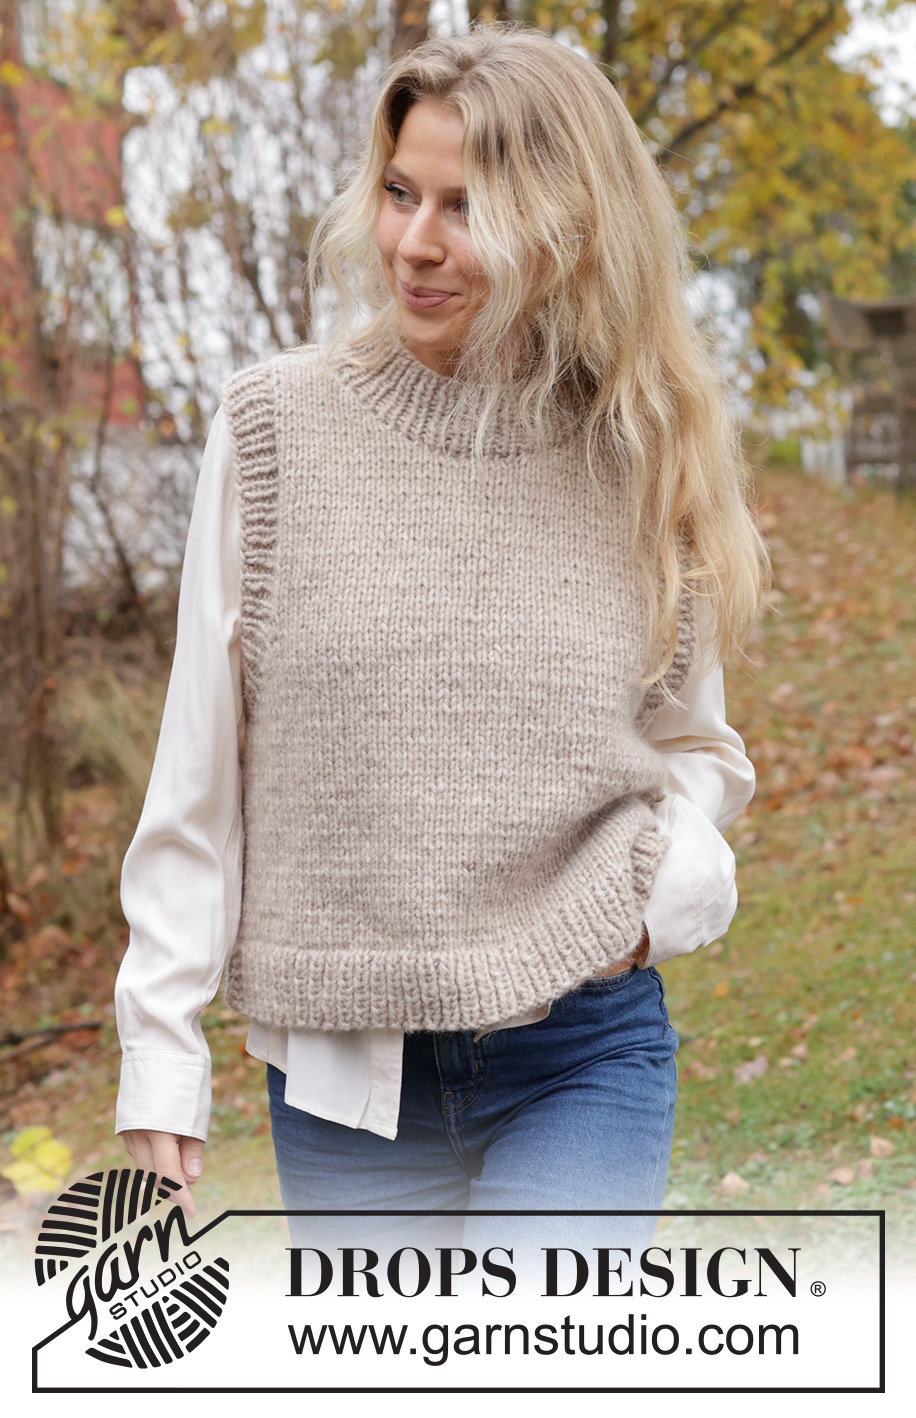
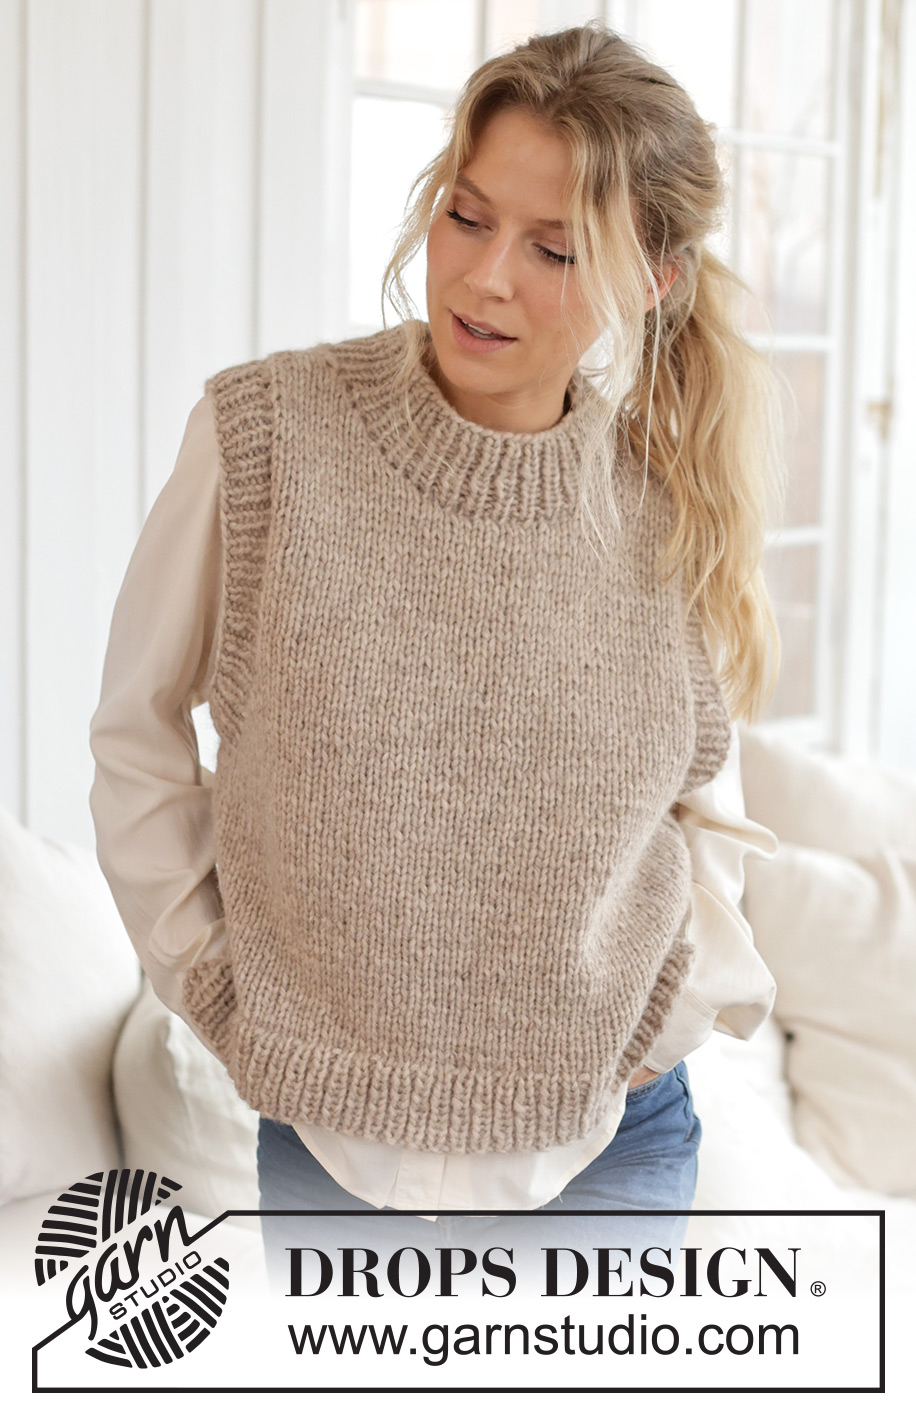
Isla Slipover#islaslipover |
|
 |
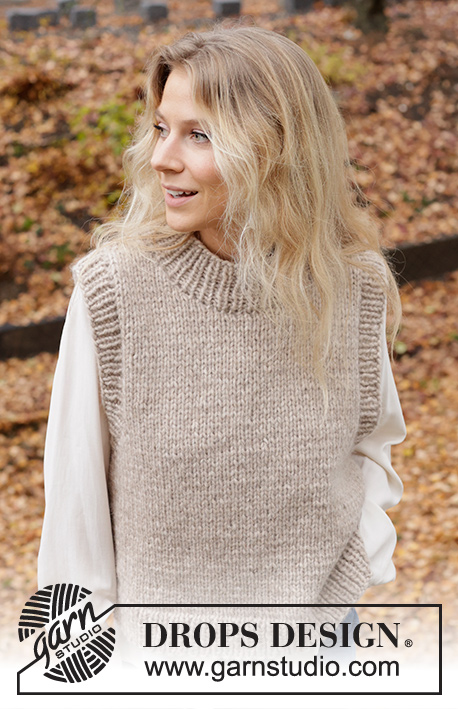 |
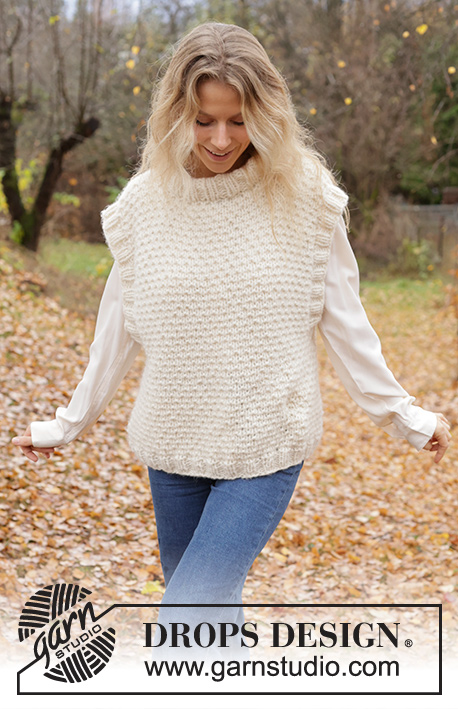
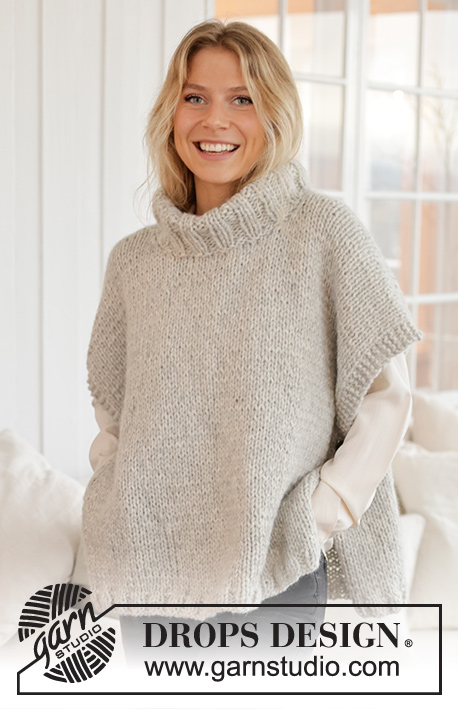
Knitted vest/slipover in DROPS Wish or 2 strands DROPS Air. The piece is worked in stocking stitch, with ribbed edges and split in the sides. Sizes S - XXXL.
DROPS 226-58 |
|
|
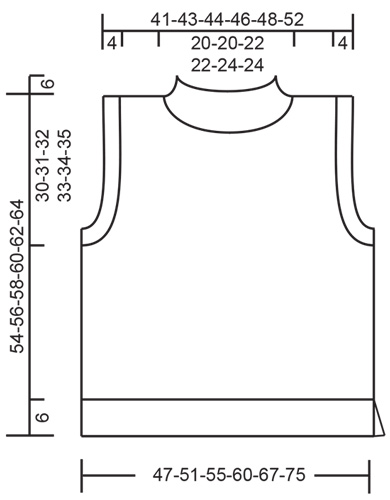
------------------------------------------------------- EXPLANATIONS FOR THE PATTERN: ------------------------------------------------------- RIDGE/GARTER STITCH (worked back and forth): Knit all rows. 1 ridge = knit 2 rows. ------------------------------------------------------- START THE PIECE HERE: ------------------------------------------------------- VEST – SHORT OVERVIEW OF THE PIECE: The front and back pieces are worked separately, back and forth. The sleeve edges and neck are worked in the round to finish. BACK PIECE: Cast on 69-73-77-85-93-103 stitches with circular needle size 7 mm and DROPS Wish or 2 strands DROPS Air. The first row is worked as follows from the right side: 2 edge stitches in GARTER STITCH – read description above, work rib (purl 1, knit 1) until there are 3 stitches left, purl 1 and 2 edge stitches in garter stitch. Continue this rib for 6 cm On the next row from the right side work as follows: 1 edge stitch in garter stitch, work stocking stitch and decrease 17-17-17-19-19-21 stitches evenly spaced over the next 67-71-75-83-91-101 stitches and 1 edge stitch in garter stitch = 52-56-60-66-74-82 stitches. Change to circular needle size 8 mm and continue with stocking stitch and 1 edge stitch in garter stitch on each side. REMEMBER THE KNITTING TENSION! When the piece measures 24-25-26-27-28-29 cm, cast off for the armholes at the beginning of every row on each side as follows: 3 stitches 1-1-1-1-1-2 times, 2 stitches 0-1-2-2-3-3 times and 1 stitch 5-4-3-5-6-5 times = 36-38-40-42-44-48 stitches. Continue with stocking stitch until the piece measures 51-53-55-57-59-61 cm. Cast off the middle 20-20-22-22-24-24 stitches for the neck and finish each shoulder separately. Then cast off 1 stitch on the next row from the neck = 7-8-8-9-9-11 stitches. Continue working until the piece measures 54-56-58-60-62-64 cm. Loosely cast off with knit from the right side. Work the other shoulder in the same way. FRONT PIECE: Cast on and work in the same way as the back piece until the piece measures 45-47-48-50-51-53 cm. Cast off the middle 8-8-8-10-10-10 stitches for the neck and finish each shoulder separately. Cast off at the beginning of each row from the neck as follows: 2 stitches 2 times and 1 stitch 3-3-4-3-4-4 times = 7-8-8-9-9-11 stitches. Continue working until the piece measures 54-56-58-60-62-64 cm. Loosely cast off with knit from the right side. Work the other shoulder in the same way. ASSEMBLY: Sew the shoulder seams. Sew the side seams in the outermost loop of the outermost ridge, so the seam is flat. Leave 6 cm at the bottom for the split. SLEEVE-EDGES: Use short circular needle size 7 mm. Start at the bottom of the armhole and knit up from the right side, inside 1 stitch, approx. 72-72-76-76-80-84 stitches around the armhole (the number of stitches should be divisible by 2). Work rib in the round (knit 1, purl 1) for 4 cm. Loosely cast off with knit over knit and purl over purl. Work the other sleeve-edge in the same way. NECK: Use short circular needle size 7 mm. Start at the top of one shoulder and knit up from the right side, inside 1 stitch, approx. 54-54-60-60-64-64 stitches around the neck (the number of stitches should be divisible by 2). Work rib in the round (knit 1, purl 1) for 6 cm. Loosely cast off with knit over knit and purl over purl. |
|
 |
|
Have you finished this pattern?Tag your pictures with #dropspattern #islaslipover or submit them to the #dropsfan gallery. Do you need help with this pattern?You'll find 23 tutorial videos, a Comments/Questions area and more by visiting the pattern on garnstudio.com. © 1982-2026 DROPS Design A/S. We reserve all rights. This document, including all its sub-sections, has copyrights. Read more about what you can do with our patterns at the bottom of each pattern on our site. |
|


With over 40 years in knitting and crochet design, DROPS Design offers one of the most extensive collections of free patterns on the internet - translated to 17 languages. As of today we count 324 catalogues and 12290 patterns translated into English (UK/cm). 12290
We work hard to bring you the best knitting and crochet have to offer, inspiration and advice as well as great quality yarns at incredible prices! Would you like to use our patterns for other than personal use? You can read what you are allowed to do in the Copyright text at the bottom of all our patterns. Happy crafting!
Post a comment to pattern DROPS 226-58
We would love to hear what you have to say about this pattern!
If you want to leave a question, please make sure you select the correct category in the form below, to speed up the answering process. Required fields are marked *.