
Popular categories
Looking for a yarn?


Comments / Questions (41)
![]() Konni wrote:
Konni wrote:
Hallo bin jetzt fast am ende der Ärmel angekommen und komme wieder nicht weiter mit der strickschrift sorry aber mir fällt es echt sehr schwer es auseinader zu halten was für meine Größe ist.... Stricke größe M und müßte wissen nach 46 vom wie genau ich in jeder 2 Reihe gegen die Schulter abketteln soll?
05.03.2018 - 22:13DROPS Design answered:
Liebe Konni, bei jeder 2. R. am Anfang jeder Reihe (= Hin- sowie Rückreihe) so abketten: 3 M. x 2, 2 M. x 1, 1 M. x 2, 2 M. x 2, 3 M. x 3. Dann alle Maschen abketten, Ärmel misst ca. 58 ) cm. Viel Spaß beim stricken!
06.03.2018 - 09:15
![]() Konni wrote:
Konni wrote:
Ich schon wieder es geht sich nicht um die abnahmen für die Ärmel..... Sondern um die abnahmen für das Vorder und Rückenteil für das Armloch
13.02.2018 - 20:55DROPS Design answered:
Liebe Konni, für das Armloch werden Sie am Vorder und Rückenteil so abketten: am Anfang jeder Reihe (Hin- sowie Rückreihe) 3 M. x 1, 2 M. x 2, 1 M. x 3 = 54 M abketten = es werden so 10 M insgesamt auf jedem Seite abgekettet. Viel Spaß beim stricken!
14.02.2018 - 08:49
![]() Konni wrote:
Konni wrote:
Also ich glaube meine Frage wurde nicht richtig verstanden es ging sich um die abnahmen intern Arm wie genau ich sie machen sollte
09.02.2018 - 14:39DROPS Design answered:
Liebe Konni, Entschulding für das Misverständnis - am Ende der Ärmel werden Sie am Anfang jeder Reihe (= Hin- sowie Rückreihe) so abketten: 3 Maschen x 2, 2 Maschen x 1, 1 Masche x 2, 2 Maschen x 2, 3 Maschen x 3, die restlichen Maschen abketten. Viel Spaß beim stricken!
09.02.2018 - 17:49
![]() Konni wrote:
Konni wrote:
Hallo ich bekomme es nicht auf der Reihe wie genau die abnahmen für unterm Arm in der Reihen folge ich es machen soll...... ich habe die zweite Größe also direckt nach der klammer Wäre nett wenn ihr mir das hier vielleicht niederschreiben könntet LG. Konni
09.02.2018 - 12:33DROPS Design answered:
Liebe Konni, das Muster wird über eine gerade Maschenanzahl gestrickt, dh nach der 1. Zunahmen stricken Sie die neuen Maschen (= 1 M auf beiden Seiten) rechts, und bei der nächsten Zunahmen, wenn Sie 2 neuen Maschen auf beiden Seiten haben, können Sie diese 2 M. jetzt wie im Muster stricken. Viel Spaß beim stricken!
09.02.2018 - 13:40
![]() Konni wrote:
Konni wrote:
Danke erst mal für die schnelle Antwort sind die Randmaschen mit in der Maschen Zahl die man für die jeweilige Größe aufnehmen soll mit berechnet oder nehme ich selber noch zwei dafür auf
02.02.2018 - 11:41DROPS Design answered:
Liebe Konni, die Randmaschen sind schon inbegriffen, dh Sie brauchen keine zusätzlichen Maschen anzuschlagen nor aufzunehmen. Viel Spaß beim stricken!
02.02.2018 - 13:33
![]() Konni wrote:
Konni wrote:
Hallo und zwar bin ich jetzt in den startlöchern den Pulli an zu Nadeln nur bin ich mir sowas von unsicher weil in der Anleitung nichts von einer Randmasche steht was mir zu denken gibt da ich ja sofort im Muster anfangen sollte wenn ich das jetzt richtig verstanden habe LG. Aus Kempen
02.02.2018 - 08:15DROPS Design answered:
Liebe Konni, Muster wird mit 1 Randmasche auf beiden Seiten gestrickt. Viel Spaß beim stricken!
02.02.2018 - 08:52
![]() Andrea Stein wrote:
Andrea Stein wrote:
In der vorletzten Zeile des Vorderteils heisst es: "auf der rechten Seite 2 re. zusammennähen. Müsste es nicht zusammenstricken heissen?
13.07.2016 - 23:23DROPS Design answered:
Liebe Andrea, das ist richtig, wir werden den Übersetzungsfehler umgehend korrigieren.
20.07.2016 - 15:43
![]() Penny Stinton wrote:
Penny Stinton wrote:
I am at the point on front where I knitted 14 sts for neck. Next row bind off the center 14 for neck. Do I need to have another yarn one for each side of neck?
04.10.2014 - 18:35DROPS Design answered:
Dear Mrs Stinton, when you have cast off the 14 sts for neck, continue each side separately, ie work to the end of should on one side then cut the yarn, join to the other side and work the other side reversed (dec towards neck). Happy knitting!
06.10.2014 - 09:08
![]() Jan Dominic wrote:
Jan Dominic wrote:
Have some questions concerning measuring the first 3" is this from bottom or the pattern its self and the second 5"5" and 10" from bottom or the actual pattern
22.04.2012 - 19:34DROPS Design answered:
You measure from the cast on edge i.e the whole piece.
23.04.2012 - 19:39
![]() DROPS Design wrote:
DROPS Design wrote:
There are things happening at the same time. Therefore first we explain at what measures you are supposed to interupt the pattern, and then at what measure you at the same time start to bind off for armholes.
23.04.2009 - 23:32
|
||||||||||
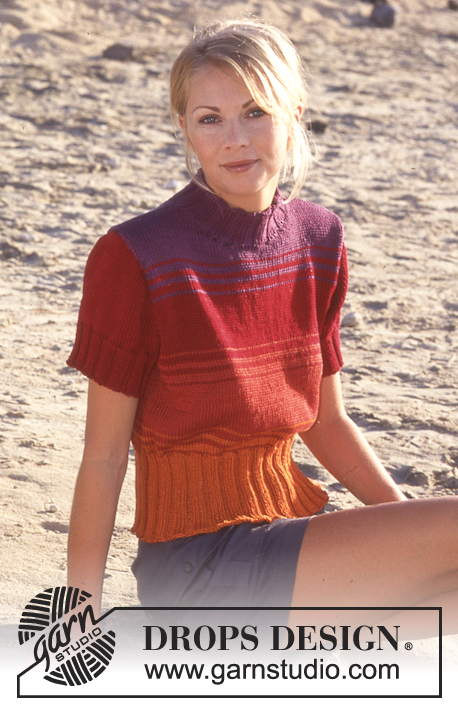
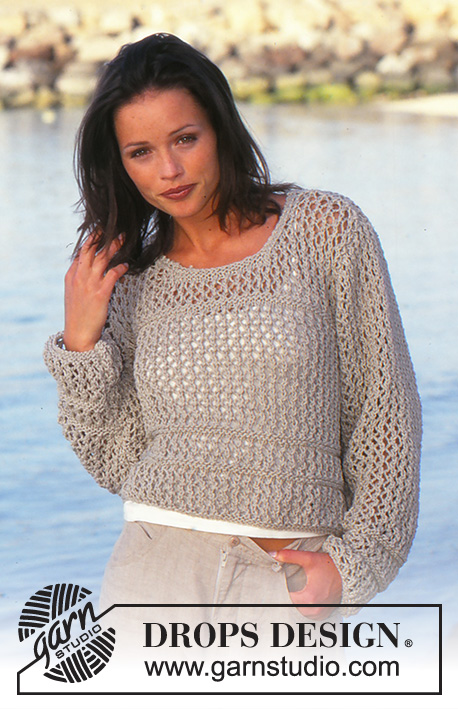
Summer Mesh |
||||||||||
 |
 |
|||||||||
DROPS Sweater with lace pattern.
DROPS 61-4 |
||||||||||
|
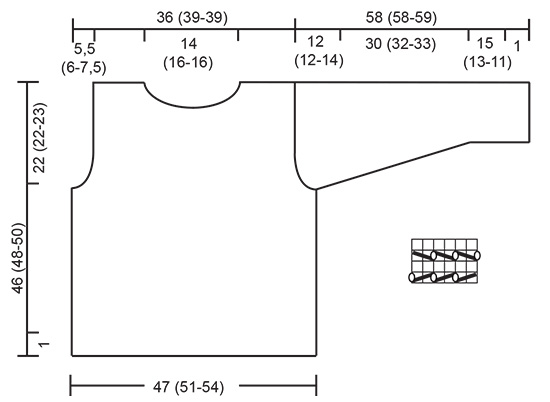
Gauge: 14 sts x 17 rows in pattern stitch = 10 x 10 cm [4" x 4"]. Garter st, when knitting flat: Knit all sts, all rows. Pattern: See chart (1 chart = 1 repeat). The pattern is shown from the right side. The pattern stitch is the following 4 rows, repeated throughout: Row 1 (right side): * K 2 tog, yarn over * Row 2 (wrong side): P all sts Row 3 (right side): * yarn over, sl 1, K 1, psso*. Row 4 (wrong side): P all sts Knitting tip: Because of the pattern stitch, it is easy to make a mistake in the number of stitches bound off, increased or decreased. Be sure you have the correct number of sts in each row. FRONT Cast on 68 (74-78) sts (divisible by 2 sts + 1 edge st at each side knit in garter st throughout) and knit 4 rows garter st. Change to Pattern stitch. When the work measures 8.5 (7.5-6.5) cm [3⅜" (3" - 2.5")] and at 16 (14-12) cm [6.25" (5.5" - 4.75")] interrupt the Pattern with 4 rows garter st before continuing with Pattern - the first row of garter st is knit from the right side. When the work measures 24 (26-27) cm [9.5" (10.25" - 10⅝")] bind off at each side for armholes every other row: 3 sts 1 time, 2 sts 2 (2-3) times, 1 st 2 (3-3) times = 50 (54-54) sts. At the same time as the work measures 32 cm [12⅝"] again interrupt the Pattern with 4 rows garter st before continuing with Pattern - the first row of garter st is knit from the right side. When the work measures 35 (37-39) cm [13.75" (14.5" - 15.25")] knit garter st over the center 16 (18-18) sts for the next 4 rows. On the next row, bind off the center 12 (14-14) sts for the neck. Continue to knit the 2 sts at the neck edge in garter st and dec 1 st inside these 2 edge sts for the neck every other row 4 times. (Make the decreases as follows: Right side: K 2 tog - Left side: slip 1, K 1, psso.) Bind off when the work measures 46 (48-50) cm [18⅛" (18⅞" - 19.75")]. BACK Cast on and knit as on the front. When the work measures 42 (44-46) cm [16.5" (17.25" - 18⅛")] knit garter st over the center 20 (22-22) sts for 4 rows. On the next row, bind off the center 16 (18-18) sts for the neck. Keeping the 2 edge sts at each neck edge in garter st, dec 1 st (inside the edge sts as on the front) every row 2 times. Bind off when the work measures 46 (48-50) cm [18⅛" (18⅞" - 19.75")]. SLEEVES Cast on 36 (38-38) sts and knit 4 rows garter st. Change to pattern stitch. When the work measures 8.5 (7.5-6.5) cm [3⅜" (3" - 2.5")] and 16 (14-12) cm [6.25" (5.5" - 4.75")] interrupt the pattern with 4 rows garter st - the first row of garter st is knit from the right side; continue the Pattern after the garter st rows. At the same time, when the work measures 16 (14-12) cm [6.25" (5.5" - 4.75")] inc 1 st at each side 12 (11-12) times: Size S: alternately every 3rd and 4th row Size M: alternately every 4th and 5th row Size L: every 4th row = 60 (60-62) sts. The increased sts are not knit into the Pattern until there are 2 increased sts at each side. When the work measures 46 (46-45) cm [18⅛" (18⅛" - 17.75")] bind off for sleeve caps at each side every other row: 3 sts 2 times, 2 sts 1 time, 1 st 2 (2-4) times, 2 sts 2 times, 3 sts 3 times, bind off all sts. The work measures approx. 58 (58-59) cm [22⅞" (22⅞" - 23.25")]. Assembly: Sew the shoulder seams. Sew the sleeve seams. Sew side seams. Sew in the sleeves. |
||||||||||
Diagram explanations |
||||||||||
|
||||||||||
 |
||||||||||
Have you finished this pattern?Tag your pictures with #dropspattern or submit them to the #dropsfan gallery. Do you need help with this pattern?You'll find 16 tutorial videos, a Comments/Questions area and more by visiting the pattern on garnstudio.com. © 1982-2026 DROPS Design A/S. We reserve all rights. This document, including all its sub-sections, has copyrights. Read more about what you can do with our patterns at the bottom of each pattern on our site. |
||||||||||


With over 40 years in knitting and crochet design, DROPS Design offers one of the most extensive collections of free patterns on the internet - translated to 17 languages. As of today we count 324 catalogs and 12290 patterns - 12280 of which are translated into English (US/in).
We work hard to bring you the best knitting and crochet have to offer, inspiration and advice as well as great quality yarns at incredible prices! Would you like to use our patterns for other than personal use? You can read what you are allowed to do in the Copyright text at the bottom of all our patterns. Happy crafting!
Post a comment to pattern DROPS 61-4
We would love to hear what you have to say about this pattern!
If you want to leave a question, please make sure you select the correct category in the form below, to speed up the answering process. Required fields are marked *.