
Popular categories
Looking for a yarn?


Comments / Questions (68)
![]() Corrie Brouwer wrote:
Corrie Brouwer wrote:
Aanvulling op mijn vraag van daarnet: ik ben met het linkervoorpand bezig.
30.10.2020 - 17:28
![]() Corrie Brouwer wrote:
Corrie Brouwer wrote:
Ik begrijp niet goed wat wordt bedoeld met: Brei bij een hoogte van ongeveer 33-34-35-36-37-39 cm 2 nld ribbelst over alleen de 8 voorbies st. Moet ik eerst heen en weer over alleen de 8 ribbelsteken aan het begin van de naald en daarna pas door met de rest van de naald?
30.10.2020 - 16:28DROPS Design answered:
Dag Corrie,
Ja dat klopt, je breit op die hoogte alleen over de biessteken heen en weer, daarna weer over alle steken. Dit wordt gedaan om de bocht van de v-hals mooi te laten lopen, zodat het niet trekt.
03.11.2020 - 14:01
![]() Christine wrote:
Christine wrote:
Liebes Team , können Sie mir bitte helfen? Bei diesem Modell rollt sich das Bündchen ein. Wie kann das verhindert werden?\\r\\nFreue mich auf Ihre Antwort.\\r\\nVielen Dank vorab \\r\\nMit freundlichen Grüßen\\r\\nChristine Niedersüß
19.04.2020 - 20:30DROPS Design answered:
Liebe Christine, Sie können die Jacke mit Stecknadeln auf einer geeigneten Unterlage spannen, anfeuchten (z.B. mit einer Sprühflasche für Blumen) und trocknen lassen, danach entfernen Sie die Stecknadeln, dann sollte sich der Rand nicht mehr rollen.
20.04.2020 - 11:22
![]() Sandra Quentin wrote:
Sandra Quentin wrote:
Hallo Ihr Lieben, Wäre es eigentlich auch möglich diese Jacke rund zu stricken mit einem steek ?
08.03.2019 - 11:31DROPS Design answered:
Liebe Frau Quentin, leider können wir nicht jede Anleitung nach jeder Anfrage anpassen, aber hier lesen Sie mehr über Jacken in Runden statt in Hin- und Rückreihen. Viel Spaß beim stricken!
08.03.2019 - 12:41
![]() Sabine wrote:
Sabine wrote:
Hallo, liebes drops Team, es wäre doch sehr praktisch, wenn es eine Übersetzungsfunktion für alle gestellten Fragen gäbe. So könnte man vielleicht schon eine Antwort auf die Frage finden, falls sie schon in einer anderen Sprache gestellt wurde. Liebe Grüße
15.01.2019 - 22:20DROPS Design answered:
Liebe Sabine, gerne können Sie eine Online-Übersezter benutzen, aber gerne können Sie auch Ihre Frage hier stellen. Viel Spaß beim stricken!
16.01.2019 - 08:57
![]() Maria wrote:
Maria wrote:
Cuando indica en el delantero izquierdo que a partir de los 8cm hay que ir disminuyendo en el lateral hasta los 71 puntos, tal y como se indica en la espalda, ¿a qué parte de las indicaciones de la espalda se refiere? Porque se disminuye en varios momentos ¿Cada cuánto debo disminuir, cada 3.5cm (en mi caso que estoy haciendo la talla XXL)? Gracias
12.08.2017 - 19:38DROPS Design answered:
Hola Maria. Se refiere a este texto: "Cuando la labor mida 8 cm dism 1 pt a cada lado cada 3-3-3.5.-3.5-3.5-3.5 cm un total de 9 vcs = 86-94-102-112-126-138 pts. " Para la talla XXL se disminuye cada 3,5 cm.
13.08.2017 - 20:23
![]() Ninouchka wrote:
Ninouchka wrote:
Modèle très sympa à tricoter mais je pense qu'il y a un oubli dans les explications des devants. Il est écrit : "À 8 cm de hauteur totale, diminuer 1 m sur le côté comme pour le dos = 51-55-59-64-71-77 m". Mais vous ne nous dites pas de continuer toutes les diminutions du dos. On devine qu'il faut le faire pour retomber sur le bon nombre de mailles pour les épaules. Merci pour tous vos superbes modèles disponibles en français !
17.05.2017 - 23:17
![]() Michela wrote:
Michela wrote:
Buonasera,ho trovato difficoltà nelle maglie della spalla sui davanti,ne restano di piu di 29.facendo le diminuzione alla fine non combaciano con la spalla dietro.dove sbaglio?
07.05.2017 - 01:47DROPS Design answered:
Buongiorno Michela. Riportiamo tutte le diminuzioni. Per la taglia S, avvia 60 m, poi diminuisce sul lato 1 m per 9 volte e quindi rimangono 51 m. Poi deve diminuire 1 m verso il centro davanti per 17 volte: rimangono 51-17= 34 m. Per gli scalfi deve intrecciare 3 m 1 volta e 2 m 1 volta. Quindi 34-3-2= 29 m per la spalla. Analogamente per le altre taglie. Buon lavoro!
07.05.2017 - 08:54
![]() Rosita wrote:
Rosita wrote:
Buongiorno,questo cardigan e' davvero stupendo ,ma purtroppo la maggior parte dei vostri modelli sono eseguiti solo con ferri circolari e chi come me non riesce proprio ad usarli si ritrova a dover rinunciare ad eseguire i vostri modelli...potreste postare modelli uguali da fare con i classici ferri?grazie...saluti.
25.10.2016 - 17:41DROPS Design answered:
Buonasera Rosita, questo modello è un cardigan, e quindi non è lavorato in tondo, pef cui può seguire le istruzioni indicate lavorando con i ferri dritti. La maggior parte dei nostri modelli sono lavorati sui ferri circolari per avere spazio per tutte le maglie, ma se legge attentamente le spiegazioni vedrà che non tutti sono lavorati in tondo. Buon lavoro!
25.10.2016 - 19:15
![]() Anette wrote:
Anette wrote:
Har prøvet at strikke den i Puna. Men synes 6 nøgler er for lidt. Skal bruge mindst 7 til en str. M
30.08.2016 - 17:59
|
|
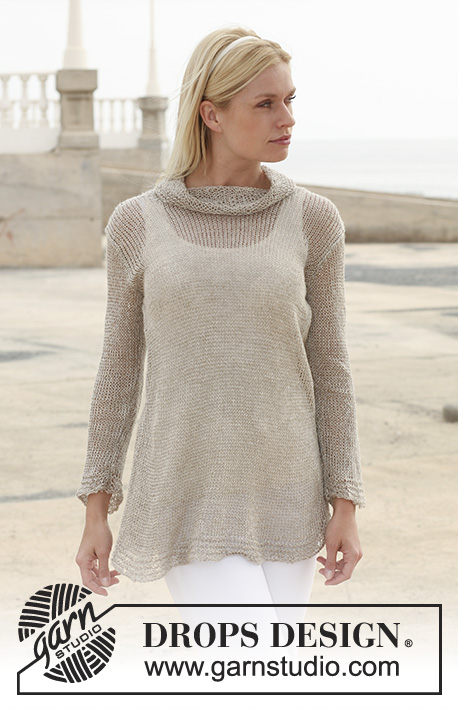
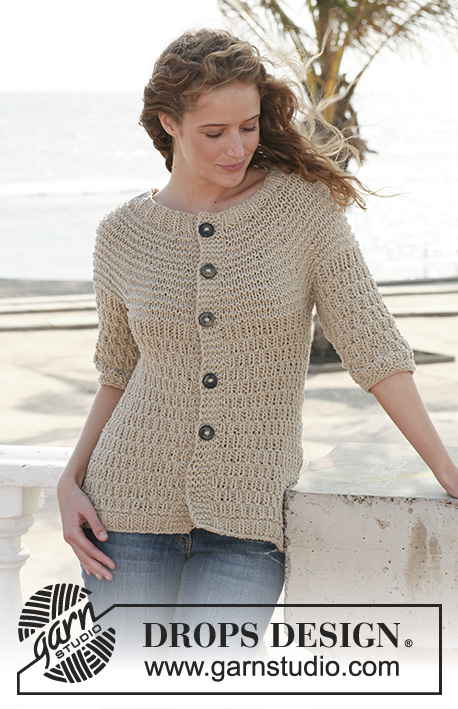
Cinnamon Toast#cinnamontoastcardigan |
|
|
|
|
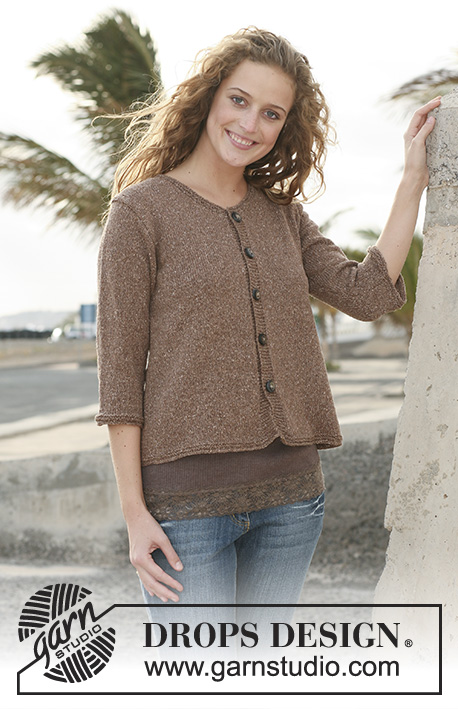
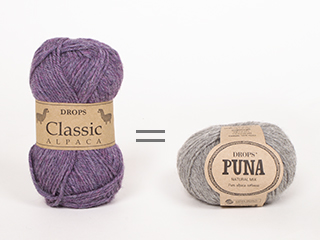
DROPS jacket with V-neck and ¾ or long sleeves in ”Classic Alpaca”, "DROPS ♥ You #3" or "Belle" or "Puna". Size S - XXXL.
DROPS 112-26 |
|
|
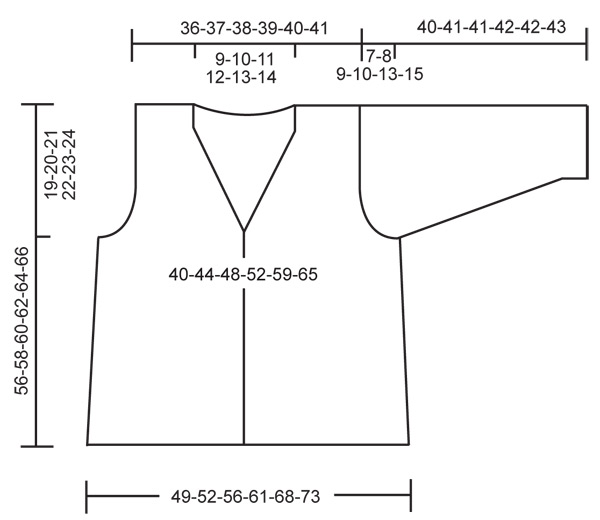
GARTER ST (back and forth on needle): K all rows. DECREASING TIP (neckline): Make all dec from RS as follows: Dec before 8 front band sts: K2 tog. Dec after 8 front band sts: slip 1 st as if to K, K1, psso. BUTTONHOLES: Make buttonholes on right front band. 1 buttonhole = bind off 4th and 5th st from mid front and cast on 2 new sts on return row. Make buttonholes when piece measures: SIZE S: 8, 14, 20, 26 and 32 cm / 3⅛", 5½", 8", 10¼" and 12½". SIZE M: 9, 15, 21, 27 and 33 cm / 3½", 6", 8¼", 10⅝" and 13". SIZE L: 10, 16, 22, 28 and 34 cm / 4", 6¼", 8¾", 11" and 13⅜". SIZE XL: 7, 14, 21, 28 and 35 cm / 2¾", 5½", 8¼", 11" and 13¾". SIZE XXL: 8, 15, 22, 29 and 36 cm / 3⅛", 6", 8¾", 11⅜" and 14¼". SIZE XXXL: 10, 17, 24, 31 and 38 cm / 4", 6¾", 9½", 12¼" and 15". -------------------------------------------------------- BACK PIECE Worked back and forth on circular needle. Cast on 104-112-120-130-144-156 sts (includes 1 edge st each side) on circular needle size 4 mm / US 6 with 1 thread Classic Alpaca, Belle, or Puna. Work 2 rows stockinette st, 4 rows garter st – see above - and now continue in stockinette st. REMEMBER THE KNITTING GAUGE! When piece measures 8 cm / 3⅛" dec 1 st each side on every 3-3-3.5-3.5-3.5-3.5 cm / 1⅛"-1⅛"-1¼"-1¼"-1¼"-1¼" a total of 9 times = 86-94-102-112-126-138 sts. When piece measures 37-38-39-40-41-42 cm / 14½"-15"-15¼"-15¾"-16⅛"-16½" bind off for armhole each side at the beg of every row: 3 sts 1 time, 2 sts 1-2-3-5-7-9 times and 1 st 0-1-2-2-4-5 times = 76-78-80-82-84-86 sts. When piece measures 53-55-57-59-61-63 cm / 21"-21⅝"-22½"-23¼"-24"-24¾" work next row as follows from RS: stockinette st on the first 21-21-20-20-20-20 sts, garter st on the next 34-36-40-42-44-46 sts, stockinette st on the remaining 21-21-20-20-20-20 sts. Continue like this until finished measurements. AT THE SAME TIME when piece measures 54-56-58-60-62-64 cm / 21¼"-22"-22¾"-23⅝"-24⅜"-25¼" bind off the middle 16-18-22-24-26-28 sts for neck and bind off 1 st on neckline on next row = 29-29-28-28-28-28 sts left on each shoulder (8 garter sts left towards neckline). Bind off remaining sts when piece measures 56-58-60-62-64-66 cm / 22"-22¾"-23⅝"-24⅜"-25¼"-26". LEFT FRONT PIECE: Cast on 60-64-68-73-80-86 sts (includes 1 edge st at the side) on circular needle size 4 mm / US 6 with 1 thread Classic Alpaca or Belle or Puna. Work 2 rows stockinette st, 4 rows garter st and continue as follows from RS: 52-56-60-65-72-78 stockinette sts, 8 garter sts (= front band). When piece measures 8 cm / 3⅛" dec 1 st at the side as described for back piece = 51-55-59-64-71-77 sts. When piece measures approx 33-34-35-36-37-39 cm / 13"-13⅜"-13¾"-14¼"-14½"-15¼" work 2 rows garter st on the 8 front band sts only. Continue on all sts, AT THE SAME TIME dec 1 st inside front band sts – SEE DECREASING TIP! – on every 1 cm / ⅜" a total of 17-18-20-21-22-23 times. AT THE SAME TIME when piece measures 37-38-39-40-41-42 cm / 14½"-15"-15¼"-15¾"-16⅛"-16½" bind off for armhole at the side as described for back piece. When all dec are complete there are 29-29-28-28-28-28 sts left on shoulder. Bind off when piece measures 56-58-60-62-64-66 cm / 22"-22¾"-23⅝"-24⅜"-25¼"-26". RIGHT FRONT PIECE: Like left front piece, but mirrored, and make BUTTONHOLES – see above. ¾ SLEEVE: For long sleeves, see below. Worked back and forth on circular needle. Cast on 54-56-58-60-62-64 sts (includes 1 edge st each side) on needle size 4 mm / US 6 with 1 thread Classic Alpaca or Belle or Puna. Work 2 rows stockinette st, 4 rows garter st and then continue in stockinette st. When piece measures 6 cm / 2⅜" inc 1 st each side on every 3-2.5-2-1.5-1.5-1 cm / 1⅛"-⅞"-¾"-½"-½"-⅜" a total of 9-10-12-14-15-16 times = 72-76-82-88-92-96 sts. When piece measures 33-33-32-32-29-28 cm / 13"-13"-12½"-12½"-11⅜"-11" - NOTE! Less for the larger sizes because of longer sleeve cap and wider shoulder – bind off for sleeve cap each side at the beg of every row: 4 sts 1 time, 2 sts 4-4-5-6-4-4 times, 1 st 0-1-0-0-8-11 times, then 2 sts each side until piece measures 39-40-40-41-41-42 cm / 15¼"-15¾"-15¾"-16⅛"-16⅛"-16½", now bind off 3 sts each side 1 time and bind off remaining sts on next row. Piece measures approx 40-41-41-42-42-43 cm / 15¾"-16⅛"-16⅛"-16½"-16½"-17". LONG SLEEVE: For ¾ sleeves, see above. Worked back and forth on circular needle. Cast on 50-52-54-56-58-58 sts (includes 1 edge st each side) on needle size 4 mm / US 6 with 1 thread Classic Alpaca or Belle or Puna. Work 2 rows stockinette st, 4 rows garter st and then continue in stockinette st. When piece measures 5 cm / 2" inc 1 st each side on every 4-3.5-3-2.5-2-2 cm / 1½"-1¼"-1⅛"-⅞"-¾"-¾" a total of 11-12-14-16-17-19 times = 72-76-82-88-92-96 sts. When piece measures 49-49-48-48-45-44 cm / 19¼"-19¼"-19"-19"-17¾"-17¼" - NOTE! Less for the larger sizes because of longer sleeve cap and wider shoulder – bind off for sleeve cap each side at the beg of every row: 4 sts 1 time, 2 sts 4-4-5-6-4-4 times, 1 st 0-1-0-0-8-11 times, then 2 sts each side until piece measures 55-56-56-57-57-58 cm / 21⅝"-22"-22"-22½"-22½"-22¾", now bind off 3 sts each side 1 time and bind off remaining sts on next row. Piece measures approx 56-57-57-58-58-59 cm / 22"-22½"-22½"-22¾"-22¾"-23¼". ASSEMBLY: Sew shoulder seams. Set in sleeves. Sew side and sleeve seams inside 1 edge st. Sew on buttons to fit buttonholes. |
|
 |
|
Have you finished this pattern?Tag your pictures with #dropspattern #cinnamontoastcardigan or submit them to the #dropsfan gallery. Do you need help with this pattern?You'll find 15 tutorial videos, a Comments/Questions area and more by visiting the pattern on garnstudio.com. © 1982-2026 DROPS Design A/S. We reserve all rights. This document, including all its sub-sections, has copyrights. Read more about what you can do with our patterns at the bottom of each pattern on our site. |


With over 40 years in knitting and crochet design, DROPS Design offers one of the most extensive collections of free patterns on the internet - translated to 17 languages. As of today we count 324 catalogs and 12290 patterns - 12280 of which are translated into English (US/in).
We work hard to bring you the best knitting and crochet have to offer, inspiration and advice as well as great quality yarns at incredible prices! Would you like to use our patterns for other than personal use? You can read what you are allowed to do in the Copyright text at the bottom of all our patterns. Happy crafting!
Post a comment to pattern DROPS 112-26
We would love to hear what you have to say about this pattern!
If you want to leave a question, please make sure you select the correct category in the form below, to speed up the answering process. Required fields are marked *.