
Popular categories
Looking for a yarn?


Comments / Questions (59)
![]() Maela wrote:
Maela wrote:
Ho del cotone da usare con uncinetto 2.5 per una misura Media secondo voi qual'è il numero di magliè per ininiziare questo modello? Grazie
02.05.2019 - 17:18DROPS Design answered:
Buongiorno Maela. Le consigliamo di fare un campione. In base al numero di maglie in 10 cm e alla misura finale che dovrà avere il suo capo, può verificare quale taglia seguire. Può rivolgersi al suo rivenditore Drops di fiducia per un aiuto più personalizzato. Buon lavoro!
02.05.2019 - 17:36
![]() Belen Espejo wrote:
Belen Espejo wrote:
Los tirantes son solo dos cadenetas separadas?
06.02.2019 - 11:27DROPS Design answered:
Hola Belen. Es correcto, los tirantes están formados por dos tiras de puntos de cadeneta.
11.02.2019 - 20:07Rocio Vidalon wrote:
Me gustaría verlo en video
28.12.2018 - 06:34Vanina Opazo wrote:
Hola. Mi duda es si tengo que cortar el hilo para hacer las sisas porque comencé a tejer y al aumentar las cadenas en la primer hilera me quedó perfecto pero al llegar al otro extremo y tejer los p.a.d. ya empecé a tejer otra hilera, me quedó desparejo. Necesito ayuda por favor! Gracias
01.11.2018 - 15:33DROPS Design answered:
Hola Vanina. Es normal para las labores de punto y ganchillo que cuando trabajemos los aumentos/disminuciones una parte sea un poco más alta que otra. Esto no afecta a la calidad de la labor.
03.11.2018 - 20:02
![]() Rikke Breiner wrote:
Rikke Breiner wrote:
Jeg forstår ikke at der skal være flere dbstm efter midten i første række end der er før midten? Så bliver den jo skæv! Hvad gør jeg forkert? Har 16 dbstm før udtagning i midten og 20 efter midten 🙄
21.04.2017 - 10:25DROPS Design answered:
Hej Rikke, hvis du sætter mærketråden i den midterste maske og sørger for at lave udtagningerne i den midterste maske med mærketråd, så bliver der lige mange masker på hver side. God fornøjsele!
03.05.2017 - 14:31Nuri wrote:
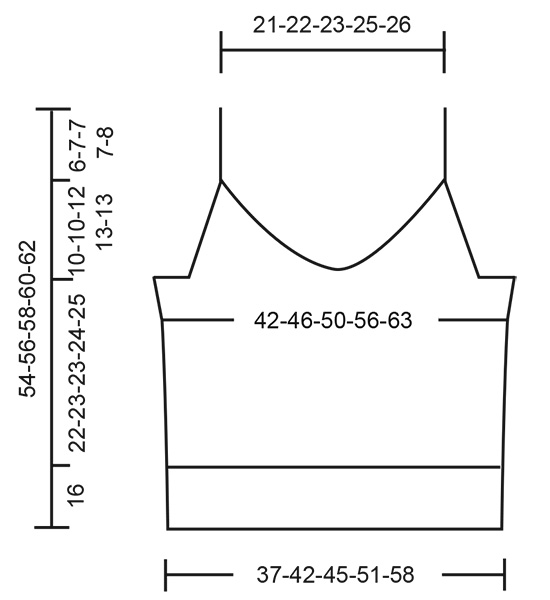
Los números indicados en el diagrama ¿son cadenas, centímetros, pulgadas?
01.04.2017 - 07:54DROPS Design answered:
Querida Nuri! Los numeros indicados en el diaframa son en centimetros. Buena suerte!
06.04.2017 - 13:16Gabriela wrote:
Tip for the armholes. Add the other increases at the end of the row by using the technique for the "foundation treble crochet" but with double treble. This way all the increases are on the same row. Consejo para las sisas: Agregar los otros aumentos al final de la vuelta usando la técnica de "punto alto sin cadena de inicio" pero usando p.a.d. De esta manera todos los aumentos quedan en la misma vuelta. Espero haber sido clara y que les sirva.
17.01.2017 - 19:08
![]() Sara wrote:
Sara wrote:
Detta hände 2013! Är du långsint eller bara dum?
24.06.2016 - 20:21
![]() Birgitte Dam wrote:
Birgitte Dam wrote:
Til Maria Søndergård. Tæl lige til 10 og læs opskriften ordentlig, inden du skriver så grim en kommentar. Det er dig der ikke læser opskriften ordentlig. Jeg har lige hæklet denne skønne model og opskriften er perfekt, hvis man altså vælger at følge den. Så til dig : Du er en ommer. Til Drops tak for alle jeres skønne gratis opskrifter.
24.06.2016 - 10:11
![]() Mariken wrote:
Mariken wrote:
Goede dag. Ook ik heb eenzelfde vraag over de armsgaten. Hoe vermeerder ik aan de andere kant. Heb filmpje bekeken, tips gelezen. Maar helaas, ik kom er niet uit. Alvast bedankt voor uw reactie. Groeten Mariken
19.06.2016 - 23:14DROPS Design answered:
Hoi Mariken. Je meerdert aan beide zijkanten voor de armsgaten door het aantal lossen aan het einde van de rij te haken, keer het werk en haak hier de stk zoals beschreven. De nieuwe stk komen niet in dezelfde rij, maar dit is de manier ;-)
21.06.2016 - 14:32
|
|
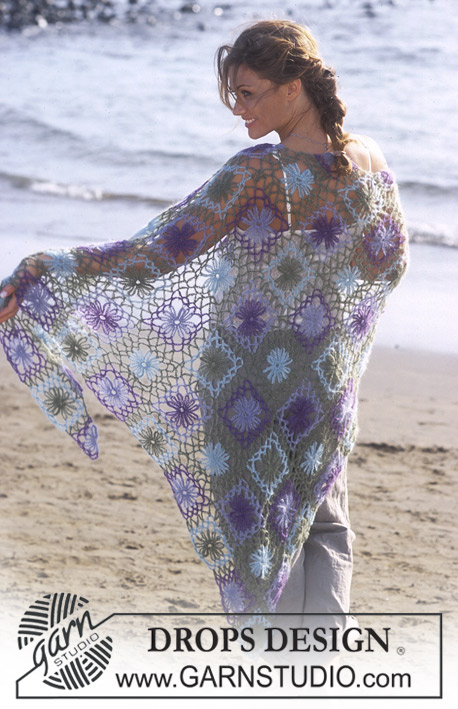
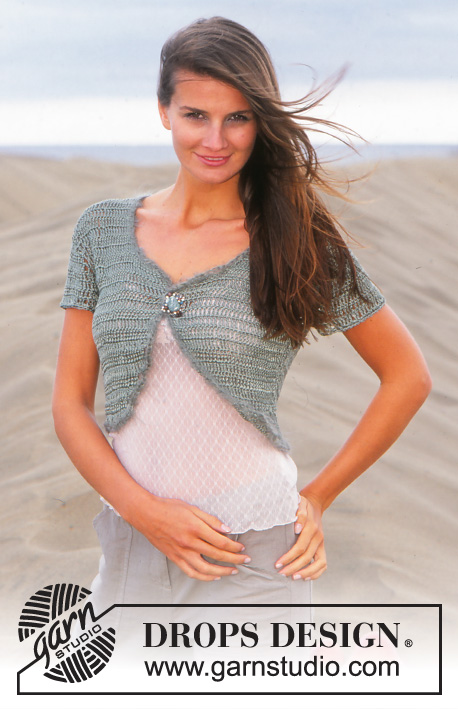
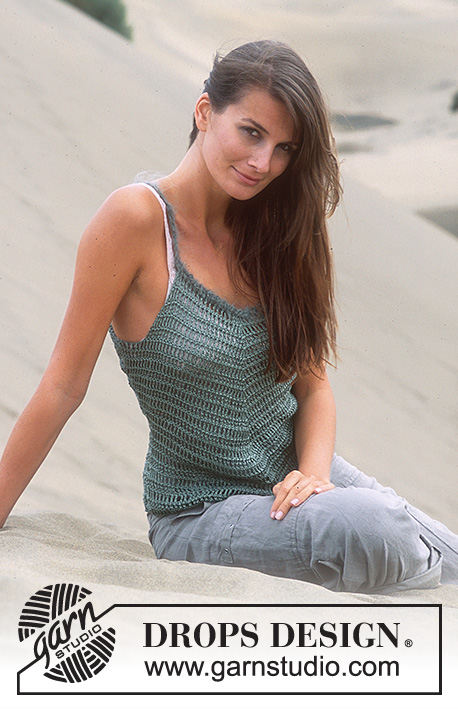
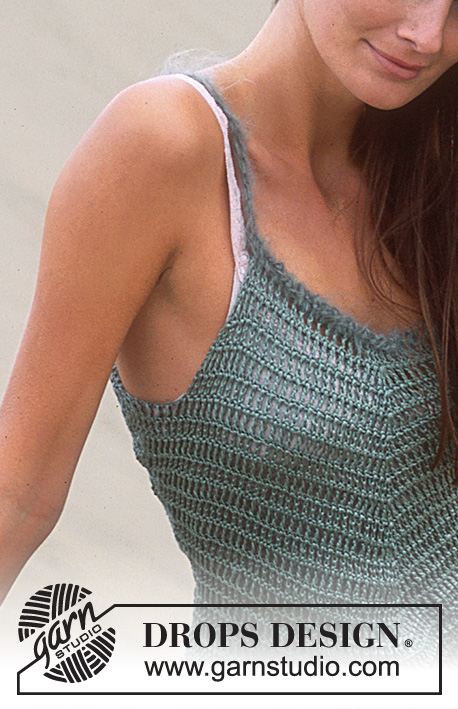
Arrowheart |
|
 |
 |
DROPS Crochet top in Cotton Viscose and Vienna or BabyMerino and Melody.
DROPS 95-37 |
|
|
Crochet Gauge: width of 17 tr and 6 rows on crochet hook size 4 = 10 x 10 cm = 4" x 4". NB: Because of different crochet techniques used by the individual, the gauge may vary, so you might have to drop/go up a hook size to obtain the correct gauge. Crochet info: At the beginning of each row replace the 1st tr with 4 ch, and finish each row with 1 tr in 4th ch from beginning of previous row. Crochet in each st and not in between. Decreasing tips (applies to side): Because you increase 2 tr continuously mid front, you need to dec 1 tr each side to keep number of sts constant. When you then have to dec each side to decrease number of sts, do this by dec 1 extra tr each side. Dec 1 tr by crocheting 2 tr together as follows: crochet 1 tr but wait with last yo and pull through (= 2 sts on hook), crochet 1 tr and pull thread through all 3 sts on hook. Increasing tips: Inc sts at the bottom of armhole each side as follows: Crochet a chain of ch at the end of the row before the row you need to increase on. Crochet 16-22-22-24-34 ch, turn the piece and crochet back as follows: 1 tr in the 6th ch from hook, *skip 1 ch, 1 tr in next ch*, repeat from *-* = 7-10-10-11-16 tr increased for armhole. Continue as before with 1 tr in each tr from previous row. Front piece: The top is crochet from top down. Crochet 36-38-40-44-46 ch using crochet hook size 4 and Cotton Viscose or Baby Merino. Crochet the 1st row as follows: 1 tr in the 5th ch from the hook, 1 tr in each of the next 14-15-16-18-19 ch, 3 tr in next ch, 1 tr in each of the remaining 16-17-18-20-21 ch = 35-37-39-43-45 tr. Insert a marking thread in the middle tr. Read all of the following section before continuing. Crochet tr’s – read Crochet info. Sloping effect: At the same time inc mid front to obtain a sloping effect by crocheting 3 tr in the tr with the marking thread – continue the increase on every row. Armhole: At the same time inc for armhole each side on every row by crocheting an extra tr in the outermost tr each side a total of 5-5-6-7-7 times (after the last inc, insert a new marking thread in piece and measure piece from this point form now on). Crochet 7-10-10-11-16 new tr – see Increasing tips above – for armhole. After all inc for armhole there are 71-79-85-95-107 tr on row. Continue with tr's as before with increases mid front but now dec at side to keep number of sts constant – see Decreasing tips. At the same time when piece measures approx 7-7-8-8-10 cm = 2¾"-2¾"-3⅛"-3⅛"-4" (from the new marking thread) dec 1 extra tr each side on every other row a total of 4 times – see Decreasing tips = 63-71-77-87-99 tr. When piece measures approx 22-23-23-24-25 cm = 8¾"-9"-9"-9½"-9¾" (the increases at sides are now finished) continue over the 63-71-77-87-99 tr with 1 tr in each tr, i.e. discontinue increases mid front and decreases at sides. When piece measures approx 38-39-39-40-41 cm = 15"-15¼"-15¼"-15¾"-16⅛" cut the thread – piece measures approx 48-49-51-53-54 cm = 19"-19¼"-20"-21"-21¼" where widest. Back piece: Crochet as front piece. Assembly: Sew side seams. Crochet border: Crochet a border round neckline on front and back pieces using crochet hook size 6 mm = US J/10 and Vienna or Melody as follows: 1 sl st in first tr, 1 ch, 1 sc in between 1st and 2nd tr, *1 ch, 1 sc between the next 2 tr*, repeat from *-* and finish with a sl st in last tr on row. Shoulder straps: Crochet 1 sl st at the top on the right side of back piece, crochet a chain of ch approx 12-14-14-14-16 cm = 4¾"-5½"-5½"-5½"-6¼" long (or desired length, try on the top), attach with 1 sl st at the top on the right side of front piece. Crochet another chain (to make the strap double) and attach with a sl st on back piece. Repeat on left side. |
|
 |
|
Have you finished this pattern?Tag your pictures with #dropspattern or submit them to the #dropsfan gallery. Do you need help with this pattern?You'll find 7 tutorial videos, a Comments/Questions area and more by visiting the pattern on garnstudio.com. © 1982-2026 DROPS Design A/S. We reserve all rights. This document, including all its sub-sections, has copyrights. Read more about what you can do with our patterns at the bottom of each pattern on our site. |
|


With over 40 years in knitting and crochet design, DROPS Design offers one of the most extensive collections of free patterns on the internet - translated to 17 languages. As of today we count 324 catalogs and 12291 patterns - 12281 of which are translated into English (US/in).
We work hard to bring you the best knitting and crochet have to offer, inspiration and advice as well as great quality yarns at incredible prices! Would you like to use our patterns for other than personal use? You can read what you are allowed to do in the Copyright text at the bottom of all our patterns. Happy crafting!
Post a comment to pattern DROPS 95-37
We would love to hear what you have to say about this pattern!
If you want to leave a question, please make sure you select the correct category in the form below, to speed up the answering process. Required fields are marked *.