
Popular categories
Looking for a yarn?


Comments / Questions (50)
![]() Alexis Mai wrote:
Alexis Mai wrote:
Hi I've under stood the pattern up til this point: "Split piece and crochet back and front pieces separately back and forth." I don't understand what I need to do.
01.06.2022 - 04:06DROPS Design answered:
Hi Alexis, Instead of working in the round as you have done on the body, you are now working the front and back pieces separately, to make the armholes. Instead of continuing round, you turn and work back to the other side of the front/back piece, turn again and work back etc. Happy crocheting!
01.06.2022 - 06:46
![]() Robyn wrote:
Robyn wrote:
How would I make this largeR? Chest size 46”?
29.04.2020 - 03:08DROPS Design answered:
Dear Robyn, we are unfortunately not able to adjust every pattern to every single request - you are welcome to contact the store where you bought the yarn or any crochet forum for any further individual assistance. Thanks for your comprehension. Happy crocheting!
29.04.2020 - 09:08
![]() Di wrote:
Di wrote:
Thank you so much for providing a completely written pattern. I am self taught and 'cut my teeth' using a written pattern. I've tried to follow so many of your patterns but have never been successful where charts are concerned and usually the means I give up. My problem I know but I cannot seem to get my head round charts at all. So big thanks for this.
18.04.2019 - 12:42
![]() Sonia B. wrote:
Sonia B. wrote:
Bonjour, dans cette section = BAS du DEBARDEUR MOTIF Monter 4 ml, former un rond avec 1 mc dans la 1ère ml. R 1 : lire astuces crochet. 8 ms dans le rond. Où se trouve "astuces crochet"? Et par où je commence l'ouvrage exactement? Comment réaliser l'échantillon (combien de mailles chaînettes) et quoi faire ensuite? J'ai un fil de coton pour crochet no 5 et je prends un crochet no 6. Merci.
25.05.2018 - 16:00DROPS Design answered:
Bonjour Sonia, il s'agit en fait ici de l'INFO CROCHET qui explique comment commencer le tour (= remplacer la 1ère ms du tour par 1 ml et terminer le tour par 1 mc). Pour l'échantillon, les 3 premiers tours du MOTIF doivent mesurer 6,5 cm ou bien vous pouvez crocheter un rectangle d'une quinzaine de brides et crocheter en POINT FANTAISIE sur 5/6 tours et mesurer si 11 DB x 3 tours font 10 x 10 cm. Ajustez la taille du crochet si nécessaire. Bon crochet!
28.05.2018 - 08:14
![]() Lynn wrote:
Lynn wrote:
Which part of the pattern is to make the squares? Where do I start it?
11.02.2018 - 20:55DROPS Design answered:
Dear Lynn, pattern for square you can find under the Bottom Part (crochet panel). You have to make it 2x. Happy crocheting!
11.02.2018 - 22:57
![]() Grace wrote:
Grace wrote:
I'm stuck on the last part of the Picot edge. I don't understand "Crochet sl st until 2nd ch on last picot, *6 ch, 1 sc around 2nd ch on next picot*, repeat from *-*. "
06.07.2017 - 15:21DROPS Design answered:
Dear Grace, 2nd row should start in the middle of 1st picot from previous row, work sl st to the 2nd of the 1st picot, then *work 6 ch, then 1 sc around the 2nd chain of next picot (= in the middle of next picot)* and repeat from *-*. Happy crocheting!
06.07.2017 - 16:04
![]() Wendy wrote:
Wendy wrote:
Hi. I'm a newbie at crocheting so I may be asking a silly question. For this pattern, concerning the square on the bottom, in the last row for the corners it says... 2 tr in each of 1-2-3 first tr, 3-5-7 tr in ch loop, 2 tr in each of next 1-2-3 tr = 96-120-144 tr. Does this mean 2 trebles in the first treble of the corner, 3, 5 or 7 trebles in the space and 2 trebles in the 2nd treble of the corner? Not sure what 1-2-3 mean?
13.03.2017 - 19:23DROPS Design answered:
Dear Wendy, each number refer to the size,in 1st size you will crochet 2 tr in the next tr, in 2nd size, 2 Tr in each of the next 2 tr, and in larger size, 2 tr in each of the next 3 tr. Happy crocheting!
14.03.2017 - 09:37Johng420 wrote:
Only wanna tell that this is very useful , Thanks for taking your time to write this. aeddeceddddc
26.08.2016 - 23:35
![]() Carrie wrote:
Carrie wrote:
Vielen lieben Dank für die schnelle Hilfe. Nun hänge ich an der Abschluss Kante. 1Dstb 2lm 3Dstb überspringen 1Dstb. Das paßt irgendwie nicht. Habe ich da wieder einen Denkfehler.
24.05.2016 - 15:03DROPS Design answered:
Liebe Carrie, damit der Rand nicht zu locker wird, werden 3 D-Stb übersprungen und darüber 2 Lm gemacht, dass sollte dann schon passen.
25.05.2016 - 19:27
![]() Carrie wrote:
Carrie wrote:
Hallo, ich weiß nicht weiter. Ich bin jetzt an der Stelle wo die Träger anfangen. Bei mir das 6.Rapport. linkes Vorderteil, 22fm ist noch okay, dann verstehe ich die Anleitung nicht mehr. Arbeit wenden, 3Dstb total 2 mal? ? Vielleicht kann mir das jemand noch mal erklären. Jetzt bin ich schon so weit, und würde gerne das Top fertig stellen. Danke schön im voraus.
22.05.2016 - 20:47DROPS Design answered:
Liebe Carrie, der ganze Satz lautet: für den Hals abk. (d.h. am Anfang einer R. mit D-Stb: 3 D-Stb total 2 Mal) und ist bei dieser älteren Anleitung vielleicht nicht so klar formuliert. Sie ketten in jeder R mit Doppelstäbchen für den Halsausschnitt ab. Es werden 2 x je 3 D-Stb abgekettet. Dann sind statt 17-19-22 D-Stb noch 11-13-16 D-Stb in der Reihe.
23.05.2016 - 19:51
|
|
Nautilus#nautilustop |
|
|
|
|
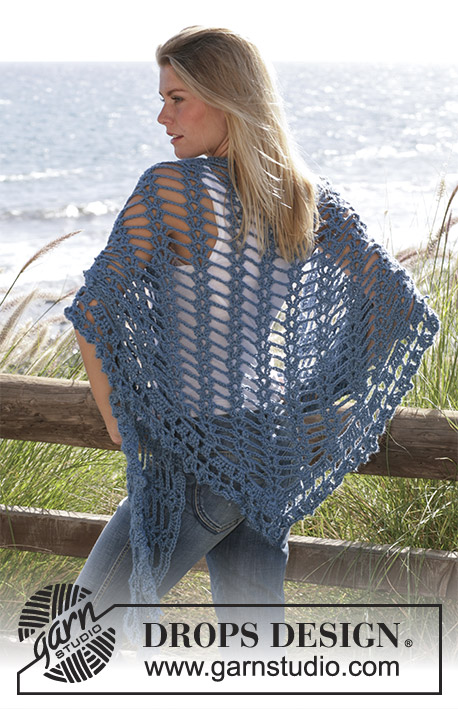
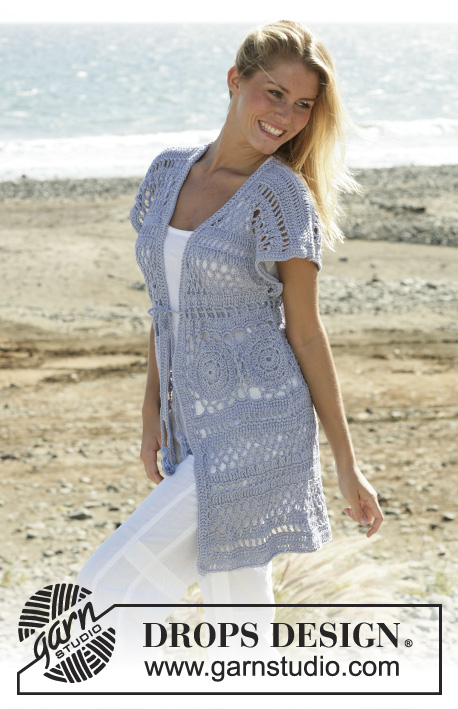
DROPS crochet top in ”Silke-Alpaca”
DROPS 99-21 |
|
|
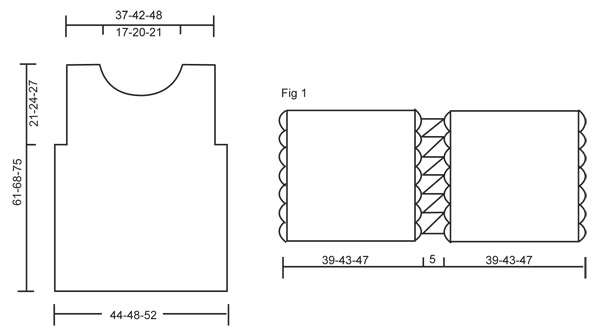
Crochet gauge: 3 rounds of the crochet square measures 6.5 cm [2½"] and 11 tr x 3 rounds of texture pattern = 10 x 10 cm [4" x 4"] Crochet info: Substitute first tr on each row/round with 4 ch. Substitute first sc on round with 1 ch. Finish round with 1 sl st in beginning of round. Picot: 1 picot = 3 ch, 1 sl st in 3rd ch from crochet hook. Texture pattern: 1st row: 1 sc in each tr. 2nd row: 1 tr in each sc. 1st and 2nd row = 1 pattern repeat of texture pattern. Binding off tip (applies to neckline): Bind off at beginning of row as follows: Crochet 3 sl st over 3 first sc. Bind off at end of row as follows: Turn piece when 3 sc are left. First crochet 2 squares that are put tog = bottom part of top. In Size S/M crochet to 7th round, inclusive. In Size L crochet to 8th round, inclusive. In Size XL crochet to 9th round, inclusive. Then crochet a border around the squares and at last crochet the top part of the top onto the 2 squares. BOTTOM PART: Crochet panel: Crochet 4 ch create a ring with 1 sl st in first ch. 1st round: Read Crochet tip! Crochet 8 sc around ring. 2nd round: Crochet 3 tr in each sc = 24 tr. 3rd round: Crochet 1 tr, *3 ch, skip 1 tr, 1 tr in next tr*, repeat from*-* and finish with 3 ch and 1 sl st in beginning of round = 12 tr. 4th round: Crochet 3 tr in first tr, *3 ch, skip 3 ch, 3 tr in next tr*, repeat from*-* and finish with 3 ch skip 1 tr and 1 sl st in beginning of round = 36 tr. 5th round: Crochet 1 tr in each tr and 3 tr in each ch loop = 72 tr. Square now measures 20 cm [8"] in diameter. 6th round: Crochet 1 tr in first tr, *3 ch, skip 1 tr, 1 tr in next tr*, repeat from*-* and finish with 3 ch, skip 1 tr and 1 sl st in beginning of round = 36 tr. 7th round: *1 tr and 3 ch in each of 8 first tr, 1 tr in next tr, 3 ch, 1 tr in same tr, (= edge), 3 ch *, repeat from *-* 4 times in total and finish with 1 sl st in beginning of round = 40 tr. Finish size S/M here. 8th round: *1 tr and 3 ch in each of 8 first tr, 2 tr in next tr, 3 ch, 2 tr in next tr, (= edge), 3 ch *, repeat from *-* 4 times in total and finish with 1 sl st in beginning of round = 48 tr. Finish size L here. 9th round: *1 tr and 3 ch in each of 8 first tr , 2 tr in next tr, 1 tr in next tr, 3 ch, 1 tr in next tr, 2 tr in next tr (= corner), 3 ch*, repeat from *-* 4 times in total and finish with 1 sl st in beginning of round = 56 tr. Finish size XL here. Last round (crochet to complete all sizes): 1 tr in each tr and 1 tr in each ch loop . Crochet each corner as follows: 2 tr in each of 1-2-3 first tr, 3-5-7 tr in ch loop, 2 tr in each of next 1-2-3 tr = 96-120-144 tr. Crochet 1 square more. Picot edge: Crochet a picot edge on 2 sides opposite each other on each square – see figure 1. Begin mid corner. Crochet as follows: 1 sc around first tr, *1 picot – see explanation above, skip 1 tr, 1 sc around next tr *. Repeat from *-* 12-15-18 times in total = 12-15-18 picots. Turn piece and crochet back as follows: Crochet sl st until 2nd ch on last picot, *6 ch, 1 sc around 2nd ch on next picot*, repeat from *-*. Cut and sew thread. Panel measures approx 39-43-47 cm [15¼"-17"-18½"] in diameter. Crocheting together: Place squares together and crochet tog – see Figure 1. Crochet squares tog on both sides with picot edges – so a cylinder is formed. Crochet 1 sc in first loop on the one square, 2 ch, 1 sc in first loop on second square, *3 ch, 1 sc in next loop on the one square, 2 ch, 1 sc in next loop on second square* repeat from *-* until squares are crochet tog on side. TOP PART: Crochet the top part now: Crochet around top edge as follows: 1st round: Crochet 1 tr in first tr, *3 ch, skip 1 tr, 1 tr in next tr*, repeat from*-* and finish with 3 ch. Crochet as follows between squares: 1 tr, *3 ch, skip approx 1 cm [⅜"], 1 tr *, repeat from *-* 4 times in total, finish off with 3 ch = 34-40-46 tr with 3 ch between each. 2nd round: Crochet 1 sc in first tr, *1 picot, skip 3 ch, 1 sc in next tr * repeat from *-* on entire round = 34-40-46 picots. 3rd round: sl st to ch loop on first picot, 2 tr in 2nd ch in each picot, finish off with 1 sl st in first tr = 68-80-92 tr. 4th round: *1sc in first tr, 2 sc in next tr*, repeat from *-* and finish with 1 sl st in first tr = 102-120-138 sc. Split piece and crochet back and front pieces separately back and forth. Front piece: = 51-60-69 dc. Place where 2 squares are crochet tog mid front and mid back on the top part. Middle of squares are placed on side of top part. Crochet next round from WS. Crochet tr in each of middle 41-48-55 sc (do not crochet over 5-6-7 sc on each side = armhole) = 41-48-55 tr. Now crochet texture pattern –see explanation above. Crochet 3-4-5 pattern repeats, then split piece. Left front piece: On 1st row on 4th-5th-6th pattern repeat crochet sc but only over first 17-19-22 tr. Turn piece. Now bind off 3 tr for neckline towards mid front (i.e. in beginning of row of tr) – read binding off tip - 2 times in total = 11-13-16 tr/sc left on shoulder. Cut and sew thread after 7-8-9 pattern repeats. Right front piece: On 1st row on 4th-5th-6th pattern repeat crochet sc but only over first 17-19-22 tr (crochet from middle towards sides.) Turn piece. Now bind off 3 tr for neckline towards mid front (i.e. in beginning of row with tr) – read binding off tip - 2 times in total = 11-13-16 tr/sc left on shoulder. Cut and sew thread after 7-8-9 pattern repeats. Top part measures approx 21-24-27 cm [8¼"-9½"-10⅝"]. Back piece: = 51-60-69 sc. Crochet 1 tr in each of middle 41-48-55 sc (do not crochet over 5-6-7 sc on each side = armhole) = 41-48-55 tr. Crochet 6-7-8 pattern repeats with texture pattern, now crochet 1 last pattern repeat over 11-13-16 sc/tr only on each side (do not crochet middle 19-22-23 sc/tr = neckline.) Cut and sew thread after 7-8-9 pattern repeats. Assembly: Sew shoulder seams. Crochet edges: Crochet around bottom edge of top as follows: 1st round: Crochet 1 tr in first tr, *2 ch, skip 3 tr, 1 tr in next tr*, repeat from*-* and finish with 2 ch and 1 sl st in first tr. 2nd round: 2 tr in first tr, *4 ch, 2 tr in same tr, 1 ch, 2 tr in next tr *, repeat from *-* and finish with 4 ch, 2 tr in same tr, 1 ch and 1 sl st in first tr. Crochet around neckline as follows: 1 sc , *4 ch, skip approx 2 cm [⅜"], 1 sc*, repeat from *-* finish off with 4 ch and 1 sl st in first sc. |
|
 |
|
Have you finished this pattern?Tag your pictures with #dropspattern #nautilustop or submit them to the #dropsfan gallery. Do you need help with this pattern?You'll find 9 tutorial videos, a Comments/Questions area and more by visiting the pattern on garnstudio.com. © 1982-2026 DROPS Design A/S. We reserve all rights. This document, including all its sub-sections, has copyrights. Read more about what you can do with our patterns at the bottom of each pattern on our site. |


With over 40 years in knitting and crochet design, DROPS Design offers one of the most extensive collections of free patterns on the internet - translated to 17 languages. As of today we count 324 catalogs and 12290 patterns - 12280 of which are translated into English (US/in).
We work hard to bring you the best knitting and crochet have to offer, inspiration and advice as well as great quality yarns at incredible prices! Would you like to use our patterns for other than personal use? You can read what you are allowed to do in the Copyright text at the bottom of all our patterns. Happy crafting!
Post a comment to pattern DROPS 99-21
We would love to hear what you have to say about this pattern!
If you want to leave a question, please make sure you select the correct category in the form below, to speed up the answering process. Required fields are marked *.