
Popular categories
Looking for a yarn?


Comments / Questions (28)
![]() Guiberteau wrote:
Guiberteau wrote:
Bonjour.au début du diagramme A3b ce présente pa comme vôtre modèle vous sa démarre de droite a gauche et moi c est l inverse
27.11.2024 - 15:23
![]() Lynne wrote:
Lynne wrote:
Can you recommend a single-strand yarn to use, instead of using two strands? And the quantity of the single-strand yarn to buy? Thank you!
28.08.2023 - 19:58DROPS Design answered:
Dear Lynne, sure, you can use any yarn from our yarn group C - read more here, scroll down to 2 strands of different meterage to 1 strand.. Happy knitting!
29.08.2023 - 09:10
![]() Kathie wrote:
Kathie wrote:
This has been a very interesting pattern and the first time, for me, from charts. Love the intricate pattern design combinations. There is one stitch on Chart A3b line 26 stitch 25 that I was wondering if it should be a Purl stitch instead Knit. Thank you so much!
05.01.2022 - 05:20DROPS Design answered:
Dear Kathie, you are right, our design team will check and edit diagram as soon as possible. Thanks for your feedback. Happy knitting!
05.01.2022 - 08:14
![]() Ariela Cohen wrote:
Ariela Cohen wrote:
Can i have translation of the instructions to hebrew i dont mind paying for it
12.05.2021 - 14:57
![]() Jean Purnell wrote:
Jean Purnell wrote:
The only way I could cope was to enlarge and print out the charts and number the rows, then use a row counter. I also printed out all the charts for the initial part and payed them out in sequence. Then I used marker threads for each chart.
22.12.2020 - 10:24
![]() Erika wrote:
Erika wrote:
Hello again. I have figured out the triangle from the 9th raw. K r
14.11.2020 - 21:27
![]() Erika wrote:
Erika wrote:
Good morning. I have got a couple of questions. First one, when it says in Ab1 in tbe3rd raw "slip stitch behind, then K1,K1 from behind, isn't it supposed to be K1 and P1 from behind? Also there is no explanation A1b in the 9th raw what the full triangle means. Thank you in advance and good day.
14.11.2020 - 08:23
![]() Linda Ovens wrote:
Linda Ovens wrote:
What do the missing squares in blocks A.1a and A.2a signify ?
09.04.2020 - 21:07DROPS Design answered:
Dear Mrs Ovens, on next to last row on these diagrams you will decrease by purling 2 sts together, on next row (= last row), there will be 1 stitch less because of this decrease, ie in A.1a 6 sts remain and work these 6 sts as follows: P2, K1, P2, K1. Happy knitting!
14.04.2020 - 09:57
![]() Paola Lontani wrote:
Paola Lontani wrote:
Possibile che al ferro numero 18 al diagramma a b3 ci sia un errrore nella parte finale dovrebbe un risultare solo un diritto invece il diagramma ne riporta due
31.10.2019 - 08:12DROPS Design answered:
Buongiorno Paola. La ringraziamo della segnalazione che inoltriamo al settore design. Alla riga 18 ci deve essere una sola maglia a diritto e non due. Buon lavoro!
31.10.2019 - 11:52
![]() Margaret wrote:
Margaret wrote:
How do you read your pattern and what is the dark section in pattern a2b
08.02.2019 - 21:09DROPS Design answered:
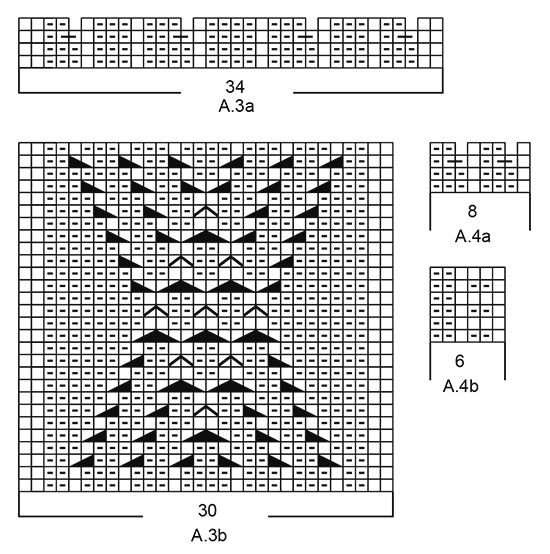
Hi Margaret, The symbols used in diagram A.2b are described above the diagrams. So if you are working row 3 in A.2b, you start from the right side and purl 2 (from right side) or knit 2 (from wrong side), then the dark triangle which slopes up right to left means: place 1 stitch on cable needle in front of piece, purl 1 and knit the stitch from the cable needle, then the dark triangle which slopes down from right to left means: place 1 stitch on cable needle behind piece, knit 1 and purl stitch on cable needle. Then continue with purl/knit 3 etc. Hope this helps and happy knitting!
09.02.2019 - 08:43
|
|||||||||||||||||||||||||||||||
Irish Winter#irishwintersweater |
|||||||||||||||||||||||||||||||
 |
 |
||||||||||||||||||||||||||||||
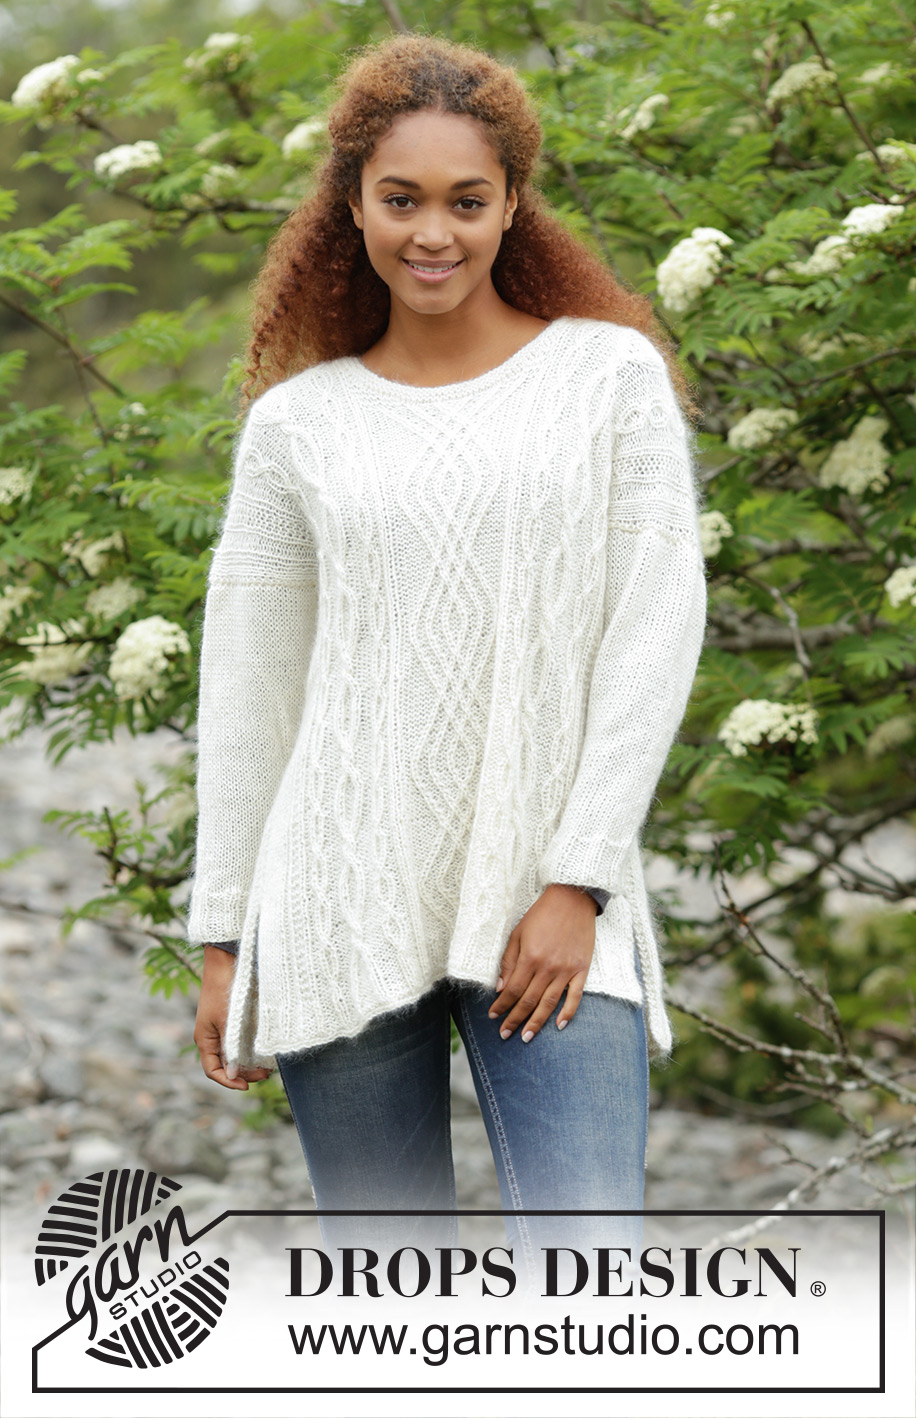
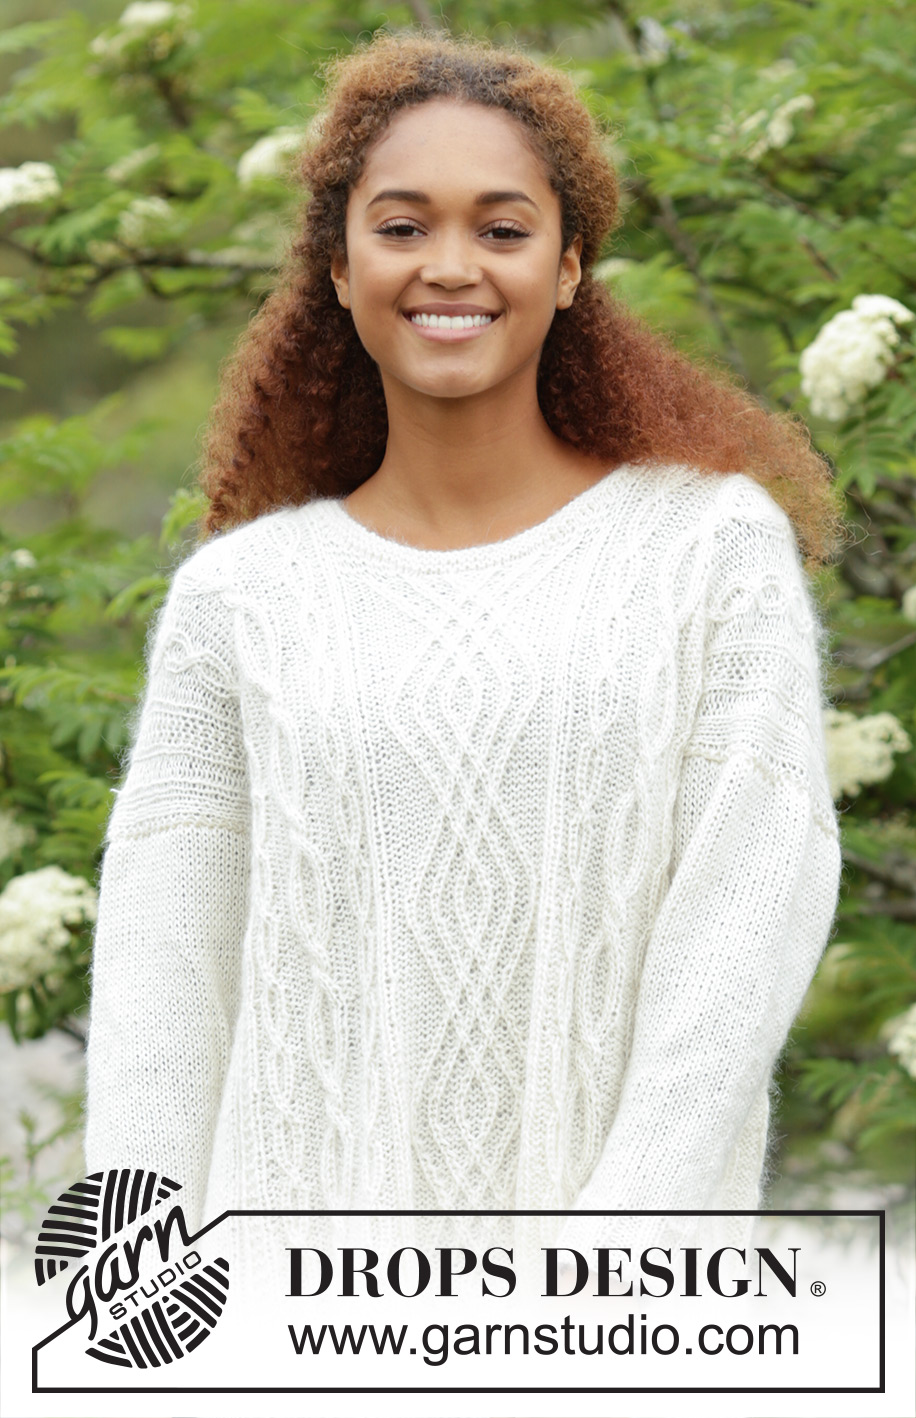
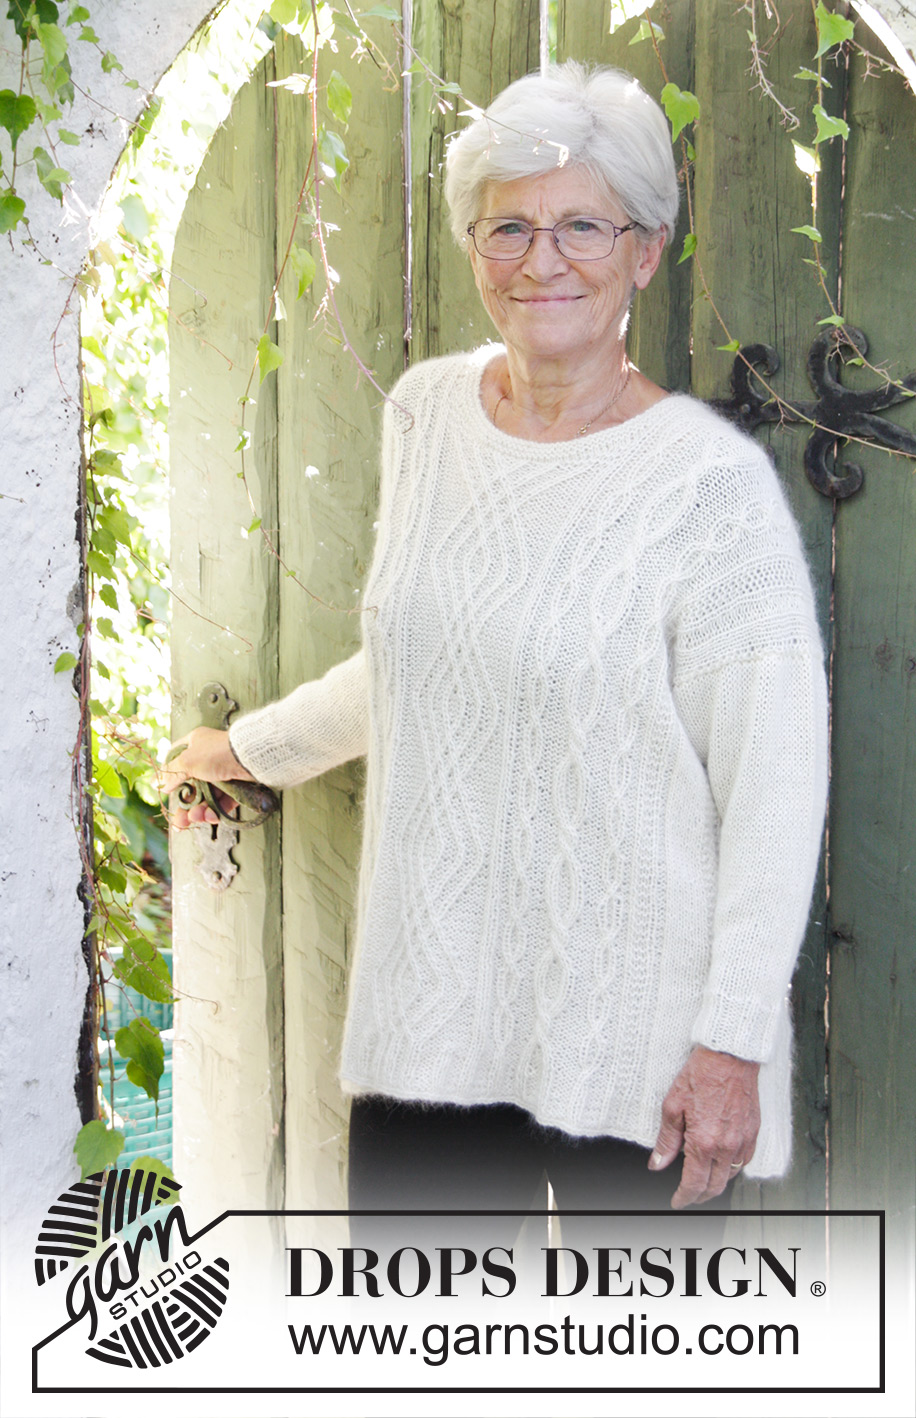
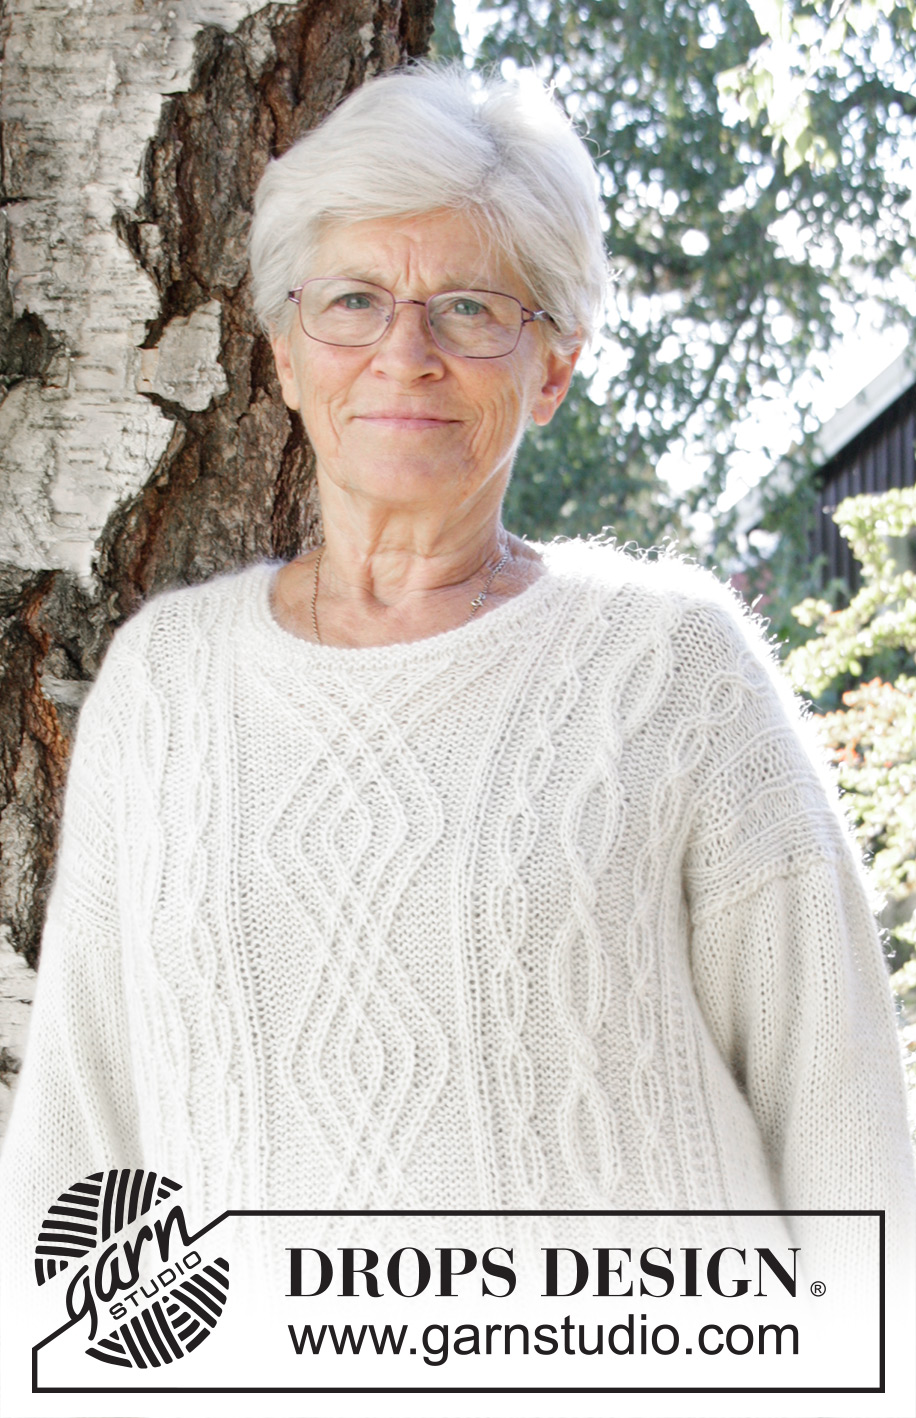
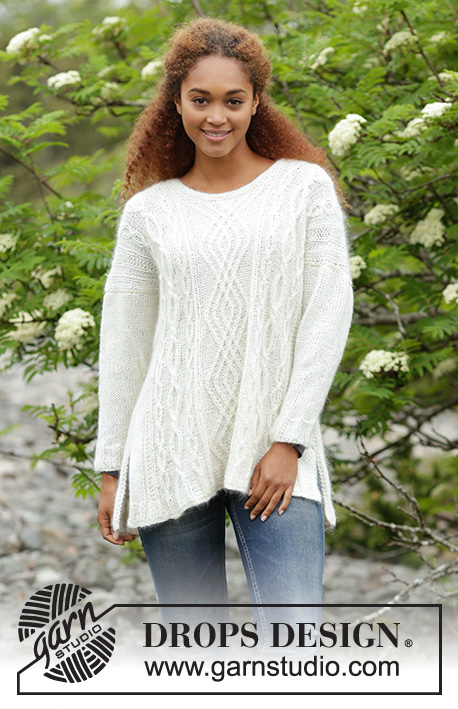
Knitted DROPS jumper with cables and vents in the side in ”Alpaca” and ”Kid-Silk”. Size: S - XXXL.
DROPS 172-2 |
|||||||||||||||||||||||||||||||
|
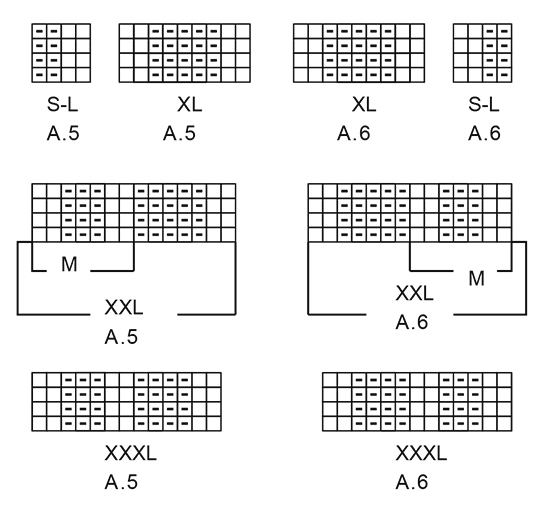
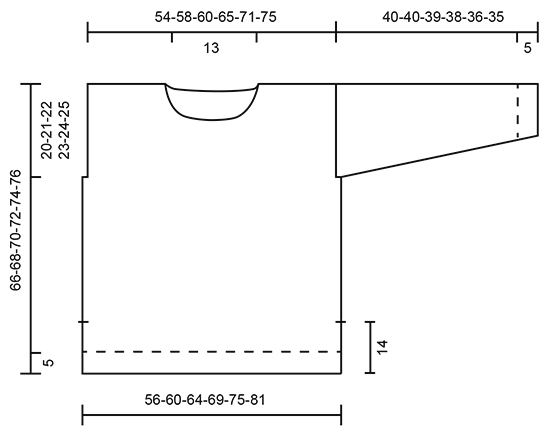
GARTER ST (worked in the round): 1 ridge = 2 rounds. * K 1 round and P 1 round *, repeat from *-*. GARTER ST (back and forth): K all rows. 1 ridge = 2 rows K. PATTERN: See diagrams A.1 to A.6 – see diagram for correct size. The diagrams show all rows in pattern seen from RS. DECREASE TIP: Dec 1 st P by P 2 tog. INCREASE TIP: All inc are done from RS. Inc 1 st by making a YO. On next row K YOs twisted to avoid holes. ---------------------------------------------------------- JUMPER: Worked back and forth on circular needle in parts and sewn tog when finished. BACK PIECE: Cast on 124-130-140-150-160-174 sts on with 1 strand Alpaca + 1 strand Kid-Silk (= 2 strands) on circular needle size 4.5 mm. P 1 row from WS, then work rib as follows: 2 edge sts in GARTER ST - see explanation above, work A.5 (= 4-7-4-9-14-13 sts), A.1a (= 8 sts) 1-1-2-2-2-3 times, A.2a (= 31 sts), A.3a (= 34 sts), A.2a (= 31 sts), A.4a (= 8 sts) 1-1-2-2-2-3 times, A.6 (= 4-7-4-9-14-13 sts), 2 edge sts in garter st. Repeat the first 2 rows in diagram until piece measures 4 cm. Then work the remaining 2 rows = 106-112-118-128-138-148 sts. Switch to circular needle size 5 mm. Now work pattern as follows from RS: 2 edge sts in garter st, 4-7-4-9-14-13 sts in stocking st, A.1b (= 6 sts) 1-1-2-2-2-3 times, A.2b (= 26 sts), A.3b (= 30 sts), A.2b, A.4b (= 6 sts) 1-1-2-2-2-3 times, 4-7-4-9-14-13 sts in stocking st, 2 edge sts in garter st. REMEMBER THE KNITTING TENSION When piece measures 14 cm in all sizes, cast on 1 new st at the end of the next 2 rows (marks vent) = 108-114-120-130-140-150 sts. Work the new st in garter st. When piece measures 46-47-48-49-50-51 cm, cast off 2-2-3-4-4-5 sts at beg of the next 2 rows for armholes = 104-110-114-122-132-140 sts on needle. Now continue with pattern as follows: 1 edge st in garter st, 4-7-3-7-12-10 sts in stocking st, pattern as before over the next 94-94-106-106-106-118 sts, 4-7-3-7-12-10 sts in stocking st, 1 edge st in garter st. When piece measures 63-65-67-69-71-73 cm, dec 4 sts evenly over the middle 24 sts - READ DECREASE TIP = 100-106-110-118-128-136 sts. On next row from RS, cast off the middle 20 sts for neck and finish each shoulder separately. Continue to cast off 1 st on next row from neck = 39-42-44-48-53-57 sts. When piece measures 65-67-69-71-73-75 cm, work 1 ridge over all sts on shoulder while dec 3 sts evenly = 36-39-41-45-50-54 sts. K 1 row from RS and cast off with K from WS. Work the other shoulder the same way but reversed. FRONT PIECE: Cast on and work as back piece. When piece measures 58-59-60-61-62-63 cm, work as follows: Work the first 45-48-50-54-59-63 sts as before, work the next 14 sts AT THE SAME TIME dec 4 sts P evenly and slip these sts on a stitch holder for neck (= 10 sts on stitch holder), work the remaining sts on needle = 45-48-50-54-59-63 sts for each shoulder. Now work each shoulder separately in pattern as before. Then cast off sts on every row from neck as follows: Cast off 2 sts 2 times and 1 st 2 times = 39-42-44-48-53-57 sts remain for shoulder. When piece measures 65-67-69-71-73-75 cm, work 1 ridge over all sts on shoulder while dec 3 sts evenly = 36-39-41-45-50-54 sts. K 1 row from RS and cast off with K from WS. Work the other shoulder the same way but reversed. SLEEVE: The sleeve is worked back and forth on circular needle. Cast on 44-44-49-49-54-54 sts (incl 1 edge st in garter st in each side) with 1 strand Alpaca + 1 strand Kid-Silk (= 2 strands) on circular needle size 4.5 mm . P 1 row from WS. Then work rib as follows: 1 edge st in garter st, (K 2, P 3) until 3 sts remain, K 2, 1 edge st in garter st. When rib measures 5 cm, dec 6-4-7-7-10-8 sts evenly = 38-40-42-42-44-46 sts. Switch to circular needle size 5 mm. Now work in stocking st with 1 edge sts in garter st in each side. When piece measures 8 cm in all sizes, inc 1 st inside 1 edge st in garter st in each side - READ INCREASE TIP. Inc like this every 4th row 15-14-13-10-6-4 times and on every other row 1-3-4-9-14-17 times = 70-74-76-80-84-88 sts. When piece measures 40-40-39-38-36-35 cm (shorter measurements in the larger sizes because of wider shoulders), cast off all sts. Knit another sleeve the same way. ASSEMBLY: Sew shoulder seams with grafting/kitchener sts inside cast-off edge. Sew sleeves in body. Sew underarm and side seams in one inside 1 edge st in garter st down to vent (vent = 14 cm). Repeat in the other side. NECK EDGE: Pick up 60-70 sts around the neck on circular needle size 4.5 mm with 1 strand of each quality (= 2 strands). Work 3 ridges and cast off. |
|||||||||||||||||||||||||||||||
Diagram explanations |
|||||||||||||||||||||||||||||||
|
|||||||||||||||||||||||||||||||

|
|||||||||||||||||||||||||||||||
|
|||||||||||||||||||||||||||||||
|
|||||||||||||||||||||||||||||||
|
|||||||||||||||||||||||||||||||
Have you finished this pattern?Tag your pictures with #dropspattern #irishwintersweater or submit them to the #dropsfan gallery. Do you need help with this pattern?You'll find 26 tutorial videos, a Comments/Questions area and more by visiting the pattern on garnstudio.com. © 1982-2025 DROPS Design A/S. We reserve all rights. This document, including all its sub-sections, has copyrights. Read more about what you can do with our patterns at the bottom of each pattern on our site. |
|||||||||||||||||||||||||||||||


With over 40 years in knitting and crochet design, DROPS Design offers one of the most extensive collections of free patterns on the internet - translated to 17 languages. As of today we count 314 catalogues and 11822 patterns translated into English (UK/cm).
We work hard to bring you the best knitting and crochet have to offer, inspiration and advice as well as great quality yarns at incredible prices! Would you like to use our patterns for other than personal use? You can read what you are allowed to do in the Copyright text at the bottom of all our patterns. Happy crafting!
Post a comment to pattern DROPS 172-2
We would love to hear what you have to say about this pattern!
If you want to leave a question, please make sure you select the correct category in the form below, to speed up the answering process. Required fields are marked *.