
Popular categories
Looking for a yarn?


Comments / Questions (8)
![]() Dani wrote:
Dani wrote:
Vielen Dank für Ihre Antwort. Hab`s beim 2.ten Versuch rausgekriegt: In Reihe 4 muss man gut aufpassen, dass man sich nicht verzählt. Den Farbwechsel hab ich auch gefunden :) Alles gut ! Vielen Dank für diese tolle Anleitung, bin absoluter Drops-Design-Fan :)
13.12.2019 - 13:52
![]() Dani wrote:
Dani wrote:
Liebes Drops-Team, leider entsteht nach der Beschreibung bei der Vorder- und Rückseite ein 5-Eck, anstatt ein 4-Eck, so gelingt das Herz nicht. Auch ist beim Bogen ein Farbwechsel nicht beschrieben und die Reihe 5 sehr unverständlich. Bitte helfen Sie mir :) wollte den Topflappen zu Weihachten verschenken, Danke Schön :)
12.12.2019 - 20:13DROPS Design answered:
Liebe Dani, Gerne helfen wir Ihnen; sagen Sie uns bitte mehr :) Ab welche Runde (und Vorder- oder Rückenteil) bekommen Sie ein 5-Eck? Farbwechsel sollten alle beschrieben werden, welche Reihe 5 verstehen Sie nicht? Vorder- oder Rückenteil? :)
13.12.2019 - 08:03
![]() Elena wrote:
Elena wrote:
Stupenda! Abbastanza grande, spessa, molto bella da vedere.
16.04.2019 - 09:56
![]() Maiken wrote:
Maiken wrote:
Hei,ser at denne flotte heklede grytekut er sortert under strikke teknikk.Håper det kan endres på,slik at de som søker etter heklet gryteklut IKKE går glipp av den ?
18.12.2016 - 01:35DROPS Design answered:
Hej Maiken. Vi har rettet, tak for beskeden
21.12.2016 - 14:39
![]() Diane wrote:
Diane wrote:
Just beautiful and the completed project can be found in my store under, Copper Creek Crochet!
22.02.2013 - 23:55
![]() Eschenbacher wrote:
Eschenbacher wrote:
Hey, ich wollte dieses tolle Projekt häkeln, aber bereits am Anfang mit der rosafarbenen Wolle (dem Inneren der Blume) hänge ich fest. Wenn man jedesmal 6 Luftmachen häkeln soll nach den Stäbchen hat man doch 7 weitere kleine Ringe. Wie soll das gehn. War das ein Versehen??
17.11.2012 - 20:51DROPS Design answered:
Hallo Frau Eschenbacher. Die rosa Luftmaschenbögen sind die Basis für die weißen Blätter, die in der nächsten Rd gehäkelt werden. Viel Spaß beim Häkeln!
20.11.2012 - 09:09
![]() Jeanne wrote:
Jeanne wrote:
Beste mevrouw,ik wilde graag de pannelap haken,maar de hartjesboog wil maar niet lukken.Ik heb de foto van de pannelap al vergroot zodat ik misschien de steken beter kon zien, maar helaas ik heb het werk al diverse keren uitgehaald.Mijn vraag is nu heeft U misschien een teltekening van de hartjesboog.Bij voorbaat hartelijk dank Mevr.Maas Lossez
20.07.2012 - 19:15DROPS Design answered:
Hoi. We hebben hier helaas geen teltekening van en de vertaling zou moeten kloppen. De werkwijze van het patroon is helemaal uitgeschreven en het is voor mij moeilijk om dit nog verder uit te schrijven. Maar u haakt eers een rij van v in toer 1 en pas in toer 2 haakt u de eerste roze boog zoals te zien is op de foto. Misschien kunt u uw haakwerk meenemen naar uw DROPS winkel voor persoonlijke ondersteuning.
26.07.2012 - 15:49Nicole wrote:
Bonjour, J'aimerais offrir cette magnifique manique à ma nièce pour son anniversaire mais malheureusement, je suis bloquée pour les arrondis du coeur. Je ne comprend pas la façon de commencer l'arrondi tout en l'attachant au carré. Avez-vous un vidéo sur la-dessus? Merci de me répondre N. Larose
19.03.2012 - 19:02DROPS Design answered:
Bonjour Nicole, les 2 arrondis se font séparément, l'un après l'autre, en commençant sur l'envers, le long d'un des 2 côtés où vous avez crocheté le tour 9, mais en piquant dans les mailles du 8ème tour du carré. Bon crochet !
20.03.2012 - 08:46
|
|
DROPS Extra 0-739 |
|
 |
 |
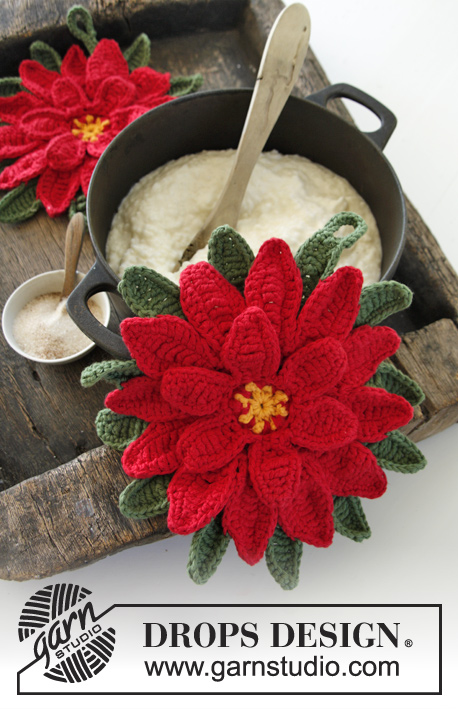
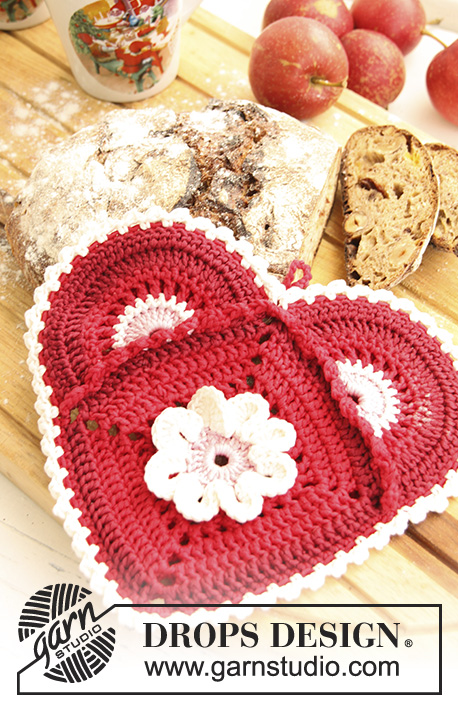
Crochet pot holder in DROPS Muskat. Piece is worked as a heart with flower. Theme: Christmas
DROPS Extra 0-739 |
|
|
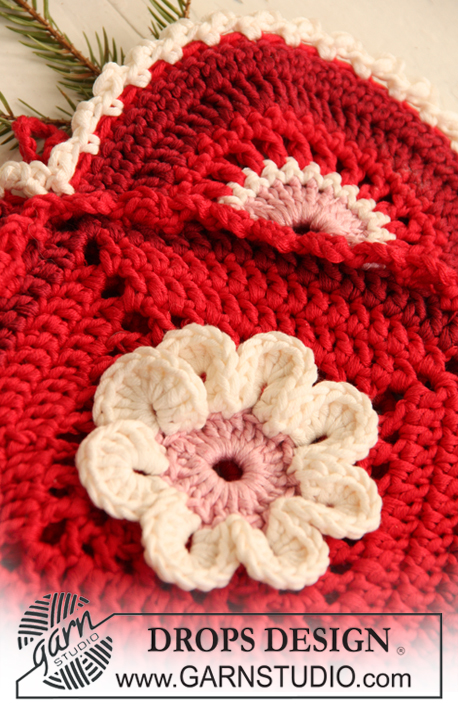
HEART POTHOLDER: Crochet one front and one back and then crochet these two tog to make a potholder with a lace edge. FRONT: CROCHET SQUARE WITH FLOWER: Ch 8 on hook size 3 mm / C with light pink and form a ring with 1 sl st in first ch. ROUND 1: ch 3 (= 1 dc), 2 dc in ch-ring, * ch 6, 1 sc at the top of the last dc made, 3 dc in ch-ring *, repeat from *-* a total of 7 times and finish with ch 6, 1 sc in the last dc made and 1 sl st in third ch from beg of round = 8 ch spaces with 3 dc between each. Cut the thread. ROUND 2: Switch to off white. 1 sc in next dc (2nd dc of the 3 dc), * 12 dc in ch space (= 1 leaf), skip 1 dc, 1 sc in 2nd dc of the 3 next dc *, repeat from *-* the entire round and finish with 1 sl st in first sc from beg of round. Cut the thread (= 8 leaves with 1 sc between each). ROUND 3: Switch to red. Fold the leaves towards you and crochet at the back of the flower as follows: ch 1, * ch 5, 1 sc in next sc between 2 leaves, ch 3, 1 sc in next sc between 2 leaves *, repeat from *-* a total of 4 times but finish with 1 sl st in first sc from beg of round (instead of 1 sc in next sc). ROUND 4: 1 sl st in first 5-ch space, 3 ch (= 1 dc), 2 dc + 3 ch + 3 dc in the same ch space, 3 dc in 3-ch space, * 3 dc + ch 3 + 3 dc in 5-ch space, 3 dc in 3-ch space *, repeat from *-* a total of 3 times and finish with 1 sl st in third ch from beg of round (= 9 dc along each side and 3 ch in each corner). ROUND 5: 4 ch (= 1 dc + 1 ch), skip 1 dc (2nd of 3), 1 dc in next dc (3rd of 3), ch 1, * in the ch space in the corner work 1 dc + ch 3 + 1 dc, (ch 1, 1 dc in next dc, skip 1 dc), repeat from (-) a total of 5 times, ch 1 *, repeat from *-* a total of 3 times, in the ch space in the corner work 1 dc + ch 3 + 1 dc, repeat from (-) a total of 3 times and finish with ch 1 and 1 sl st in third ch from beg of round (= 7 dc with 1 ch in between along each side + 3 ch in each corner). ROUND 6: ch 3 (= 1 dc), continue working 1 dc in each ch and 1 dc in each dc and in the 3-ch space in each corner work 1 dc + ch 3 + 1 dc, finish the round with 1 sl st in third ch from beg of round (= 15 dc along each side and 3 ch in each corner). ROUND 7: ch 3 (= 1 dc), continue working 1 dc in each dc and 1 dc + ch 3 + 1 dc in the 3-ch space in each corner, finish the round with 1 sl st in third ch from beg of round (= 17 dc along each side and 3 ch in each corner). Cut the thread. ROUND 8: Switch to bordeaux and crochet as round 7 (= 19 dc along each side and 3 ch in each corner). Cut the thread. ROUND 9: Switch to red and start with 1 sl st in the ch space in one corner, ch 3, 1 dc in first ch, skip 1 dc, 1 sc in next dc, * ch 3, 1 dc in first ch, skip 1 dc, 1 sc in next dc *, repeat from *-* a total of 9 times but finish last time with 1 sc in ch space in the corner (instead of 1 sc in next dc). Repeat from *-* along the next side of the square. Cut and fasten the thread, now there is a lace edge along 2 sides of the square. HEART ARCH: ROW 1 (=WS): Start from the wrong side along one of the sides with lace edge and crochet with light pink as follows: 1 sc in 7th dc from the edge (i.e. in dc from 8th round of the square), ch 2, skip 1 dc, 1 sc in next dc, ch 3, skip 1 dc, 1 sc in next dc, ch 2, skip 1 dc, 1 sc in next dc, turn piece (there are now 6 dc left on the row before the corner). ROW 2 (= RS): Crochet 10 dc in 3-ch space and finish with 1 sc in next dc from 8th round of the square (there are now 5 dc left on the row before the corner). Cut the thread and turn piece. ROW 3: Switch to off white, ch 1, 1 sc in each of the 10 dc, 1 sc in sc from 1st row, (= 1 ch + 11 sc), 1 sc in next dc from 8th round of the square. Switch to red, ch 2, skip 1 dc from 8th round of the square, 1 sc in next dc (there are now 3 dc left on the row before the corner, turn piece. ROW 4 (= RS): * 1 dc in next sc, ch 1 *, repeat from *-* a total of 11 times and finish with 1 dc in last sc, skip 1 dc from 8th round of the square, 1 sc in next dc, 1 sl st in next dc from 8th round of the square (there are now 3 dc left on the row before the corner, turn piece. ROW 5: 1 sc in first dc on arch, continue to work as follows: * 1 sc in ch, 1 sc in next dc *, repeat from *-* a total of 11 times, finish with 1 sc in last dc on arch and 1 sl st in next dc from 8th round of the square (there are now 2 dc left on the row before the corner). Cut the thread. Switch to bordeaux, ch 2, skip 1 dc from 8th round of the square, 1 sc in last dc and turn piece. ROW 6: continue to crochet along the arch as follows: 1 dc in first sc, * 2 dc in next sc, 1 dc in next sc *, repeat from *-* a total of 11 times = 34 dc, ch 1, skip 2 dc, 1 sl st in last dc from 8th round of the square. Ch 2, 1 sl st in ch-ring in the corner of the square and turn piece. ROW 7: Work 1 dc in each of the 34 dc along the arch, 1 dc in last sc, finish with 1 sl st in ch space in the corner. Cut and fasten all the threads. Crochet another heart arch along the other side of square with lace edge – remember to work 1st row from WS. BACK: CROCHET SQUARE WITHOUT FLOWER: Ch 8 on hook size 3 mm / C with red and form a ring with 1 sl st in first ch. ROUND 1: ch 3 (= 1 dc), continue to work 23 dc in ch-ring, finish with 1 sl st in third ch from beg of round. ROUND 2: 1 ch (= 1 sc), * ch 5 , skip 2 dc, 1 sc in next dc, ch 3, skip 2 dc, 1 sc in next dc *, repeat from *-* a total of 4 times but finish with 1 sl st in ch from beg of round (instead of 1 sc in next dc). ROUND 3: 1 sl st in first 5-ch space, ch 3 (= 1 dc), 2 dc + ch 3 + 3 dc in the same ch space, 3 dc in 3-ch space, * 3 dc + ch 3 + 3 dc in 5-ch space, 3 dc in 3-ch space *, repeat from *-* a total of 3 times and finish with 1 sl st in third ch from beg of round. ROUND 4: ch 4 (= 1 dc + 1 ch), skip 1 dc, 1 dc in next dc, ch 1, * in the ch space in the corner work 1 dc + ch 3 + 1 dc, (ch 1, 1 dc in next dc, skip 1 dc), repeat from (-) a total of 5 times, ch 1 *, repeat from *-* a total of 3 times, in the ch space in the corner work 1 dc + ch 3 + 1 dc, repeat from (-) a total of 3 times and finish with ch 1 and 1 sl st in third ch from beg of round. ROUND 5: ch 3 (= 1 dc), continue working 1 dc in each ch and 1 dc in each dc and in the 3-ch space in each corner work 1 dc + ch 3 + 1 dc, finish round with 1 sl st in third ch from beg of round = 15 dc along each side and 3 ch in each corner. ROUND 6: ch 3 (= 1 dc), continue working 1 dc in each dc and 1 dc + ch 3 + 1 dc in the 3-ch space in each corner, finish round with 1 sl st in third ch from beg of round = 17 dc along each side and 3 ch in each corner. Cut the thread. ROUND 7: Switch to bordeaux and crochet as round 6 = 19 dc along each side and 3 ch in each corner. Cut and fasten the threads. HEART ARCH: Work as heart arch on front but crochet the first 5 rows with red and the last 2 rows with bordeaux. Cut and fasten all the threads. CROCHET TOG FRONT AND BACK: Place the 2 potholders on top of each other WS against WS. Crochet on hook size 3 mm / C with red as follows – start from RS in the ch space in the corner between the 2 heart arches (and crochet at the back of the lace edge): ROUND 1: 1 sl st in the ch space in the corner, ch 16 (= loop for hanging), 1 sl st in the same ch space. Continue to work 1 sc in each st all the way around – NOTE: Work through the entire st and both layers at the same time, finish the round with 1 sl st in first sl st from beg of round. ROUND 2: Switch to off white and ch 2, 1 sc in first ch, 1 sc in next sl st (in the sl st you fastened the loop for hanging), * ch 2, 1 sc in first ch, skip 1 sc, 1 sc in next sc *, repeat from *-* all the way around and finish with 1 sl st in first ch from beg of round (instead of 1 sc in next st). Cut and fasten the threads. |
|
Have you finished this pattern?Tag your pictures with #dropspattern or submit them to the #dropsfan gallery. Do you need help with this pattern?You'll find 5 tutorial videos, a Comments/Questions area and more by visiting the pattern on garnstudio.com. © 1982-2025 DROPS Design A/S. We reserve all rights. This document, including all its sub-sections, has copyrights. Read more about what you can do with our patterns at the bottom of each pattern on our site. |
|


With over 40 years in knitting and crochet design, DROPS Design offers one of the most extensive collections of free patterns on the internet - translated to 17 languages. As of today we count 314 catalogs and 11822 patterns - 11812 of which are translated into English (US/in).
We work hard to bring you the best knitting and crochet have to offer, inspiration and advice as well as great quality yarns at incredible prices! Would you like to use our patterns for other than personal use? You can read what you are allowed to do in the Copyright text at the bottom of all our patterns. Happy crafting!
Post a comment to pattern DROPS Extra 0-739
We would love to hear what you have to say about this pattern!
If you want to leave a question, please make sure you select the correct category in the form below, to speed up the answering process. Required fields are marked *.