
Popular categories
Looking for a yarn?


Comments / Questions (18)
![]() PATRICIA GUILLIAMS wrote:
PATRICIA GUILLIAMS wrote:
Bonsoir, je ne comprend pas pour diminuer pour les emmanchure et combien je dois avoir de mail pour finir la manche. je fait la taille 5/7 ans et 11/12 ans. pourriez vous m envoyer comment je dois faire mes diminution svp. bien a vous . Patricia Guilliams.
03.11.2024 - 20:15DROPS Design answered:
Bonjour Mme Guillaume, pour le haut des manches rabattez d'abord de chaque côté: 1 x 3 m puis 1 x 2 m puis 2-4 fois 1 m puis vous rabattez 2 m de chaque côté jusqu'à ce que la manche mesure 41-49 cm (le nombre de fois va dépendre de votre tension en hauteur, l'important est de bien rabattre le même nombre de mailles de chaque côté, autrement dit sur l'endroit et sur l'envers); rabattez ensuite 1 x 3 m de chaque côté et rabattez les mailles restantes. La hauteur en cm est ici plus important que le nombre de mailles. La tête de manche va ainsi mesurer 6-8 cm. Bon tricot!
04.11.2024 - 09:57
![]() Ola wrote:
Ola wrote:
Czy sweterek uda się również z włóczki D Melody?
18.09.2024 - 11:52DROPS Design answered:
Witaj Olu, uda się, dlaczego nie :) Dopasuj tylko rozmiar drutów, aby próbka była zbliżona do tej we wzorze. Pozdrawiamy!
18.09.2024 - 11:58
![]() Tabea Rohrer wrote:
Tabea Rohrer wrote:
Was soll ich anstelle von Drops Vivaldi für die Arbeit DROPS jacke in Alpaca und Vivaldi einsetzen. Vivaldi sei nicht mehr lieferbar.
25.10.2019 - 23:48DROPS Design answered:
Liebe Frau Rohrer, Sie können entweder Vivaldi durch 1 Faden Brushed Alpaca Silk oder 2 Fäden Kid-Silk ersetzen - benutzen Sie unseren Garnumrechner. Viel Spaß beim stricken!
04.11.2019 - 11:45
![]() Nathalie Bazinet wrote:
Nathalie Bazinet wrote:
Dans le modèle on débute par 1 m lis, malheureusement je ne sais pas ce que c'est lis, comment réaliser ce point, merci de me donner la référence nécessaire.
03.10.2015 - 22:27DROPS Design answered:
Bonjour Mme Bazinet, les m lis (= mailles lisières) sont des mailles qui servent aux coutures lors de l'assemblage, vous pouvez les tricoter au point mousse, en jersey ou bord chaînette. Choisissez votre méthode en fonction de ce que vous préférez (voir assemblage ici et là. Bon tricot!
05.10.2015 - 09:05
![]() Lotte wrote:
Lotte wrote:
Hej Drops design. Super flot Boleo. Jeg vil gerne strikke denne model til en god kollegas datter. Kan man erstatte Alpaka garnet med et bomuldsgarn? Hvilke vil I anbefale? Datteren tåler ikke uld, desværre. Med venlig hilsen Lotte
17.08.2015 - 20:26DROPS Design answered:
Hej Lotte, Modellen er strikket med 2 tråde (Alpaca og mohair som er udgået) Du kan strikke med 1 tråd Paris men da skal du strikke lidt løst hvilket en Bolero godt kan bære. Eller så strikker du med 2 tråde fra garngruppe B fex Cotton Light eller Belle. Sørg for at overholde strikkefastheden!
21.08.2015 - 10:45
![]() Myrtha wrote:
Myrtha wrote:
Kan I anvise mig andet garn, da jeg ikke ønsker uld der skal vaskes i hånden. Gerne garn i en tykkelse, så der ikke skal strikkes med 2 tråde!
26.04.2015 - 16:41DROPS Design answered:
Hej Myrtha. Vi har paa nuvaerende tidspunkt ikke et garn i tykkelse pinde 6 (gruppe D) som passer til det du önsker. Du kan erstatte med en dobbelt traad fra gruppe A eller et andet garn som ikke er fra DROPS. Du kan spörge i din garnbutik efter alternativer.
27.04.2015 - 14:46
![]() Heike Blisner wrote:
Heike Blisner wrote:
Ich habe diese Jacke nach gearbeitet und habe festgestellt das 50g Vivaldi völlig ausreichend ist bei der Größe 5/6 Jahre und 7/8 Jahre. Gruß Heike Blisner
03.04.2015 - 18:11
![]() Mette Antonisen wrote:
Mette Antonisen wrote:
Min datter spørger om man kan lave den længere i ryg og forstykke ? kan man det uden det bliver alt for kompliceret
06.05.2013 - 14:23DROPS Design answered:
Det kan du godt. Men start evt med lidt faerre maske for at göre den smallere og tag ud til 48-52-56-56-60 m inden du begynder at lukke af til aermegab. God fornöjelse.
10.05.2013 - 16:42
![]() Dorothy wrote:
Dorothy wrote:
HELP !!!!!! What is the "edge stitch" Pattern states to "incl 1 edge stitch on each side" I am making this for my grand daughters birthday and am not sure what this is asking for Thank You
31.05.2012 - 16:27
![]() Dorothy wrote:
Dorothy wrote:
HELP !!!!!! What is the "edge stitch" Pattern states to "incl 1 edge stitch on each side" I am making this for my grand daughters birthday and am not sure what this is asking for Thank You
31.05.2012 - 16:26
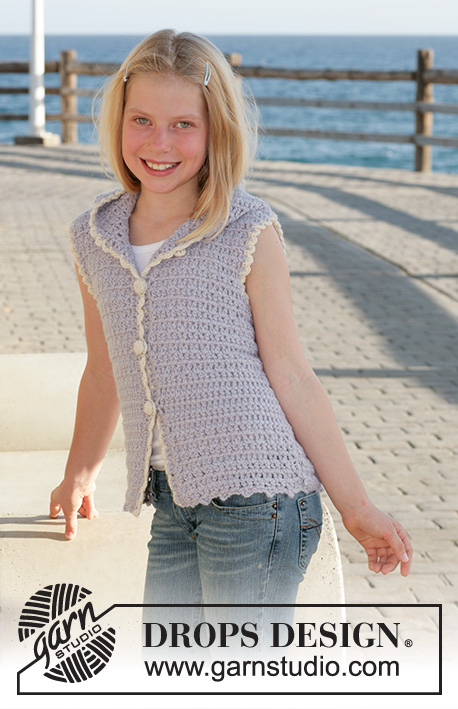
|
|
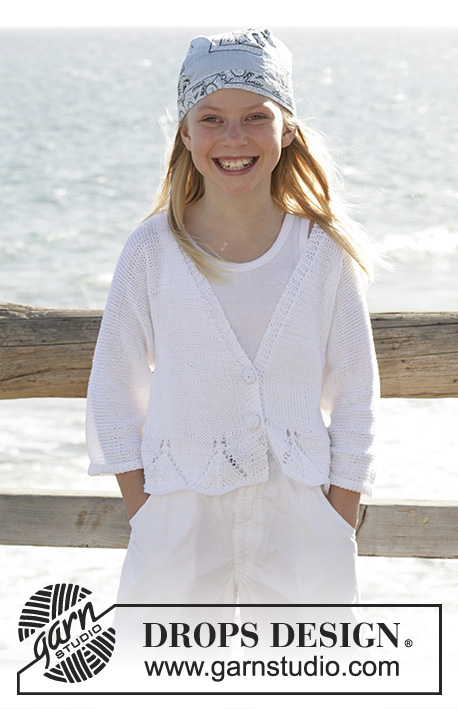
Seaside Smiles#seasidesmilesbolero |
|
|
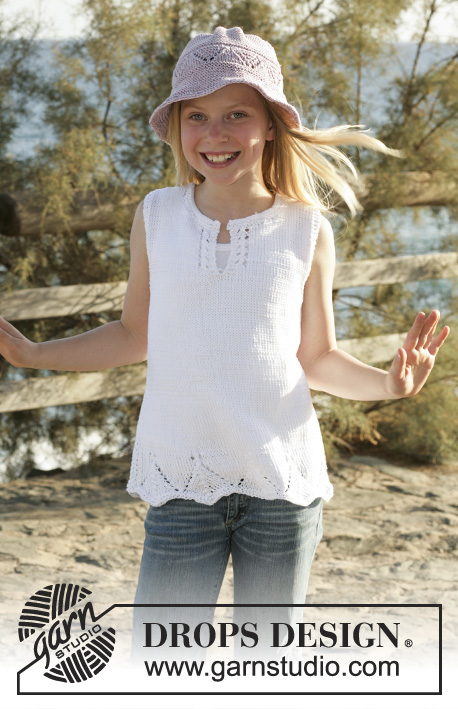
|
|
Knitted bolero with ties in DROPS Alpaca and DROPS Vivaldi. Size children 5 to 14 years.
DROPS Children 15-13 |
|
|
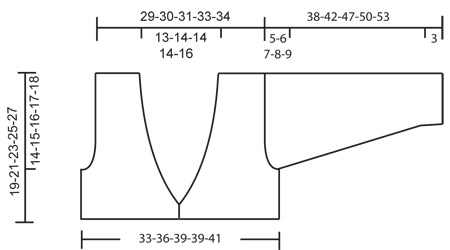
Garter st back and forth: Knit all rows. Back piece: Cast on 48-52-56-56-60 sts (includes 1 edge sts on each side) on needle size 6 mm / US 10 with 1 strand of each quality yarn (= 2 strands held together). K1 row from WS. Work next row as follows from RS: K1 edge st, * K2, P2 * repeat from *-* and end with K2 and K1 edge st. Next row from WS: K1 edge st, * P2, K2 * repeat from *-* and end with P2 and K1 edge st. Repeat this for rib until piece measures 2 cm / ¾". Continue in stockinette sts. When piece measures 5-6-7-8-9 cm / 2"-2⅜"-2¾"-3⅛"-3½" bind off for armholes in beg of every row, each side as follows: 3 sts 1 time, 1 st 1-2-3-2-3 times = 40-42-44-46-48 sts. When piece measures 17-19-21-23-25 cm / 6¾"-7½"-8¼"-9"-9¾" bind off middle 16-18-18-18-20 sts for neck and work each side separately. Continue and bind off 1 st on next row at neckline = -11-11-12-13-13 sts left on shoulder. Bind off when piece measures 19-21-23-25-27 cm / 7½"-8¼"-9"-9¾"-10⅝". Right front piece: Cast on 25-25-29-29-29 sts (includes 1 edge sts in side) on needle size 6 mm / US 10 with 1 strand of each quality yarn (= 2 strands held together). K1 row from WS. Work next row as follows from RS: * K2, P2 * repeat from *-* and end with K1 edge st. Next row from WS: K1 edge st, * K2, P2 * repeat from *-*. Continue like this for rib until piece measures 2 cm / ¾". Continuing in stockinette sts. When piece measures 3-4-5-6-7 cm / 1⅛"-1½"-2"-2⅜"-2¾" bind off 1 st for v-neck mid front on every 2nd cm / ¾" a total of 5-6-6-6-9 times and then on every cm / ⅜" a total of 5-3-5-5-1 times - and at the same time when piece measures 5-6-7-8-9 cm / 2"-2⅜"-2¾"-3⅛"-3½" bind off for armhole at side as on back piece = 11-11-12-13-13 sts. Bind off when piece measures 19-21-23-25-27 cm / 7½"-8¼"-9"-9¾"-10⅝". Left front piece: Work like right piece but reversed. Sleeve: Cast on 26-26-30-30-30 sts (includes 1 edge sts in each side) on needle size 6 mm / US 10 with 1 strand of each quality yarn (= 2 strands held together). K1 row from WS. Continue in rib * K2, P2 * repeat from *-* with 1 edge st in each side worked in garter st until piece measures 3 cm / 1⅛". Continue in stockinette sts, on first row inc 1 sts in each side, repeat inc on every 7-6-7-7-6 cm / 2¾"-2⅜"-2¾"-2¾"-2⅜" a total of 5-6-6-6-7 times = 36-38-42-42-44 sts. When piece measures 33-36-40-42-44 cm / 13"-14¼"-15¾"-16½"-17¼" bind off to shape sleeve cap in beg of every row, each side: 3 sts 1 time, 2 sts 1 time and 1 st 1-2-3-4-5 times. Continuing to bind off 2 sts on each side until piece measures 37-41-46-49-52 cm / 14½"-16⅛"-18"-19¼"-20½", then bind off 3 sts 1 time on each side. Bind off rem sts when piece measures approx 38-42-47-50-53 cm / 15"-16½"-18½"-19¾"-21". Assembly: Sew shoulder seams. Pick up 74-98 (dividable by 6+2) sts on needle size 6 mm / US 10 along one front piece, around neckline and down along other front piece. K1 row from WS. Work next row as follows from RS: K 2 sts in garter st, * K4, P2 * repeat from *-* and end with K4 and K2 sts ingarter st. Next row from WS: K 2 sts in garter st, * P4, K2 * repeat from *-* and end with P4 and K2 sts in garter st. Work in rib like this until edge measures 3 cm / 1⅛". Work first 8 sts and then put them on a stitch holder. Bind off remaining sts until 8 sts are left on row. Now 8 sts are left at the bottom of each front piece that are to be worked for ties as follows seen from RS: K2 sts in garter st, 4 sts in stockinette st, K2 sts in garter st. Bind off when tie measures approx 14 cm / 5½". Sew in sleeves. Sew sleeve and side seams in one within 1 edge st. |
|
|
|
Have you finished this pattern?Tag your pictures with #dropspattern #seasidesmilesbolero or submit them to the #dropsfan gallery. Do you need help with this pattern?You'll find 11 tutorial videos, a Comments/Questions area and more by visiting the pattern on garnstudio.com. © 1982-2025 DROPS Design A/S. We reserve all rights. This document, including all its sub-sections, has copyrights. Read more about what you can do with our patterns at the bottom of each pattern on our site. |


With over 40 years in knitting and crochet design, DROPS Design offers one of the most extensive collections of free patterns on the internet - translated to 17 languages. As of today we count 314 catalogs and 11822 patterns - 11812 of which are translated into English (US/in).
We work hard to bring you the best knitting and crochet have to offer, inspiration and advice as well as great quality yarns at incredible prices! Would you like to use our patterns for other than personal use? You can read what you are allowed to do in the Copyright text at the bottom of all our patterns. Happy crafting!
Post a comment to pattern DROPS Children 15-13
We would love to hear what you have to say about this pattern!
If you want to leave a question, please make sure you select the correct category in the form below, to speed up the answering process. Required fields are marked *.