
Popular categories
Looking for a yarn?


Comments / Questions (272)
![]() Štěpánka wrote:
Štěpánka wrote:
Dobrý den, prosím o radu. Blížím se s pletením lev.před.dílu k části, kdy mám dát 24 ok légy na pomoc.jehlici a dále na konci lícové řady přidat 2 oka ( vlastně 2x) ..tzn.na konci rukávu? ( ale píše se proti průkrčníku) tomu moc nerozumím. To by konec rukávu, kde je Vroubkovy vzor,bylo místo 10 ok, bylo 14 ok??? A následující rubovou řadu hladce? To by se na lícové str.bylo obrace? Předem děkuji, Štěpánka
06.07.2021 - 20:28DROPS Design answered:
Viz výše :-)
18.07.2021 - 20:01
![]() Kirsten Christensen wrote:
Kirsten Christensen wrote:
Hvordan kan det blive 106 m til hætten? Jeg har 2 x 24 forkanten + 4 x 2 nye m + 16 nye m fra ryggen = 72 m Hvor kommer de resterende 34 m fra?
02.07.2021 - 22:56DROPS Design answered:
Hei Kristen. De skal da plukkes opp, f.eks plukke opp en ny maske mellom 2 masker, mellom rillene der du la opp nye masker, til du har det antallet som står i oppskriften. mvh DROPS design
05.07.2021 - 14:36
![]() Kirsten wrote:
Kirsten wrote:
På forstykket til 6/9 mdr. . Hvor skal jeg sætte 1 mærketråd = midt ovenpå skulderen? Er det midt på hele stykket, altså midt i 89 masker? De 2 nye masker der skal slås op, vil det sige at forstykket bliver delt i 2 separate dele: 24 forkantmasker og 69 masker?
12.06.2021 - 17:04DROPS Design answered:
Hej Kirsten, du sætter en mærketråd på skulderen for at kunne måle bagstykket herfra, så det bliver lige så langt som forstykket :)
15.06.2021 - 15:15
![]() Leeanne Nicholls wrote:
Leeanne Nicholls wrote:
Hello, just getting my head around this pattern. With the short rows are they done every 4cm from the beginning of the work ie at 4cm, 8 cm etc or 4 cm from the final 12 st row ? Guess I’m just asking how to measure the 4cm between them.
10.05.2021 - 12:19DROPS Design answered:
Dear Leeanne, its 4 cm from the previous place you knitted the short rows from. They are only done, so the farter stitch wouldn't pull the other parts of the piece. Happy Knitting!
10.05.2021 - 13:33
![]() Margret wrote:
Margret wrote:
Hallo,liebes Dropsteam,werden die verkürzten Reihen bei der Kapuze auch wie beschrieben erst über 24 M und dann über 12 M gestrickt,oder nur über die ersten 12 M und dann normal in kraussrippe weiter?Der Höhenunterschied ist doch bei 2X verkürzte R wie beschrieben sehr groß!
01.05.2021 - 15:59DROPS Design answered:
Liebe Magret, die verkürzten Reihen bei der Kapuze werden nur in jeder 2. cm gestrickt. Viel Spaß beim stricken!
03.05.2021 - 07:36
![]() Margret wrote:
Margret wrote:
Sorry hatte einen Fehler in den verkürzten Reihen,jetzt sind beide Seiten gleich lang,alles io.
31.03.2021 - 21:47
![]() ŠTĚPÁNKA wrote:
ŠTĚPÁNKA wrote:
Zdravím, prosím o radu. Nerozumím moc dobře návodu, plete se klasicky od zdola nahoru nebo obráceně? Nenašla jsem ani k tomuto pomocné video. Ani počet ok v psaném návodu mi nesouhlasí s počtem ok u kresleného návodu, aby mě to navedlo, kde mám začít? Moc děkuji za Vaši odpověď, Štěpánka
07.02.2021 - 08:37DROPS Design answered:
Dobrý den, Štěpánko! Kabátek se plete bez švů na ramenech, začínáme tedy u dolního okraje předních dílů, když dopleteme k podpaží, nahodíme oka pro rukávy, ve výšce ramen oba přední díly přesuneme na jednu a tu samou jehlici (nejlépe kruhovou kvůli většímu počtu ok a pohodlnějšímu pletení), nahodíme oka pro zadní průkrčník a plynule pokračujeme zády, která pleteme shora dolů. Hodně zdaru! Hana
09.02.2021 - 07:32
![]() Brochet wrote:
Brochet wrote:
Bonjour tout le monde En ce moment je tricoté le petit manteau BM-038. J'ai fait les devants gauche et droit mais maintenant je suis bloquée je n'arrive pas à relier les 2 côtés pour réaliser le dos. Quelqu'un pourrait -il m'aider svp ? Un grand merci à toutes et tous. Annick
02.02.2021 - 16:51DROPS Design answered:
Bonjour Annick, le dos se tricote de haut en bas: tricotez les mailles de l'épaule/manche du devant gauche (en commençant par les mailles du bord de la manche), montez 16 à 20 mailles selon la taille, et tricotez à suivre les mailles de l'épaule/devant droit (en commençant par le côté encolure/épaule) = vos deux devants sont placés sur la même aiguille avec des mailles montées pour l'encolure entre les 2 devants. Vous tricotez maintenant de haut en bas, vous rabattrez les mailles des manches un peu plus tard. Bon tricot!
03.02.2021 - 08:20
![]() Julia wrote:
Julia wrote:
Hallo, ich habe ein Frage bezüglich der verkürzten Reihen. Beim rechten Vorderteil (spiegelverkehrt zum linken Vorderteil) liegen die Blendenmaschen dann ja am Ende der Rückreihe oder nicht? Wie mache ich das dann mit der verkürzten Reihe? Weil beim linken Vorderteil liegen die blendenmaschen ja am Anfang der Rückreihe, dann drehe ich ja und stricke die verkürzten Reihen! Aber wie mache ich das beim rechten Vorderteil? Dann von der Hinreihe aus? Vielen Dank!
07.01.2021 - 10:41DROPS Design answered:
Liebe Julia, beim rechten Vorderteil stricken Sie "verkehr", dh, die Blendemaschen sind am Anfang von den Hinreihen gestrickt und die Maschen für die Ärmel werden am Ende von den Hinreihen gestrickt. So beginnen Sie die verkürzten Reihen über die Blendemaschen bei einer Hinreihe. Viel Spaß beim stricken!
07.01.2021 - 12:56
![]() Anne Kristine Christiansen wrote:
Anne Kristine Christiansen wrote:
Der står at man skal tage to masker ud ved halsen til man har 64 masker - men jeg har stadig 84 masker på pinden - og det vil så sammenlagt give 148 masker. dette kan jeg ikke få til at passe med de tal der stå i opskriften, så mener i ikke at det er 2 masker man indtager istedet for udtagning
06.11.2020 - 08:59DROPS Design answered:
Hej Anne, når du har sat de 24 masker mod midt foran på en tråd og har taget ud mod halsen har du 64 masker på hvert stykke. 64+64+16=144 masker. God fornøjelse!
10.11.2020 - 09:36
|
|
Buttercup#buttercupset |
|
 |
 |
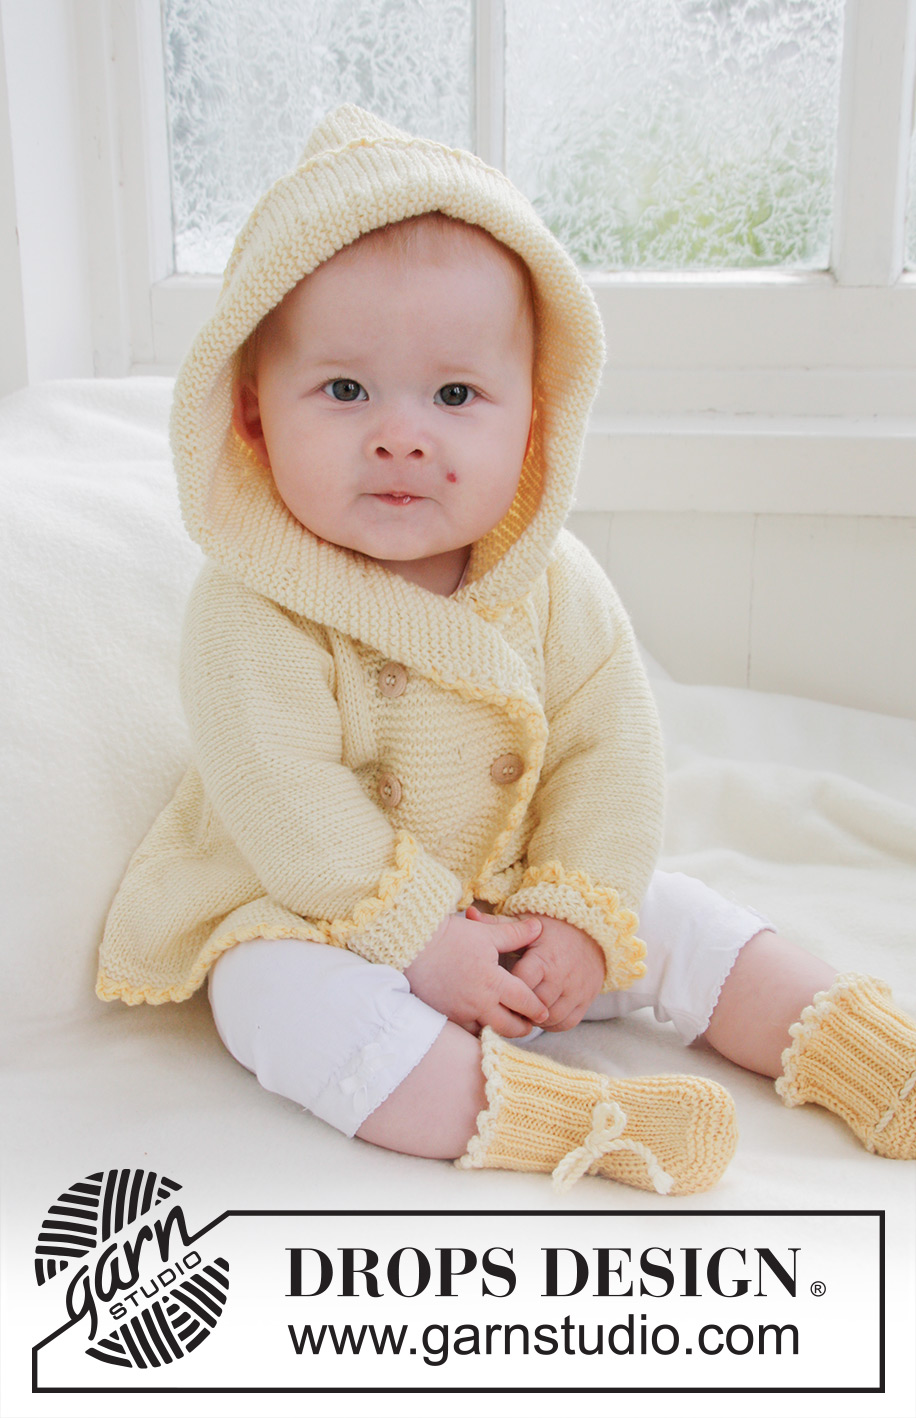
Knitted jacket with hood and slippers for baby and children in DROPS BabyMerino
DROPS Baby 21-1 |
|
|
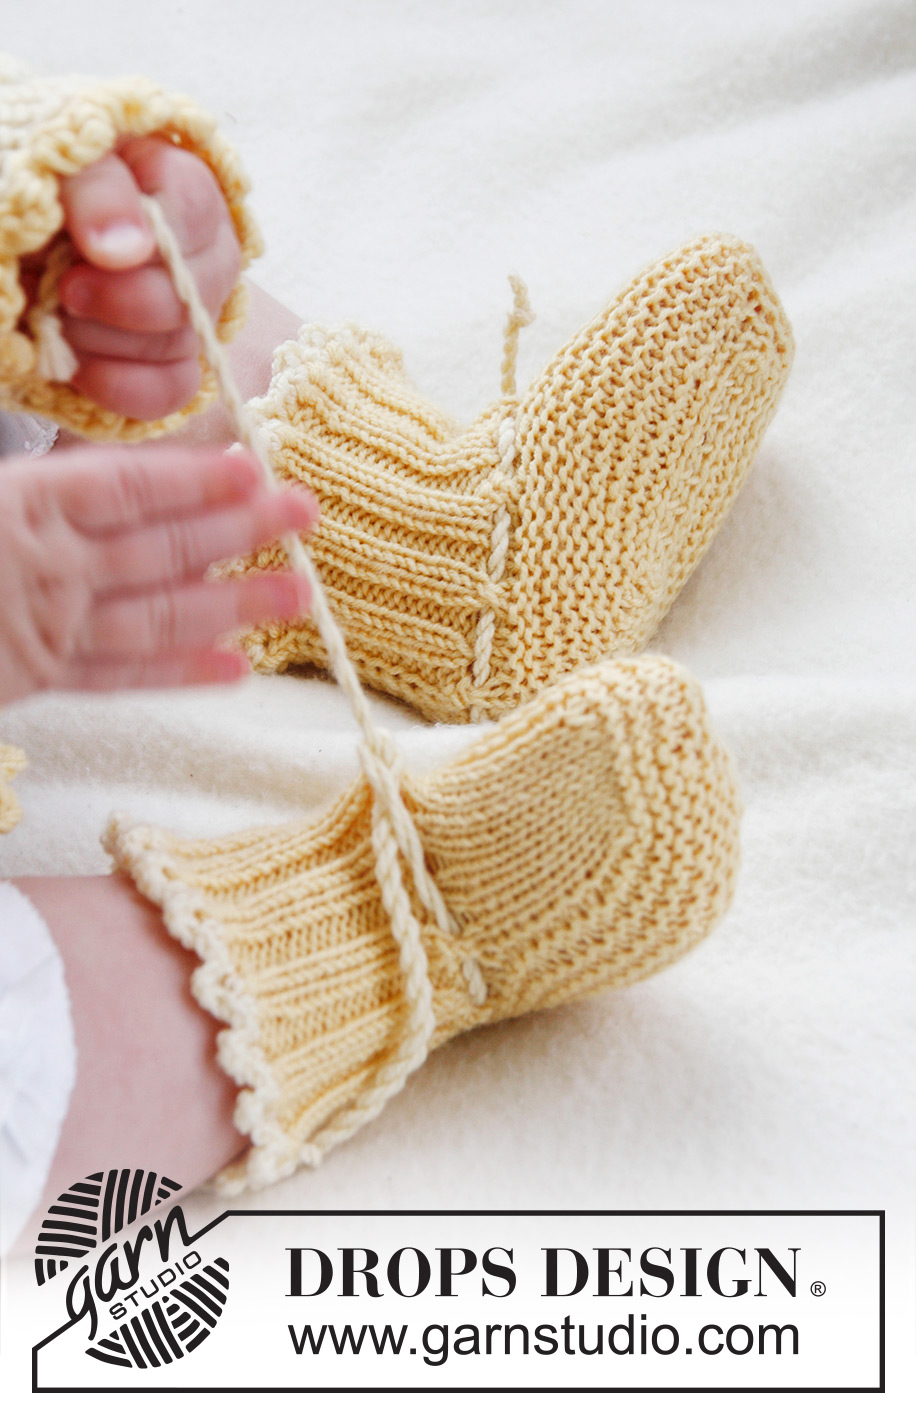
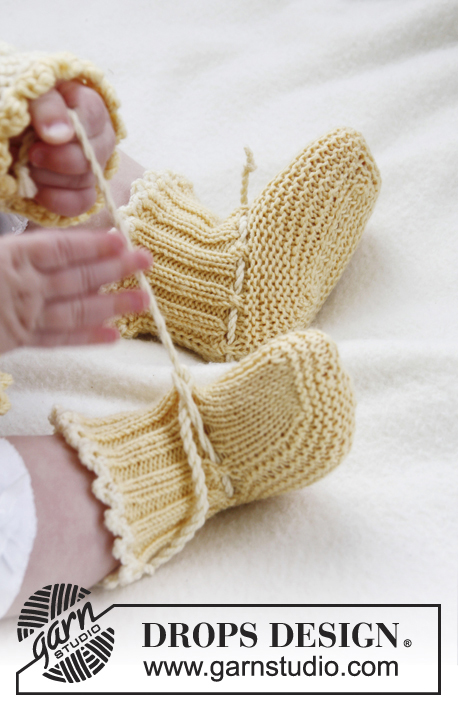
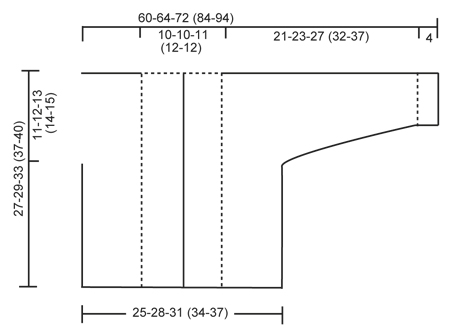
GARTER ST (back and forth on needle): K all rows. SHORT ROWS: * Work 2 rows in garter st over the 24-24-26 (28-28) band sts, work 2 rows in garter st only over the outermost 12-12-13 (14-14) sts. NOTE: When turning mid piece, slip first st. Tighten thread and continue as before. This is done to avoid holes in the transitions *. BUTTON HOLES: The jacket is double-breasted. Cast off for 4 button holes on right band. 1 BUTTON HOLE = K tog fourth and fifth st from edge and make 1 YO. On same row also K tog fourth and fifth LAST st on band, make 1 YO. Cast off for 2 button holes when piece measures: SIZE 1/3 MONTHS: 14 and 19 cm SIZE 6/9 MONTHS: 16 and 21 cm SIZE 12/18 MONTHS: 18 and 24 cm SIZE 2 YEARS: 20 and 27 cm SIZE 3/4 YEARS: 22 and 30 cm ---------------------------------------------------------- JACKET: Worked back and forth on circular needle. Beg on front piece, cast on sts for sleeve and work up to the shoulder. Knit the other front piece, place both front pieces tog and work down the back piece. LEFT FRONT PIECE: Read all of the following section before continuing! Cast on 43-47-51 (56-59) sts (incl 1 edge st in the side and 24-24-26 (28-28) band sts towards mid front) on needle size 2.5 mm with Baby Merino. Work 6 rows in GARTER ST - see explanation above. Switch to circular needle size 3 mm and work in stocking st but continue to work the 24-24-26 (28-28) band sts towards mid front in Garter st. When piece measures 4 cm, work SHORT ROWS - see explanation above (1st row = from WS). Repeat from *-* 1 time every 4 cm until piece measures 19-21-24 (27-30) cm, then repeat from *-* 1 time every other cm until finished measurements. AT THE SAME TIME when piece measures 16-17-20 (23-25) cm, cast on new sts at the end of every row from WS (towards the side of sleeve): 6 sts 2-2-3 (3-3) times, 8 sts 1-1-1 (2-3) times and 21-22-22 (25-26) sts 1 time = 84-89-99 (115-127) sts for shoulder/sleeve. Work inc sts in stocking st. When all sts have been cast on, continue in stocking st and Garter st as before while AT THE SAME TIME also working the outermost 10 sts on sleeve in garter st. When piece measures 27-29-33 (37-40) cm, insert a marker = mid on top of shoulder. Now slip the 24-24-26 (28-28) band sts towards mid front on a stitch holder. Then cast on 2 new sts at the end of row from RS (towards neck), repeat inc on next row towards neck = 64-69-77 (91-103) sts on needle. Work 1 row from WS. Put all sts on a stitch holder. RIGHT FRONT PIECE: Cast on and work as left front piece but reversed. In addition cast off for BUTTON HOLES on band - see explanation above. NOTE! Slip sts on a stitch holder after the last row with inc (i.e. last row = from WS). BACK PIECE: Work left front piece on to circular needle, cast on 16-16-18 (20-20) new sts (= back of neck) and work right front piece on to circular needle = 144-154-172 (202-226) sts. NOW MEASURE PIECE FROM MARKERS ON SHOULDERS. Continue in stocking st and Garter st at the end on each sleeve back and forth on needle. When piece measures 8½-9½-10 (10-11) cm, beg to cast off sleeve sts. Cast off at beg of every row in each side as follows: 21-22-22 (25-26) sts 1 time, 8 sts 1-1-1 (2-3) times and 6 sts 2-2-3 (3-3) times = 62-70-76 (84-90) sts on needle. Continue in stocking st with 1 edge st in each side. When piece measures approx. 26-28-32 (36-39) cm – fold the piece double at the markers on shoulders and make sure that the back piece is as long as front piece down to rows in garter st, switch to needle size 2.5 mm and work 6 rows in garter st, then cast off. ASSEMBLY: Sew the sleeve and side seams inside 1 edge st. Sew on buttons. HOOD: Knit up approx. 102-106-112 (118-122) sts (incl sts from stitch holders at the front – NOTE: If more/fewer sts have been knitted up, dec/inc evenly on 1st row. Continue in garter st over all sts while AT THE SAME TIME working short rows in each side every other cm – SEE EXPLANATION ABOVE. Cast off when hood measures approx. 21-23-25 (27-28) cm. Sew hood neatly tog at the top - sew in front loop of outermost st to avoid a chunky seam. CROCHET BORDER: Crochet a border around the entire jacket. Beg at the bottom on right front piece and crochet with 2 threads yellow Baby Merino and hook size 3 mm as follows: Work 1 dc, * 3 ch, 1 tr in 1st ch, skip approx. ½ cm, 1 dc in next st *, repeat from *-*. Crochet the same way around the openings on sleeves. ----------------------------------------------------------------- SLIPPER: The slipper is worked back and forth from mid back. Cast on 48-52-56 (56) sts on needle size 2.5 mm with 2 threads yellow Baby Merino. Remove 1 thread and work rib (= K 2/P 2) for 5-6-6 (7) cm – adjust so that next row is worked from WS. P 1 row from WS while at the same time dec 14-14-18 (14) sts evenly = 34-38-38 (42) sts. On next row work eyelet holes as follows from RS: K 1, *K 2 tog, 1 YO *, repeat from *-* and finish with K 1. P 1 row from WS. Now slip the outermost 12-13-13 (15) sts in each side on a stitch holder. Work 4 - 4½ - 5½ (6½) cm in stocking st over the middle 10-12-12 (12) sts. Slip sts from stitch holders back on needle and knit up 10-11-13 (16) sts on each side of mid piece = 54-60-64 (74) sts on needle. K every row over all sts for 3-4-5 (5) cm while at the same time after 1½ - 2 - 2½ (3) cm, dec on every other row as follows until completed: Dec 1 st at the beg and the end of row and K 2 tog on each side of the 2 mid sts. Cast off and sew tog mid under foot and continue up mid back in front loop of outermost sts to avoid a chunky seam. Knit another slipper the same way. TIES: Cut 3 threads light yellow of approx. 1 metres, twine them tightly tog, fold them double and they will twine again, tie a knot in each end. Thread tie up and down through the eyelet holes on slipper. CROCHET BORDER: Crochet a border at the top of slipper on hook size 2 mm with light yellow as follows: 1 dc in first st, * 3 ch, 1 tr in 1st ch, skip approx. ½ cm, 1 dc in next st *, repeat from *-* and finish with 1 sl st in dc from beg of round. |
|
 |
|
Have you finished this pattern?Tag your pictures with #dropspattern #buttercupset or submit them to the #dropsfan gallery. Do you need help with this pattern?You'll find 21 tutorial videos, a Comments/Questions area and more by visiting the pattern on garnstudio.com. © 1982-2026 DROPS Design A/S. We reserve all rights. This document, including all its sub-sections, has copyrights. Read more about what you can do with our patterns at the bottom of each pattern on our site. |
|


With over 40 years in knitting and crochet design, DROPS Design offers one of the most extensive collections of free patterns on the internet - translated to 17 languages. As of today we count 324 catalogues and 12245 patterns translated into English (UK/cm). 12245
We work hard to bring you the best knitting and crochet have to offer, inspiration and advice as well as great quality yarns at incredible prices! Would you like to use our patterns for other than personal use? You can read what you are allowed to do in the Copyright text at the bottom of all our patterns. Happy crafting!
Post a comment to pattern DROPS Baby 21-1
We would love to hear what you have to say about this pattern!
If you want to leave a question, please make sure you select the correct category in the form below, to speed up the answering process. Required fields are marked *.