
Popular categories
Looking for a yarn?


Comments / Questions (10)
![]() Yvonne wrote:
Yvonne wrote:
Wat betekent dit: meerder 1 steek richting links *, brei van *-* 1 keer. Waarvoor staat *?
19.04.2026 - 13:25DROPS Design answered:
Dag Yvonne,
Wat tussen de sterretjes (*) staat herhaal je nog een keer.
19.04.2026 - 16:25
![]() Martina wrote:
Martina wrote:
Prosím, nemá být u ,,TIP2" přídávání z rubové strany , v obou případech- obrace?
06.04.2026 - 18:48DROPS Design answered:
Dobrý den, Marti, Máte naprostou pravdu, z rubové strany pleteme tato nová oka obrace. Děkujeme za upozornění, návod jsme opravili. Hodně zdaru!
07.04.2026 - 10:39
![]() Coby Greijdanus wrote:
Coby Greijdanus wrote:
Klopt de lengte van de mouwen wel? De lengte van de mouwen op de foto lijken lang.. Volgens mij kunnen ze wel 10 centimeter langer. Of vergis ik mij. Bij voorbaat dank!
02.04.2026 - 14:17DROPS Design answered:
Dag Coby,
Ja, de lengte van de mouw klopt. Op een gegeven moment meet je de lengte van de mouw vanaf de scheiding, dus eigenlijk vanaf de oksel.
02.04.2026 - 20:06
![]() Heike Walcher wrote:
Heike Walcher wrote:
Ab dem Punkt "Teilung für Rumpfteil und Ärmel" haben sich meines Erachtens in der Maschenanzahl für Vorder-/Rückenteil sowie Ärmel Fehler eingeschlichen. Es werden jeweils zuviele Maschen angegeben. Bitte rechnen Sie nochmal nach und korrigieren ggfs. die Anleitung. Beste Grüße
14.03.2026 - 10:31DROPS Design answered:
Liebe Frau Walcher, vielleicht können Sie uns teilen, welche Größe Sie stricken, so können wir Ihnen versuchen, Ihnen anders zu erklären, wie Sie die Teilung stricken? Danke im voraus für Ihr Verständnis.
16.03.2026 - 08:31
![]() Coby Greijdanus wrote:
Coby Greijdanus wrote:
Waar moet ik beginnen met de boord van het lijf. Aan de zijkant, of middenachter of middenvoor? Alvast bedankt!
08.03.2026 - 12:38DROPS Design answered:
Dag Coby,
Je breit steeds rondom van midden voor tot midden voor, dus je kunt de boord ook midden voor beginnen, maar dit komt niet zo precies, het kan ook midden achter of in de zijkant.
09.03.2026 - 13:23
![]() Barbara Schrenk wrote:
Barbara Schrenk wrote:
Will "warerline sweater" nachstricken. In Anleitung dürfte jedoch Fehler drin sein, da Passe in Hin und Rückrunden angeben ist, veine zu schließende Naht jedoch nicht angegeben ist! Sollte vielleicht von Anfang an in Runden gestrickt werden? Dann müsste aber Anschlagmaschen Anzahl erhöht werden. Ersuche um Klärung, danke! Lieben Gruß aus Graz/Austria
17.02.2026 - 18:08DROPS Design answered:
Liebe Barbara, unter "Kurzbeschreibung der Arbeit" am Anfang der Anleitung können Sie lesen, wie der Pullover konstruiert ist. Er wird von oben nach unten zuerst in Hin- und Rück-Reihen gestrickt, damit der Halsausschnitt geformt wird - er soll hinten höher als vorne werden, daher werden wie in der Anleitung beschrieben am Ende jeder Reihe neue Maschen angeschlagen. Wenn der Halsausschnitt fertig ist, wird der Pullover in Runden weitergestrickt. Eine Naht, die Sie schließen müssten, ergibt sich dadurch nicht. Viel Spaß beim Stricken!
18.02.2026 - 14:09
![]() Birgitte Bjerggaard wrote:
Birgitte Bjerggaard wrote:
Er der ikke en fejl i bærestykke der står der strikkes frem og tilbage i glatstrik det kan jeg ikke få til at passe det må da være til gardiganen og ikke blusen
17.02.2026 - 11:47DROPS Design answered:
Hei Birgitte. Bærestykket strikkes først frem og tilbake for å forme en hals, deretter strikkes bærestykket ferdig rundt før det deles til bol og ermer. mvh DROPS Design
23.02.2026 - 15:07
![]() Fernanda wrote:
Fernanda wrote:
Estou fazendo o modelo 266-7 , gola redonda e manga martelo. Fiz a primeira parte do decote, agora fala para colocar 18 pontos para as costas e tricotar em redondo , a partir desse ponto ficará um buraco que corresponde ao princípio do tricô . Não consigo ver explicação quando for fazer a gola, na receita diz para pegar os pontos, mas vai haver algumas carreiras feitas a mais que foi feita antes de começar a tricotar em redondo. Sei que está confuso, espero que tenha entendido.
11.02.2026 - 21:03DROPS Design answered:
Bom dia, Não entendemos a sua dúvida,,, As 18 malhas de que fala são para cada manga (não para as costas). Temos 18 malhas para cada manga e 40-42-44-44-46-46-48 malhas para a frente e para as costas. Aumentou-se ao todo 7 vezes para os ombros/as mangas martelo. Deppis destes primeiros aumentos para as mangas martelo, junta as malhas e começa a tricotar em redondo para fazer mais aumentos. Bons tricôs, A equipa DROPS
12.02.2026 - 11:48
![]() Erika wrote:
Erika wrote:
Gefällt mir sehr
04.02.2026 - 17:30
![]() AGNES wrote:
AGNES wrote:
Pourriez-vous faire une mise à jour du patron pour ajouter des rangs raccourcis afin de teminter le dos ?
03.02.2026 - 20:44DROPS Design answered:
Bonjour Agnès, nous ne sommes malheureusement pas en mesure de pouvoir adapter chacun de nos modèles à chaque demande, vous pouvez toutefois vous inspirer d'un modèle similaire avec rangs raccourcis. Merci pour votre compréhension. Bon tricot!
04.02.2026 - 17:19
|
|
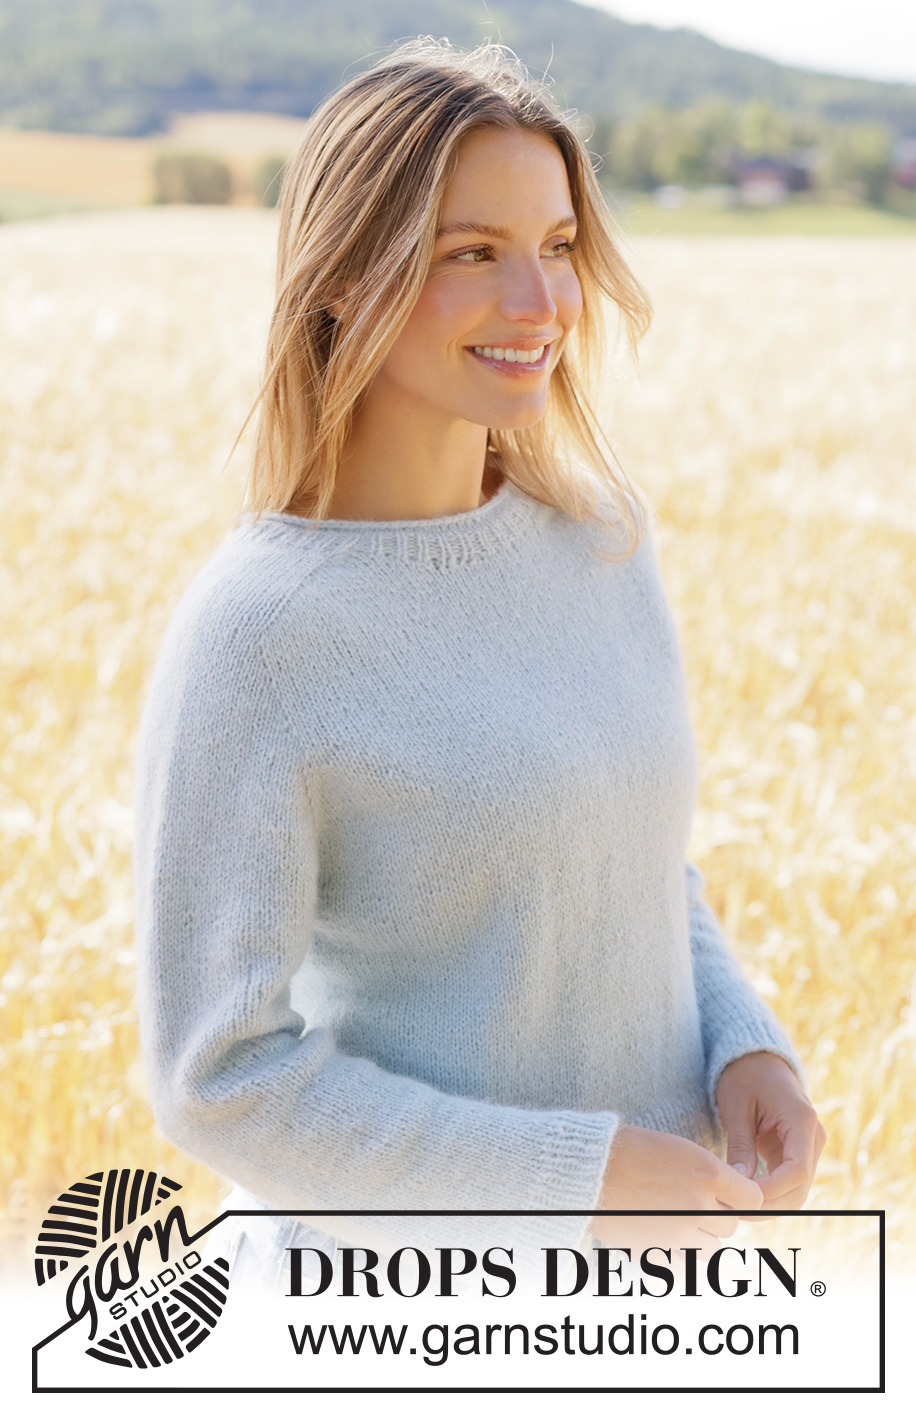
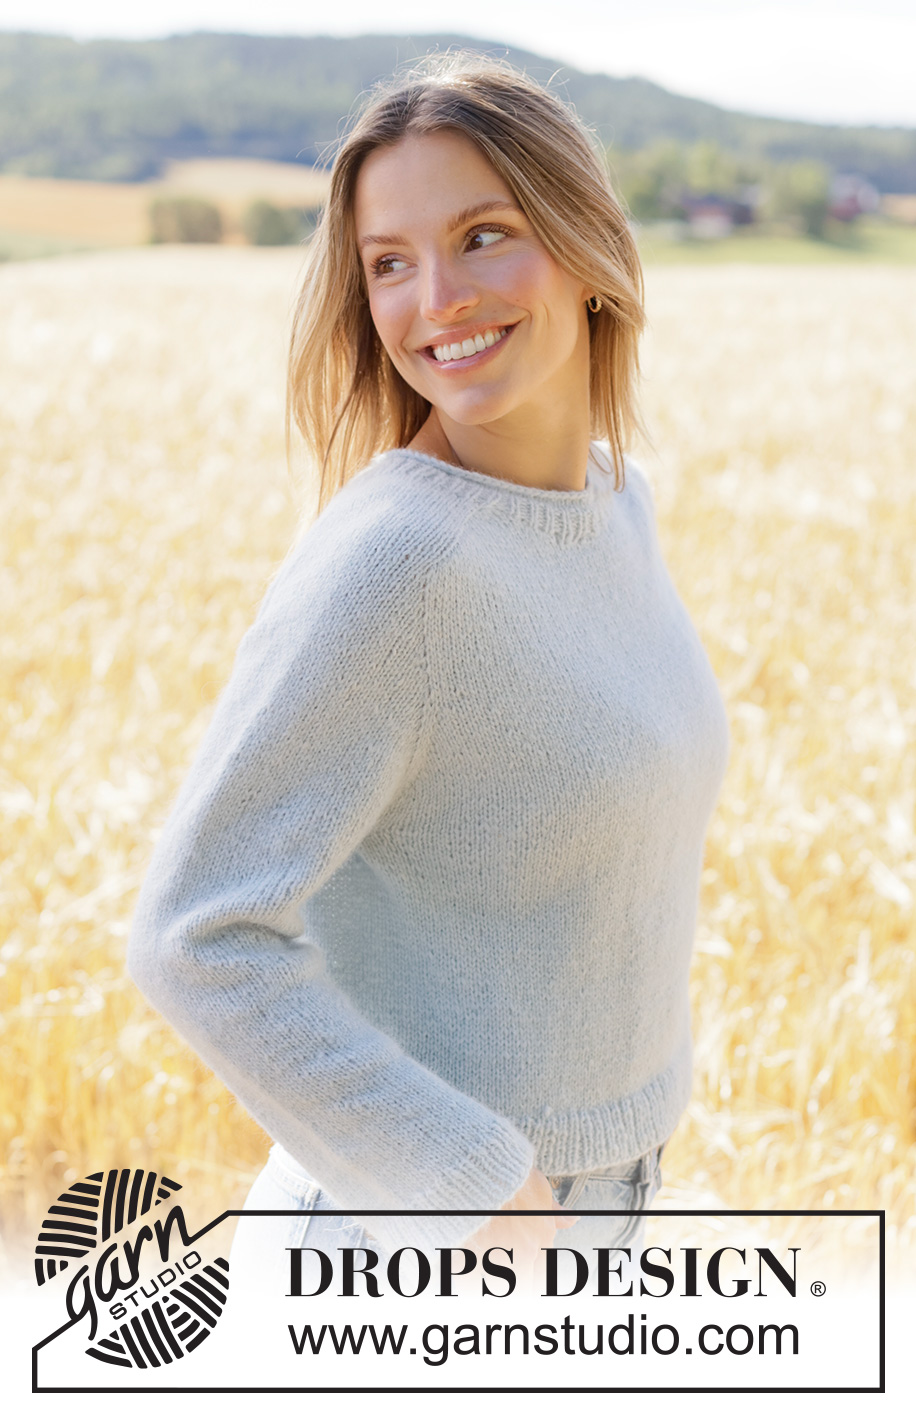
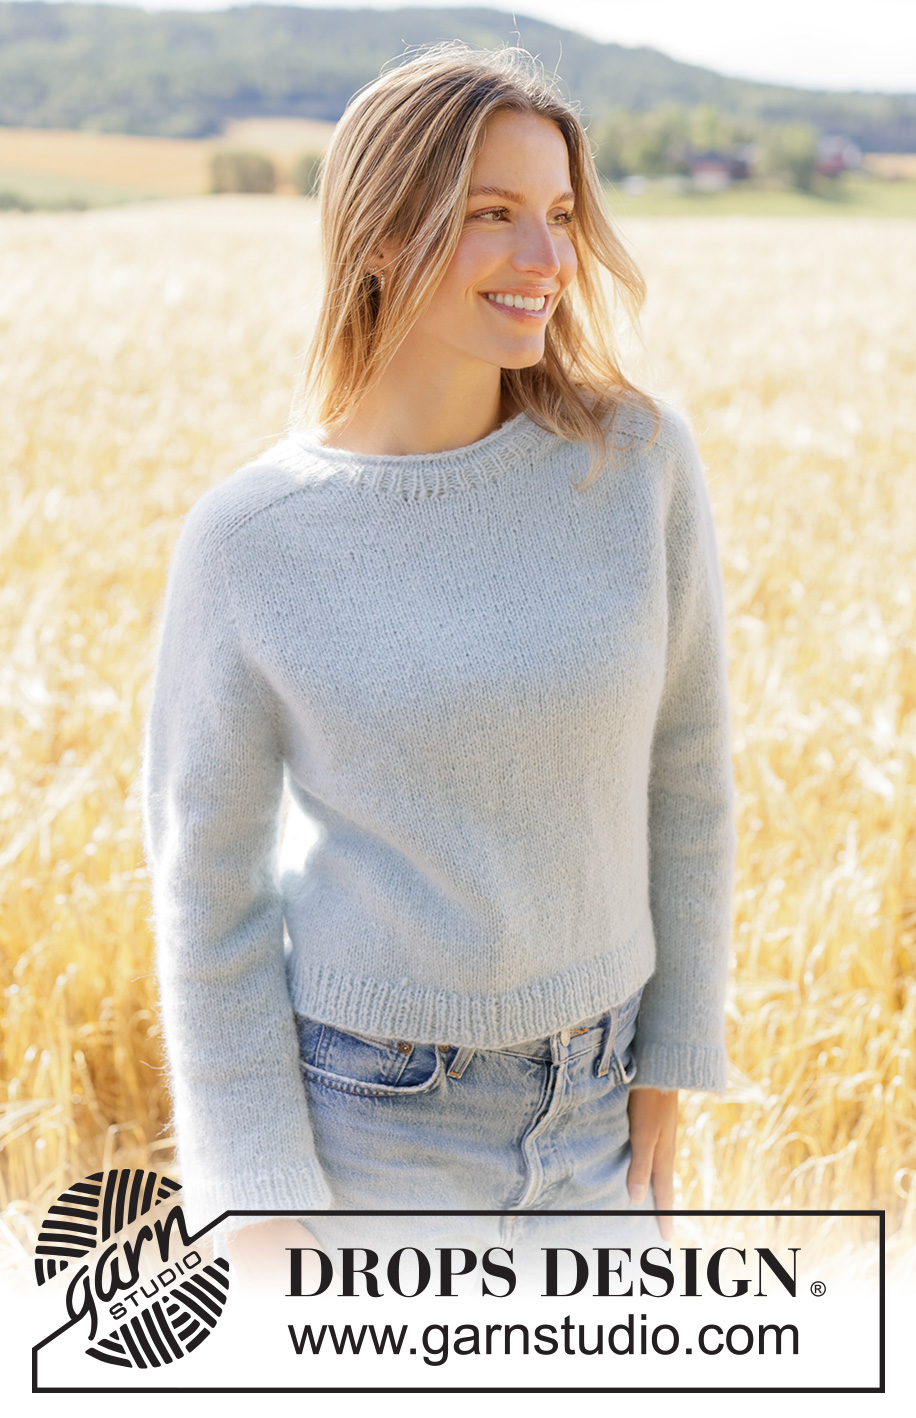
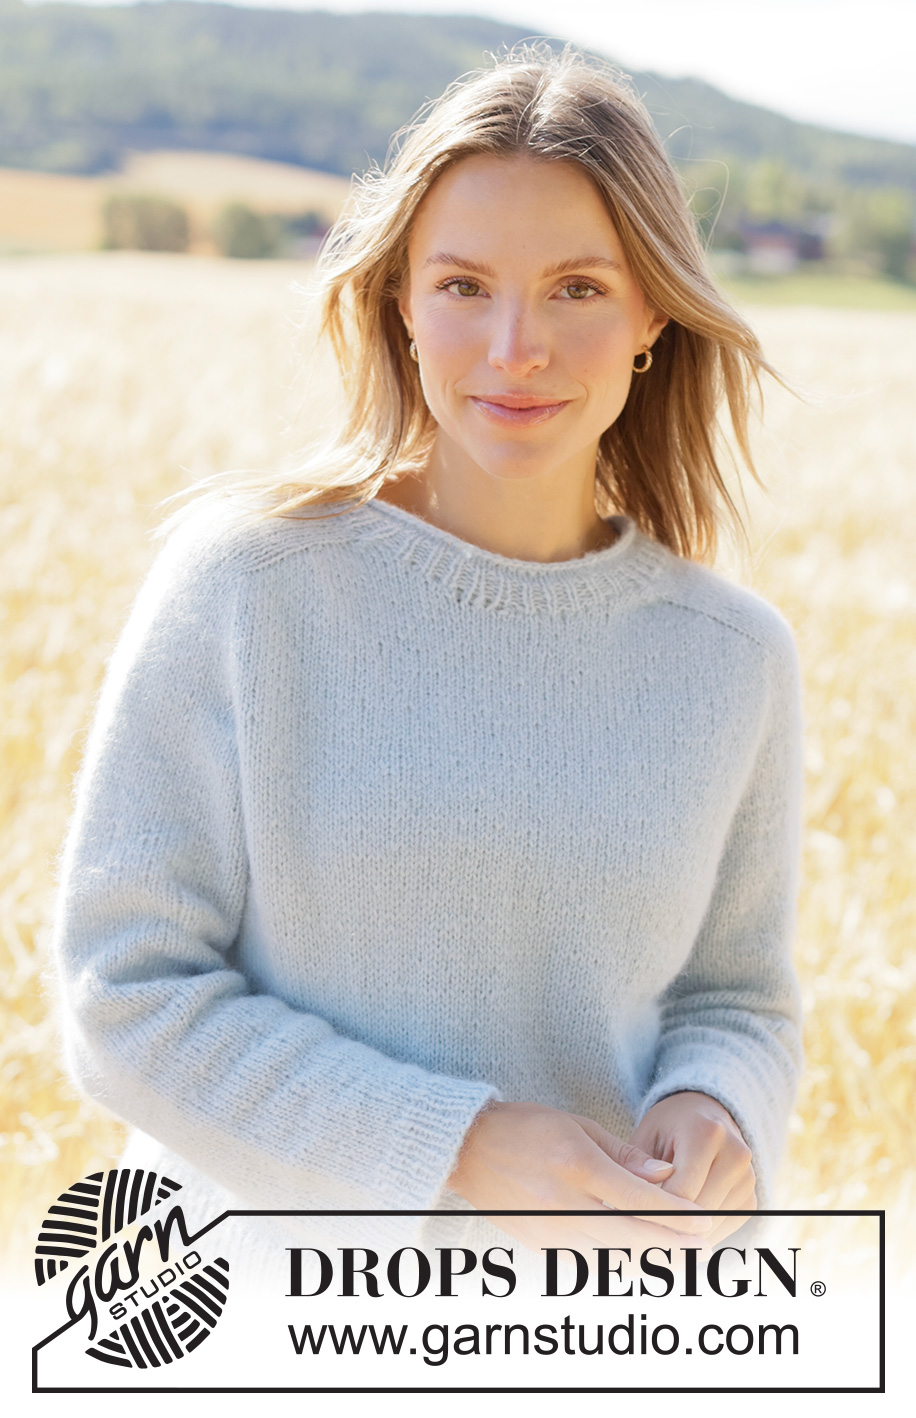
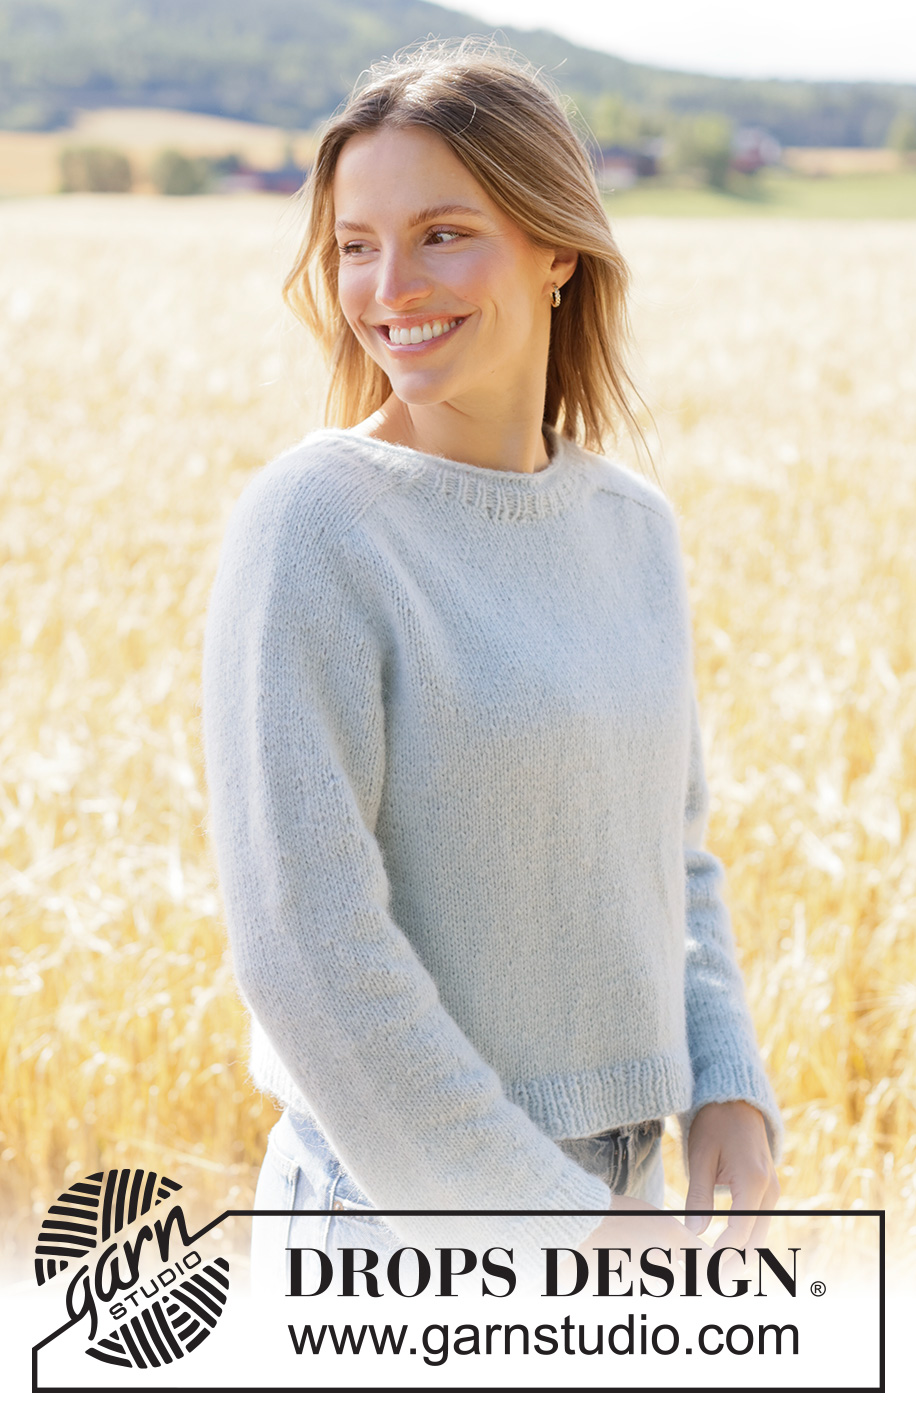
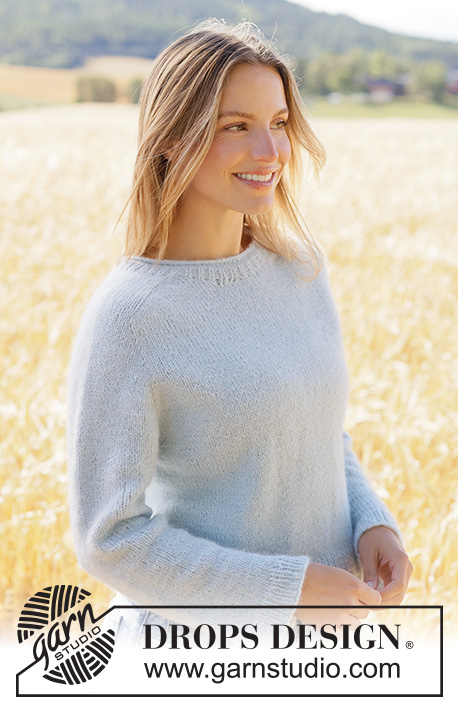
Waterline Sweater#waterlinesweater |
|
 |
 |
Knitted jumper in DROPS Air. The piece is worked top down in stocking stitch, with saddle shoulders and rolled neck-edge. Sizes XS - XXXL.
DROPS 266-7 |
|
|
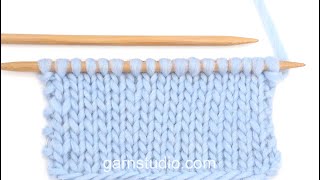
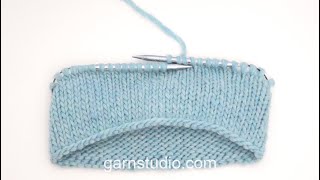
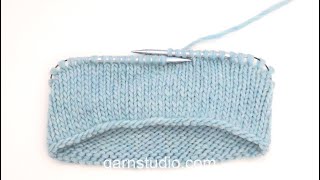
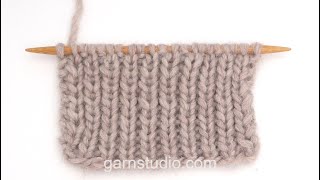
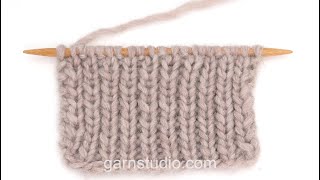
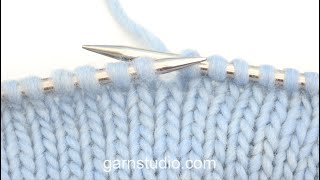
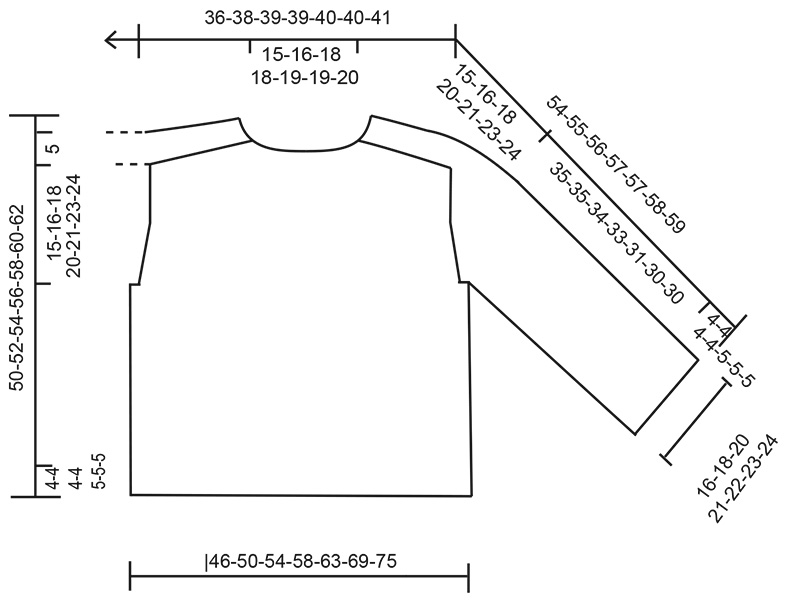
------------------------------------------------------- EXPLANATIONS FOR THE PATTERN: ------------------------------------------------------- INCREASE TIP-1 (from right side): INCREASE 1 STITCH TOWARDS RIGHT BEFORE MARKER: Use the left needle to pick up the strand between 2 stitches from the row below, pick up the strand from the back and knit through the stitch loop that is on the front of the needle. INCREASE 1 STITCH TOWARDS LEFT AFTER MARKER: Use the left needle to pick up the strand between 2 stitches from the row below, pick up the strand from the front and knit through the stitch loop that is on the back of the needle. INCREASE TIP-2 (from wrong side): INCREASE 1 STITCH TOWARDS LEFT BEFORE MARKER: Use the left needle to pick up the strand between 2 stitches from the row below, pick up the strand from the front and purl through the stitch loop that is on the back of the needle. INCREASE 1 STITCH TOWARDS RIGHT AFTER MARKER: Use the left needle to pick up the strand between 2 stitches from the row below, pick up the strand from the back and purl through the stitch loop that is on the front of the needle. SLEEVE TIP: When knitting up stitches under the sleeve, you can get a small hole in the transition between stitches on the body and sleeve. This hole can be closed by picking up the strand between 2 stitches and working this strand twisted together with the first stitch between body and sleeve. DECREASE TIP: Decrease 1 stitch on each side of the marker-thread as follows: Work until there are 3 stitches left before the marker-thread, knit 2 together, knit 2 (marker-thread sits between these 2 stitches), slip 1 stitch knit-wise, knit 1 and pass the slipped stitch over the knitted stitch (2 stitches decreased). ------------------------------------------------------- START THE PIECE HERE: ------------------------------------------------------- JUMPER – SHORT OVERVIEW OF THE PIECE: The pattern uses both long and short needles; start with the length which fits the number of stitches and change when necessary. The yoke is begun back and forth to create the neckline, then finished in the round before being divided for the body and sleeves. The body is continued in the round, while the sleeves wait. The sleeves are worked top down in the round. Stitches are knitted up around the neckline and the neck is worked in the round to finish. YOKE: Cast on 66-68-70-70-72-72-74 stitches with circular needle size 5 mm and DROPS Air. Purl 1 row from the wrong side. Insert 4 markers without working the stitches, as follows. These markers are used when increasing for the saddle shoulders, sleeves and yoke. Marker-1: Count 2 stitches (= front piece), insert marker-1 before the next stitch. Marker-2: Count 18 stitches from marker-1, insert marker-2 before the next stitch (= sleeve). Marker-3: Count 26-28-30-30-32-32-34 stitches from marker-2 (= back piece), insert marker-3 before the next stitch. Marker-4: Count 18 stitches from marker-3, insert marker-4 before the next stitch (= sleeve). There are 2 stitches left after marker-4 (= front piece). Now work stocking stitch back and forth, increasing for the shoulders and casting on for the front neckline as follows. Only increase on the front and back pieces, the stitch count on the sleeves remains the same: ROW 1 (right side) – read INCREASE TIP-1: * Knit to the first/next marker, increase 1 stitch towards the right, move the marker onto the right needle, knit 18 stitches (= sleeve), move the marker onto the right needle, increase 1 stitch towards the left *, work from *-* 1 more time, knit to end of row, cast on 2 stitches = 72-74-76-76-78-78-80 stitches. ROW 2 (wrong side) – read INCREASE TIP-2: * Purl to the first/next marker, increase 1 stitch towards the left, move the marker onto the right needle, purl 18 stitches (= sleeve), move the marker onto the right needle, increase 1 stitch towards the right *, work from *-* 1 more time, purl to end of row, cast on 2 stitches = 78-80-82-82-84-84-86 stitches. ROW 3 (right side): * Knit to the first/next marker, increase 1 stitch towards the right, move the marker onto the right needle, knit 18 stitches (= sleeve), move the marker onto the right needle, increase 1 stitch towards the left *, work from *-* 1 more time, knit to end of row, cast on 2 stitches = 84-86-88-88-90-90-92 stitches. ROW 4 (wrong side): * Purl to the first/next marker, increase 1 stitch towards the left, move the marker onto the right needle, purl 18 stitches (= sleeve), move the marker onto the right needle, increase 1 stitch towards the right *, work from *-* 1 more time, purl to end of row, cast on 2 stitches = 90-92-94-94-96-96-98 stitches. ROW 5 (right side): * Knit to the first/next marker, increase 1 stitch towards the right, move the marker onto the right needle, knit 18 stitches (= sleeve), move the marker onto the right needle, increase 1 stitch towards the left *, work from *-* 1 more time, knit to end of row, cast on 3 stitches = 97-99-101-101-103-103-105 stitches. ROW 6 (wrong side): * Purl to the first/next marker, increase 1 stitch towards the left, move the marker onto the right needle, purl 18 stitches (= sleeve), move the marker onto the right needle, increase 1 stitch towards the right *, work from *-* 1 more time, purl to end of row, cast on 3 stitches = 104-106-108-108-110-110-112 stitches. ROW 7 (right side): * Knit to the first/next marker, increase 1 stitch towards the right, move the marker onto the right needle, knit 18 stitches (= sleeve), move the marker onto the right needle, increase 1 stitch towards the left *, work from *-* 1 more time, knit to end of row and cast on 8-10-12-12-14-14-16 stitches for the neckline = 116-120-124-124-128-128-132 stitches. There are 18 stitches on each sleeve and 40-42-44-44-46-46-48 stitches on the front and back pieces. You have increased a total of 7 times for the saddle shoulders. Continue in the round, increasing for the shoulders as follows. The round starts on the left side of the front piece, after the neckline. INCREASE FOR SADDLE SHOULDERS: Work stocking stitch in the round. Remember INCREASE TIP – 1 and continue increasing on the front and back pieces, the stitch count on the sleeves remains the same (4 increased stitches) as follows: ROUND 1: * Knit to the first/next marker, increase 1 stitch towards the right, move the marker onto the right needle, knit 18 stitches (= sleeve), move the marker onto the right needle, increase 1 stitch towards the left *, work from *-* 1 more time, knit to end of round (4 increased stitches). Work this round 11 times (a total of 18 increases in height for the shoulders) = 160-164-168-168-172-172-176 stitches. Remember to maintain the knitting tension. There are 18 stitches on each sleeve and 62-64-66-66-68-68-70 stitches on the front and back pieces. Now increase for the sleeves. INCREASE FOR SLEEVES: Increase only on the sleeves, the stitch count on the front and back pieces remains the same. Work and increase 4 stitches every 2nd round as follows - remember INCREASE TIP-1: ROUND 1: * Knit to the first/next marker, move the marker onto the right needle, increase 1 stitch towards the left, knit to the next marker, increase 1 stitch towards the right, move the marker onto the right needle, *, work from *-* 1 more time, knit to end of round (= 4 increased stitches). ROUND 2: Knit. Work ROUNDS 1 and 2 a total of 10-10-10-10-8-5-3 times (20-20-20-20-16-10-6 rounds worked) = 200-204-208-208-204-192-188 stitches. There are 38-38-38-38-34-28-24 stitches on each sleeve and 62-64-66-66-68-68-70 stitches on the front and back pieces. Now increase for both the yoke and the sleeves as follows. INCREASE FOR YOKE: Work stocking stitch and increase 8 stitches every 2nd round, increasing before and after each marker as follows: ROUND 1: * Work until there is 1 stitch left before the first marker, increase 1 stitch towards the right, knit 1, move the marker onto the right needle, increase 1 stitch towards the left, knit to the next marker, increase 1 stitch towards the right, move the marker onto the right needle, knit 1, increase 1 stitch towards the left*, work from *-* 1 more time, knit to end of round (8 increased stitches). ROUND 2: Knit. Work ROUNDS 1 and 2 a total of 6-8-10-12-15-20-23 times (12-16-20-24-30-40-46 rounds worked) = 248-268-288-304-324-352-372 stitches. There are 50-54-58-62-64-68-70 stitches on each sleeve and 74-80-86-90-98-108-116 stitches on the front and back pieces. The piece measures approx. 20-21-23-25-26-28-29 cm from outermost on the shoulder (= 5 cm shoulder-depth and 15-16-18-20-21-23-24 cm sleeve-increases). Now divide for the body and sleeves. DIVIDE FOR BODY AND SLEEVES: Knit as far as the sleeve stitches, place the 50-54-58-62-64-68-70 sleeve-stitches on a stitch holder, cast on 4-6-6-8-10-10-12 stitches (mid-under the sleeve), knit 74-80-86-90-98-108-116 stitches for back piece, place the 50-54-58-62-64-68-70 sleeve-stitches on a stitch holder, cast on 4-6-6-8-10-10-12 stitches (mid-under the sleeve), knit the last 74-80-86-90-98-108-116 stitches. The body and sleeves are finished separately. BODY: = 156-172-184-196-216-236-256 stitches. Continue stocking stitch in the round until the piece measures 46-48-50-52-53-55-57 cm from the cast-on edge mid-back. Change to circular needle size 3.5 mm. Work rib (knit 1, purl 1), AT THE SAME TIME increase 28-28-30-34-34-38-42 stitches evenly on round 1 = 184-200-236-230-250-274-298 stitches. When the rib measures 4-4-4-4-5-5-5 cm, cast off. The jumper measures approx. 50-52-54-56-58-60-62 cm from the cast-on edge mid-back. SLEEVES: Place the 50-54-58-62-64-68-70 sleeve-stitches from one stitch holder onto circular needle size 5 mm and knit up 1 stitch in each of the 4-6-6-8-10-10-12 stitches cast on under the sleeve – read SLEEVE TIP = 54-60-64-70-74-78-82 stitches. Insert a marker-thread in the middle of the 4-6-6-8-10-10-12 stitches under the sleeve. The round starts by the marker-thread. Work stocking stitch in the round. AT THE SAME TIME, when the sleeve measures 1 cm from the division, decrease mid-under the sleeve – read DECREASE TIP as follows: Decrease 2 stitches 2 times every 2nd round, then decrease 2 stitches every 4-4-4-3½-3-3-2 cm, 1-3-4-6-7-8-9 times = 48-50-52-54-56-58-60 stitches. Continue working until the sleeve measures 35-35-34-33-31-30-30 cm from the division. Change to double pointed needles size 3.5 mm. Work rib (knit 1, purl 1), AT THE SAME TIME increase 4-6-6-6-6-6-6 stitches evenly on the first round = 52-56-58-60-62-64-66 stitches. When the rib measures 4-4-4-4-5-5-5 cm, cast off with rib. The sleeve measures approx. 39-39-38-37-36-35-35 cm from the division. NECK: Use circular needle size 3.5 mm. Start from the right side, mid-front and knit up 100 to 120 stitches around the neckline: stitch count must be divisible by 2. Work rib in the round (knit 1, purl 1) for 2-2-2-2-2½-2½-2½ cm. Knit 3 rounds (= rolled edge). Cast off with needle size 5 mm. |
|
 |
|
Have you finished this pattern?Tag your pictures with #dropspattern #waterlinesweater or submit them to the #dropsfan gallery. Do you need help with this pattern?You'll find 39 tutorial videos, a Comments/Questions area and more by visiting the pattern on garnstudio.com. © 1982-2026 DROPS Design A/S. We reserve all rights. This document, including all its sub-sections, has copyrights. Read more about what you can do with our patterns at the bottom of each pattern on our site. |
|


With over 40 years in knitting and crochet design, DROPS Design offers one of the most extensive collections of free patterns on the internet - translated to 17 languages. As of today we count 325 catalogues and 12291 patterns translated into English (UK/cm). 12291
We work hard to bring you the best knitting and crochet have to offer, inspiration and advice as well as great quality yarns at incredible prices! Would you like to use our patterns for other than personal use? You can read what you are allowed to do in the Copyright text at the bottom of all our patterns. Happy crafting!
Post a comment to pattern DROPS 266-7
We would love to hear what you have to say about this pattern!
If you want to leave a question, please make sure you select the correct category in the form below, to speed up the answering process. Required fields are marked *.