Comments / Questions (28)
![]() Nelly Gautier wrote:
Nelly Gautier wrote:
Bonjour Comment faire pour avoir les mensurations ? Merci
15.01.2024 - 12:42
![]() Emilia wrote:
Emilia wrote:
Wanneer je mindert voor de armsgaten: hoe werk je dan verder in het patroon? Bv. Die 9 keer iedere andere naald, daar doe je 1 kantsteek, 3 steken in patroon, 1 afhalen, 1 recht, en de vorige eroverheen afhalen, ga je dan met de volgende steek terug verder in het patroon of telt die ene geminderde of die ene rechte mee in het patroon?
16.12.2023 - 23:11DROPS Design answered:
Dag Emilia,
Op het moment dat je mindert voor de armsgaten ben je patroon A.3 aan het breien. Zorg ervoor dat A.3 over de rest van het pand door loopt. Als je bijvoorbeeld 1 steek hebt geminderd dan brei je 1 steek minder in het patroon, maar het patroon mag niet verschuiven.
17.12.2023 - 17:23
![]() Helga Heathcote wrote:
Helga Heathcote wrote:
Day to it pattern, I dont understand the symbol in a1 chart row 3 and 7. Do I have to purl 3 tog. 2 times? Pls explain the symbol. Thank you
23.11.2023 - 03:09DROPS Design answered:
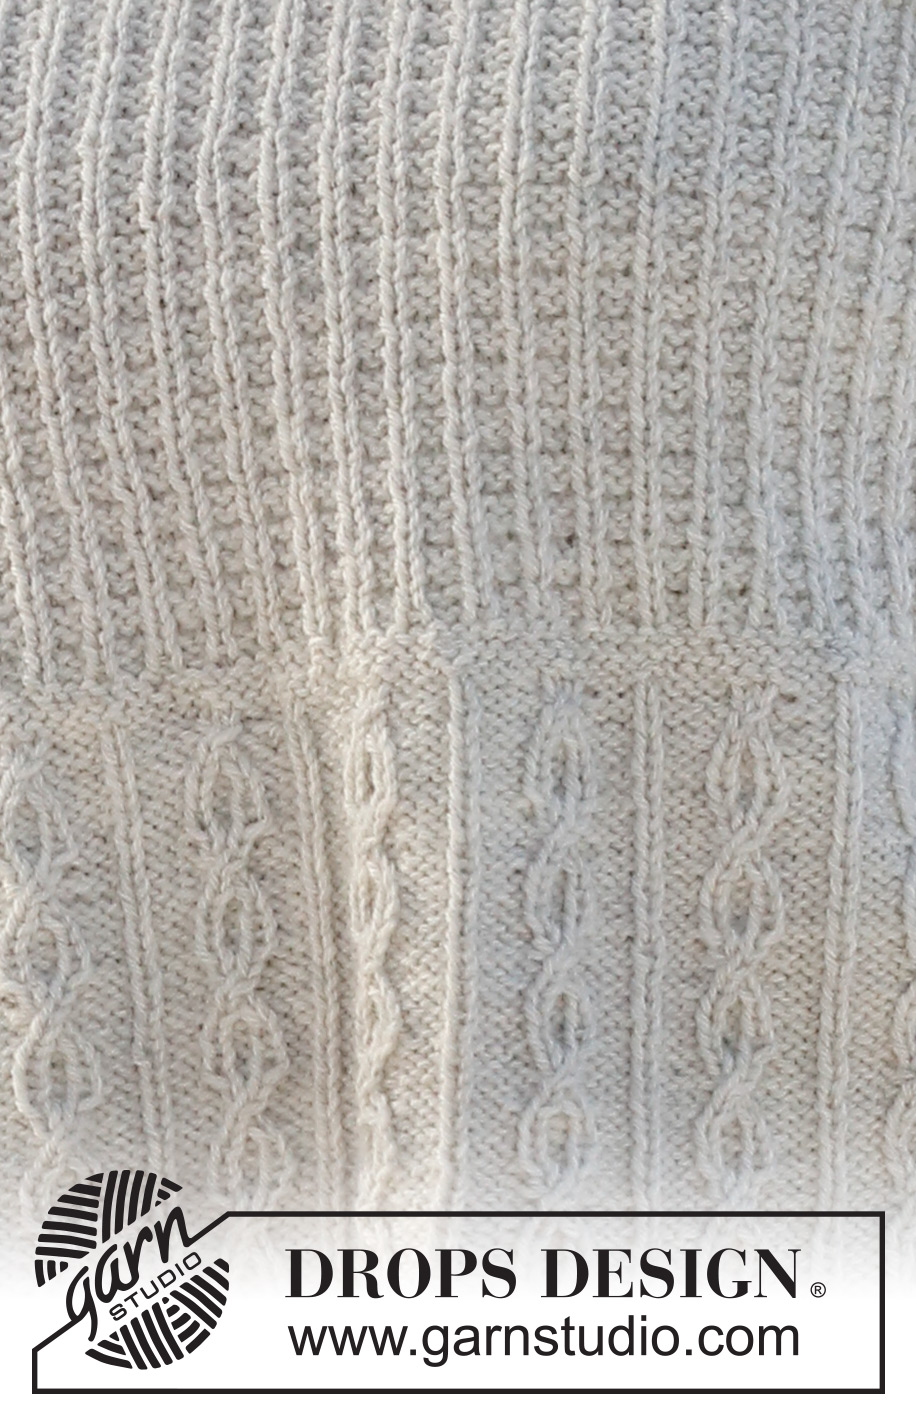
Hi Helga, The diagonal lines in chart A.1 are for the cabling. The first line from top right to bottom left is "place 1 stitch on cable needle held behind the piece, knit 1 as usual, then purl the stitch on the cable needle". The line from bottom right to top left is "place 1 stitch on the cable needle held in front of the piece, purl 1 as usual and knit the stitch on the cable needle". Happy knitting!
23.11.2023 - 07:26
![]() Ine Van Der Meer wrote:
Ine Van Der Meer wrote:
Telpatroon: aangegeven is dat het telpatroon alle naalden aan de goede kant laat zien. Alleen als ik uitga van heen- en teruggaande naalden, krijg ik het juiste patroon. Klopt dit? Telpatroon A1-3e naald (heengaand) Steek op kabelnaald achter het werk, 1 recht en 1 averecht van de kabelnaald . Daarna steek op kabelnaald 1 steek voor het werk, 1 averecht en 1 recht van de kabelnaald (dus precies andersom dan is aangegeven. Idem voor 7e naald - ook andersom dan is aangegeven.
11.11.2023 - 18:13
![]() Ximena wrote:
Ximena wrote:
Tengo una duda. En la espalda, al seguir tejiendo, despues de la disminucion de las sisas, habla de trabajar en punto musgo en algunos puntos y segun el patron en el resto, pero no me queda claro si el punto musgo es sobre los puntos centrales o no.
10.08.2023 - 03:02DROPS Design answered:
Hola Ximena, se trataba de una errata, ya está corregida. Trabajas en punto musgo sobre los 28-28-28-34-34-34 puntos centrales.
20.08.2023 - 18:20
![]() Majbrit Hansen wrote:
Majbrit Hansen wrote:
Hej der står i opskriften at diagrammet viser alle retninger. Skal jeg så strikke vrangpind som masken viser. På forhånd tak for hjælpen. Håber på hurtig svar da jeg skal til at begynde på den . Venlig hilsen Majbrit Sloth Jørgensen
01.05.2023 - 06:07DROPS Design answered:
Hei Majbritt. Man leser et strikkediagram motsatt av slik man normalt leser: Fra høyre mot venstre, nedenfra og opp. Du begynner altså nederst i det høyre hjørnet (fre retten), og jobber deg mot venstre og oppover. Da blir 2.rekke i diagrammet fra vrangen og det strikkes da fra venstre mot høyre. Og så er det viktig å lese diagramikon forklaringen. F.eks blank firkant strikkes rett fra retten, vrang fra vrangen, og en firkant med en vannrett strekk strikkes vrang fra retten, rett fra vrangen . mvh DROPS Design
02.05.2023 - 13:38
![]() Majbrit Hansen wrote:
Majbrit Hansen wrote:
Hej der står i opskriften at diagrammet viser alle retninger, skal jeg så strikke vrangpinden som masken viser . På forhånd tak håber på hurtig svar da jeg skal til igang med den
01.05.2023 - 06:05
![]() Hilary Forsyth wrote:
Hilary Forsyth wrote:
The pattern does not specify whether the tension square should be knitted with 3 or 4 mm needles.
21.11.2022 - 22:43DROPS Design answered:
Dear Mrs Forsyth, tension should be worked with the larger needles, ie the needle size 4 mm. Happy knitting!
22.11.2022 - 10:08
![]() Virág wrote:
Virág wrote:
Nagyon tetszik a minta, megszeretném kötni L méretben. Azonban a mellényt a teljes oldal hosszon egybe szeretném varrni, alul is. Tudnának tanácsot adni nekem, hogy ehhez hogyan kell módosítani a mintán? Előre is köszönöm a segítségüket.
05.11.2022 - 09:26DROPS Design answered:
Kedves Virág! A megértését kérjük, de közel 10 ezer minta érhető el a weboldalon, nem tudunk minden mintát a felhasználók egyedi igényei szerint módosítani. (Rövid segítségül, a kezdő szemszám az eleje + a háta szemei - a szélszemek, a mintáknál minden kört jobbról balra kell olvasni). Sikeres kézimunkázást!
21.03.2023 - 17:57
![]() Virág wrote:
Virág wrote:
Nagyon tetszik a minta, megszeretném kötni L méretben. Azonban a mellényt a teljes oldal hosszon egybe szeretném varrni, alul is. Tudnának tanácsot adni nekem, hogy ehhez hogyan kell módosítani a mintán? Előre is köszönöm a segítségüket.
05.11.2022 - 09:25
Day to Knight#daytoknightslipover |
||||||||||||||||||||||
 |
 |
|||||||||||||||||||||
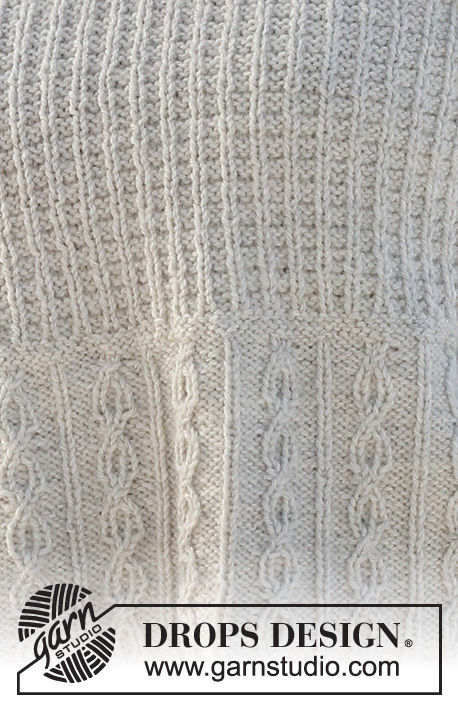
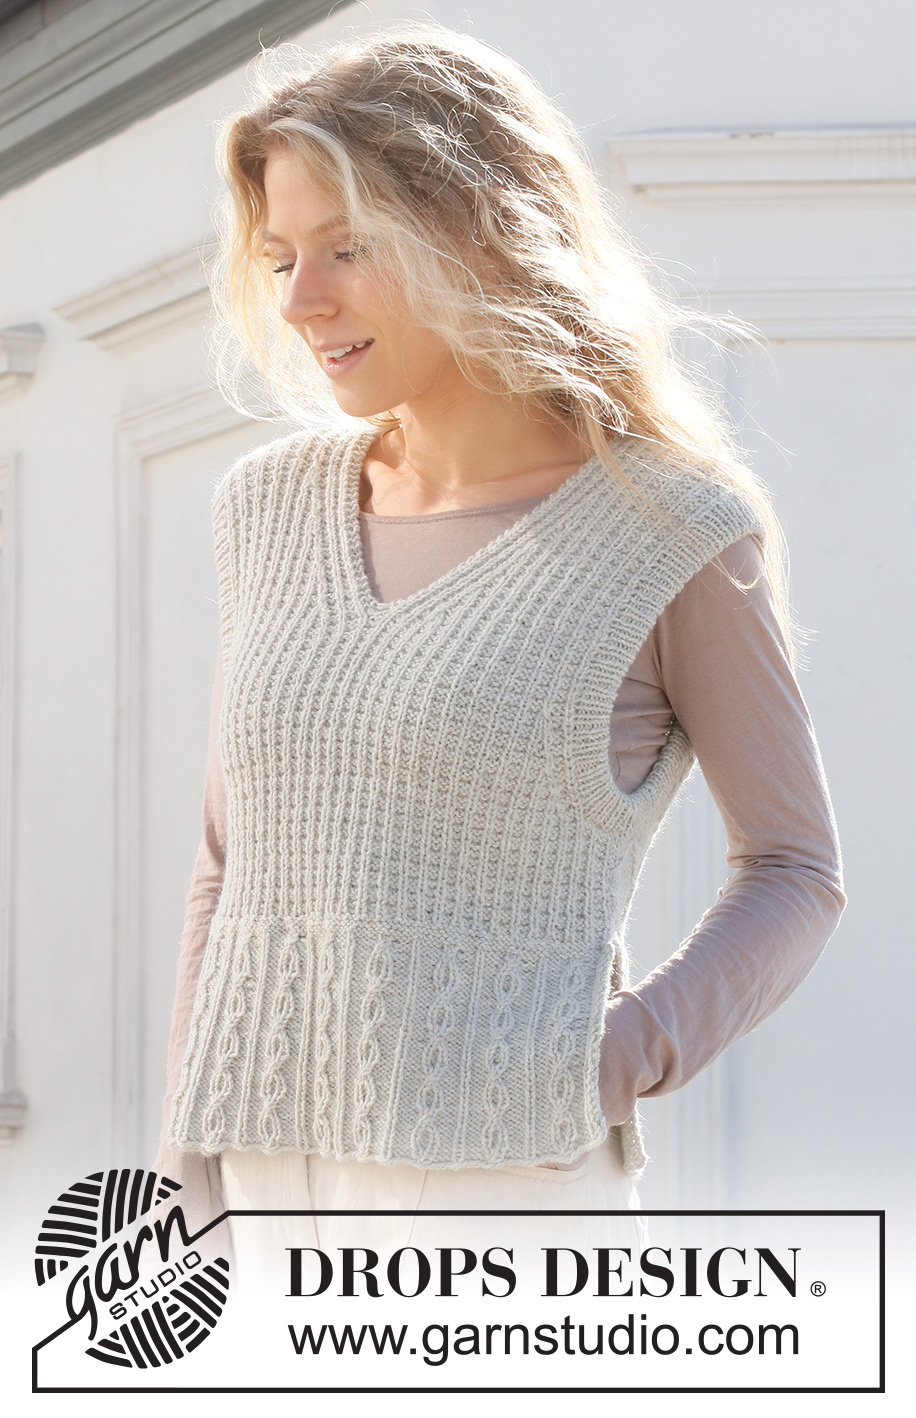
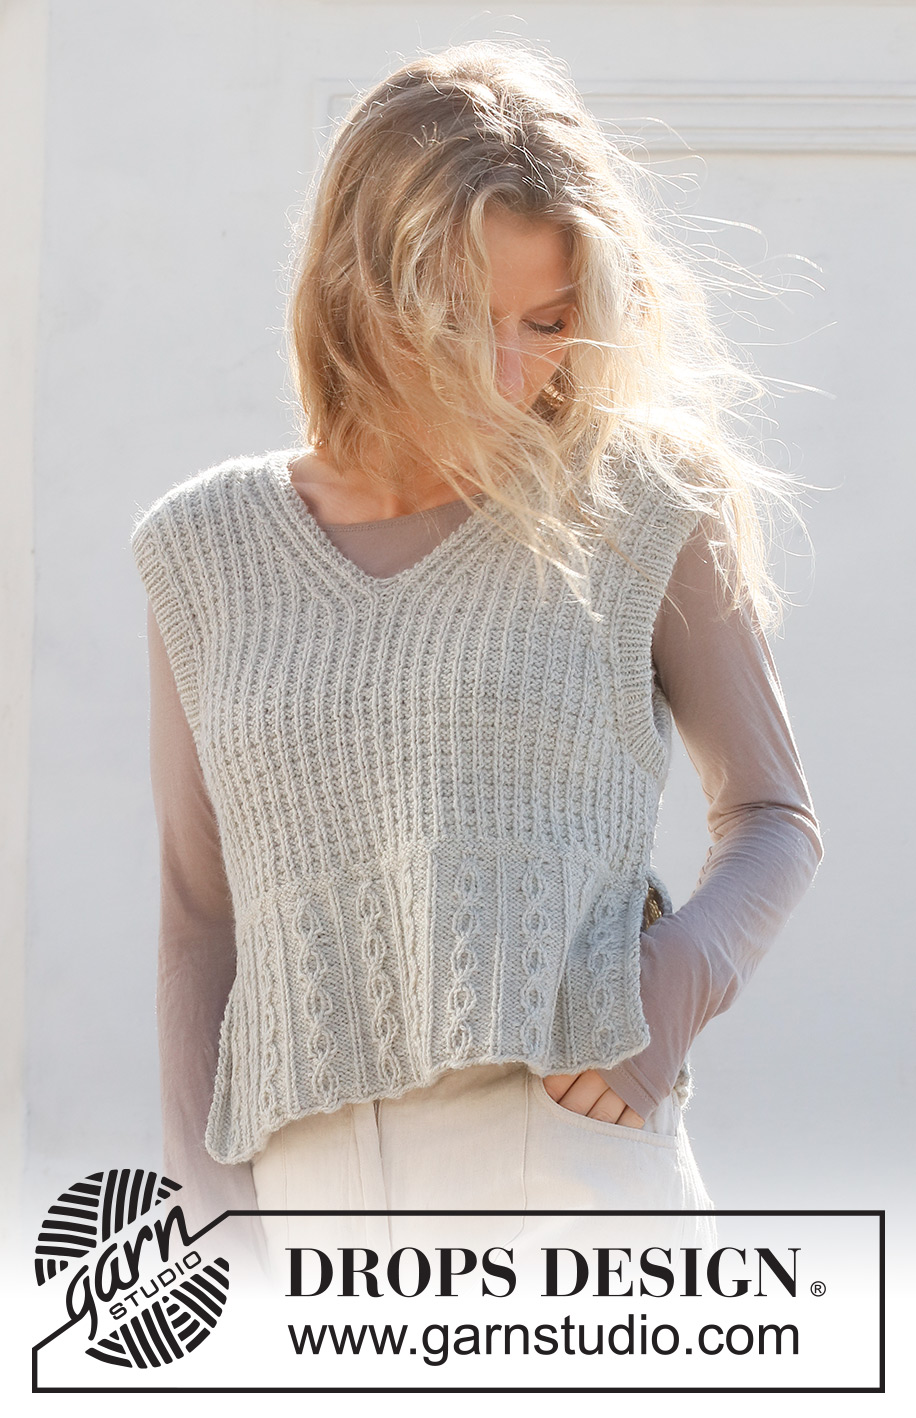
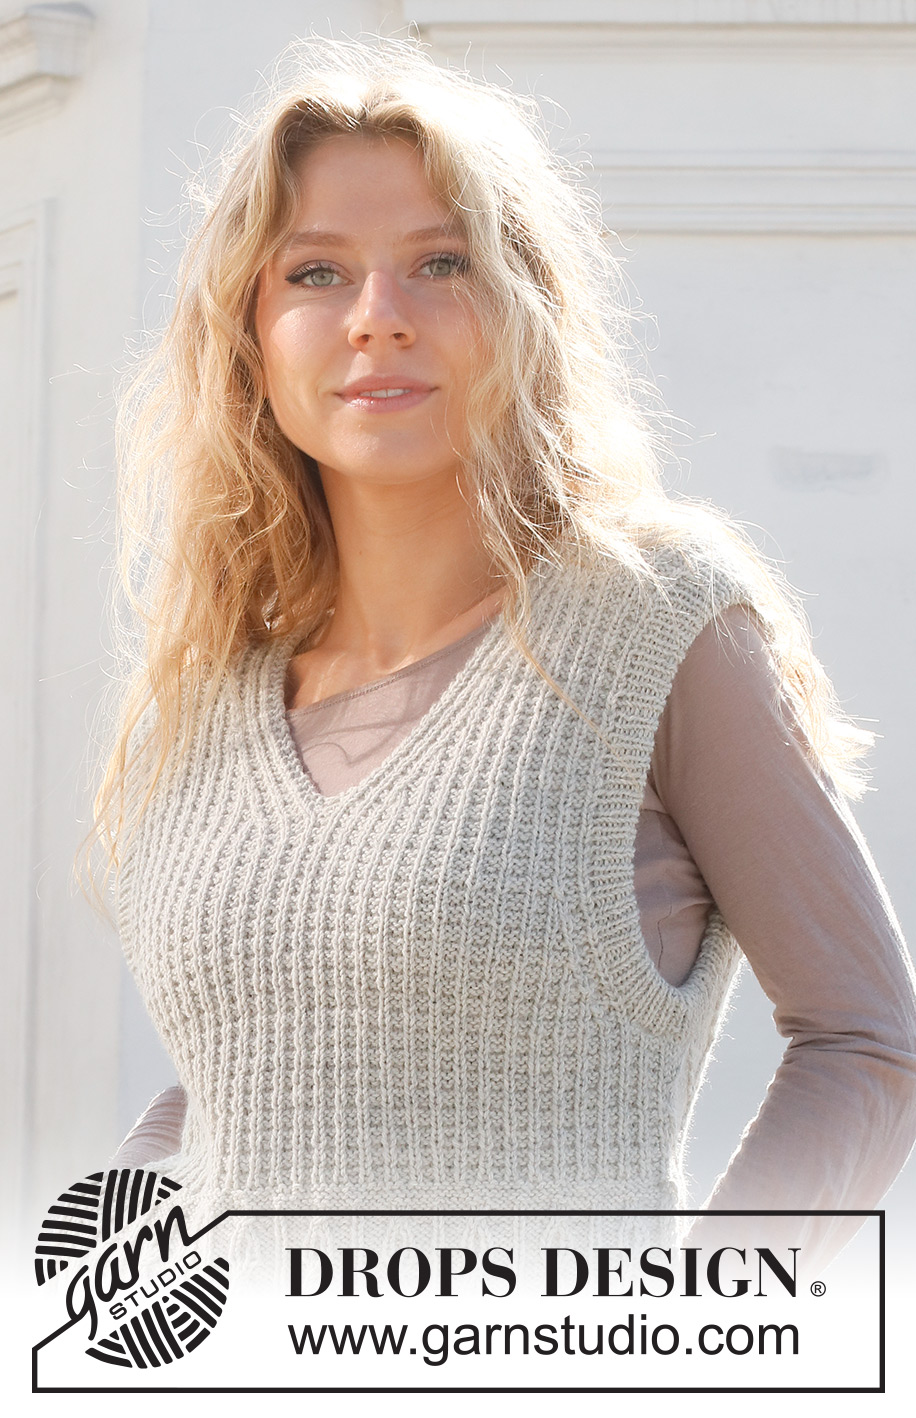
Knitted vest / slipover in DROPS Lima or DROPS Karisma. Piece is knitted with V-neck, cables, textured pattern and double sleeve edges. Size: S - XXXL
DROPS 228-5 |
||||||||||||||||||||||
|
---------------------------------------------------------- EXPLANATION FOR THE PATTERN: ---------------------------------------------------------- GARTER STITCH (back and forth): Knit all rows. 1 ridge vertically = knit 2 rows. PATTERN: See diagrams A.1 to A.3. Diagrams show all rows in pattern seen from the right side. DECREASE TIP (evenly): To calculate how to decrease evenly, use the total number of stitches on row (e.g. 105 stitches) and divide stitches by number of decreases to be done (e.g. 5) = 21. In this example decrease by purling every 20th and 21st stitch together. CAST-OFF TIP: To avoid a tight cast-off edge when casting off, you may use a larger needle. If this still is too tight make 1 yarn over after approx. every 4th stitch while casting off (cast off yarn overs as stitches). ---------------------------------------------------------- START THE PIECE HERE: ---------------------------------------------------------- VEST – SHORT SUMMARY OF PIECE: Work front and back piece back and forth in 2 parts. Then assemble the piece at the shoulder seems and sew the side seams. Finish with sleeve edges in round on a circular needle. BACK PIECE: Cast on 104-115-126-137-148-159 stitches (including 2 edge stitches in each side) on circular needle size 4 mm with DROPS Lima or DROPS Karisma. Purl 1 row from wrong side. Then work pattern as follows: 2 edge stitches in GARTER STITCH – read explanation above, A.1 over the next 99-110-121-132-143-154 stitches (= 9-10-11-12-13-14 repetitions of 11 stitches), work first stitch in A.1, 2 edge stitches in garter stitch. Continue back and forth until A.1 has been worked 5 times vertically. REMEMBER THE KNITTING TENSION. Now work A.2 over every repetition A.1 (continue edge stitches as before). When A.2 has been worked vertically, there are 95-105-115-125-135-145 stitches on row and piece measures approx. 15 cm. Work next row from right side as follows: Purl over all stitches on needle and decrease 1-5-3-7-5-3 stitches evenly– read DECREASE TIP = 94-100-112-118-130-142 stitches. Cast on 1 stitch at the end of row (= 1 edge stitch), turn and knit over all stitch, cast on 1 stitch at the end of row (= 1 edge stitch) = 96-102-114-120-132-144 stitches. Now work pattern as follows: 1 edge stitch in garter stitch, A.3 until 2 stitches remain on needle, work first stitch in A.3, 1 edge stitch in garter stitch. Continue back and forth like this. When piece measures 24-25-26-27-28-29 cm, cast off 6-6-9-9-12-12 stitches for armholes at the beginning of the next 2 rows. On next row from right side, decrease 1 stitch in each side as follows: Work 1 edge stitch in garter stitch, work 3 stitch in pattern as before, slip 1 stitch knitwise, knit 1, pass slipped stitch over stitch worked (= 1 stitch decreased), work until 6 stitches remain, knit 2 together (= 1 stitch decreased), work the last 4 stitches in pattern as before. Decrease like this every other row 5-5-9-9-7-10 times in total, then every 4th row 4-4-3-3-5-5 times (= 9-9-12-12-12-15 stitches decreased for armhole in each side) = 66-72-72-78-84-90 stitches. Continue to work until piece measures 51-53-55-57-59-61 cm. Now work in garter stitch over the middle 28-28-28-34-34-34 stitches, work remaining stitches in pattern as before. When 2 ridges have been worked over these stitch, cast off the middle 22-22-22-28-28-28 stitches on next row from right side = 22-25-25-25-28-31 stitches remain on each shoulder. Now finish each shoulder separately. Work pattern as before, i.e. work 1 edge stitch in garter stitch towards the side, 2 edge stitches in garter stitch towards the neck and A.3 over the remaining stitches. When piece measures 54-56-58-60-62-64 cm, cast off. Work the other shoulder the same way. FRONT PIECE: Cast on and work as on back piece until piece measures 24-25-26-27-28-29 cm. OVERVIEW OF NEXT SECTION: Then decrease for armholes, at the same time divide for right and left front piece and decrease for V-neck. DECREASE FOR ARMHOLES: When piece measures 24-25-26-27-28-29 cm, cast off 6-6-9-9-12-12 stitches for armholes at the beginning of the next 2 rows. On next row from right side, decrease 1 stitch in each side as follows: Work 1 edge stitch in garter stitch, work 3 stitch in pattern as before, slip 1 stitch knitwise, knit 1, pass slipped stitch over stitch worked (= 1 stitch decreased), work until 6 stitches remain, knit 2 together (= 1 stitch decreased), work the last 4 pattern in pattern as before. Decrease like this every other row 5-5-9-9-7-10 times in total, then every 4th row 4-4-3-3-5-5 times (= 9-9-12-12-12-15 stitches decreased for armhole in each side). V-NECK: AT THE SAME TIME when piece measures 34-35-36-37-38-39 cm, work next row from wrong side as follows: Work as before until the 2 middle stitches on needle. Work 2 stitches in each of the middle 2 stitches on needle (i.e. work in front and back loop of stitch) = 2 stitches increased, work the rest of row. Turn and work the next row - work the new stitch in the middle of front piece in garter stitch. Now divide the piece in the middle of these middle stitches and continue each part separately. LEFT FRONT PIECE: Work as follows from right side: Work pattern and decrease for armhole as before until 10 stitches remain before V-neck, knit the next 2 together (= 1 stitch decreased), work pattern as before the rest of row. Decrease like this every other row 4-4-3-7-7-6 times, then every 4th row 8-8-9-8-8-9 times 12-12-12-15-15-15 stitches decreased for V-neck When all decreases for armholes and neck are done, 22-25-25-25-28-31 stitches remain for shoulder. Continue to work until piece measures 54-56-58-60-62-64 cm. Cast off knitting from right side. RIGHT FRONT PIECE: Work as follows from right side: Work pattern as before over the first 8 stitches, slip 1 stitch knitwise, knit 1, pass slipped stitch over stitch worked (= 1 stitch decreased), work pattern the rest of row and decrease for armhole as before. Decrease like this every other row 4-4-3-7-7-6 times, then every 4th row 8-8-9-8-8-9 times in total = 12-12-12-15-15-15 stitches decreased for V-neck When all decreases for armhole and neck are done, there are 22-25-25-25-28-31 stitches on round. Continue to work until piece measures 54-56-58-60-62-64 cm. Cast off knitting from right side. ASSEMBLY: Sew the shoulder seams. Sew side seam from armholes and down to where 1 edge stitch was cast on in each side (= approx. 16 cm vent). DOUBLE SLEEVE EDGES: Begin mid under sleeve in side seam and pick up approx. 136 to 162 stitch around armhole with circular needle size 3 mm and DROPS Lima or DROPS Karisma. Number of stitches must be divisible by 2. Work rib in the round as follows: * Knit 1, purl 1 *, repeat from *-* in the round for 6 cm round. Cast off – read CAST-OFF TIP. Work the same way around the other armhole. Fold the rib around sleeves on inside of garment. Fasten rib to get a double sleeve edge. To avoid a tight sleeve edge that sticks out it is important to keep the seam elastic. |
||||||||||||||||||||||
Diagram explanations |
||||||||||||||||||||||
|
||||||||||||||||||||||
 |
||||||||||||||||||||||
 |
||||||||||||||||||||||
Have you finished this pattern?Tag your pictures with #dropspattern #daytoknightslipover or submit them to the #dropsfan gallery. Do you need help with this pattern?You'll find 25 tutorial videos, a Comments/Questions area and more by visiting the pattern on garnstudio.com. © 1982-2025 DROPS Design A/S. We reserve all rights. This document, including all its sub-sections, has copyrights. Read more about what you can do with our patterns at the bottom of each pattern on our site. |
||||||||||||||||||||||







Post a comment to pattern DROPS 228-5
We would love to hear what you have to say about this pattern!
If you want to leave a question, please make sure you select the correct category in the form below, to speed up the answering process. Required fields are marked *.