
Popular categories
Looking for a yarn?


Comments / Questions (64)
![]() SANDRINE Lequin wrote:
SANDRINE Lequin wrote:
Bonjour doit-on tricoter uniquement avec les aiguilles circulaires n° 3 ou on tricote que les côtes avec les aiguilles n°3 et le jersey avec les aiguilles n°5 merci
11.01.2022 - 12:08DROPS Design answered:
Bonjour Mme Lequin, l'échantillon doit se réaliser avec les aiguilles 5, les aiguilles 3 seront utilisées pour les côtes. Bon tricot!
11.01.2022 - 14:24
![]() Raquel Cuadra Sonera wrote:
Raquel Cuadra Sonera wrote:
Pone que hay una rectificacion del cuello, pero en el patrón pone exactamente lo mismo que en la rectificación. ¿ Está mal la rectificacion o el patrón? gracias!
30.12.2021 - 13:08DROPS Design answered:
Hola Raquel, el patron esta rectificado tambien. Saludos!
30.12.2021 - 13:41
![]() Raquel Cuadra wrote:
Raquel Cuadra wrote:
La muestra de 10cmx 10cm está hecha con agujas de 3mm o con las de 5mm?
30.12.2021 - 10:27DROPS Design answered:
Hola Raquel, la muestra está hecha on agujas de 5mm. Saludos!
30.12.2021 - 13:39
![]() Anna wrote:
Anna wrote:
Hello. Is it possible there is a mistake in the pattern? Before the yoke starts there are 240 stitches (size S) yet in the yoke section only 236 stitches are worked at the beginning (31+56+62+56+31). Should there be 58 stitches on the shoulders rather than 56?
08.12.2021 - 11:06DROPS Design answered:
Dear Anna, you are missing 4 sts, these 4 stitches are the ones where you should insert a marker in, ie: 31 sts, 1 st with a marker, 56 sts, 1 st with a marker, 62 sts, 1 st with a marker, 56 sts, 1 st with a m arker, 31 sts = 31+1+56+1+62+1+56+1+31=240 sts. Happy knitting!
08.12.2021 - 13:34
![]() Sara wrote:
Sara wrote:
When this pattern is available in Finnish?
29.11.2021 - 07:47DROPS Design answered:
Dear Sara,o our translators work around the clock to bring you these patterns as soon as possible, but we cannot tell just exactly when the translation will be available. Please check back in a few days. Happy Stitching!
30.11.2021 - 03:19
![]() CANTELOUVES MURIEL wrote:
CANTELOUVES MURIEL wrote:
Bonjour, Une chose m'échappe, dans les explications du modèle, vous dites qu'il se fait en point mousse alors que sur la photo du modèle, c'est du jersey, le rendu ne sera pas identique ? Bien cordialement, Muriel
18.11.2021 - 16:47DROPS Design answered:
Bonjour Muriel, ce pull se tricote effectivement en jersey et côtes, seules les mailles lisières des épaules seront tricotées au point mousse, pouvez-vous m'indiquer où vous avez trouvé cette information pour qu'elle soit corrigée? Merci d'avance.
18.11.2021 - 17:30
![]() Nina Hamre Bjørklund wrote:
Nina Hamre Bjørklund wrote:
Er det noe feil i beskrivelsen under A1, den svarte prikken? Burde det stått følgende: «stikk høyre pinne inn i masken under neste maske. Ta masken over på venstre pinne og strikk de to maskene sammen»
12.11.2021 - 20:05DROPS Design answered:
Hei Nina. Nei, det skal strikkes slik det er forklart til den sorte prikken. Se gjerne videoen: Hvordan strikke 1 rett i masken fra forrige omgang Det er et annet diagramikon som er brukt, det er kun 1 vrangmasken mellom patentmaskene og forrige rad er vrang, men teknikken der høyre pinne stikkes gjennom masken under neste maske og det strikkes 1 maske rett og deretter slippes maskene det ble strikket i av venstre pinne, er den sammen. mvh DROPS Design
15.11.2021 - 10:14
![]() Kitty wrote:
Kitty wrote:
Når jeg har taget i d fra 120 til 102 og strikker mønstret, får jeg masker i overskud. Er der en fejl i opskriften?
11.11.2021 - 00:09
![]() Haouder Malika wrote:
Haouder Malika wrote:
Bonjour J’ai commencé à tricoter ce modèle quand j’ai compté pour le premier rang après 16 cm du col j’ai trouvé qu’il me reste 2 mailles en plus
24.10.2021 - 23:00
![]() Rikke wrote:
Rikke wrote:
Hej, jeg må melde mig i koret over folk, der ikke forstår A1.. Strik 2 vrang(tjek), normalt ville jeg så her i patent strikke således: slå om, tag maske løst af og næste række ville jeg med en retmaske strikke omslag og den løse maske sammen. Forstår ikke hvad dette betyder: stik højre pind gennem masken under næste maske, strik 1 maske ret og slip masken der blev strikket i af venstre pind ? Kan I forklare på anden måde?
19.10.2021 - 11:56DROPS Design answered:
Hej Rikke, i denne video kan du se hvordan du strikker selve patentmasken: Se her hvordan du strikker patentmasken
21.10.2021 - 09:19
|
||||||||||
Falling Water Sweater#fallingwatersweater |
||||||||||
 |
 |
|||||||||
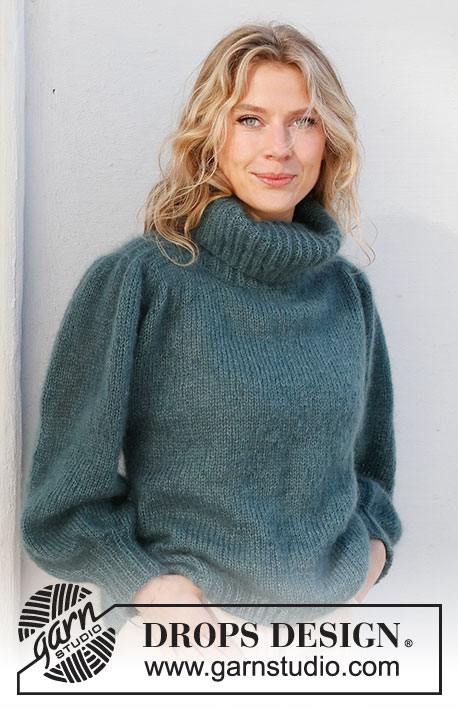
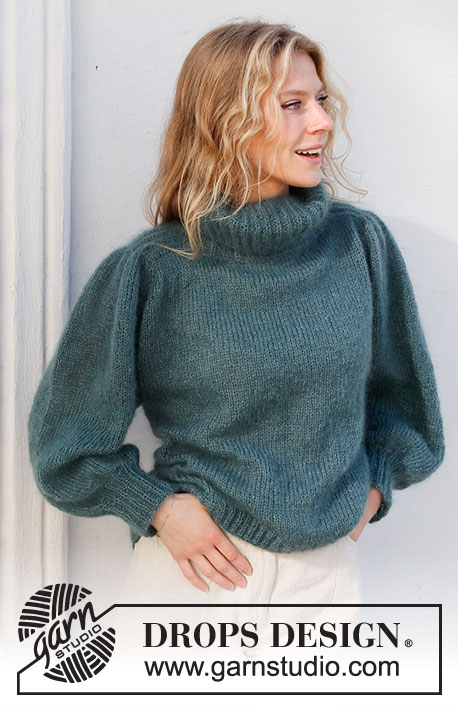
Knitted jumper in 2 strands DROPS Kid-Silk. The piece is worked top down, with saddle shoulders, puffed sleeves and high neck. Sizes S - XXXL.
DROPS 227-39 |
||||||||||
|
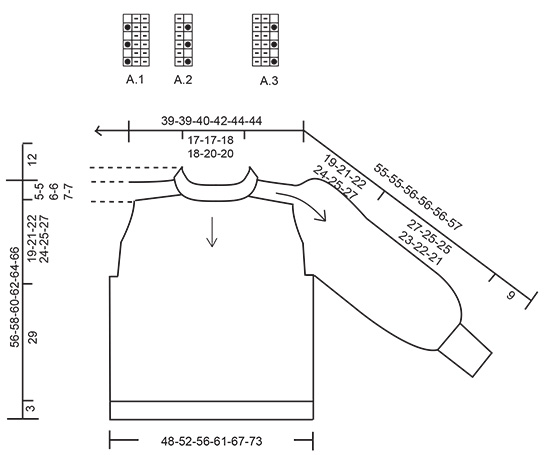
------------------------------------------------------- EXPLANATIONS FOR THE PATTERN: ------------------------------------------------------- RIDGE/GARTER STITCH (worked back and forth): Knit all rows. 1 ridge = knit 2 rows. PATTERN: See diagrams A.1 to A.3. The diagrams show all rows in the pattern from the right side. INCREASE/DECREASE TIP (evenly spaced): To work out how to increase/decrease evenly, count the number of stitches on to be increased/decreased over (e.g. 120 stitches) and divide by the number of increases/decreases to be made (e.g. 18 stitches) = 6.6. In this example, increase by making 1 yarn over after alternately each 6th and 7th stitch (approx.). On the next row work the yarn overs twisted to avoid holes. When decreasing, knit together alternately each 5th and 6th stitch and each 6th and 7th stitch. INCREASE TIP-1: All increases are worked from the right side! Increase 1 stitch by making 1 yarn over. On the next row (wrong side) knit the yarn over twisted to avoid a hole. INCREASE TIP-2: BEFORE MARKER-STITCH: The new stitch twists to the right. Use the left needle to pick up the strand between 2 stitches from the previous round, pick up the back strand and knit in the front loop. AFTER MARKER-STITCH: The new stitch twists to the left. Use the left needle to pick up the strand between 2 stitches from the previous round, pick up the front strand and knit in the back loop. DECREASE TIP (for sleeves): Decrease 1 stitch on either side of the marker thread as follows: Work until there are 3 stitches left before the marker thread, knit 2 together, knit 2 (marker thread sits between these 2 stitches), slip 1 stitch as if to knit, knit 1 and pass the slipped stitch over the knitted stitch (2 stitches decreased). CASTING-OFF TIP: To avoid the cast-off edge being tight you can cast off with a larger size needle. If the edge is still tight, make 1 yarn over after approx. each 4th stitch at the same time as casting off; the yarn overs are cast off as normal stitches. ------------------------------------------------------- START THE PIECE HERE: ------------------------------------------------------- JUMPER – SHORT OVERVIEW OF THE PIECE: The jumper is worked from top down, with 2 strands. The neck is worked in the round with circular needle. The piece is then divided for the front/back pieces and the saddle shoulders. The shoulders are worked separately, back and forth, after which the front and back pieces are worked together again; at the same time stitches are knitted up along the sides of the shoulders. The yoke is continued in the round from mid-back then divided for the body and sleeves. The body is continued in the round. The sleeves are worked in the round with short circular needle/double pointed needles. NECK: Cast on 120-120-132-132-150-150 stitches with circular needle size 5 mm and 2 strands DROPS Kid-Silk. Change to circular needle size 3 mm and work A.1 in the round for 16 cm. Knit 1 round where you decrease 18-18-20-20-22-22 stitches evenly spaced – read INCREASE/DECREASE TIP = 102-102-112-112-128-128 stitches. Now turn the piece so you work in the opposite direction (this means the previous right side will be on the outside when the neck is turned down later). Continue in rib as follows: Work A.3 over the first 18-18-21-21-24-24 stitches, insert a marker here, work A.2 over the next 12-12-14-14-16-16 stitches, work the first stitch in A.2, insert a marker here, work A.1 over the next 36-36-39-39-45-45 stitches, work the first 2 stitches in A.1, insert a marker here, work A.2 over the next 12-12-14-14-16-16 stitches, work the first stitch in A.2, insert a marker here, work A.1 over the next 18-18-18-18-21-21 stitches, work the first 2 stitches in A.1. Continue this pattern for 8 cm (the neck measures 24 cm) – adjust so the next row is an even row in the diagrams. Work the next row as follows: Knit 18-18-21-21-24-24 stitches and decrease 1-0-2-1-3-3 stitches evenly over these stitches (= half back piece), work pattern as before over the next 13-13-15-15-17-17 stitches (= shoulder), knit 38-38-41-41-47-47 stitches and decrease 4-2-3-1-5-5 evenly over these stitches (= front piece), work pattern as before over the next 13-13-15-15-17-17 stitches (= shoulder), knit 20-20-20-20-23-23 and decrease 3-2-1-0-2-2 stitches evenly over these stitches (= half back piece). There are 94-98-106-110-118-118 stitches (34-36-38-40-42-42 stitches on the front/back pieces and 13-13-15-15-17-17 stitches on each shoulder). Cut the strand. Now work the shoulders; leave the other stitches on the needle or place them on a thread. SADDLE SHOULDERS: Starting from the right side, work back and forth over the shoulder-stitches with circular needle size 3 mm and 2 strands DROPS Kid-Silk as follows: Cast on 1 stitch (= edge stitch), work the 13-13-15-15-17-17 stitches in pattern A.2 as before, at the same time as each purl-1 is increased to purl-2 – read INCREASE TIP-1 (= 6-6-7-7-8-8 stitches increased), cast on 1 stitch at the end of the row (= edge stitch) = 21-21-24-24-27-27 stitches. Work 1 row from the wrong side then work the next row from the right side as follows: 1 edge stitch in garter stitch, A.3 until there are 2 stitches left, work the first stitch in A.3 (so the pattern is symmetrical), 1 edge stitch in garter stitch. Continue this pattern back and forth until the piece measures 8-8-9-9-10-10 cm from the purl-increases – adjust so the last row is from the wrong side. Place these stitches on a thread and work the other shoulder in the same way. Now work the front and back pieces and the shoulders onto the same circular needle size 5 mm, at the same time as stitches are knitted up along the sides of the shoulders. Start the round from mid-back: HALF BACK PIECE: Work stocking stitch over the first 17-18-19-20-21-21 stitches, knit up 14-14-14-15-15-15 stitches inside the edge stitch along the side of the shoulder. SHOULDER: Knit 1, * knit 1 in both the front and back loops of the next stitch, make 1 yarn over *, work from *-* a total of 18-18-21-21-24-24 times, knit 1 in both the front and back loops of the next stitch, knit 1 (= 37-37-43-43-49-49 stitches increased and 58-58-67-67-76-76 stitches on the shoulder). FRONT PIECE: Knit up 14-14-14-15-15-15 stitches inside the edge stitch along the other side of the shoulder, knit the next 34-36-38-40-42-42 stitches on the front piece, knit up 14-14-14-15-15-15 stitches inside the edge stitch along the side of the other shoulder. SHOULDER: Knit 1, * knit 1 in both the front and back loops of the next stitch, make 1 yarn over *, work from *-* a total of 18-18-21-21-24-24 times, knit 1 in both the front and back loops of the next stitch, knit 1 (= 37-37-43-43-49-49 stitches increased and 58-58-67-67-76-76 stitches on the shoulder). HALF BACK PIECE: Knit up 14-14-14-15-15-15 stitches inside the edge stitch along the other side of the shoulder, knit the remaining 17-18-19-20-21-21 stitches on the back piece. There are 240-244-266-274-296-296 stitches on the needle. YOKE: Insert a marker thread at the beginning of the round (= mid-back). THE PIECE IS NOW MEASURED FROM HERE! Now insert 4 markers as follows: Marker 1: Work stocking stitch over the first 31-32-33-35-36-36 stitches, insert the marker in the next stitch (= half back piece). Marker 2: Work stocking stitch over the next 56-56-65-65-74-74 stitches, insert the marker in the next stitch (= right sleeve). Marker 3: Work stocking stitch over the next 62-64-66-70-72-72, stitches, insert the marker in the next stitch (= front piece). Marker 4: Work stocking stitch over the next 56-56-65-65-74-74 stitches, insert the marker in the next stitch (= left sleeve). Work stocking stitch over the last 31-32-33-35-36-36 stitches (= half back piece). Allow the 4 markers to follow your work onwards; they are used when increasing. Continue with stocking stitch in the round. AT THE SAME TIME, on the next round the increase for the sleeves and yoke will start. The increase are done at the same time, but in size L, XL, XXL and XXXL the increases continue on the yoke after the increases for the sleeves are finished. Increase as explained below. On the first round increase 4 stitches for the sleeves and 4 stitches for the yoke. Increase 1 stitch on each side of the 4 markers – read INCREASE TIP-2 ( = 8 increased on the round). SLEEVE INCREASES: Increase AFTER markers 1 and 3 and BEFORE markers 2 and 4. Increase like this every 2nd round a total of 7-9-6-9-6-8 times = 72-76-79-85-88-92 stitches on the sleeves (including the marker-stitches on each side) YOKE INCREASES: Increase BEFORE markers 1 and 3 and AFTER markers 2 and 4. Increase like this every 2nd round a total of 7-9-11-12-16-21 times = 76-82-88-94-104-114 stitches on the front and 76-82-88-94-104-114 on the back piece. When all the increases are finished there are 296-316-334-358-384-412 stitches. Continue with stocking stitch until the piece measures 19-21-22-24-25-27 cm from the marker thread after the neck. Now divide for the body and sleeves as follows: Work the first 38-41-44-47-52-57 stitches (= half back piece), place the next 72-76-79-85-88-92 stitches on a thread for the sleeve, cast on 6-6-8-10-10-10 stitches (= in side under sleeve), work the next 76-82-88-94-104-114 stitches (= front piece), place the next 72-76-79-85-88-92 stitches on a thread for the sleeve, cast on 6-6-8-10-10-10 stitches (= in side under sleeve), work the last 38-41-44-47-52-57 stitches (= half back piece). The body and sleeves are finished separately. THE PIECE IS NOW MEASURED FROM HERE. BODY: = 164-176-192-208-228-248 stitches. Continue with stocking stitch in the round for 29 cm. Try the jumper on and work to desired length (3 cm left to finished length). Increase 37-40-42-47-51-55 stitches evenly spaced = 201-216-234-255-279-303 stitches. Change to circular needle size 3 mm. Work A.1 for 3 cm. Cast off with knit over Fisherman’s rib and purl over purl – read CASTING-OFF TIP. The jumper measures approx. 56-58-60-62-64-66 cm from the shoulder down. SLEEVES: Place the 72-76-79-85-88-92 stitches from the thread on the one side of the piece on double pointed needles/short circular needle size 5 mm and knit up 1 stitch in each of the 6-6-8-10-10-10 stitches cast on under the sleeve = 78-82-87-95-98-102 stitches. Insert a marker thread in the middle of the new stitches under the sleeve. Start at the marker thread and work stocking stitch in the round for 4 cm. Now decrease 1 stitch on either side of the marker thread – read DECREASE TIP. The decreases in sizes S and M are finished (= a total of 1-1 time). In sizes L, XL, XXL and XXXL repeat the decrease every 8-2½-2-2 cm 1-3-4-4 more time(s) (= a total of 2-4-5-5 times). When all decreases are worked, there are 76-80-83-87-88-92 stitches on the round. Continue working until the sleeve measures 27-25-25-23-22-21 cm from the division. Try the jumper on and work to desired length (9 cm left to finished length). Knit 1 round where you decrease 34-38-38-42-40-41 stitches evenly spaced = 42-42-45-45-48-51 stitches. Change to double pointed needles size 3 mm and work A.1 for 9 cm. Cast off with knit over Fisherman’s rib and purl over purl – remember CASTING-OFF TIP. The sleeve measures approx. 36-34-34-32-31-30 cm from the division. Work the other sleeve in the same way. |
||||||||||
Diagram explanations |
||||||||||
|
||||||||||
|
||||||||||
Have you finished this pattern?Tag your pictures with #dropspattern #fallingwatersweater or submit them to the #dropsfan gallery. Do you need help with this pattern?You'll find 32 tutorial videos, a Comments/Questions area and more by visiting the pattern on garnstudio.com. © 1982-2025 DROPS Design A/S. We reserve all rights. This document, including all its sub-sections, has copyrights. Read more about what you can do with our patterns at the bottom of each pattern on our site. |
||||||||||


With over 40 years in knitting and crochet design, DROPS Design offers one of the most extensive collections of free patterns on the internet - translated to 17 languages. As of today we count 314 catalogues and 11821 patterns translated into English (UK/cm). 11821
We work hard to bring you the best knitting and crochet have to offer, inspiration and advice as well as great quality yarns at incredible prices! Would you like to use our patterns for other than personal use? You can read what you are allowed to do in the Copyright text at the bottom of all our patterns. Happy crafting!
Post a comment to pattern DROPS 227-39
We would love to hear what you have to say about this pattern!
If you want to leave a question, please make sure you select the correct category in the form below, to speed up the answering process. Required fields are marked *.