
Popularne kategorie
Szukasz włóczki?


Komentarze / Pytania (37)
![]() Jacqueline Moore napisała::
Jacqueline Moore napisała::
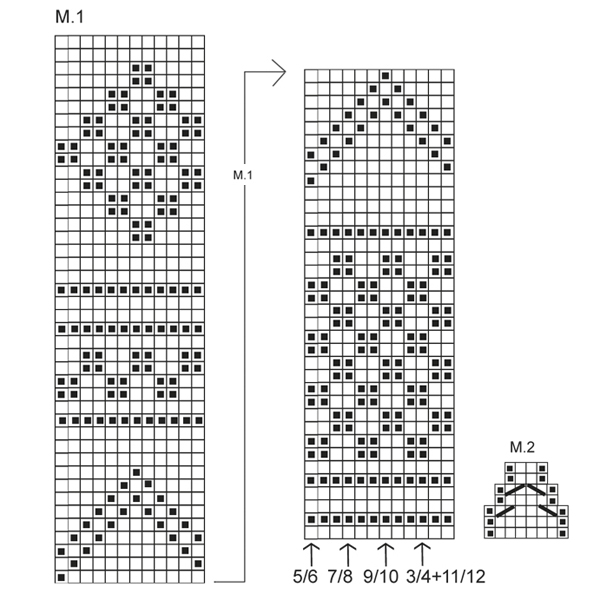
I love this pattern but am having difficulty understanding the chart. I am knitting size 7/8 and about to start chart M.1 with 156 stitches. I will start at the 9th stitch on first round. Does that mean I knit 4 stitches then purl 152 to the end of the round? Or do I knit the 1st round, purl the 2nd, knit the 3rd and 4th, purl the 5th, knit the 6th and then start round 7 on the 9th stitch? Thank you.
01.12.2019 - 18:10Odpowiedź DROPS Design :
Dear Mrs Moore, in size 7/8, start working with 9th st in diagram and work the last 4 sts; then repeat M.1 (= 12 sts) a total of 12 times = over the next 144 sts; and finish with the first 8 stitches in diagram = 4+144+8= 156 sts. Happy knitting!
02.12.2019 - 10:21
![]() Ekaterina napisała::
Ekaterina napisała::
Dear Drops! I'm working Back piece row 28 on M1 with the arrow. How should I continue if I have 54 sts in order to have the pattern mid front?Should I work 1K, 11P on row 28, then on row 29 -1 P, 9 K, 1P, 1K?
08.11.2019 - 17:01Odpowiedź DROPS Design :
Dear Ektaterina, if you are working with a different tension or another size, you would have to adjust the pattern how you rather would like it to be and center the part of the pattern you'd like (check the example in the pattern to help you). Happy knitting!
11.11.2019 - 09:43
![]() Ekaterina napisała::
Ekaterina napisała::
Much obliged for your kind help!
07.10.2019 - 16:42
![]() Ekaterina napisała::
Ekaterina napisała::
"= start with 9th stitch in size 7/8, then work diagram to the end, then repeat diagram from 1st stitch" Dear Drops! Do you mean I have to repeat the right part of M.1 twice?
07.10.2019 - 15:36Odpowiedź DROPS Design :
Dear Ekaterina, in size 7/8 you first work the 4 last stitches in diagram (from the stitch with the arrow to the left/end of diagram), then repeat the 12 sts of diagram from 1st stitch (from the right towards the left) and finish round with the first 8 stitches in diagram (so that the pattern is nicely centered) : 4sts+ 12stsx12 repeats+ 8sts= 156 sts. Work then the first part of M.1 (with the arrows at the bottom), and when you have worked to the last row of this diagram, work now the 2nd part of diagram (the diagram on the left side). Happy knitting!
07.10.2019 - 15:55
![]() Ekaterina napisała::
Ekaterina napisała::
Dear Drops! Could you help me with the following: M.1 -Should I begin it with the smaller part for 36 rows and then continue with the bigger one for 42 rows? What does the big arrow from M.1to M.1indicate? And one more question: I knit for size 7/8 - should I consider the 9th stitch as the first one for this size?
07.10.2019 - 14:24Odpowiedź DROPS Design :
Dear Ekaterina, M.1 has been splitted into 2 parts to make it more visible, start working M.1 from the bottom part with the arrows (= start with 9th stitch in size 7/8, then work diagram to the end, then repeat diagram from 1st stitch), and when this part has been worked in height, continue with 2nd part of diagram (the one on the left side). Happy knitting!
07.10.2019 - 15:00
![]() Jocelyne Theberge napisała::
Jocelyne Theberge napisała::
Dois-je tricoter les 288 mailles en côtes 2/2 avant de réaliser le M2 ?
08.09.2019 - 09:40Odpowiedź DROPS Design :
Bonjour Mme Theberge, tricotez M.2 sur toutes les 288 mailles pour former le petit volant du bas du débardeur; quand M.2 est terminé, il reste 144 mailles, continuez en tricotant les mailles comme elles se présentent (1 m env, 2 m end, 1 m env), répétez de (à) jusqu'à ce que l'ouvrage mesure 5 cm. Bon tricot!
09.09.2019 - 08:40Marinkovic napisała::
Hi! I need help understanding M2 diagram. Since the number of stitches decreases, what should I do with those that are not needed (e.g. 3rd row is knitted with 8 st per repetition and the 4th row has 6 st per rep)? Do I cast off, knit 2 together or something like that? Jelena
19.10.2018 - 16:39Odpowiedź DROPS Design :
Dear Mrs Marinkovic, decrease as shown in diagram, ie on 3r row in M.2 work: P1, slip 1 as if to K, K1, psso, K3, K2 tog, P1 = 6 sts remain. On row 5 dec again as shown in diagram; P1, slip 1 as if to K, K1, psso, K2 tog, P1 = 4 sts remain. Happy knitting!
22.10.2018 - 07:48
![]() Agnes Holst Kazuhara napisała::
Agnes Holst Kazuhara napisała::
Iflg. opskrift skal der lukkes 2 m af til hals. Mine spørgsmål er: Skal disse 2 masker forblive aflukkede, og evt. hvorfor, eller skal de evt. indgå i de masker, man skal strikke op til halskant, - dvs. de 80 - 100 m? Jeg vil være meget taknemmelig for jeres forhåbentlige snarlige hjælp. Mvh Agnes
13.05.2018 - 14:14Odpowiedź DROPS Design :
Hei Agnes. Ja de 2 maskene skal felles av - Dette for å lage plass til halskantens om skal strikkes opp senere. God fornøyelse.
15.05.2018 - 15:10Nelly napisała::
Hola tengo una duda en el patrón SmåDROPS 22-4, cuántos puntos d tienen que montar para iniciar para la talla 3/4, porqué dice 288 pero más adelante dice q 144, cuál es el número correcto? Muchas gracias...
23.03.2017 - 21:17Odpowiedź DROPS Design :
Hola Nelly. Está correcto. Para el elástico debes montar 288 pts. El diagrama para trabajar el elástico incluye las disminuciones. Al terminar el elástico quedan 144 pts.
27.03.2017 - 20:29
![]() Manon Tholstrup napisała::
Manon Tholstrup napisała::
Hvordan skal jeg forstå mønstret - i str. 3/4 skal der slås 288 m op på rundpind og når M2/rib er strikket er der 144 m tilbage på rundpind?? Herefter skal der yderligere tages 12 m ind = ialt 132 m på rundpind; dvs. 156 (!) m mindre end slået op (288)?? Mvh
02.04.2015 - 22:49Odpowiedź DROPS Design :
Hej Manon. I og med du strikker M.2 tager du automatisk ind. 1 gentagelse af M.2 er i förste pind 8 m = 36 gentagelser over 288 m. Med indtagningerne ender du i 7. pind med 4 masker per gentagelse = 144 m tilbage
29.04.2015 - 14:52
|
|||||||||||||
Gretchen#gretchenvest |
|||||||||||||
 |
 |
||||||||||||
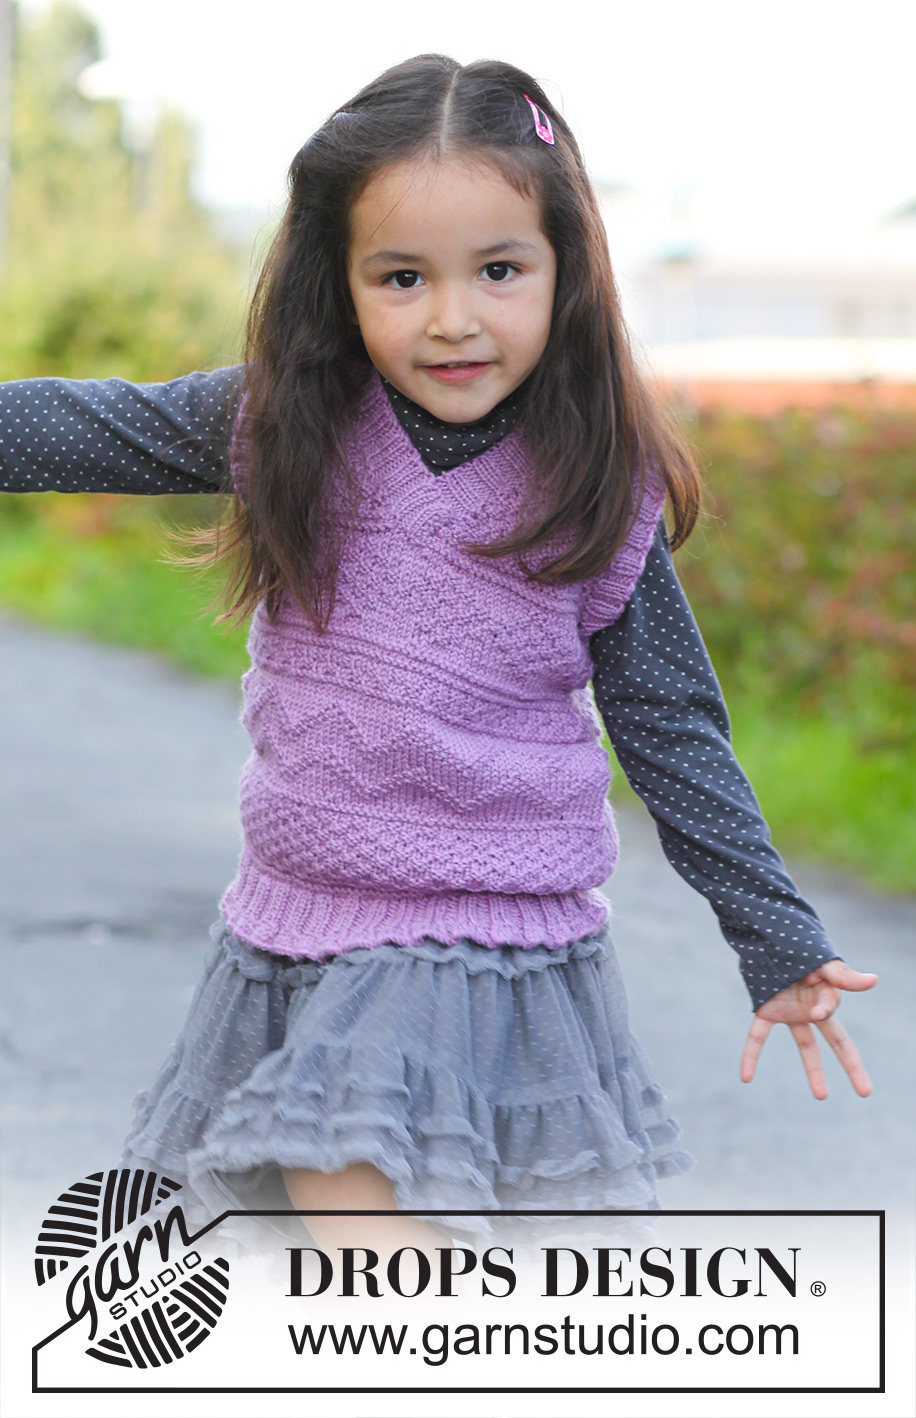
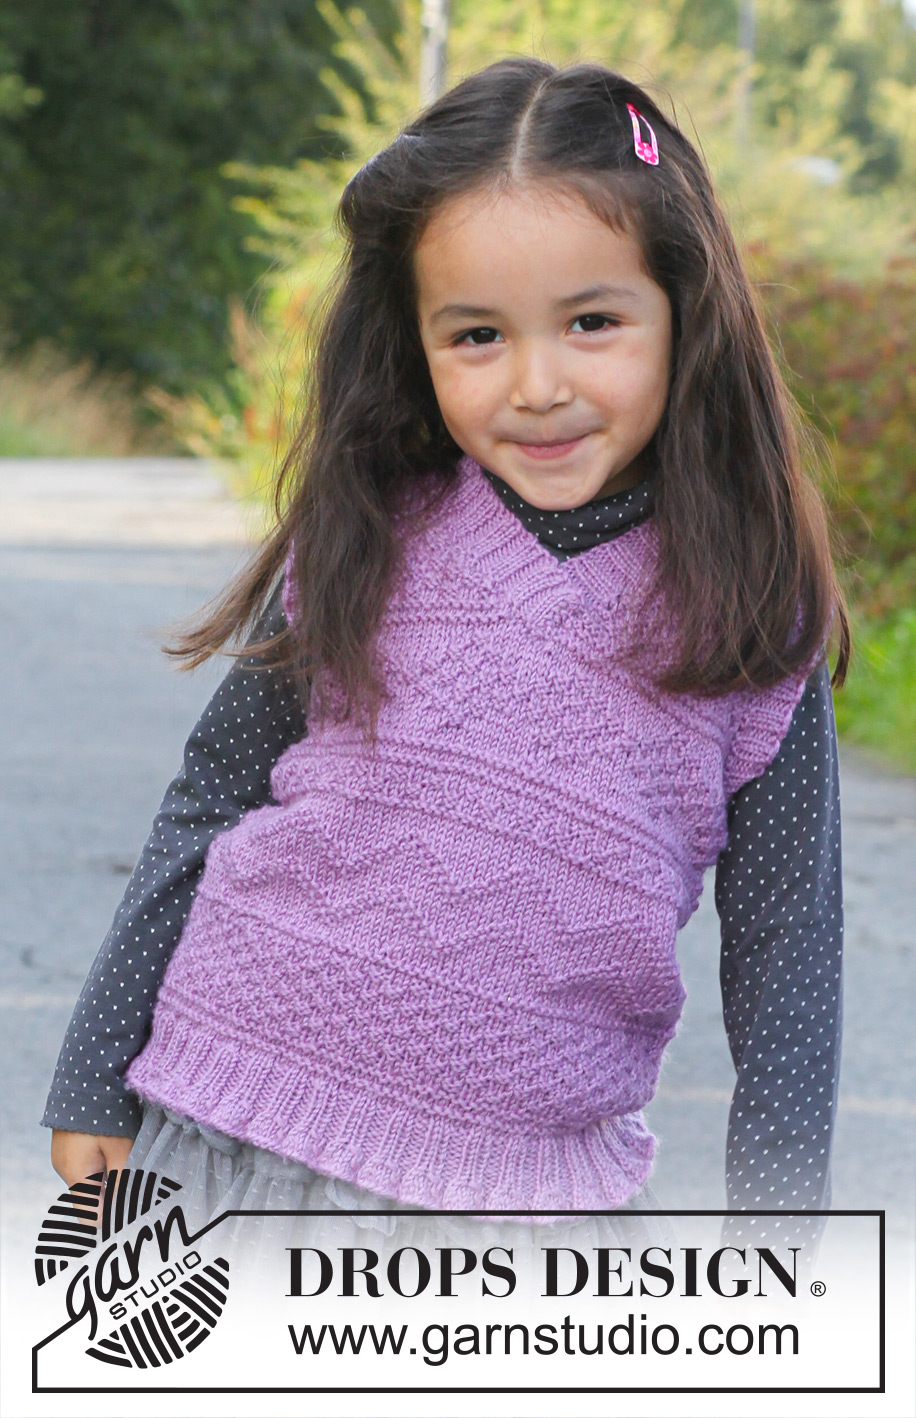
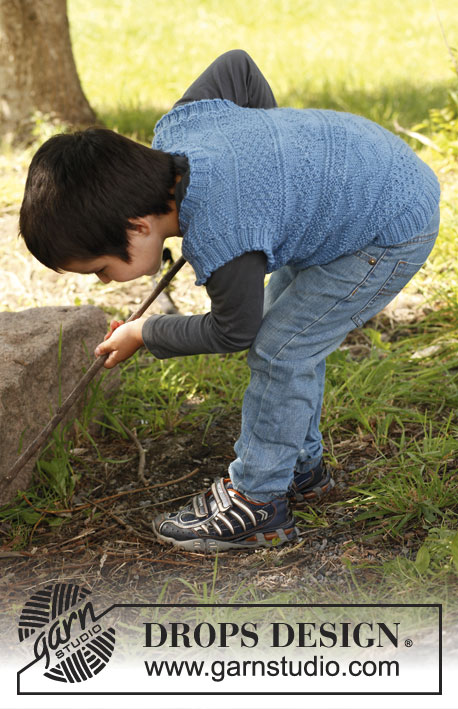
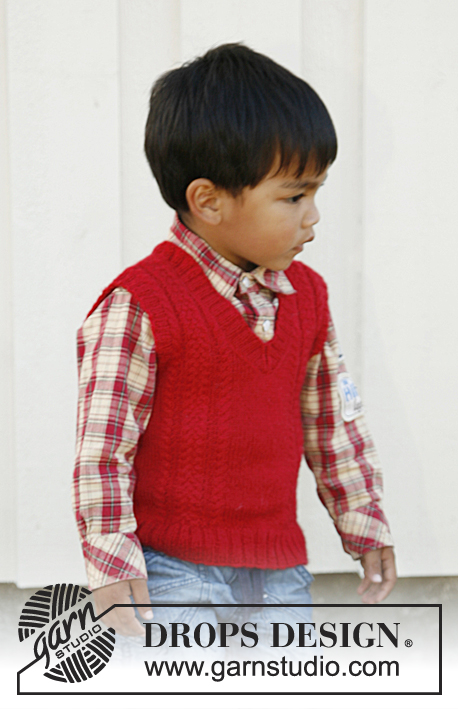
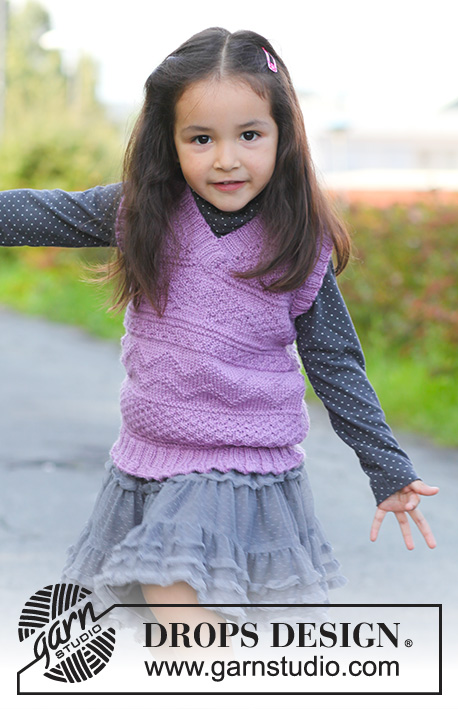
Kamizelka na drutach ze ściegiem strukturalnym, z włóczki DROPS Karisma. Rozmiary od 3 do 12 lat.
DROPS Children 22-41 |
|||||||||||||
|
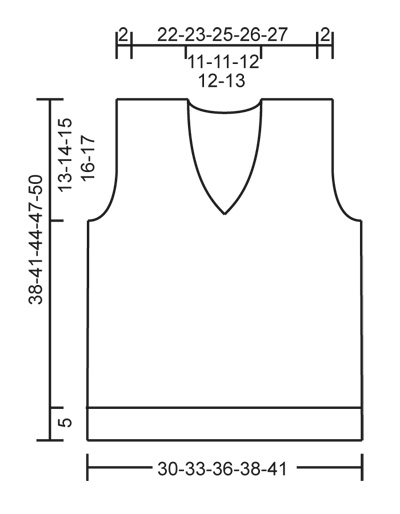
ŚCIEG FANTAZYJNY: Patrz schematy M.1 i M.2 – schematy przedstawiają motyw na prawej stronie robótki. --------------------------------------------------------- TYŁ & PRZÓD: Przerabiane na okrągło na drutach z żyłką. Na drutach z żyłką nr 3 nabrać 288-312-336-360-384 o. włóczką Karisma. Przer. schemat M.2. Po przerobieniu schematu M.2 zostaje 144-156-168-180-192 o. Dalej przer. oczka tak jak schodzą z drutu. Na wys. 5 cm od dołu robótki zacząć przer. na drutach z żyłką nr 3,5 i przer. 1 okr. na prawo, W TYM SAMYM CZASIE równomiernie zamknąć 12 o. = 132-144-156-168-180 o. Dalej przer. wg schematu M.1 do końca – patrz strzałka pokazująca gdzie zacząć w zależności od rozmiaru (to ważne, aby motyw wypadał równo na środku przodu). ZACHOWAĆ TAKIE SAME NAPRĘŻENIE NICI JAK W PRZYPADKU PRÓBKI! Na wys. 25-27-29-31-33 cm od dołu robótki przer. kolejne okrążenie następująco: zamknąć 3 o. na podkrój rękawa, przer. 29-32-35-38-41 o. (= lewy przód), zamknąć 2 o. na dekolt, przer. 29-32-35-38-41 o. (= prawy przód), zamknąć 6 o. na podkrój rękawa, przer. 60-66-72-78-84 o. (= tył), zamknąć 3 o. na podkrój rękawa, odciąć nitkę. Zakańczać przód i tył oddzielnie. TYŁ: = 60-66-72-78-84 o. Dalej przer. schemat M.1 w tę i z powrotem - W TYM SAMYM CZASIE zamknąć na podkroje rękawów na pocz. każdego rzędu z każdej strony: 1 raz 3 o., 0-1-2-2-3 razy 2 o. i 3-3-2-3-3 razy 1 o. = 48-50-54-58-60 o. Na wys. 36-39-42-45-48 cm od dołu robótki zamknąć na dekolt 20-20-22-22-24 o. środk. i zakańczać każde ramię osobno. Następnie zamykać w każdym rzędzie od strony dekoltu: 2 razy 1 o. = zostaje 12-13-14-16-16 o. na ramię. Zakończyć na wys. ok. 38-41-44-47-50 cm od dołu robótki. LEWY PRZÓD: = 29-32-35-38-41 o. Formować podkrój rękawa jak z tyłu - W TYM SAMYM CZASIE zamykać o. w każdym rzędzie od strony dekoltu: 11-11-12-12-13 razy 1 o. Po zamknięciu wszystkich oczek zostaje 12-13-14-16-16 o. na ramię. Zakończyć na wys. 38-41-44-47-50 cm od dołu robótki. PRAWY PRZÓD: Przerabiany jak lewy przód, tylko w odwrotnym układzie. WYKOŃCZENIE: Zszyć ramiona. WYKOŃCZENIE DEKOLTU: Przerabiane w tę i z powrotem od brzegu (środek przodu). Na drutach z żyłką nr 3 nabrać od 80 do 100 o. wokół dekoltu – zacząć na środku przodu. Obrócić i przer. 1 rz. na prawo na lewej stronie robótki, W TYM SAMYM CZASIE równomiernie dodać o., aby dopasować ich liczbę do 96-100-108-112-124. Dalej przer. ściągaczem następująco (widok na prawej stronie robótki): 1 o. ściegiem francuskim (= przerabiane w każdym rzędzie na prawo), *2 o.p., 2 o.l.*, powt. od *-* aż zostaje 3 o., zakończyć przerabiając 2 o.p. i 1 o. ściegiem francuskim. Na wys. ok. 2-2½-2½-3-3 cm zamknąć oczka tak jak schodzą z drutu. Na dole umieścić lewą część na prawej i zszyć kilkoma ściegami. BRZEGI PRZY PODKROJACH RĘKAWÓW: Na drutach pończoszniczych nr 3 nabrać od 70 do 90 o. wokół każdego podkroju rękawa. Przer. 1 okr. na lewo, W TYM SAMYM CZASIE równomiernie dodać o., aby dopasować ich liczbę do 80-88-92-100-104. Przer. ściągaczem = 2 o.p./2 o.l. przez 2 cm, następnie zamknąć oczka tak jak schodzą z drutu. |
|||||||||||||
Objaśnienia do schematu |
|||||||||||||
|
|||||||||||||
 |
|||||||||||||
 |
|||||||||||||
Skończyłaś ten wzór?Otaguj swoje zdjęcia #dropspattern #gretchenvest lub prześlij je do #dropsfan gallery. Potrzebujesz pomocy w związku z tym wzorem?Zobacz 14 instrukcje video, sekcję Komentarze/Pytania i jeszcze więcej, wchodząc na stronę wzoru na garnstudio.com © 1982-2026 DROPS Design A/S. Wszelkie prawa zastrzeżone. Ten dokument, w całości, jest chroniony prawem. Zobacz co możesz robić z naszymi wzorami na dole każdego wzoru na naszej stronie. |
|||||||||||||


Posiadając 40 lat doświadczenia w projektowaniu wzorów na druty i szydełko, DROPS Design oferuje jedną z największych kolekcji bezpłatnych wzorów w internecie – przetłumaczonych na 17 języków. Obecnie jest dostępnych 324 katalogów i 12290 wzorów w języku polskim.
Dokładamy wszelkich starań, aby oferować Wam druty i szydełka, inspiracje, fachowe porady oraz doskonałej jakości włóczki w najlepszych cenach! Zamierzasz wykorzystać nasze wzory inaczej niż tylko do osobistego użytku? Przeczytaj jakie masz prawa w Copyright, który znajdziesz na końcu każdego wzoru. Miłej pracy!
Dodaj komentarz do modelu DROPS Children 22-41
Chcielibyśmy się dowiedzieć co masz do powiedzenia o tym wzorze!
Jeśli chcesz zadać pytanie i szybko uzyskać odpowiedź, upewnij się, że została wybrana właściwa kategoria w formularzu poniżej. Pola obowiązkowe są oznaczone *.