
Popularne kategorie
Szukasz włóczki?


Komentarze / Pytania (40)
![]() Nicolle napisała::
Nicolle napisała::
Hi, I was wondering how to do kitchener stitches according to the video tutorial that uses two rows both on knitting needles, when in my knitting the first original row is already off the needle? Then i am left with two pieces, one on the needle (the last row) and the one off the needle (first row) to graft together. Or is there another way of doing it? Thanks in advance, Nicolle
29.08.2024 - 10:01Odpowiedź DROPS Design :
Dear Nicolle, you have to make a mix of 2 techniques: grafting for the stitches on needle on one side and this technique for the stitches of the cast on edge. Happy knitting!
30.08.2024 - 07:46
![]() Moira napisała::
Moira napisała::
Hello, could you please help me understand the set of 16 stitches for M1. It says to knit on wrong side in the chart oh, but I don't understand that because I'm still on the right side? Could you please advise right from the start? (After cast on) Continue as follows from RS: 52-58-64 garter sts, 16-16-20 sts in M.1. Insert a marker after st no 42-48-54 from RS. Thank you, I LOVE Drops!
02.03.2021 - 17:07Odpowiedź DROPS Design :
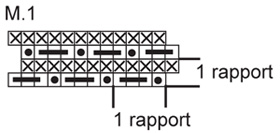
Dear Moira, on first row you are working from right side of sock: 52-58-64 sts in garter stitch, and 16 or 20 sts as shown in M.1,: *Work 3 sts in first st (= P1, YO, P1), P3 sts, psso 1st st then 2nd st over last st = 1 st remain*, repeat from *to* a total of 8 or 10 times. From WS knit all stitches (= the 16-20 sts of M.1) and the remaining sts (garter stitch). On next row from RS work 3rd row in M.1 over the last 16-20 sts: *P3 sts, psso 1st st then 2nd st over last st , (P1, YO, P1) in next st* repeat from *-* and knit remaining sts. Hope this will help, happy knitting!
03.03.2021 - 06:52
![]() Nicole napisała::
Nicole napisała::
Ich habe Probleme mit M1. Die erste Reihe habe ich gestrickt, wie angegeben von der Vorderseite. Die nächste Reihe ( also die Rückreihe) zeigt laut Diagramm (x im Kästchen) "re. Von der Vorderseite ". Mir ist unklar, wie ich diese Maschen stricken soll, weil ich mich doch auf der Rückseite befinde.
18.01.2021 - 15:20Odpowiedź DROPS Design :
Liebe Nicole, hier sollte es "recht bei den Rückreihen" sein, eine Korrektur erfolt so bald wie möglich. D.h. bei den Rückreihen (= Rückseite) stricken Sie alle Maschen in A.1 rechts. Viel Spaß beim stricken!
18.01.2021 - 15:27
![]() Diana napisała::
Diana napisała::
I have done a lot of patterns but l just can't figure it out. Is there a way you can explain the first paragraph a different or other way? I love the slippers and would like to make them. Thank you for any help.
16.10.2019 - 18:07Odpowiedź DROPS Design :
Dear Diana, work 4 rows with: 52-58-64 sts garter st, 16-16-20 sts as in M.1, on 5th row (= from RS), start decrease on each side of the marker for the heel. At the same time, you will work short rows for toe: every 4th row (= every other row from WS), work until 8-10-12 sts in garter st remain and turn (= short rows). Hope it helps, happy knitting!
17.10.2019 - 09:51
![]() Odeth napisała::
Odeth napisała::
El patrón no lo veo claro en la parte del talón gracias
21.09.2019 - 04:39Odpowiedź DROPS Design :
Hola Odeth. El talón lo formamos trabajando disminuciones (2 puntos juntos de derecho a cada lado del marcapuntos) un total de 10 veces.
17.10.2019 - 19:45
![]() Lyly napisała::
Lyly napisała::
Je ne comprends pas les explications concernant les rangs raccourcis de la pointe : au 6e rg, sur l\\\'env du travail, on ne tricote pas les 8 dernières mailles pour la taille S ? Combien de fois doit-on laisser ces mailles en attente ? Je ne comprends absolument pas comment faire la pointe du chausson.les rgs raccourcis se font sur l\\\'endroit ou l\\\'envers du travail ?
08.04.2019 - 23:30Odpowiedź DROPS Design :
Bonjour Lyly, les rangs raccourcis pour la pointe vont se tricoter en commençant sur l'envers: tricotez le rang jusqu'à ce qu'il reste 8 m (= pointe), tournez et tricotez le rang suivant sur l'endroit (diminuez sur l'endroit si besoin), tournez et tricotez le rang suivant sur toutes les mailles, tournez et tricotez le rang suivant sur toutes les mailles - n'oubliez pas les diminutions si besoin - continuez ainsi, les 8 m de la fin du rang ne sont simplement plus travaillées = rangs raccourcis; cf vidéo. Bon tricot!
09.04.2019 - 09:24
![]() Emmah napisała::
Emmah napisała::
Min socka har väldigt dålig passform (stor) från hälen och hela vägen upp på skaftet. Resten av socken sitter perfekt. Vad har jag gjort för fel?
26.12.2018 - 17:35Odpowiedź DROPS Design :
hei Emmah. Denne modellen er en del løsere rundt ankelen enn tradisjonelle sokker, du kan se det på bildet også om du ser etter. Så den skal være sånn. Om du gjerne vil ha den strammere kan du feks prøve å feste et bånd som du kan knyte rundt ankelen? God fornøyelse.
08.01.2019 - 14:44Erica napisała::
I\'m stuck again 😞 I\'m doing the middle size. Continue until piece measures 15cm. I\'ve done that but no idea how to do the next paragraph: work 38 garter st and 16 sts of m1 and increase for heel. I don\'t know which sue is the heel! I have 44sts of pattern and a separate 10sts of garter stitch for the toe...
13.12.2018 - 13:38Odpowiedź DROPS Design :
Dear Erica, when piece measures 15 cm from the last dec, work now: the first 38 sts seen from RS in garter st and the last 16 sts in M.1, now increase for heel on each side of the marker placed in the 38th st from RS. Happy knitting!
13.12.2018 - 14:40Erica napisała::
Im confused about how to p into same stitch. Pattern = p1, yo, p1 all in same stitch but my sts are decreasing. I did p1, yo and then I slipped the yo onto other needle and purled that. Where am I going wrong?!
07.12.2018 - 11:39Odpowiedź DROPS Design :
Dear Erica, y ou have to work the same stitch a total of 3 times, purl next stitch on the left needle without dropping this off the needle, make a YO on right needle, then purl the same stitch on left needle one more time and drop it from left needle = you should have now 3 sts on the right needle. The next 3 sts will be purled together = the number of stitches keep constant. Happy knitting!
07.12.2018 - 11:59
![]() Dufour Arlette napisała::
Dufour Arlette napisała::
Je reviens vers vous, je vous ai posée une question hier je tenais a vous dire qu'après avoir fait et refait j'ai trouvée ,je vous remercie Mme Dufour
27.09.2018 - 08:22
|
||||||||||
Cotton Patch#cottonpatchsocks |
||||||||||
 |
 |
|||||||||
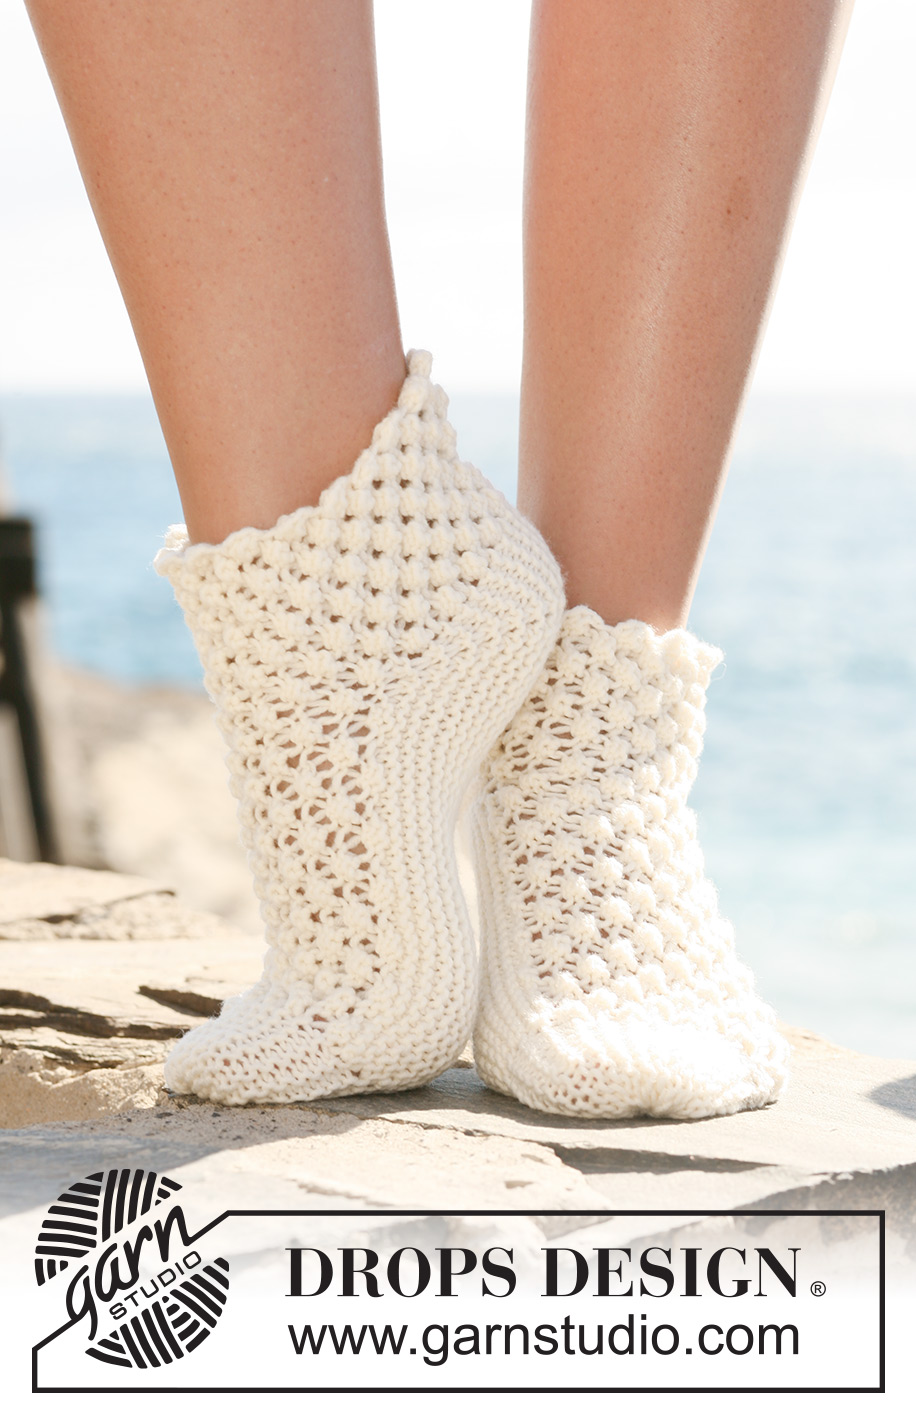
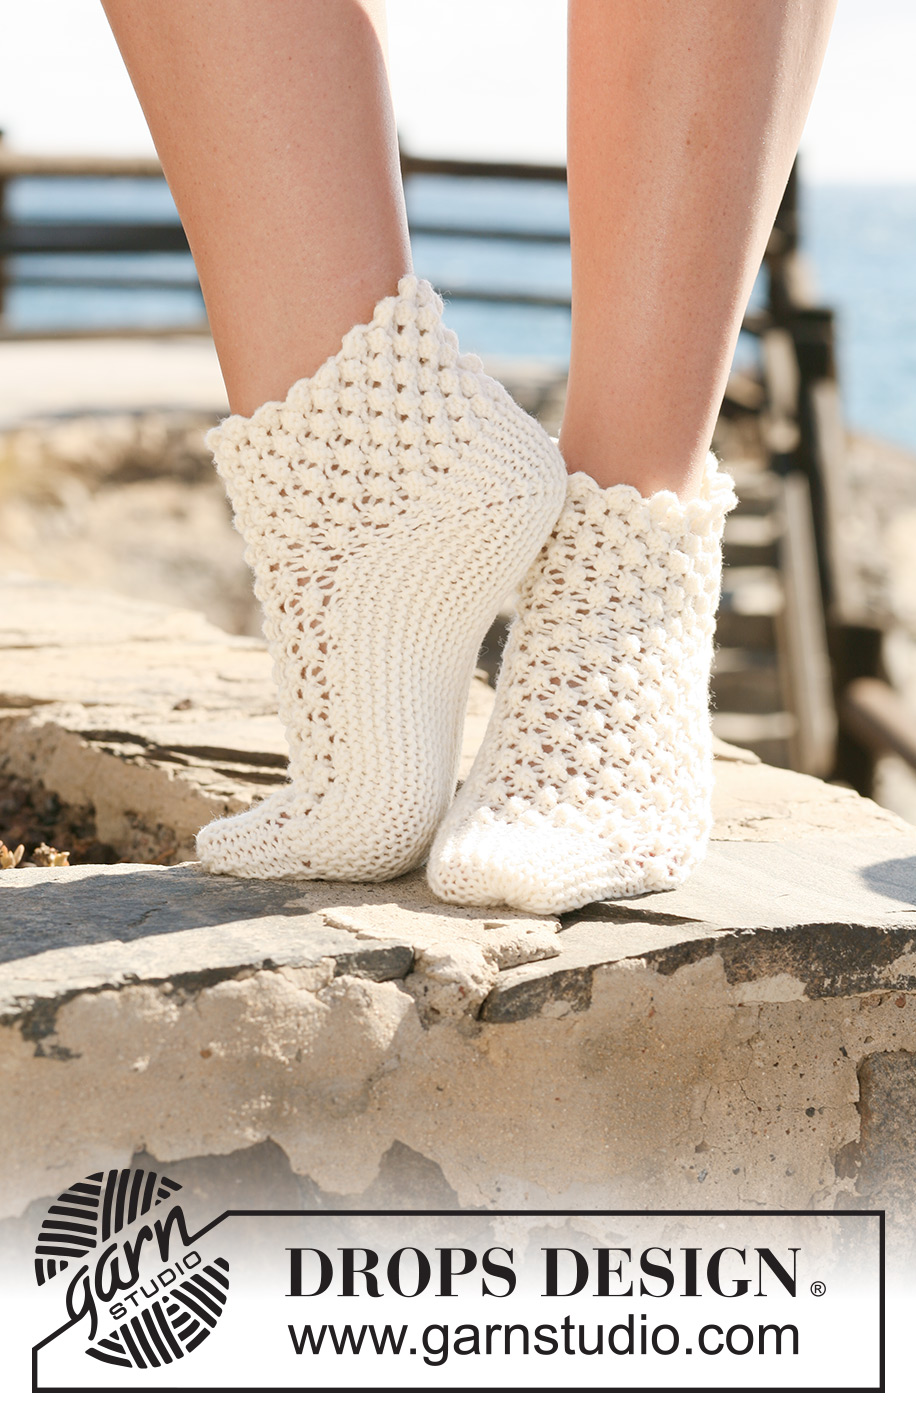
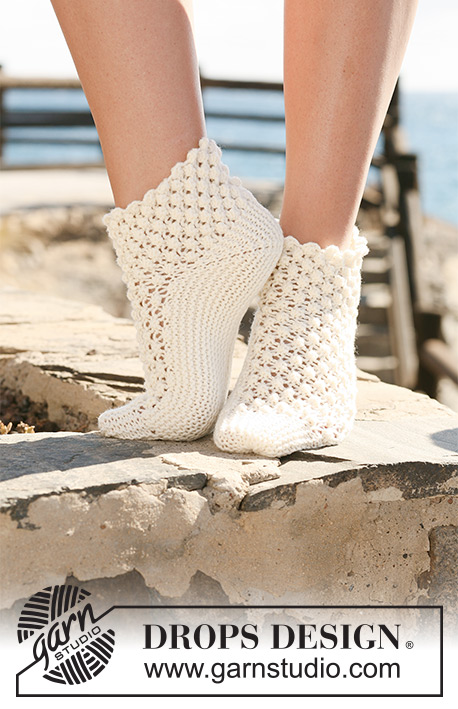
Skarpetki na drutach przerabiane w poprzek robótki, ściegiem perełkowym z włóczki DROPS Merino Extra Fine.
DROPS 119-32 |
||||||||||
|
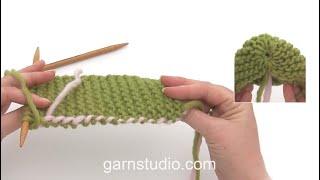
ŚCIEG FRANCUSKI (w tę i z powrotem): Przerabiać wszystkie rzędy na prawo. WSKAZÓWKA: Gdy obracamy robótkę przed zakończeniem rzędu, zdjąć 1-sze oczko jak do przerobienia na prawo, zacisnąć nitkę i przerabiać następny rząd. Dzięki temu unikniemy dziur w przejściach. ŚCIEG FANTAZYJNY: Patrz schemat M1. Schemat przedstawia motyw na prawej stronie robótki. 1-szy rząd = na prawej stronie robótki. WYKOŃCZENIE - WSKAZÓWKA: wkłuć igłę w skrajne pętelki oczek od strony palców i przeciągnąć nitkę przez wszystkie oczka. Następnie użyć tej nitki, aby zacisnąć oczka palców. ----------------------------------------------------------- SKARPETKI: Są przerabiane w tę i z powrotem, od środka pod spodem stopy, następnie wykonujemy wierzch stopy i kończymy ponownie pod spodem stopy. Gdy wykonujemy zamykanie i dodawanie oczek na piętę, przerabiać również rzędami skróconymi ponad oczkami palców następująco: co 2 rzędy od strony palców (lub co 4 rzędy) obrócić, gdy zostaje 8-10-12 oczek i przerabiać następny rząd – patrz WSKAZÓWKA! Palce znajdują się na początku rzędu na prawej stronie robótki. ZACHOWAĆ TAKIE SAMO NAPRĘŻENIE NICI JAK W PRZYPADKU PRÓBKI! Włóczką Merino i na drutach nr 4 nabrać 68-74-84 oczka. Dalej przerabiać na prawej stronie robótki następująco: 52-58-64 oczka ściegiem francuskim, 16-16-20 oczek wg schematu M1. Umieścić 1 marker za 42-48-54-tym oczkiem na prawej stronie robótki. Dalej przerabiać ściegiem fantazyjnym tak samo, W TYM SAMYM CZASIE w 5-tym rzędzie zamykać oczka na piętę następująco (nie zapomnieć o rzędach skróconych od strony palców): 2 oczka razem na prawo z 2 stron markera w sumie 10 razy co 2 rzędy = 48-54-64 oczka. Dalej przerabiać na prawej stronie robótki następująco (nie przerabiać rzędów skróconych od strony palców): 8-10-12 oczek ściegiem francuskim (= palce), M1 ponad pozostałymi oczkami. Dalej przerabiać tak samo do wys. 13-15-17 cm, mierząc od ostatnich zamykanych oczek – UWAGA: mierzyć na środku, wzdłuż zamykanych oczek. Następnie przerobić 32-38-44 oczka ściegiem francuskim i 16-16-20 oczek wg schematu M1. Następnie dodawać oczka na piętę (a rzędy skrócone od strony palców): umieścić 1 marker w 32-38-44-te oczko na prawej stronie robótki. Dodawać 1 oczko z 2 stron markera w sumie 10 razy co 2 rzędy – dodawać wykonując 1 narzut, w następnym rzędzie przerobić oczko przekręcone w miejscu narzutu, aby uniknąć dziur – przerabiać dodawane oczka ściegiem francuskim = 68-74-84 oczka. Przerabiać 4 rzędy ponad wszystkimi oczkami z 52-58-64 oczkami ściegiem francuskim i 16-16-20 oczek wg schematu M1. Zdjąć oczka na drut pomocniczy. Wykonać 2-gą skarpetkę. WYKOŃCZENIE: Zszywać ściegiem dziewiarskim (grafting) oczka z drutu pomocniczego do rzędu nabierania oczek. Zszywać wzdłuż spodu stopy, aż do góry skarpetki. Zacisnąć palce - patrz WSKAZÓWKA WYKOŃCZENIE – i wrobić nitkę. |
||||||||||
Objaśnienia do schematu |
||||||||||
|
||||||||||
 |
||||||||||
Skończyłaś ten wzór?Otaguj swoje zdjęcia #dropspattern #cottonpatchsocks lub prześlij je do #dropsfan gallery. Potrzebujesz pomocy w związku z tym wzorem?Zobacz 17 instrukcje video, sekcję Komentarze/Pytania i jeszcze więcej, wchodząc na stronę wzoru na garnstudio.com © 1982-2026 DROPS Design A/S. Wszelkie prawa zastrzeżone. Ten dokument, w całości, jest chroniony prawem. Zobacz co możesz robić z naszymi wzorami na dole każdego wzoru na naszej stronie. |
||||||||||


Posiadając 40 lat doświadczenia w projektowaniu wzorów na druty i szydełko, DROPS Design oferuje jedną z największych kolekcji bezpłatnych wzorów w internecie – przetłumaczonych na 17 języków. Obecnie jest dostępnych 324 katalogów i 12290 wzorów w języku polskim.
Dokładamy wszelkich starań, aby oferować Wam druty i szydełka, inspiracje, fachowe porady oraz doskonałej jakości włóczki w najlepszych cenach! Zamierzasz wykorzystać nasze wzory inaczej niż tylko do osobistego użytku? Przeczytaj jakie masz prawa w Copyright, który znajdziesz na końcu każdego wzoru. Miłej pracy!
Dodaj komentarz do modelu DROPS 119-32
Chcielibyśmy się dowiedzieć co masz do powiedzenia o tym wzorze!
Jeśli chcesz zadać pytanie i szybko uzyskać odpowiedź, upewnij się, że została wybrana właściwa kategoria w formularzu poniżej. Pola obowiązkowe są oznaczone *.