
Categorie popolari
State cercando un filato?


Commenti / Domande (168)
Debbie ha scritto:
I understand where the markers are placed but what I don't understand is how you can knit 2 tog. when there is only one stitch before the marker because this is the beginning of the round
21.10.2014 - 16:07DROPS Design ha risposto:
Dear Debbie, to decrease 1 st before marker, work until 2 sts remain before marker and work K2 tog, so that you will work last st on round tog with 1st st next round at the beg of round. Happy knitting!
21.10.2014 - 17:07Debbie ha scritto:
My problem is with the decrease round. You say to decrease 1 stitch before the first marker by knitting 2 together but the 1st stitch before the marker is the beginning of the round (beginning ofA3 pattern). I am not sure how I should be decreasing.
20.10.2014 - 22:17DROPS Design ha risposto:
Dear Debbie, markers are place here to work the dec for toe, 1st marker will be between 1st and 2nd st in A.3, and you will dec 1st before 1st marker (see next paragraph where decreases are explained). Happy knitting!
21.10.2014 - 09:58
![]() Bev ha scritto:
Bev ha scritto:
What is meant by A.a in the pattern. It is mentioned after working in the round after A.2 has ben worked 1 time vertically. " work A.a until piece measures 61/2/ 71/2, 81/2 inches. I have read over this pattern multiple times and I cannot find what this refers to. Please respond as I am at that point in the construction
20.10.2014 - 02:56DROPS Design ha risposto:
Dear Bev, when you have worked diagram A.2 1 time vertically (all rows in diagram), start again on 2nd row in A.2 working the A.a part (framed on the side). Happy knitting!
20.10.2014 - 10:37
![]() Barb ha scritto:
Barb ha scritto:
I am having trouble going from straight to in the round. Could you tell me exactly where in the pattern Is the first stitch in the beginning of the round and are the 12 stitches in chart A2 all worked together? Sorry if this is obvious but I just can't get my head around this.
14.10.2014 - 18:04DROPS Design ha risposto:
Dear Barb, when working straight, row from RS starts and ends with P4, join in the round on a RS row casting on 4 sts between the first and last P4 = you get P12 for the upper foot. Rounds will then start there (after cast on), continue then in the round in pattern as before and work A.2 over the P12 (end of round). Happy knitting!
15.10.2014 - 08:33
![]() Debbie ha scritto:
Debbie ha scritto:
Do you have a video for this slipper?
14.10.2014 - 16:31DROPS Design ha risposto:
Dear Debbie, you will find all relevant videos to these slippers under the tab "videos" at the right side of the picture. Remember you can ask any question here or contact your DROPS store for any individual assistance. Happy knitting!
14.10.2014 - 16:57
![]() Debbie ha scritto:
Debbie ha scritto:
What do you mean by work one row vertically?
12.10.2014 - 19:58DROPS Design ha risposto:
Dear Debbie, when it says "When A.2 has been worked 1 time vertically" it means you have to work 1 time in height all rows of diagram A.2. Happy knitting!
13.10.2014 - 10:12
![]() Debbie Clarke ha scritto:
Debbie Clarke ha scritto:
When you say to cast on 4 stitches and then work them, are the purled or knitted? Also I am not sure where you should join for in the round. Is the start of the round before or after the 4 stitches?
12.10.2014 - 17:27DROPS Design ha risposto:
Dear Mrs Clarke, the 4 sts are cast on at the end of a row from RS and then continue in the round - beg of round will be then after the new 4 sts. Happy knitting!
13.10.2014 - 10:03
![]() Sue ha scritto:
Sue ha scritto:
I love the pictures but your patterns are so hard to follow! They are not clearly written. Maybe if you write it out by rows instead of a paragraph?
06.09.2014 - 14:33
![]() Corinna ha scritto:
Corinna ha scritto:
Hallo liebes Drops Team, wenn im Muster A2 steht: "1 M auf eine Hilfsnadel hinter die Arbeit legen, 2 M re, 1 M li/re von der Hilfsnadel" bzw. "2 M auf eine Hilfsnadel vor die Arbeit legen, 1 M li/re, 2 M re von der Hilfsnadel" was ist dann mit li/re gemeint. Woher weiß ich, ob ich links oder rechts stricken soll? Vielen Dank vorab :)
20.08.2014 - 22:22DROPS Design ha risposto:
Liebe Corinna, das ergibt sich aus dem Muster. Sie stricken die M so, wie sie erscheinen. Also je nachdem, ob Sie eine linke oder rechte M auf die Hilfsnadel gelegt haben, stricken Sie diese links oder rechts.
21.08.2014 - 09:30
![]() Johanna ha scritto:
Johanna ha scritto:
I finished my pair a few weeks ago and I love them! My husband wants me to make a pair for him and two friends have asked for the pattern, so that they can make their own =) It seems like Drops have created another winner!
07.08.2014 - 14:48
|
|||||||||||||||||||
Celtic Dancer#celticdancerslippers |
|||||||||||||||||||
 |
 |
||||||||||||||||||
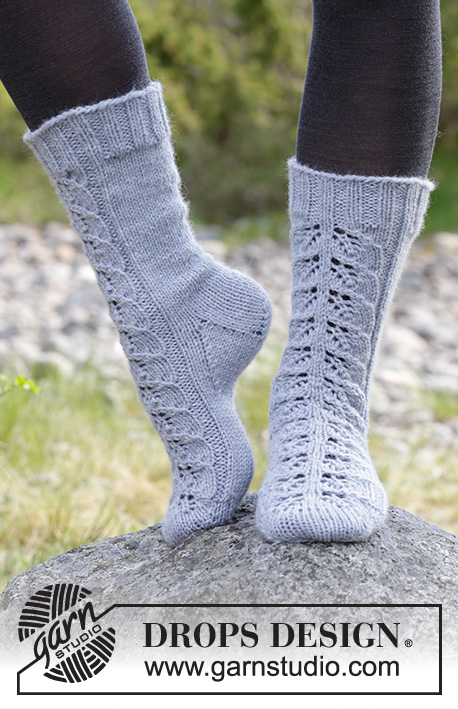
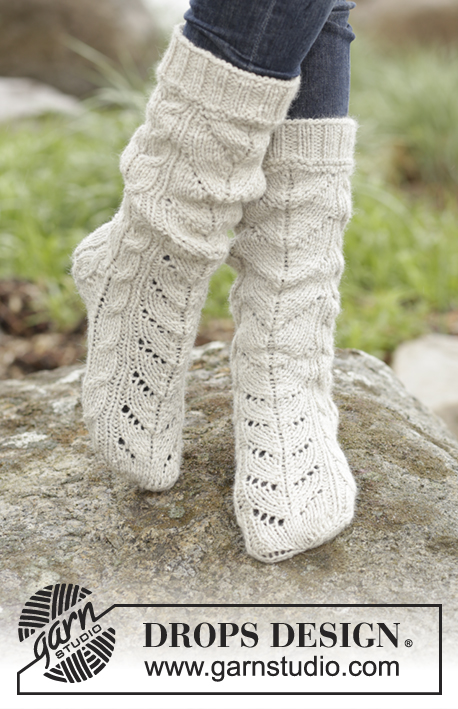
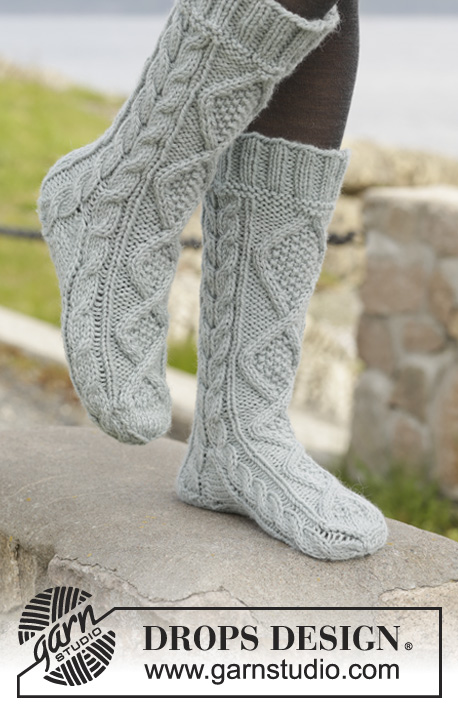
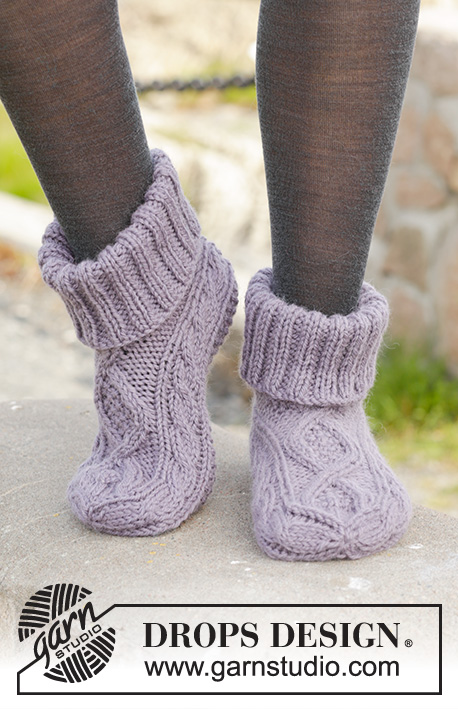
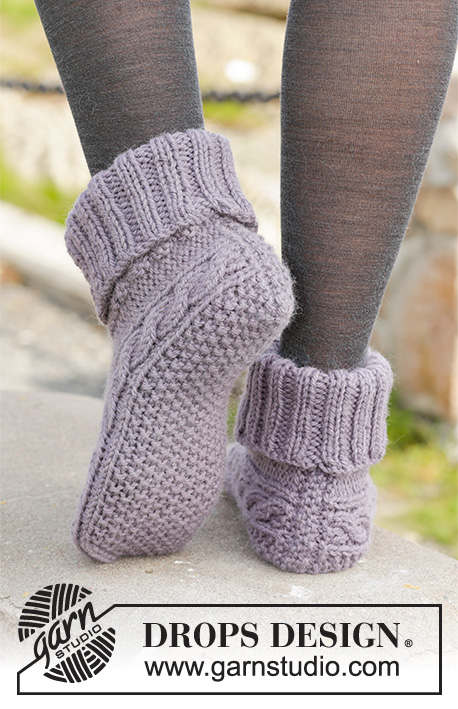
Pantofole DROPS lavorate ai ferri con trecce in "Nepal". Taglie: 35 - 43.
DROPS 156-55 |
|||||||||||||||||||
|
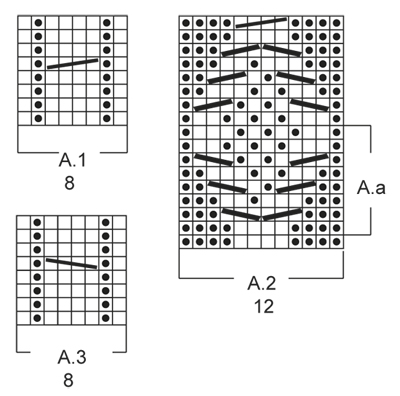
MOTIVO: Vedere i diagrammi A.1-A.3. I diagrammi mostrano il motivo visto dal diritto del lavoro. SUGGERIMENTO PER LE DIMINUZIONI: Diminuire 1 m prima del segnapunti come segue: 2 m insieme a dir. Diminuire 1 m dopo il segnapunti come segue: 2 m insieme a dir ritorto. M LEGACCIO (avanti e indietro sui f): Lavorare tutti i f a dir. 1 “costa” a m legaccio = 2 f dir. GRANA DI RISO: 1° f/giro: * 1 m dir, 1 m rov *, ripetere *-*. 2° f/giro: dir su rov e rov su dir. Ripetere il 2° f/giro. SUGGERIMENTO PER LE MISURAZIONI: Misurare al centro della treccia in A.1/A.3. ---------------------------------------------------------- PANTOFOLA: Lavorata avanti e indietro dal centro dietro. Avviare 33-33-35 m con i f n° 5 mm con Nepal (lasciare un’estremità di filato di circa 20 cm; usata per la confezione). Lavorare 1 “costa” a M LEGACCIO – leggere la spiegazione sopra, ALLO STESSO TEMPO sull’ultimo f distribuire 4 aumenti in modo uniforme = 37-37-39 m. Poi lavorare come segue dal diritto del lavoro: 4 m rov, A.3 (= 8 m), 13-13-15 m a GRANA DI RISO – leggere la spiegazione sopra, A.1 (= 8 m), finire con 4 m rov. Continuare il motivo in questo modo, lavorare le m rov a dir, dal rovescio del lavoro. Ripetere A.1 e A.3 fino alla fine del lavoro. FARE ATTENZIONE ALLA TENSIONE DEL LAVORO! Quando il lavoro misura 10½-11½-13 cm – leggere il SUGGERIMENTO PER LE MISURAZIONI sopra, lavorare come segue dal diritto del lavoro: 4 m rov, A.3, 13-13-15 m a grana di riso, A.1, 4 m rov, avviare 4 nuove m, lavorare le prime 4 m, il giro inizia qui = 41-41-43 m. Ora lavorare in tondo con i f a doppia punta. Lavorare il motivo come prima ma ora lavorare A.2 (= 12 m) sulle 4 m rov a ogni lato del lavoro e sulle 4 nuove m. Quando A.2 è stato lavorato 1 volta in verticale, lavorare A.a fino a quando il lavoro misura 17-19-22 cm. Ora lavorare a m rasata sulle m in A.a, o iniziare la m rasata un po’ prima. Continuare A.1 e A.3 fino alla fine del lavoro. Ora inserire 4 segnapunti nel lavoro come segue: lavorare A.3 ma inserire il 1° segnapunti tra la 1° e la 2° m e il 2° segnapunti tra la 7° e 8° m in A.3, lavorare a grana di riso come prima, lavorare A.1 ma inserire il 3° segnapunti tra la 1° e la 2° m e il 4° segnapunti tra la 7° e 8° m in A.1, lavorare a dir le m rimaste (= 14 m sul sopra del piede, 15-15-17 m sotto il piede e 6 m a ogni lato del lavoro). Ora diminuire per la punta sul giro successivo come segue: Diminuire 1 m dopo il 2° segnapunti e 1 m prima del 3° segnapunti sotto il piede 0-0-1 volte in totale – LEGGERE IL SUGGERIMENTO PER LE DIMINUZIONI sopra, lavorare le m rimaste = 14 m sul sopra del piede e 15 m sul sotto del piede (= 41 m in totale). Sul giro successivo, diminuire come segue: Diminuire 1 m prima del 1° e del 3° segnapunti e 1 m dopo il 2° e il 4° segnapunti (= 4 diminuzioni in totale). Ripetere le diminuzioni ogni giro 6 volte in totale, ALLO STESSO TEMPO sull’ultima diminuzione lavorare le m delle trecce in A.1 e A.3 come segue: 2 m insieme a dir ritorto, 2 m insieme a dir. Alla fine di tutte le diminuzioni ci sono 13 m sul f. Il lavoro misura circa 20-22-25 cm. Tagliare il filo e farlo passare attraverso le m rimaste, tirare forte e affrancare. CONFEZIONE: Piegare il bordo di avvio a metà (= centro dietro), usare l’estremità del filo dell’inizio per cucire in modo ordinato al centro dietro. BORDO: Lavorare il bordo in tondo con i f a doppia punta attorno all’apertura della pantofola. Riprendere 50-50-54 m con i f a doppia punta n° 4 mm con Nepal. Lavorare 1 giro rov. Poi lavorare 1 giro dir e ALLO STESSO TEMPO distribuire 10 aumenti in modo uniforme = 60-60-64 m. Lavorare a coste = 2 m dir/2 m rov fino a quando il lavoro misura circa 12-13-14 cm. Intrecciare con dir su dir e rov su rov. Piegare il bordo a metà. Lavorare un’altra pantofola. |
|||||||||||||||||||
Spiegazioni del diagramma |
|||||||||||||||||||
|
|||||||||||||||||||
 |
|||||||||||||||||||
Avete terminato questo modello?Allora taggate le vostre foto con #dropspattern #celticdancerslippers o inviatele alla #dropsfan gallery. Avete bisogno di aiuto con questo modello?Troverete 22 video tutorial, una sezione per i commenti/domande e molto altro guardando il modello su www.garnstudio.com © 1982-2026 DROPS Design A/S. Ci riserviamo tutti i diritti. Questo documento, compreso tutte le sue sotto-sezioni, è protetto dalle leggi sul copyright. Potete leggere quello che potete fare con i nostri modelli alla fine di ogni modello sul nostro sito. |
|||||||||||||||||||


Con oltre 40 anni di esperienza nel design di modelli di maglia e uncinetto, DROPS Design offre la più estesa collezione di modelli gratuiti su internet - tradotti in 17 lingue. Ad oggi vi possiamo fornire 324 cataloghi e 12290 modelli - 9561 dei quali sono tradotti in Italiano.
Ci stiamo impegnando molto per darvi il meglio che vi possiamo offrire in termini di maglia e uncinetto, ispirazioni e consigli così come filati di grande qualità ad un prezzo incredibile! Volete utilizzare i nostri modelli per qualcosa d'altro oltre al vostro uso personale? Potete leggere tutto ciò che è consentito nel testo sul Copyright in basso su tutte le pagine dei nostri modelli. Buon lavoro!
Lasciare un commento sul modello DROPS 156-55
Noi saremmo felici di ricevere i tuoi commenti e opinioni su questo modello!
Se vuoi fare una domanda, fai per favore attenzione a selezionare la categoria corretta nella casella qui sotto per velocizzare il processo di risposta. I campi richiesti sono indicati da *.