
Popular categories
Looking for a yarn?


Comments / Questions (125)
Adela wrote:
Hola!Por favor explícame ´como procedo en este punto TIPS:".Debido al peso de la lana, se aconseja tomar todas las medidas con la prenda suspendida, de lo contrario.........".Un abrazoo!!
14.07.2015 - 12:06DROPS Design answered:
Hola Adela, cuando midas la labor para calcular los cm ten en cuenta que la labor debe de estar en posición vertical, suspendida en el aire porque el peso de la lana hace que se estire bastante y no es lo mismo medirla sobre la mesa, por ejemplo.
15.07.2015 - 09:42
![]() Catia wrote:
Catia wrote:
Salve , vorrei realizzare questo modello senza utilizzare i ferri circolari , è possibile ? e se si , potete inviarmi le istruzioni? grazie catia
11.03.2015 - 21:58DROPS Design answered:
Buongiorno Catia. Può lavorare il modello su ferri dritti, in parti separate. E’ però necessario ricalcolare il numero di m per il dietro e per ognuno dei davanti. Se ha difficoltà, può indicarci la taglia e cercheremo di aiutarla. Buon lavoro!
20.04.2015 - 10:47
![]() Gitte Zachariassen wrote:
Gitte Zachariassen wrote:
- efter at have strikket de første 25 cm har jeg brugt 6½ nøgle garn, Drops Bomull-lin. Det er ½ delen af garnforbruget! -modellen er alt for stor i omfang: iflg. opskrift 68 cm .d.v.s. hele vejen rundt i livet : 136 cm. Det er meget til en slank str. 36! -Har strikket på pinde 4 med korrekt maskeantal. Vil meget gerne ha feed back på mine efaringer. MVH Gitte
04.02.2015 - 19:04DROPS Design answered:
Hej Gitte, Du finder målene nederst i opskriften, strik den model hvor målene passer dig og sørg for at overholde strikkefastheden. Brystvidden i den mindste størrelse er 80 cm og det er meningen at den skal være vid fra brystet og ned. Se billedet!
05.02.2015 - 13:42
![]() Gabva wrote:
Gabva wrote:
Hab diese wunderschöne Jacke fertig und würde sie am Liebsten nicht mehr ausziehen. Das Garn ließ sich sehr gut verarbeiten. Ich liebe es besonders, das bei fast allen Anleitungen in einem Stück gestrickt wird. Vielen Dank für die tolle Anleitung. Der Sitz ist perfekt.
19.04.2014 - 16:07
![]() Caja wrote:
Caja wrote:
Hallo, Deze vraag hoort bij dit patroon. Maar ik ben er gelukkig uitgekomen. Ik twijfelde of ik nu alleen aan het begin (zoals in de beschrijving) van iedere regel moest minderen , om aan het aantal stk te komen. Óf aan het begin en het einde van iedere toer... Het is dus zoals beschreven in patroon alleen aan het begin van iedere toer. Groeten Caja
17.04.2014 - 09:35
![]() Caja wrote:
Caja wrote:
Bij het minderen van het achterpand voor de maat xxl. Begrijp ik dat er in totaal - 30 stk, van 94 stk. naar 64 stk. Door - 24 stk en - 6 stk. = -30stk. Is het dan zo dat je 6x2 stk. aan het begin EN aan het EIND van iedere toer mindert? = - 24stk. Daarna 3x1 stk aan het ook aan het begin EN aan het EIND van iedere toer? =- 6 stk. Dus niet alleen aan het begin van iedere toer minderen maar aan het begin en het einde van iedere toer? Alvast bedankt!
15.04.2014 - 14:43DROPS Design answered:
Hoi Caja. Hoort deze vraag wel bij dit patroon?
16.04.2014 - 12:57
![]() Konstanze Burger wrote:
Konstanze Burger wrote:
Ich bin gerade mittendrin in diesem Riesenstrickstück und verstehe nicht, warum man lt. Anleitung das Modell in einem Stück stricken soll: es hängt schwer an der Nadel je mehr es wächst und das Arbeiten damit wird immer mühsamer. Inzwischen schmerzt schon meine rechte Schulter.
09.04.2014 - 13:04DROPS Design answered:
Liebe Konstanze, der untere Teil der Jacke fällt viel schöner, wenn er an einem Stück ohne Naht gestrickt wird. Viele Strickerinnen empfinden es übrigens als angenehm, wenn sie keine Seitennaht arbeiten müssen. :-) Weiterhin gutes Gelingen, das Resultat dürfte Ihre Mühe belohnen!
10.04.2014 - 10:10
![]() BEATRICE wrote:
BEATRICE wrote:
Bonjour, J'ai tricoté ce modèle, comme précédemment indiquer en ajoutant plus de rang mousse sur le haut avant emmanchure. De ce fait ce modèle je le porte en robe avec collant opaque et bottes. Le cotton viscose et le fil kidsilk sont beaucoup plus agréable à tricoter que le lin. C'est dommage qu'il ni ai pas plus de modèle de robe.
17.01.2014 - 12:08
![]() Marcia wrote:
Marcia wrote:
I don't understand what the M.1 is. I will be making the L size. Is the first row a dec every 5th stitch and the 3 row, dec every other stitch?
05.12.2013 - 22:46DROPS Design answered:
Dear Marcia, on 1st row in M.1 you work *K5, K2 tog* all the row (except on the 5 front band sts each side), and on row 3, you work *K1, K2 tog, K1, K2 tog* all the row (except on the 5 front band sts each side). Happy knitting!
06.12.2013 - 09:41
![]() Beatrice wrote:
Beatrice wrote:
J'ai tricoter ce modèle avec le fil lin, et comme se modèle me plait je vais le faire en cooton viscose avec le kid silk. Pour connaitre le nombre de pelote dont j'ai besoin j'ai calculer le metrage de mes 20 pelotes de lin. Est-ce la bonne méthode ?
19.10.2013 - 12:12DROPS Design answered:
Bonjour Béatrice, il vous faut effectivement calculer le métrage total requis pour votre taille. Pour toute aide dans vos calculs, contactez votre magasin DROPS, il saura vous aider et vous conseiller. Bon tricot!
21.10.2013 - 10:46
|
|||||||
Holiday Joy#holidayjoyjacket |
|||||||
 |
 |
||||||
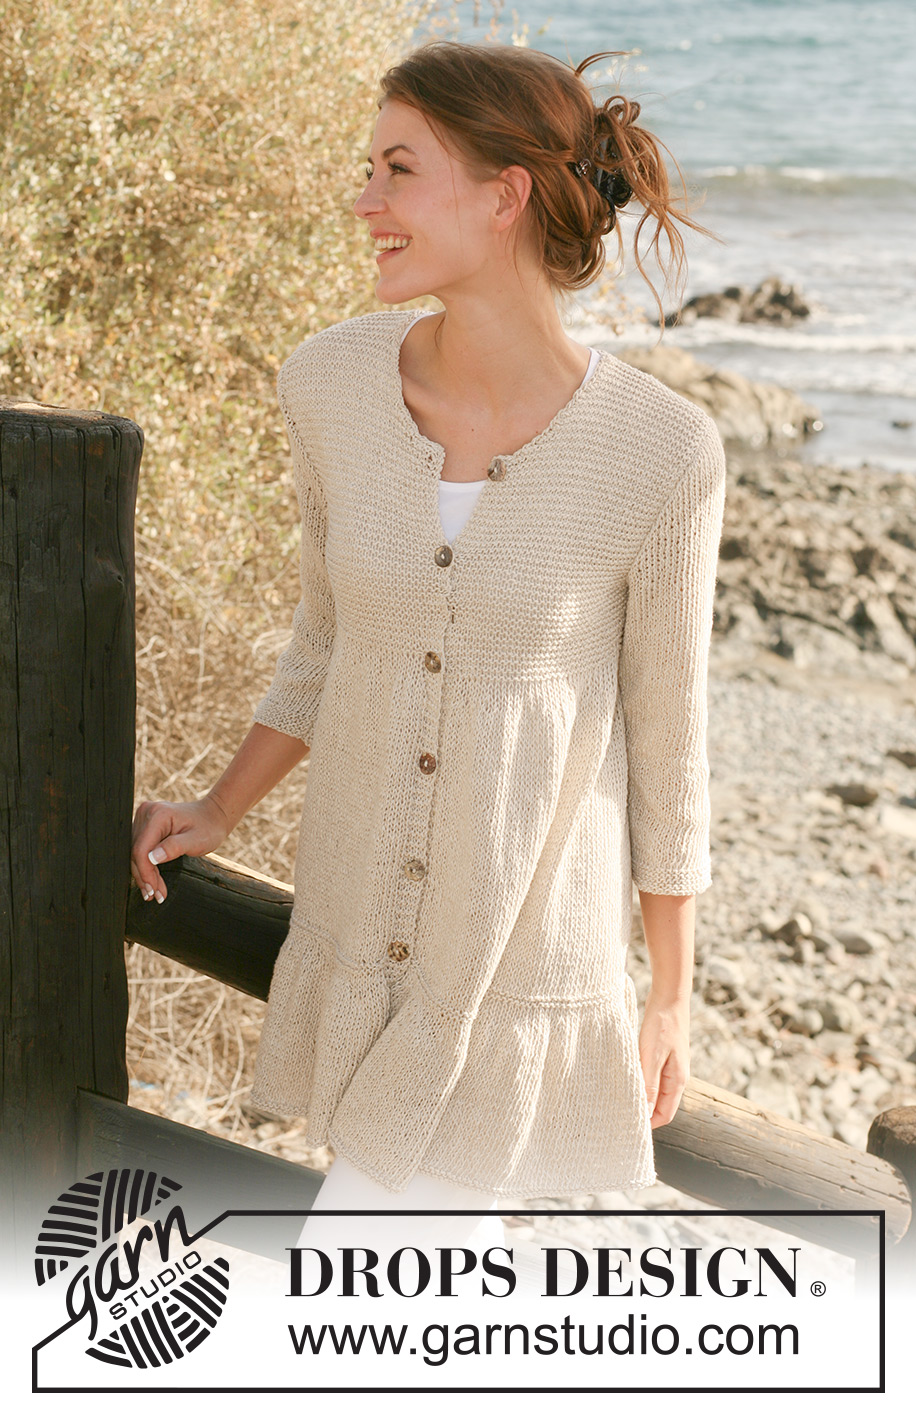
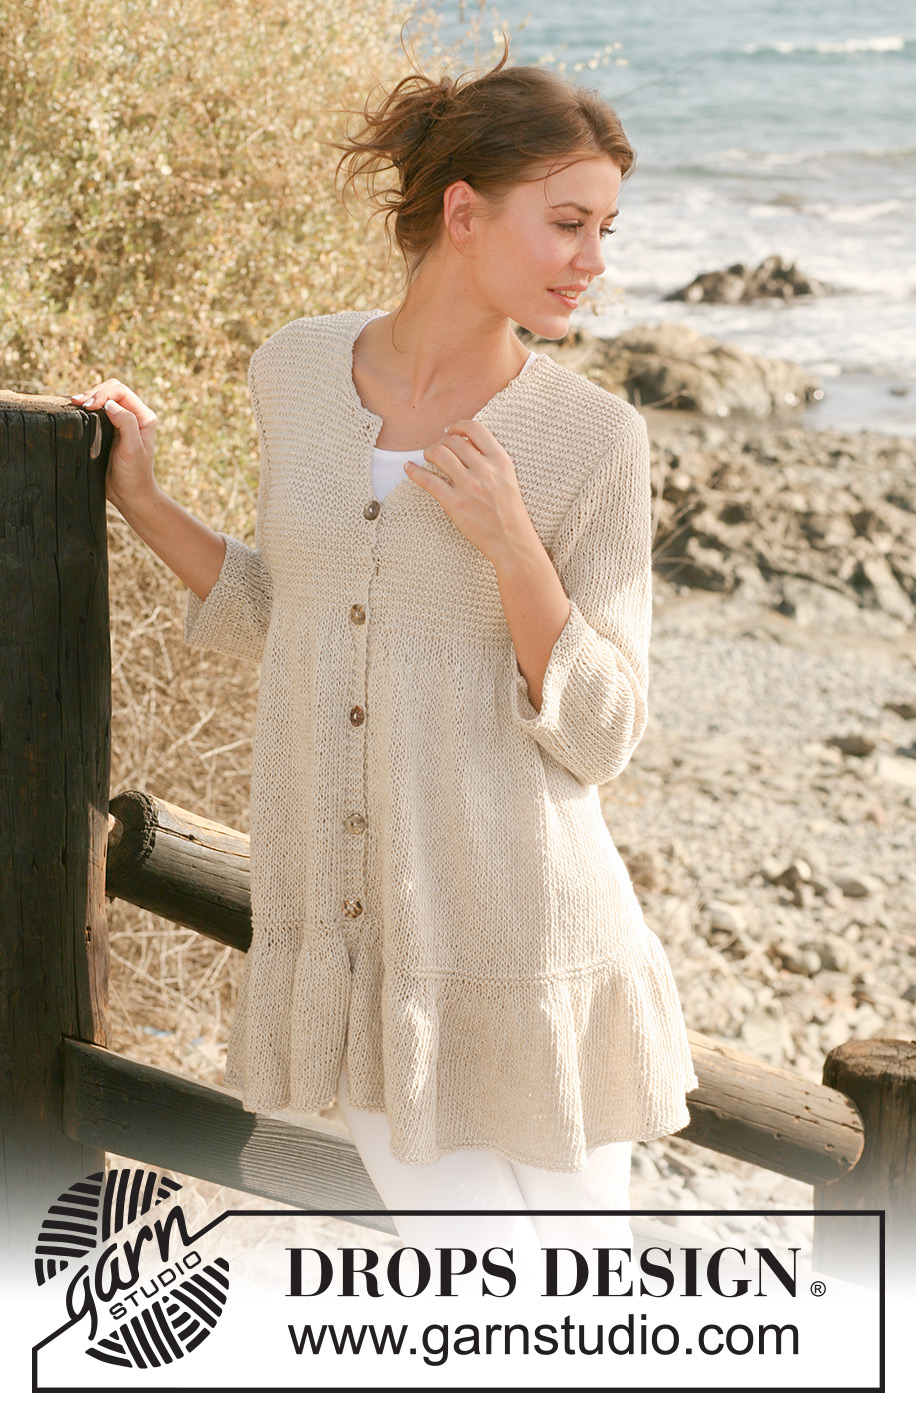
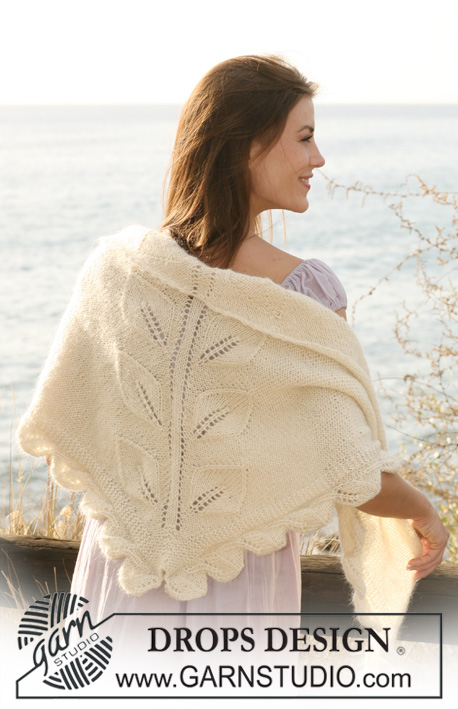
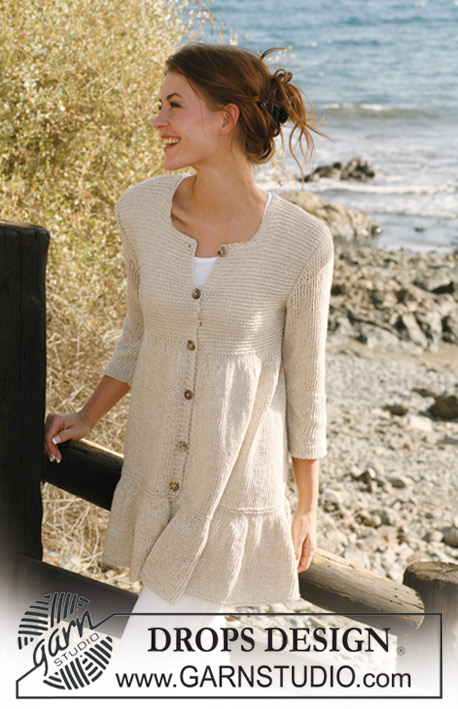
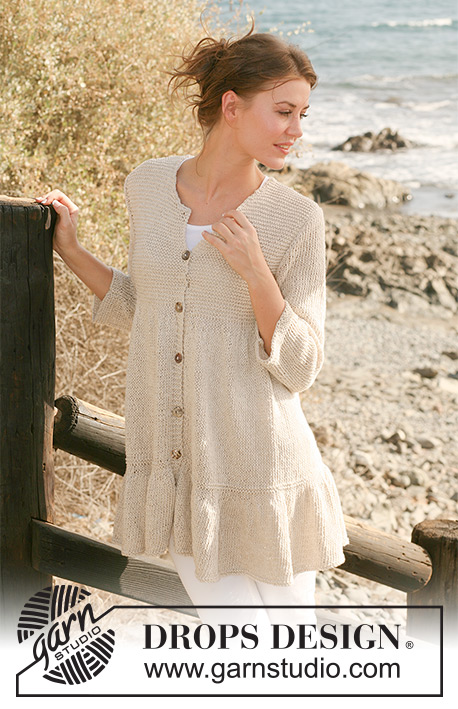
Knitted DROPS jacket in ”Bomull-Lin” with wide flounce border and yoke in garter st. Size S-XXXL.
DROPS 118-1 |
|||||||
|
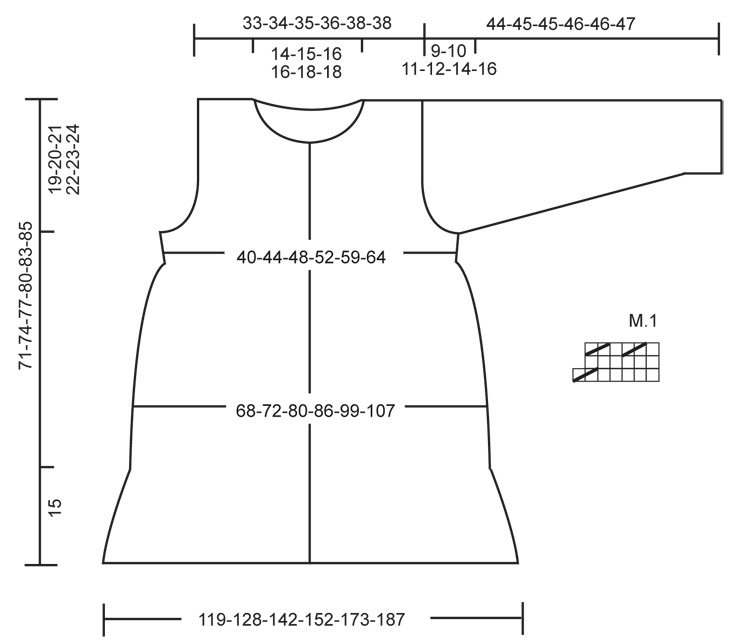
GARTER ST (back and forth on needle): K all rows. GARTER ST (in the round): K 1 round, P 1 round. MEASUREMENT TIP: Because of the weight of the yarn all measurements should be made whilst the garment is hanging, otherwise it will be too long when worn. FLOUNCE: See diagram M.1 (= 7 sts). Diagram shows the pattern from RS. BUTTONHOLES: Make buttonholes on right front band. 1 buttonhole = cast off 3rd st from mid front and cast on 1 new st on return row. Make buttonholes when piece measures: Size S: 20, 28, 36, 44, 52 and 60 cm Size M: 20, 27, 34, 41, 48, 55 and 62 cm Size L: 22, 29, 36, 43, 50, 57 and 64 cm Size XL: 19, 27, 35, 43, 51, 59 and 67 cm Size XXL: 20, 28, 36, 44, 52, 60 and 68 cm Size XXXL: 21, 28, 35, 42, 49, 56, 63 and 70 cm -------------------------------------------------------- -------------------------------------------------------- JACKET: Worked back and forth on circular needle from mid front. Cast on 416-444-493-528-598-647 sts on circular needle size 5 mm with Bomull-Lin. Work 4 rows GARTER ST – see above! Work next row as follows from RS: 5 garter sts (front band), stocking st until 5 sts remain and finish with 5 garter sts (front band). Continue like this. See MEASUREMENT TIP! REMEMBER THE KNITTING TENSION! When piece measures 15 cm for all sizes work FLOUNCE on next row from RS as follows – see above: 5 garter sts, M.1 on all sts until 5 sts remain, work these in garter st. After 1 vertical repeat of M.1 there are 242-258-286-306-346-374 sts on needle. P 1 row from WS with 5 garter sts each side. Change to circular needle size 4 mm and work 4 rows garter st, AT THE SAME TIME dec 1-3-3-2-0-0 sts evenly on first row = 241-255-283-304-346-374 sts. Change back to circular needle size 5 mm and continue in stocking st with 5 garter sts each side. AT THE SAME TIME when piece measures 20-20-22-19-20-21 cm make BUTTONHOLE on right front band – see above! When piece measures 45 cm for all sizes work next row from RS as follows: 5 garter sts, M.1 on all sts until 5 sts remain, finish with 5 garter sts. After 1 repeat of M.1 there are 142-150-166-178-202-218 sts on needle. P 1 row from WS with 5 garter sts each side. Insert 2 markers in piece, 38-40-44-47-53-57 sts in from each side (back piece = 66-70-78-84-96-104 sts). Change to circular needle size 4 mm and continue in garter st on all sts. When piece measures 48 cm for all sizes inc 1 st each side of both markers and repeat the inc in size M-XXXL when piece measures 50-52-54-56-57 cm (no inc for size S) = 146-158-174-186-210-226 sts. When piece measures 52-54-56-58-60-61 cm cast off 6 sts for armhole each side (i.e. 3 sts each side of marker) and complete each piece separately. BACK PIECE: = 62-68-76-82-94-102 sts. Cast off for armhole each side at the beg of every row: 2 sts 1-2-3-4-6-8 times and 1 st 1-1-2-2-3-3 times = 56-58-60-62-64-64 sts. When piece measures 69-72-75-78-81-83 cm cast off the middle 22-24-26-26-28-28 sts for neck and complete each shoulder separately. Cast off 1 st on neckline on next row = 16-16-16-17-17-17 sts left on shoulder. Cast off when piece measures 71-74-77-80-83-85 cm. LEFT FRONT PIECE: = 36-39-43-46-52-56 sts. Cast off for armhole at the side as described for back piece = 33-34-35-36-37-37 sts. When piece measures 62-64-66-68-70-71 cm cast off to shape the neckline at the beg of every row from mid front: 10-11-12-12-13-13 sts 1 time, 2 sts 3 times and 1 st 1 time = 16-16-16-17-17-17 sts left on shoulder. Cast off when piece measures 71-74-77-80-83-85 cm. RIGHT FRONT PIECE: Like left front piece, but mirrored. NOTE! Remember buttonholes! SLEEVE: Worked in the round on double pointed needles. Cast on 46-48-50-52-52-54 sts on double pointed needles size 4 mm with Bomull-Lin. Work 8 rounds GARTER ST – see above! Change to double pointed needles size 5 mm. Insert a marker at beg of round. Continue in stocking st. When piece measures 6 cm inc 1 st each side of marker and repeat the inc on every 6-6-5-3.5-2.5-2 cm a total of 5-5-6-8-10-10 times = 56-58-62-68-72-74 sts. When piece measures 35-35-34-34-32-31 cm - NOTE! Less for the larger sizes because of longer sleeve cap and wider shoulder- cast off 6 sts mid under sleeve (= 3 sts each side of marker) and complete piece back and forth on needle. Cast off for sleeve cap each side at the beg of every row: 2 sts 2 times for all sizes, 1 st 3-5-6-7-9-11 times, then 2 sts each side until piece measures 43-44-44-45-45-46 cm, now cast off 3 sts 1 time each side and cast off remaining sts. Piece measures approx 44-45-45-46-46-47 cm. ASSEMBLY: Sew shoulder seams. Set in sleeves. Sew on buttons. CROCHET BORDER: Crochet a border round neckline with crochet hook size 4 mm and Bomull-Lin as follows: 1 dc, * 1 ch, skip approx 1 cm, 1 dc *, repeat from *-*. |
|||||||
Diagram explanations |
|||||||
|
|||||||
 |
|||||||
Have you finished this pattern?Tag your pictures with #dropspattern #holidayjoyjacket or submit them to the #dropsfan gallery. Do you need help with this pattern?You'll find 22 tutorial videos, a Comments/Questions area and more by visiting the pattern on garnstudio.com. © 1982-2026 DROPS Design A/S. We reserve all rights. This document, including all its sub-sections, has copyrights. Read more about what you can do with our patterns at the bottom of each pattern on our site. |
|||||||


With over 40 years in knitting and crochet design, DROPS Design offers one of the most extensive collections of free patterns on the internet - translated to 17 languages. As of today we count 324 catalogues and 12290 patterns translated into English (UK/cm). 12290
We work hard to bring you the best knitting and crochet have to offer, inspiration and advice as well as great quality yarns at incredible prices! Would you like to use our patterns for other than personal use? You can read what you are allowed to do in the Copyright text at the bottom of all our patterns. Happy crafting!
Post a comment to pattern DROPS 118-1
We would love to hear what you have to say about this pattern!
If you want to leave a question, please make sure you select the correct category in the form below, to speed up the answering process. Required fields are marked *.