
Popular categories
Looking for a yarn?






























Comments / Questions (57)
 Helene wrote:
Hej. Jag funderar på det färdiga måttet i omkrets. Eftersom den ska sys överlappar, antar att måtten på skissen är innan man sytt i knappen. Svårt att beräkna storlek i färdigmonterad. Det försvinner väl magra centimeter när den är klar?
26.09.2026 - 07:48DROPS Design answered:
Hei Helene. Under Montering står det: Det sys 2 pyntknappar i var sida om västen, rätmaskorna från framstycket läggs över rätmaskorna från bakstycket, sedan sys knapparna fast genom båda lager. Så når rätmaskorna från framstycket läggs över rätmaskorna från bakstycket vil du få det målet du ser på målskissen i den str. du strikker etter. mvh DROPS Design
28.09.2026 - 08:12
Barbro Lidman wrote:
Hej, jag undrar; det står att västen ska stickas med dubbelt garn, men under rubriken garn , står det att det går åt 300 g av det ena garnet och 100 g av det andra. Jag förstår inte. Tacksam för svar.
23.09.2026 - 22:21DROPS Design answered:
Hej Barbro, ja det stemmer du strikker med 1 tråd af hver af de 2 kvaliteter (Kid-Silk er tyndere og længere så her behøver du kun 100g) :)
24.09.2026 - 09:22
Catarina Åkerström wrote:
Varför ska framstycket stickas 2 cm längre än bakstycket? Står maska av vid 56 cm på bak men avmaska vid 58 cm på framstycket.
19.09.2026 - 08:41DROPS Design answered:
Hei Catarina . Husk å hake av for Spørsmål om du ønsker svar. Sendes det inn et Spørsmål som Kommentarer blir det ikke besvart / kan ta tid. Forstykket og bakstykket er like lange, men når bakstykket måler 56 cm , felles de midterste 24 maskene av til hals og hver skulder strikkes ferdig for seg og det strikkes ca 2 cm til før maskene på skuldrene felles av = 58 cm (samme som forstykket). mvh DROPS Design
28.09.2026 - 11:22
 Flore wrote:
Bonjour, En lisant le patron, je ne vois pas les explications pour créer les boutonnières sur les côtés ? Merci d'avance
25.02.2026 - 09:11DROPS Design answered:
Bonjour Flore, il n'y pas de boutonnières, les boutons sont cousus dans les 2 épaisseurs, cf. ASSEMBLAGE. Bon tricot!
26.02.2026 - 09:08
Rouzier wrote:
Peut on finir l\'encolure avec des aiguilles droites de ce pull sans manche svp merci ?
11.02.2026 - 15:20DROPS Design answered:
Bonjour Mme Rouzier, tout à fait, dans ce cas précis, quand le dos et le devant sont terminés, faites la couture d'une seule des 2 épaules, relevez les mailles du col autour de l'encolure + 2 m lis (1 de chaque côté), tricotez le col et rabattez les mailles, puis terminez par la couture du col et de la 2ème épaule. Découvrez ici comment adapter un modèle sur aiguilles droites. Bon tricot!
11.02.2026 - 17:22
Rebecka wrote:
Hej, jag har precis börjat sticka resåren. När jag vänder varv har jag 12 avuga maskor i början på varvet, det borde vara 10. I beskrivningen står det att jag ska avsluta ett varv med 2 räta maskor och 8 maskor i rätstickning (rätstickningen betyder väl räta maskor?), så på slutet av varvet blir det alltid 10 räta maskor....? Misstänker att det blir något fel här. Tack
01.02.2026 - 18:54DROPS Design answered:
Hej Rebecka, hvilken størrelse strikker du?
04.02.2026 - 13:34
Carina Bengtsson wrote:
Måste man sticka med rundstickor
01.01.2026 - 16:09DROPS Design answered:
Hi Cortina, you can use straight needles for this project. Happy knitting!
02.01.2026 - 12:52
Naoum wrote:
Pourquoi faire toutes ces diminution au 1er rang jersey? Merci
12.12.2025 - 22:12DROPS Design answered:
Bonjour Naoum, il faut plus de mailles pour tricoter les côtes avec les aiguilles 4,5 que le jersey avec les aiguilles 6, ainsi, on va devoir diminuer des mailles pour conserver la largeur souhaitée (la bordure du bas ne resserre ici pas l'ouvrage). Bon tricot!
15.12.2025 - 10:31
 Josine Foreman wrote:
Ik begrijp het gebruik van de rondbreinaald voor dit model niet, Ik brei toch niet rond? Ik brei van links naar rechts omdat de zijkant openblijft. Ben ok een beetje dom? Groet Josine
12.12.2025 - 10:55DROPS Design answered:
Dag Josine,
Voor de constructie is het inderdaad niet nodig om rondbreinaalden te gebruiken. Het wordt geadviseerd omdat je veel steken op de naald hebt, met name in de grotere maten, en dan past het beter op de naald.
14.12.2025 - 15:12
Mineau wrote:
Comment se fait il que j ai payé pour avoir explication pour pull sans manche et vous m avez débité pour 2 explications soit 10.24 au lieu de 5.12
10.12.2025 - 13:56DROPS Design answered:
Bonjour Mme Mineau, nos explications sont gratuites et directement disponibles gratuitement sur notre site, merci de bien vouloir contacter directement la personne qui vous les a vendues. Bon tricot!
11.12.2025 - 08:53
|
|
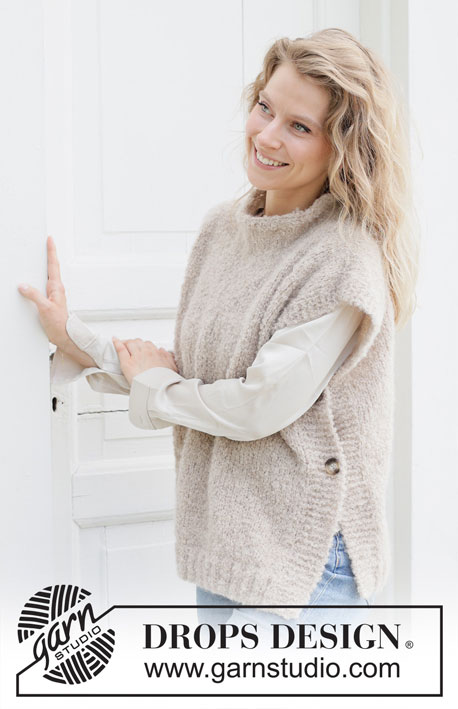
Latte Love Vest#lattelovevest |
|
 |
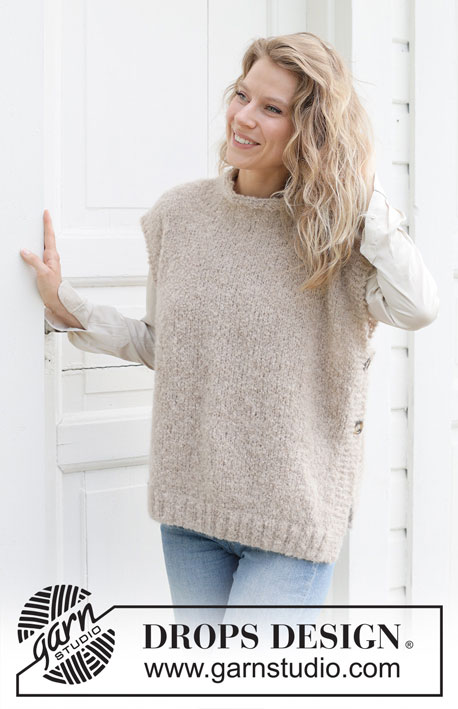 |
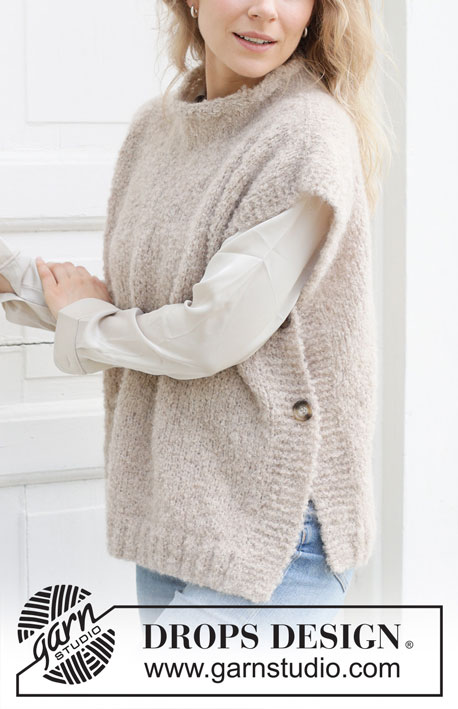
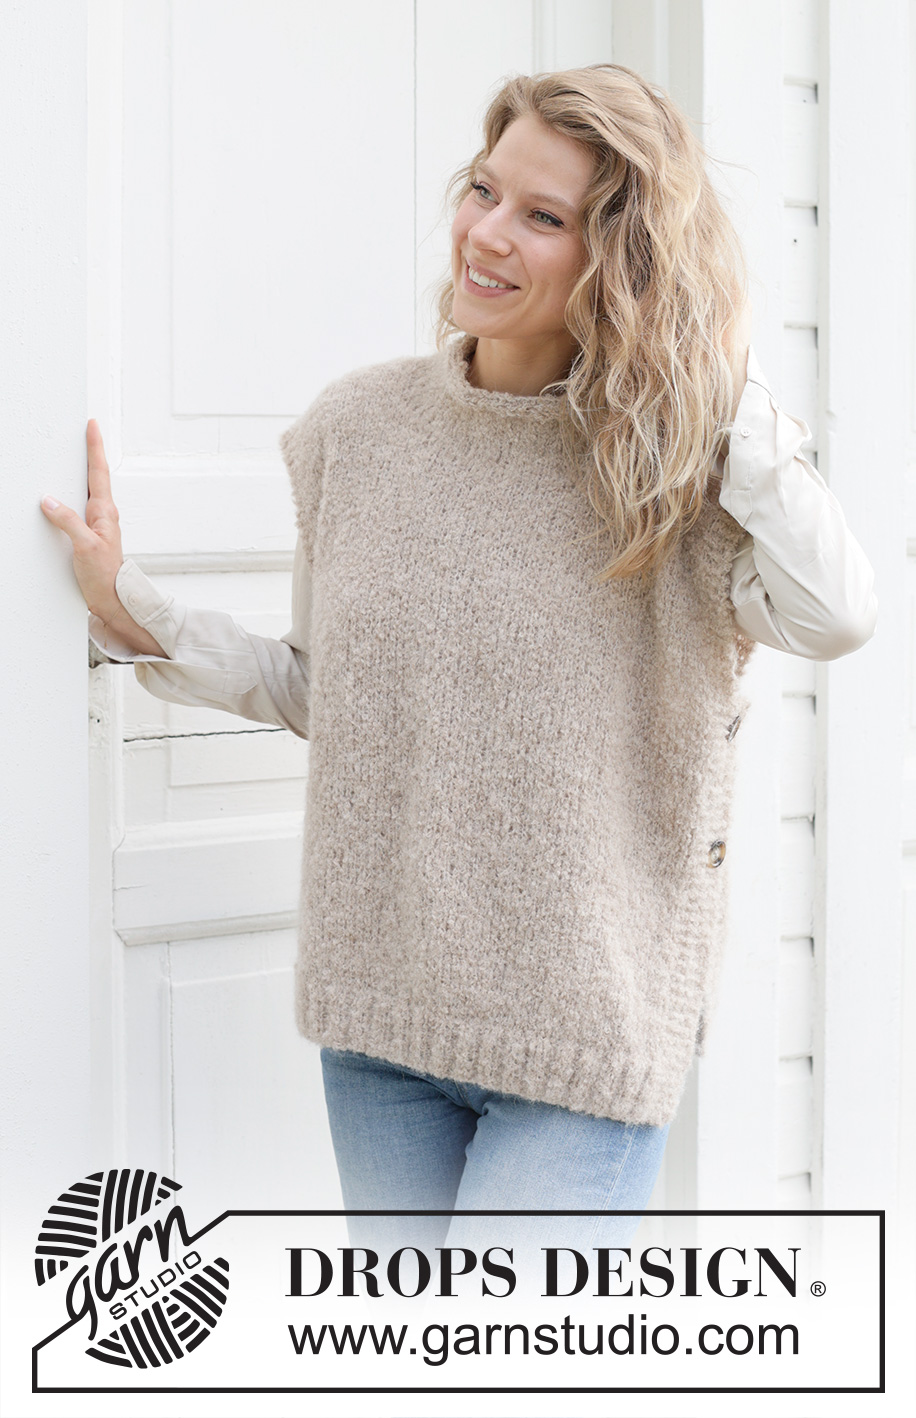
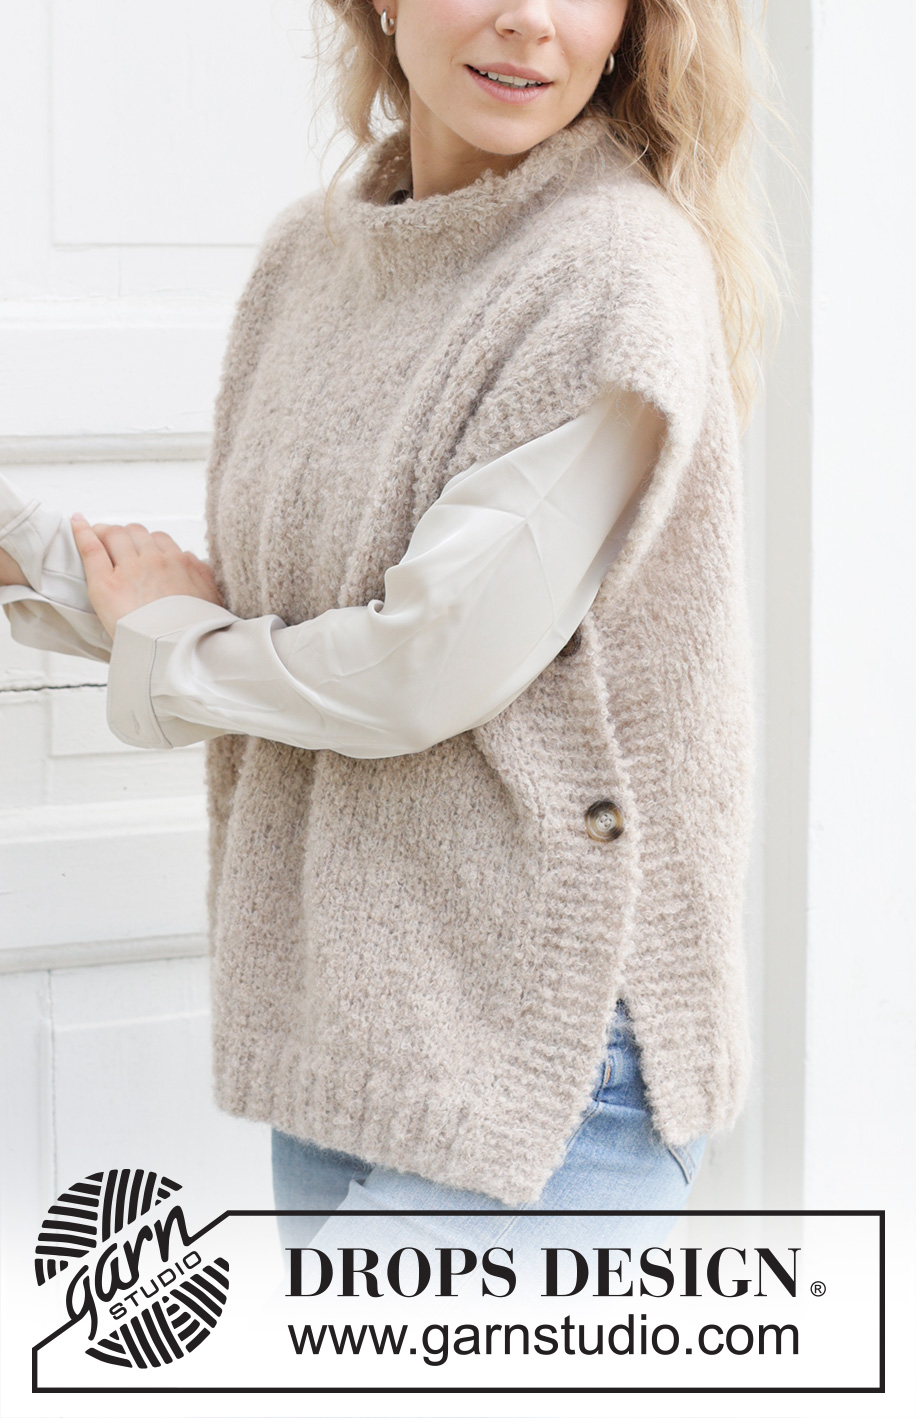
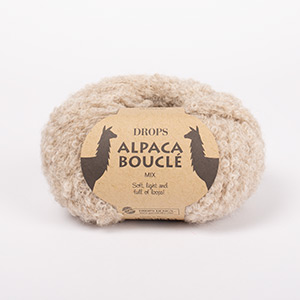
Knitted waistcoat in DROPS Alpaca Bouclé and DROPS Kid-Silk. Piece is knitted bottom up in stocking stitch with edges in garter stitch, i-cord and opening in the side. Size: S - XXXL
DROPS 255-40 |
|
|
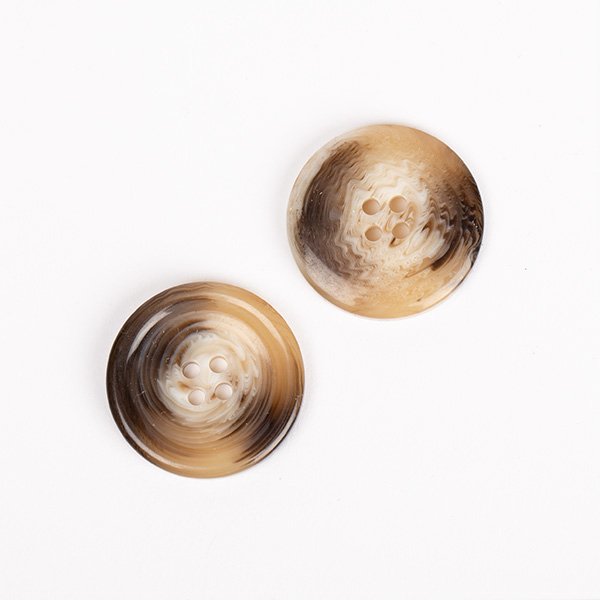
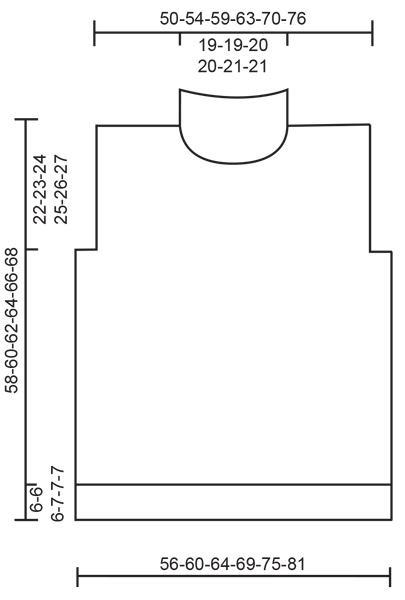
---------------------------------------------------------- EXPLANATION FOR THE PATTERN: ---------------------------------------------------------- GARTER STITCH (when working back and forth): Knit on all rows, i.e. knit from right side and knit from wrong side. 1 ridge vertically = knit 2 rows. I-CORD CAST-OFF: At the end of round and after last stitch on round has been worked: Cast on 3 new stitches on right needle from right side. Slip the 3 new stitches from right needle to left needle so that working yarn is 3 stitches in on left needle (the working yarn tightens the piece when working to form a little tube). ROW 1 (= right side): Knit 2, knit the next 2 stitches twisted together. ROW 2 (= right side): Slip the 3 stitches from right needle back on left needle, knit 2, knit the next 2 stitches twisted together. AFTER 2ND ROW: Repeat ROW 2 until 3 stitches remain on right needle. Slip the 3 stitches from right needle back on left needle. Cast off. Sew a little stitch that binds beginning/end of I-cord together. ---------------------------------------------------------- START THE PIECE HERE: ---------------------------------------------------------- WAISTCOAT - SHORT OVERVIEW OF PIECE: Worked back and forth on circular needle, bottom up. Work front and back piece separately. Sew the parts together on the shoulders and sew on buttons for decoration in each side. Finish by picking up stitches around the neck and cast off with I-cord. BACK PIECE: Work back and forth on circular needle. Cast on 94-102-110-118-130-138 stitches on circular needle size 4.5 mm with 1 strand of each colour (= 2 strands). Work rib, begin from right side as follows: Work 8 stitches in GARTER STITCH - read explanation above, work rib (= knit 2/purl 2), until 10 stitches remain on row, knit 2 and finish with 8 stitches in garter stitch. Work until rib measures 6-6-6-7-7-7 cm. Switch to circular needle size 6 mm, work 1 row in stocking stitch with 8 stitches in garter stitch in each side while AT THE SAME TIME decreasing 16-18-20-22-24-24 stitches evenly on first row (do not decrease over stitches in garter stitch in each side) = 78-84-90-96-106-114 stitches. Continue in stocking stitch with 8 stitches in garter stitch in each side. Remember to follow the knitting tension! When piece measures 36-37-38-39-40-41 cm cast off 4 stitches in each side for armholes = 70-76-82-88-98-106 stitches. Continue in stocking stitch with 4 stitches in garter stitch in each side. When piece measures 56-58-60-62-64-66 cm, cast off the middle 24-24-26-26-28-28 stitches for neck and finish each shoulder separately. SHOULDER: On next row cast off 1 stitch from the neck = 22-25-27-30-34-38 stitches remain on each shoulder. Cast off when piece measures 58-60-62-64-66-68 cm. FRONT PIECE: Cast on the same number of stitches and work the same way as back piece until piece measures 50-52-54-55-57-59 cm. Now slip the middle 18-18-20-20-22-22 stitches on a thread for neck, and finish each shoulder separately. SHOULDER: Now cast off stitches for neck on every other row as follows: Cast off 2 stitches 1 time, and 1 stitch 2 times = 22-25-27-30-34-38 stitches remain on each shoulder. Cast off when piece measures 58-60-62-64-66-68 cm. ASSEMBLY: Sew the shoulder seams. Sew on 2 buttons for decoration in each side of waistcoat, place stitches in garter stitch from front piece over stitches in garter stitch from back piece, then fasten button through both layers. Place top button approx. 3 cm from armhole and place the next approx. 9-10 cm below. NECK EDGE: Pick up approx. 62 to 74 stitches around the neck (including stitches on the thread) with 1 strand of each quality and on a short circular needle size 6 mm. Work in stocking stitch in the round for 7 cm, then cast off with I-cord - read explanation above. |
|
 |
|
Have you finished this pattern?Tag your pictures with #dropspattern #lattelovevest or submit them to the #dropsfan gallery. Do you need help with this pattern?You'll find 14 tutorial videos, a Comments/Questions area and more by visiting the pattern on garnstudio.com. © 1982-2026 DROPS Design A/S. We reserve all rights. This document, including all its sub-sections, has copyrights. Read more about what you can do with our patterns at the bottom of each pattern on our site. |
|






With over 40 years in knitting and crochet design, DROPS Design offers one of the most extensive collections of free patterns on the internet - translated to 17 languages. As of today we count 333 catalogues and 12525 patterns translated into English (UK/cm). 12525
We work hard to bring you the best knitting and crochet have to offer, inspiration and advice as well as great quality yarns at incredible prices! Would you like to use our patterns for other than personal use? You can read what you are allowed to do in the Copyright text at the bottom of all our patterns. Happy crafting!
Post a comment to pattern DROPS 255-40
We would love to hear what you have to say about this pattern!
If you want to leave a question, please make sure you select the correct category in the form below, to speed up the answering process. Required fields are marked *.