
Popular categories
Looking for a yarn?


Comments / Questions (63)
![]() Denise wrote:
Denise wrote:
I'm very confused how to make the increases for the Raglan sleeves. Is there a video I can see or can you show me pictures? I looked online but none of them come close to what you're trying to describe.
11.02.2026 - 21:17DROPS Design answered:
Hi Denise, Here is a link to our video for working raglan top down. https://www.garnstudio.com/video.php?id=1031&lang=en In this particular pattern, you are increasing on either side of 2 stitches (with the marker between these stitches) but otherwise the technique is the same. Regards, Drops Team.
12.02.2026 - 07:02
![]() Ana wrote:
Ana wrote:
Do I need to block this sweater after I knit this? If so, can you recommend what soap I need to use? Or in general give recommendations about blocking? I have been knotting for a long time but I have never done this. What are pros and cons?
10.02.2026 - 17:36
![]() Ana wrote:
Ana wrote:
What does it mean when it says that after 29 stitches I need to place a marker and the piece is measured from there? Why 29 and do I knit these 29?
07.02.2026 - 00:30DROPS Design answered:
Dear Ana, you don't work these 29 stitches; simply count them and insert 1 marker for measuring the piece. This position, after 29 stitches, should match the mid-back, so it will allow for more accurate measurements of the length of the back, as opposed to raglan-lines or the stitches of the shoulders. This marker doesn't follow the piece downwards. Afterwards, you will insert the 4 raglan markers as well, without working the piece. You are not displacing the beginning of the round, so you start working the round from the 1st of the 29 stitches. Happy knitting!
08.02.2026 - 19:54
![]() Joanna wrote:
Joanna wrote:
Co dokladnie oznacza polecenie "Dalej dodawać oczka na reglan następująco: co 2 okrążenia na przód i tył i co 4 okrążenia na rękawy (= dodajemy na przemian 4 i 8 oczek w każdym okrążeniu z dodawaniem oczek)" ? Kiedy mamy okrążnie gdzie dodajemy 4 oczka należy dodać po 1 oczku przy każdym reglanie? Czy dodać oczka po obu stronach dwóch reglanów a dwa kolejne reglany po prostu przerobić bez dodawania oczek?
05.02.2026 - 15:10DROPS Design answered:
Witaj Joanno, to oznacza, że w okr. 1 dodasz tylko oczka na tył i przód (dodane 4 oczka w okrążeniu - dodajesz 1 oczko przy każdym reglanie, ale tylko z jednej jego strony, a nowe oczka stają się oczkami przodu i tyłu). W okr. 3 dodasz oczka jak zwykle, czyli z każdej strony oczek reglanów (dodanych 8 oczek). Pozdrawiamy!
06.02.2026 - 08:45
![]() Kim wrote:
Kim wrote:
When starting the ribbing for the sleeve, the directions say to increase 4 stitches. Doesn't this make the ribbing very loose? If that is the case then why do I need to switch to DPNs.
27.01.2026 - 20:06DROPS Design answered:
Hi Kim, Yes, the extra stitches are to give you a looser cuff. This is optional and you can continue with the original number of stitches if you wish. Reducing the needle size is to give a tighter weave to the ribbing. Regards, Drops Team.
28.01.2026 - 05:46
![]() Cécile wrote:
Cécile wrote:
Bonjour, Ayant fini le col, je compte 29 mailles à partir du debut du tour pour mettre le marqueur du milieu du devant, sauf que ça donne le debut du tour sur l’épaule gauche. Et pas droite ! Quelle est mon erreur ? Cordialement
14.01.2026 - 16:46DROPS Design answered:
Bonjour Cécile, les tours commencent au niveau de l'épaule droite côté dos (juste avant la manche droite donc), le marqueur placé à 29 m après le début du tour n'est pas le début des tours, il marque seulement le milieu du devant (approximativement) et va servir de repère pour les mesures en longueur suivantes. Bon tricot!
15.01.2026 - 10:21
![]() ANGELA wrote:
ANGELA wrote:
Posso lavorare il progetto con i ferri diritti?
08.12.2025 - 09:02DROPS Design answered:
Buonasera Angela, questo modello è lavorato in tondo: può lavorare con i ferri dritti aggiungendo una maglia di vivagno per lato per la cucitura. Buon lavoro!
08.12.2025 - 22:36
![]() Laure wrote:
Laure wrote:
Merci
24.11.2025 - 11:48
![]() Laure wrote:
Laure wrote:
Bonjour, je ne comprends pas "Augmenter ensuite pour le raglan ainsi: Tous les 2 tours pour le devant et le dos et tous les 4 tours pour les manches (= on augmente alternativement 4 et 8 mailles à chaque tour d'augmentations" concrètement on augmente côté devant mais pas côté manche autour du marqueur ????
23.11.2025 - 10:21DROPS Design answered:
Bonjour Laure, concrètement vous allez effectivement augmenter tous les 2 rangs seulement 4 mailles: début du devant/fin du devant + début du dos/fin du dos (comme avant); et tous les 4 rangs, vous augmentez comme avant vos 8 mailles: devant, dos et manches. Bon tricot!
24.11.2025 - 09:38
![]() Csilla wrote:
Csilla wrote:
Befejeztem a szemek szaporítását a vállrészen, de a hossza csak 14 cm. A kötéspróbában 22 sor = 10 cm. Ha jól értelmeztem összesen 32 sort kötünk a szaporításokkal. Hogyan lenne 32 sor 22 cm? Egyszerűen nem értem. Kérem segítsenek!
16.11.2025 - 14:21
|
|
Midnight Glow#midnightglowsweater |
|
 |
 |
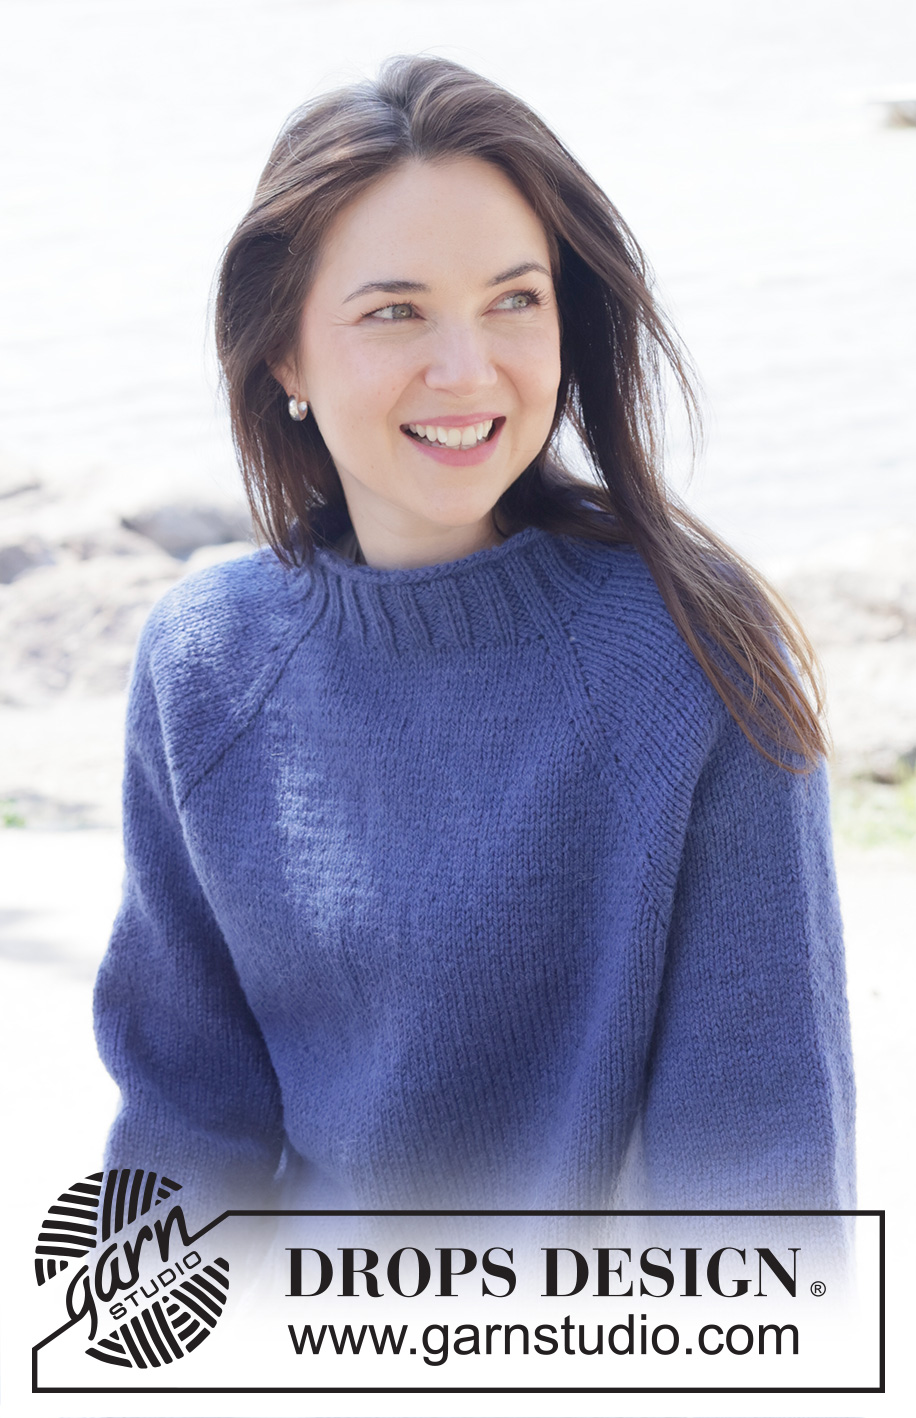
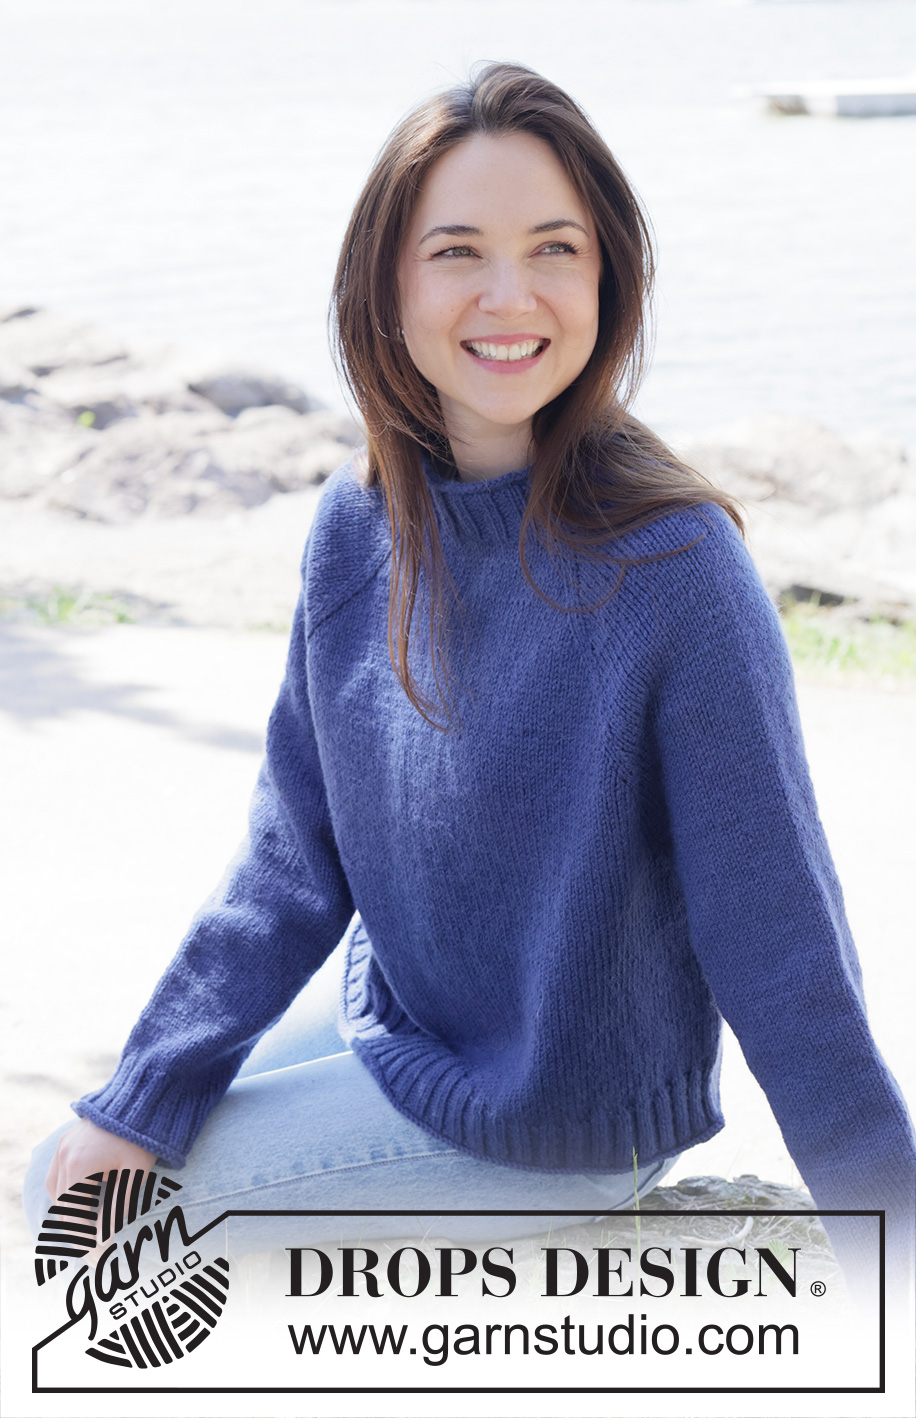
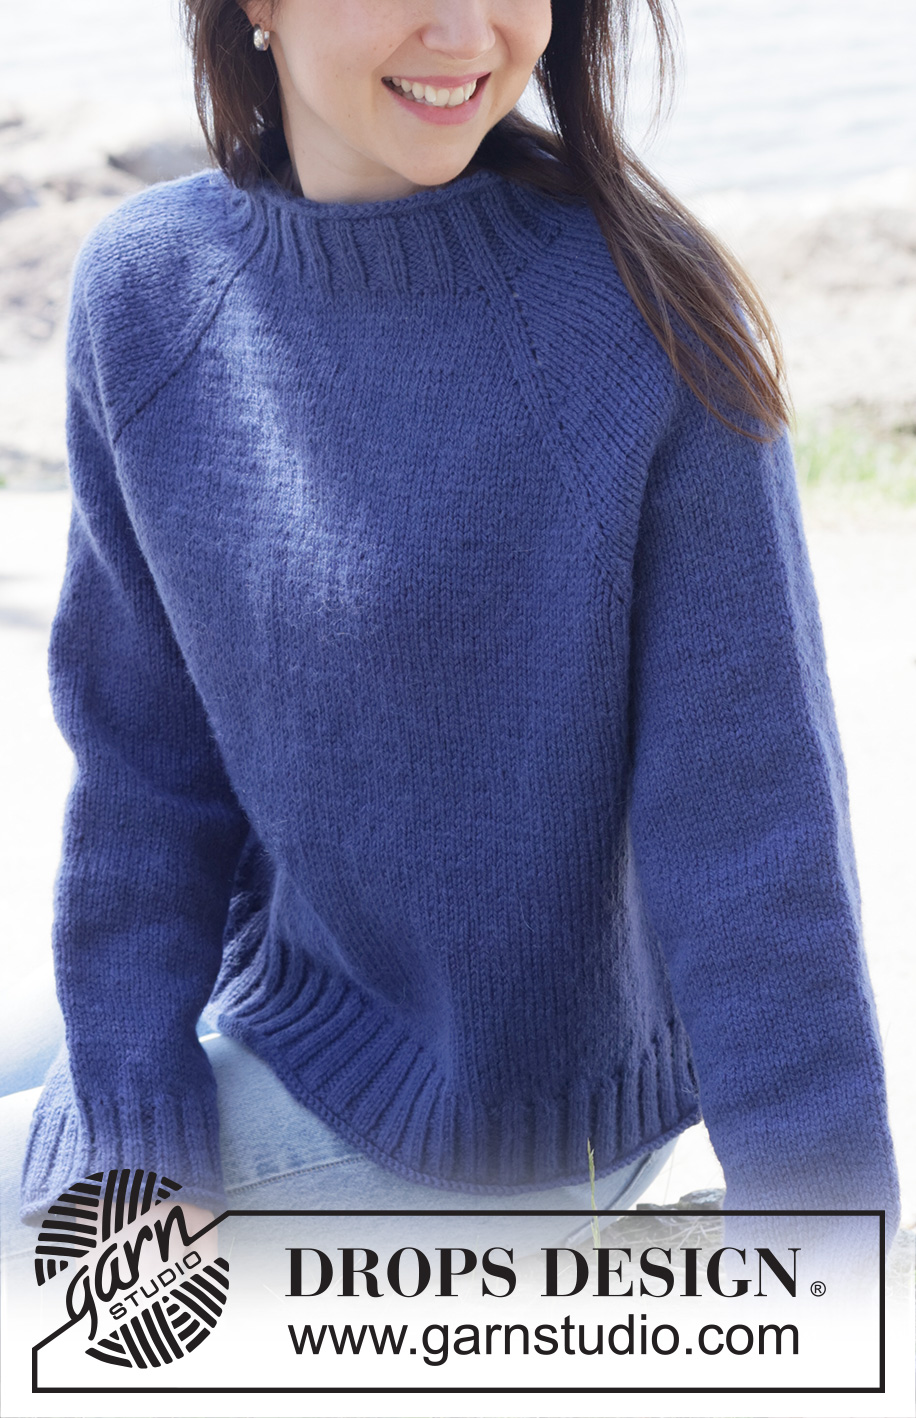
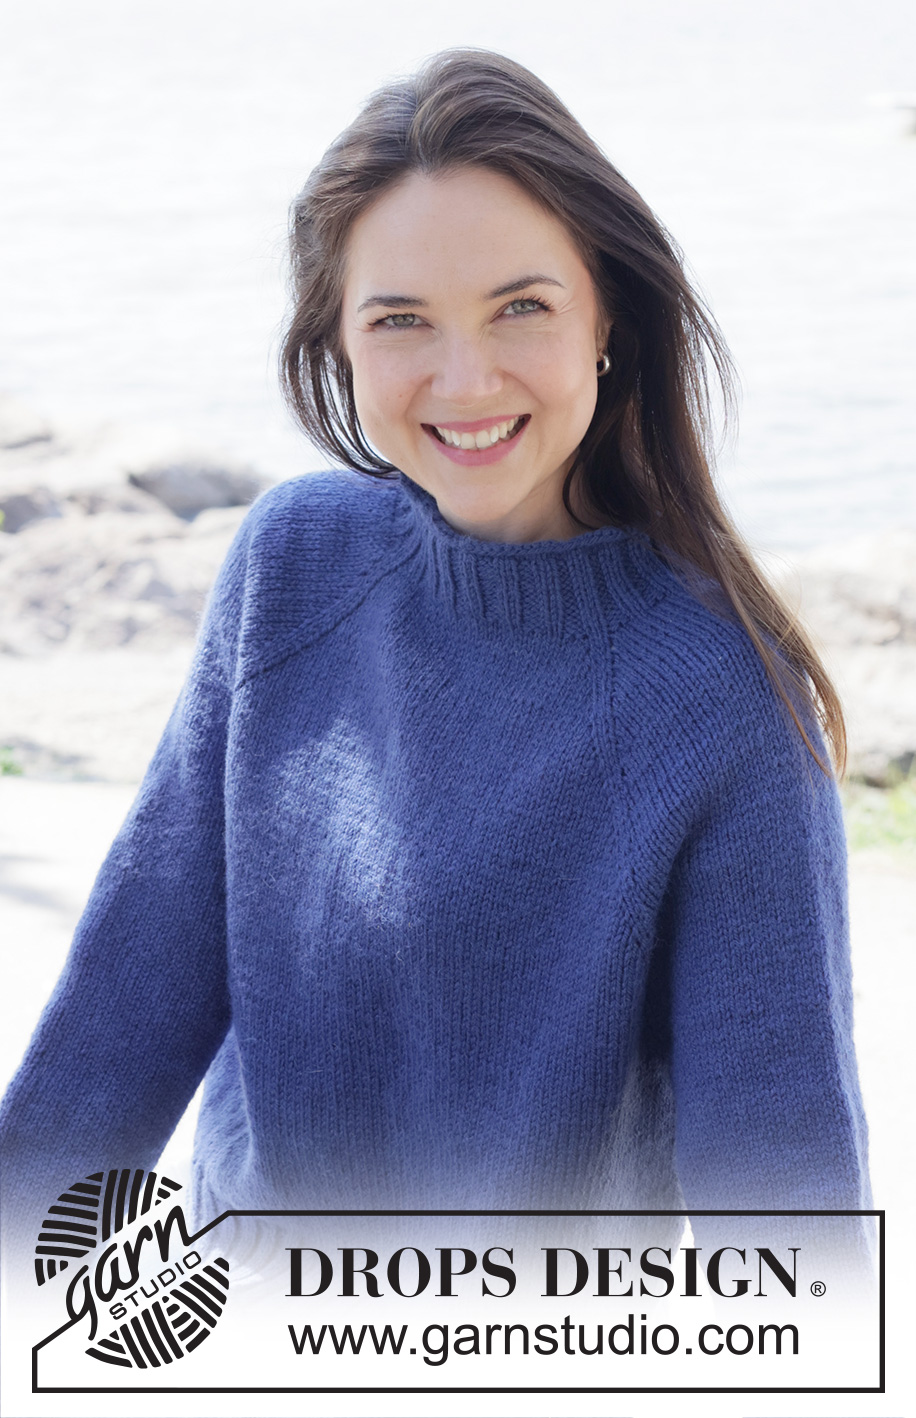
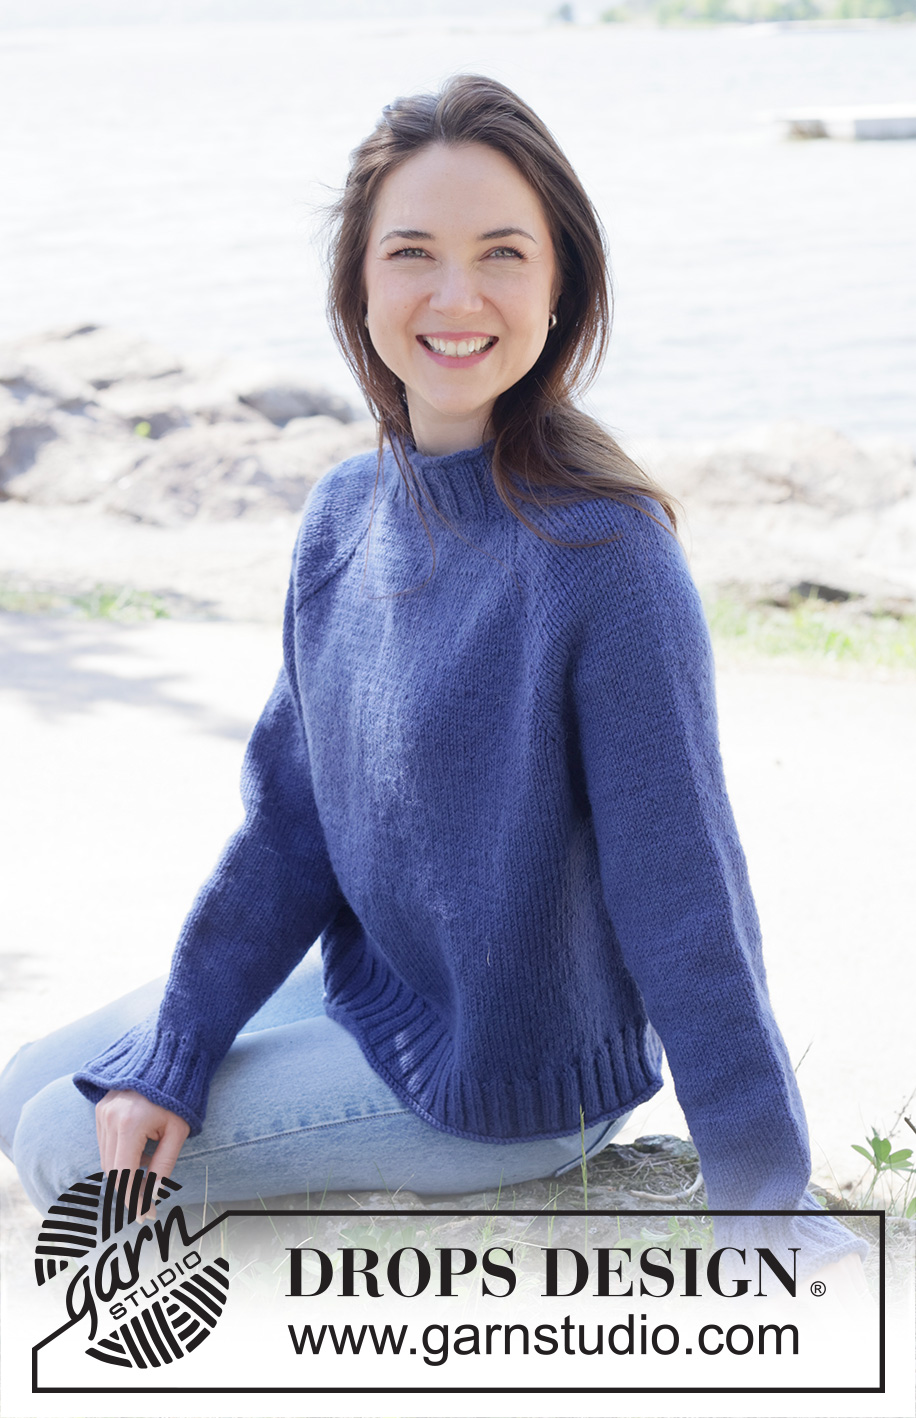
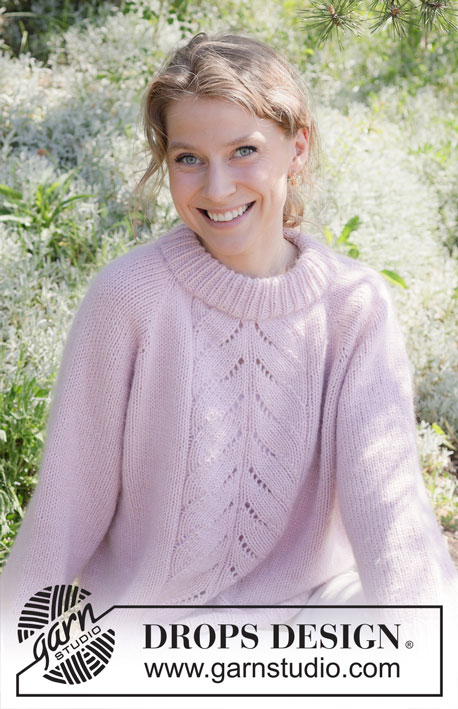
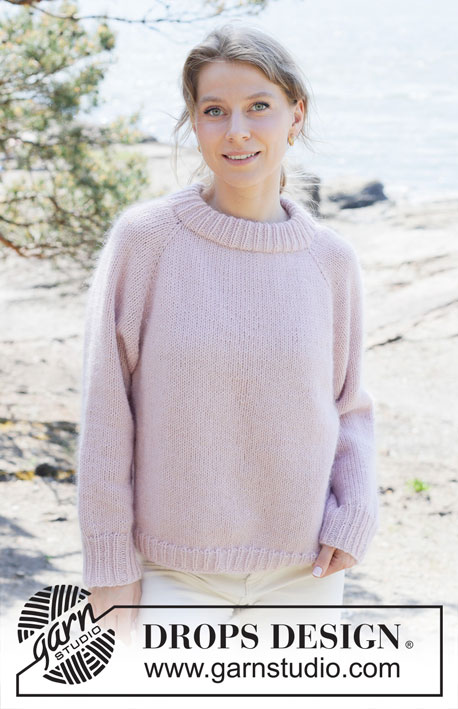
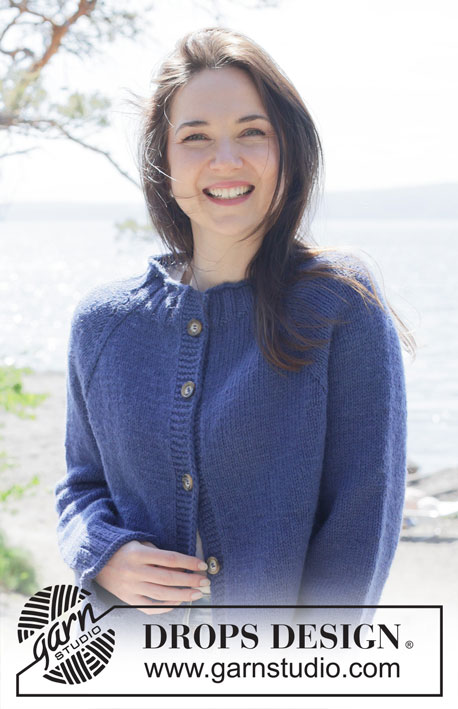
Knitted jumper in DROPS Nepal. The piece is worked top down with raglan and rolled edges. Sizes S - XXXL.
DROPS 254-39 |
|
|
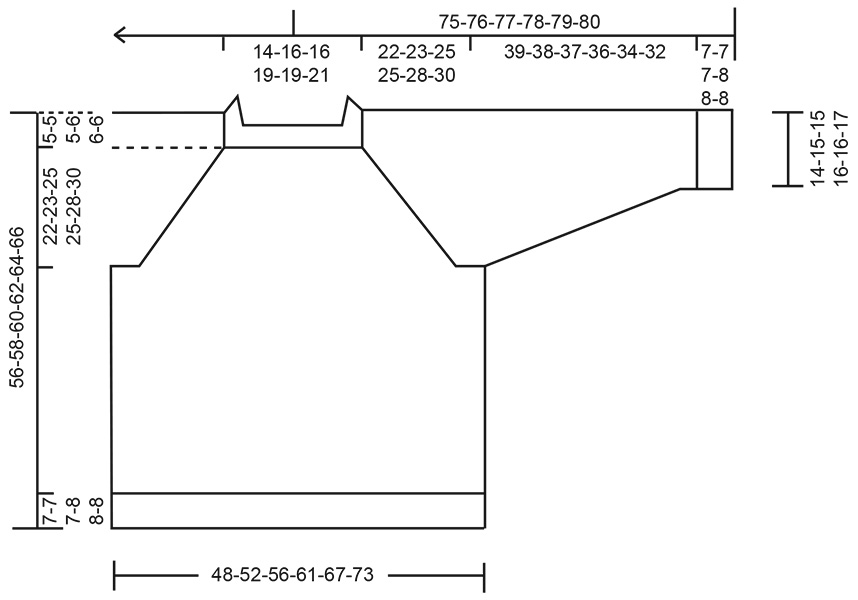
------------------------------------------------------- EXPLANATIONS FOR THE PATTERN: ------------------------------------------------------- RAGLAN: Increase 1 stitch by making 1 yarn over, which is then worked on the next round as follows: BEFORE MARKER-THREAD: Slip the yarn-over off the left needle and replace it twisted (insert the left needle through the back when replacing it). Knit the front loop of the yarn-over to avoid a hole. Then work the new stitch in stocking stitch. AFTER MARKER-THREAD: Knit the yarn-over through the back loop to avoid a hole. Then work the new stitch in stocking stitch. DECREASE TIP: Decrease 1 stitch on each side of the marker-thread as follows: Work until there are 3 stitches left before the marker-thread, knit 2 together, knit 2 (marker-thread sits between these 2 stitches), slip 1 stitch knit-wise, knit 1 and pass the slipped stitch over the knitted stitch (2 stitches decreased). INCREASE TIP-1 (evenly spaced): To work out how to increase evenly, count the total number of stitches on the needle (e.g., 164 stitches) and divide by the number of increases to be made (e.g., 20) = 8.2. In this example, increase by making 1 yarn-over after approx. each 8th stitch. On the next round work the yarn overs twisted to avoid holes. ------------------------------------------------------- START THE PIECE HERE: ------------------------------------------------------- JUMPER – SHORT OVERVIEW OF THE PIECE. The pattern uses both long and short needles; start with the length which fits the number of stitches and change when necessary. The neck and yoke are worked in the round with circular needle, from the right back shoulder, top down. When the yoke is finished, it is divided for the body and sleeves. The body is continued in the round, while the sleeves wait. The sleeves are worked in the round, top down. NECK: Cast on 80-88-88-104-104-112 stitches with circular needle size 5 mm and DROPS Nepal. Change to circular needle size 4 mm (casting on with a larger needle size makes the cast-on edge elastic) and knit 4 rounds. The beginning of the round is the right back shoulder. Work rib in the round (knit 2, purl 2) for 6-6-6-7-7-7 cm. Insert 1 marker after the first 29-31-31-37-37-39 stitches (approx. mid-front); the piece is now measured from here. YOKE: Insert 4 marker-threads, without working the piece and inserting each thread between 2 knitted stitches from the rib (these are raglan-stitches which are continued in stocking stitch). Count 1 stitch and insert 1 marker-thread before the next stitch, count 16-16-16-20-20-20 stitches (= sleeve), insert 1 marker-thread before the next stitch, count 24-28-28-32-32-36 stitches (= front piece), insert 1 marker-thread before the next stitch, count 16-16-16-20-20-20 stitches (= sleeve), insert 1 marker-thread before the next stitch, there are 24-28-28-32-32-36 stitches left (= back piece). Change to circular needle size 5 mm and work stocking stitch in the round. AT THE SAME TIME increase for RAGLAN – read description above, before/after the 2 raglan-stitches by each marker-thread (in each transition between the body and sleeves) every 2nd round a total of 8-8-11-9-7-7 times = 144-152-176-176-160-168 stitches (= 8 increased stitches on each increase-round). Remember to maintain the knitting tension. Then increase for raglan as follows: Every 2nd round on the front and back pieces and every 4th round on the sleeves (= alternately 4 and 8 increased stitches on each increase-round). Repeat these increases a total of 16-16-16-18-24-26 times on the front and back pieces (8-8-8-9-12-13 times on the sleeves). After the last increase there are 240-248-272-284-304-324 stitches and the yoke measures approx. 22-22-25-25-28-30 cm from the marker mid-front. Continue working without further increases until the yoke measures 22-23-25-25-28-30 cm from the marker. Now divide for the body and sleeves. DIVIDE FOR BODY AND SLEEVES: On the next round work as follows: Knit 1 (belongs to the back piece), place the next 48-48-54-56-58-60 stitches on a thread for the sleeve, cast on 10-12-14-18-20-22 stitches (in side mid-under sleeve), knit 72-76-82-86-94-102 (= front piece), place the next 48-48-54-56-58-60 stitches on a thread for the sleeve, cast on 10-12-14-18-20-22 stitches (in side mid-under sleeve), knit the last 71-75-81-85-93-101 stitches (= back piece). The body and sleeves are finished separately and the next round begins under the sleeve. BODY: = 164-176-192-208-228-248 stitches. Insert 1 marker in the middle of the 10-12-14-18-20-22 cast-on stitches under the sleeve. Work to the marker and continue stocking stitch in the round until the piece measures 44-46-48-48-50-52 cm from the marker mid-front. Change to circular needle size 4 mm and work rib (knit 2, purl 2), AT THE SAME TIME increasing 20-20-24-24-28-28 stitches evenly on the first round – read INCREASE TIP = 184-196-216-232-256-276 stitches. When the rib measures 6-6-6-7-7-7 cm, knit 4 rounds, then cast off a little loosely with knit. The jumper measures approx. 51-53-55-56-58-60 cm from the marker mid-front and approx. 56-58-60-62-64-66 cm from top of shoulder. SLEEVES: Place the 48-48-54-56-58-60 sleeve-stitches from the thread on one side of the piece on short circular needle size 5 mm and knit up 1 stitch in each of the 10-12-14-18-20-22 stitches cast on under the sleeve = 58-60-68-74-78-82 stitches. Insert a marker-thread in the middle of the 10-12-14-18-20-22 stitches under the sleeve. Start at the marker-thread and work stocking stitch in the round. When the sleeve measures 3 cm, decrease under the sleeve – read DECREASE TIP. Decrease 2 stitches every 7-7-4-3-2½-2 cm a total of 5-5-8-10-11-12 times = 48-50-52-54-56-58 stitches. Continue working until the sleeve measures 39-39-38-36-34-32 cm from the division. Change to double pointed needles size 4 mm. Work rib (knit 2, purl 2), AT THE SAME TIME increase 4-6-4-6-4-6 stitches evenly on the first round = 52-56-56-60-60-64 stitches. When the rib measures 6-6-6-7-7-7 cm, knit 4 rounds, then cast off a little loosely with knit. The sleeve measures approx. 46-46-45-44-42-40 cm from the division. |
|
 |
|
Have you finished this pattern?Tag your pictures with #dropspattern #midnightglowsweater or submit them to the #dropsfan gallery. Do you need help with this pattern?You'll find 28 tutorial videos, a Comments/Questions area and more by visiting the pattern on garnstudio.com. © 1982-2026 DROPS Design A/S. We reserve all rights. This document, including all its sub-sections, has copyrights. Read more about what you can do with our patterns at the bottom of each pattern on our site. |
|


With over 40 years in knitting and crochet design, DROPS Design offers one of the most extensive collections of free patterns on the internet - translated to 17 languages. As of today we count 324 catalogues and 12290 patterns translated into English (UK/cm). 12290
We work hard to bring you the best knitting and crochet have to offer, inspiration and advice as well as great quality yarns at incredible prices! Would you like to use our patterns for other than personal use? You can read what you are allowed to do in the Copyright text at the bottom of all our patterns. Happy crafting!
Post a comment to pattern DROPS 254-39
We would love to hear what you have to say about this pattern!
If you want to leave a question, please make sure you select the correct category in the form below, to speed up the answering process. Required fields are marked *.