
Popular categories
Looking for a yarn?































Comments / Questions (180)
 Mikki wrote:
Bonjour, Une amie tricoteuse plus chevronnée que moi m’a expliqué que les diminutions/augmentations permettaient d’ajuster le tricot, le resserrer à la taille et l’élargir aux hanches. Était-ce si difficile de m’écrire cela ? Merci encore infiniment pour votre ABSENCE DE RÉPONSE. Pardon de vous avoir ennuye avec mes questions stupides. Je vous promets de ne pas recommencer. Je ne vous écrirai plus. Adieu
28.07.2026 - 19:20
Mikki wrote:
Bonsoir Je vous ai laissé un message il ya deux jours parce que je ne comprends pas pourquoi il faut, dans la partie dos/devant, il faut d’abord diminuer pour ensuite augmenter. Je ne vois pas quel en est le but. Mais vous ne me répondez pas. Ma question n’est-elle pas digne de votre attention ? Merci.
27.07.2026 - 20:30DROPS Design answered:
Bonjour Mikki, vous trouverez la réponse ci-dessous, un peu tardive peut-être en raison de la période estivale et des vacances. N'hésitez pas si la réponse n'était pas suffisamment claire. Bon tricot!
04.08.2026 - 14:09
Mikki wrote:
Pour le tricot du dos et devant, on procède d'abord à des diminutions pour ensuite faire des augmentations. Quel est l'intérêt de ces procédures ? pourquoi ne pas continuer tout droit ?
25.07.2026 - 10:18DROPS Design answered:
Bonjour Mikki, on va ainsi cintrer la taille pour la marquer, vous pouvez tout à fait continuer tout droit (notez toutefois que l'on diminue ici 4 fois mais on augmente 6 fois - pensez à faire vos ajustements si besoin). Bon tricot!
04.08.2026 - 13:36
 Angelika wrote:
Werden die 2 re Maschen zwischen Ärmel und Vorder-/Rückenteil je zur Hälfte geteilt oder werden die 2 Maschen, zwischen denen die Markierer saßen, dem jeweiligen Vorder- oder Rückenteil zugeordnet wenn Ärmel und Teile getrennt weitergestrickt werden?
31.05.2026 - 12:48DROPS Design answered:
Liebe Angelika, in allen Größen gehören die 2 Raglanmaschen zum Vorder-/Rückenteil (= Rumpfteil). Viel Spaß beim Stricken!
01.06.2026 - 09:15
Leni wrote:
Merci pour votre réponse. Le diagramme est si petit que je n’avais pas vu le symbole du jeté. Je rectifie tout et tente d’agrandir les différents diagrammes out y voir plus clair. Merci encore.
28.05.2026 - 10:54
Leni wrote:
Bonjour Je suis en train de tricoter l’empiècement de ce pull. Au rang 5 une succession de 2mailles tricotées ensemble. Mais il y a un nombre impair de mailles : que faire de la dernière ? Puis au rang 6 on doit retrouver 91 mailles alors qu’on a fait des diminutions au rang 5 : comment procéder ? Merci pour vos explications.
27.05.2026 - 20:17DROPS Design answered:
Bonjour Leni, au rang 5 de A.1 vous devez tricoter (2 m ens à l'end, 1 jeté) tout le tour, terminez par 1 m endroit, ainsi vous conservez bien vos 91 mailles. Il ne doit pas y avoir de diminutions sur ce tour. Bon tricot!
28.05.2026 - 09:31
Angelika wrote:
Ich verstehe die Differenz zwischen den Maßen in der Zeichnung und der Anleitung bzw. MP nicht. Für Größe M benötigt man 35 Reihen aus dem Diagramm und die sollen eine Länge von 16cm gem. Zeichnung haben. Die Maschenprobe sagt aber, dass 28 R 10 cm ergeben, und somit müssten 45 Reihen gestrickt werden um auf die vorgegebene Höhe von 16cm zu kommen. Was stimmt da nicht??
27.05.2026 - 19:51DROPS Design answered:
Liebe Angelika, die 16 cm in der Maßskizze sind für A.1 (ca 3 cm) und A.2 (ca 13 cm) so sind es ingesamt 16 cm + 3 cm Schulter. Viel Spaß beim Stricken!
28.05.2026 - 09:30
Astrid wrote:
Ich verstehe nicht den Unterschied zwischen den Absatz RAGLANZUNAHMEN in jeder 2. Rd. mit 12 Maschen und dem nachfolgenden Absatz mit der Zunahme in jeder 2. Rd mit 8 Maschen. In der Beschreibung der PASSE geht man nur auf den 1. Absatz ein. Wann bzw. ab wann wird denn der 2. Absatz gestrickt?
01.04.2026 - 17:07DROPS Design answered:
Liebe Astrid, man soll zuerst insgesamt 12 Maschen 1-3-4-8-11-15 x insgesamt zunehmen, dann wenn alle diese ersten Zunahmen fertig sind, wird man nur 8 maschen insgesamt 16-15-16-13-12-9 x zunehmen. Viel Spaß beim Stricken!
07.04.2026 - 16:33
Uschi wrote:
Guten Tag, ich habe Probleme mit der Maschenaufteilung. Ich soll bei Größe S nach Pass-zunahme 102 Ma auf der Nadel haben. Die Einteilung zur Raglanzunahme ist: 17 Ma halber Rücken 11 Ma Ärmel 34 Ma Vordereil 11 Ma Ärmel 17 Ma halbes Rückenteil = 90 Ma Ich habe jedoch 102 Maschen auf der Nadel. Wo ist der Fehler?
01.04.2026 - 17:00DROPS Design answered:
Liebe Uschi, es fehlen die Raglanmaschen, so sollen die Maschen gerechnet werden: 17 M re, 1 M re, 2 M re, A.2 (= 11 M), 2 M re, 1 M re, 34 M re, 1 M re, 2 M re, A.2, 2 M re, 1 M re, 17 M re = 17+1+2+11+2+1+34+1+2+11+2+1+17=102 Maschen. Viel Spaß beim Stricken!
07.04.2026 - 16:31
 Elena wrote:
Buonasera Vi chiedo se il primo giro della manica inizia a dritto o subito con il motivo relativo allo schema A3 Grazie
11.03.2026 - 15:52DROPS Design answered:
Buonasera Elena, deve lavorare con la sequenza indicata, che comprende anche lo schema A.3. Buon lavoro!
11.03.2026 - 23:38
|
|||||||||||||||||||
Sea Nymph#seanymphsweater |
|||||||||||||||||||
 |
 |
||||||||||||||||||
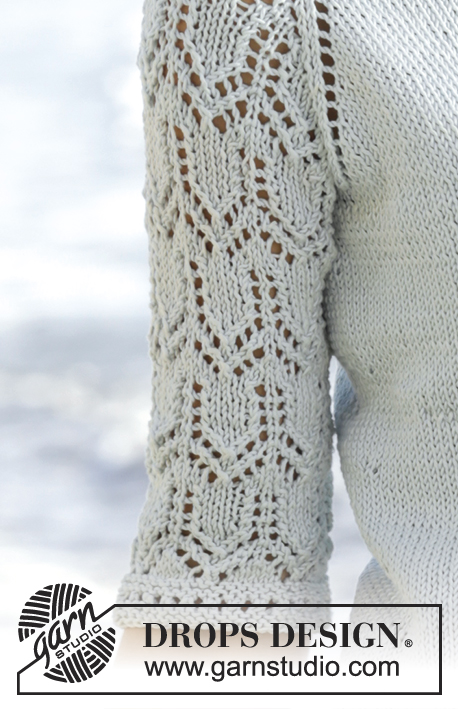
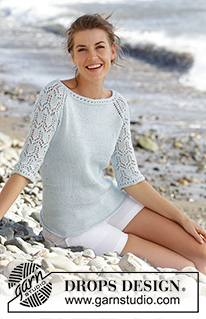
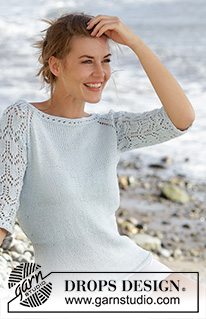
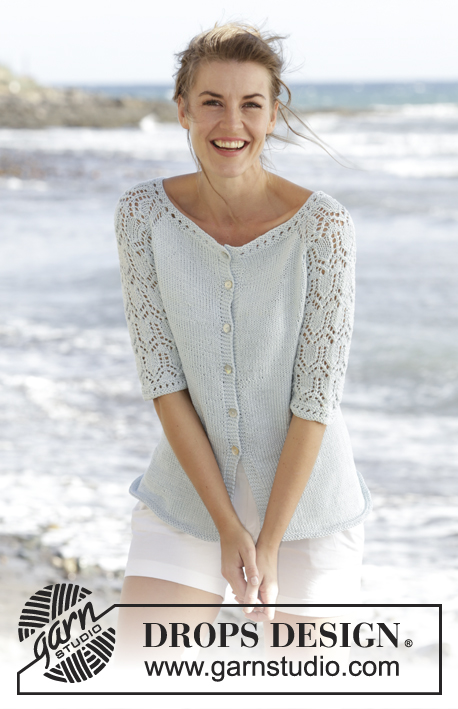
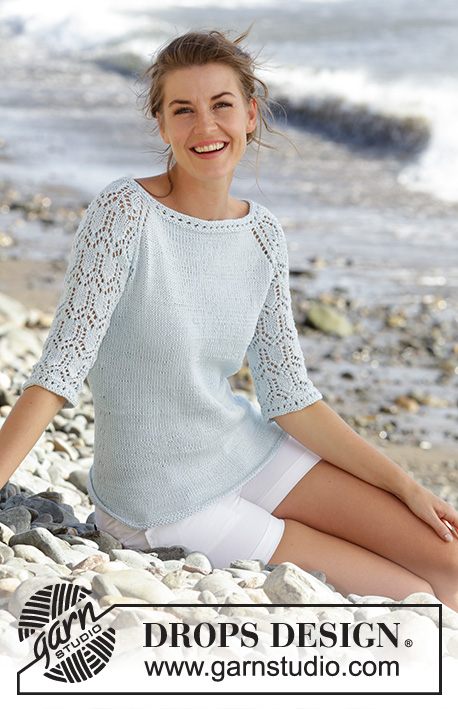
Knitted DROPS jumper with raglan, lace pattern and ¾ sleeves in "Muskat". Worked top down. Size: S - XXXL.
DROPS 168-1 |
|||||||||||||||||||
|
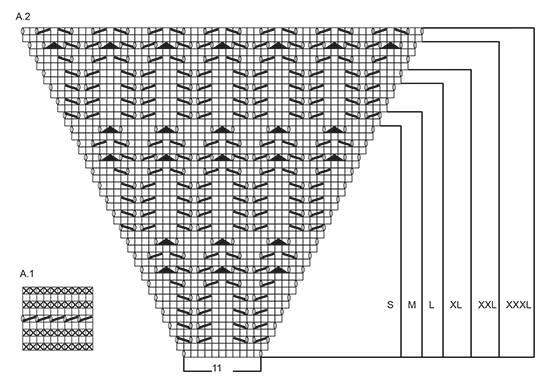
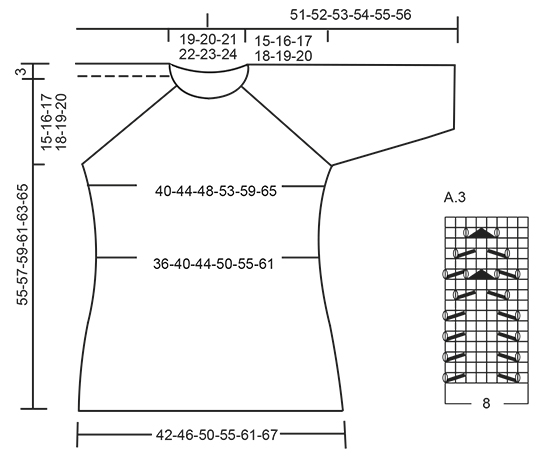
GARTER ST (worked in the round): 1 ridge = 2 rounds. * K 1 round and P 1 round *, repeat from *-*. PATTERN: See diagrams A.1 to A.3. See diagram for size! RAGLAN: Inc every other round as follows: Inc 4 sts on back piece, 4 sts on front piece and 2 sts on each sleeve (= 12 sts inc, inc on sleeve are drawn in pattern) – beg 3 sts before each A.2 and work as follows: 1 YO, K 1, 1 YO, K 2 (marker is in the middle of these sts), A.2, K 2 (marker is in the middle of these sts), 1 YO, K 1, 1 YO. K the YOs closest to markers on next row to make holes, K YOs towards back/front piece twisted to avoid holes. Inc 12 sts this way 0-2-3-7-10-14 times more (= 1-3-4-8-11-15 times in total, first inc is explained in the text). Then inc every other round as follows: Inc 2 sts on back piece, 2 sts on front piece and 2 sts on each sleeve (= 8 sts inc, inc on sleeve are drawn in pattern) – beg 2 sts before each A.2 and work as follows: 1 YO, K 2 (marker is in the middle of these sts), A.2, K 2 (marker is in the middle of these sts), 1 YO. K YOs on next round to make a hole. Inc 8 sts this way 16-15-16-13-12-9 times in total. ---------------------------------------------------------- JUMPER: Worked in the round on circular needle, top down. YOKE: Cast on 87-91-95-99-103-107 sts on circular needle size 4 mm with Muskat. K 1 round, them work A.1, on last round in A.1 inc 15 sts evenly = 102-106-110-114-118-122 sts. Then work as follows from mid back: K 17-18-19-20-21-22, 1 YO, K 1, 1 YO, K 2 (insert a marker between these sts), A.2 (= 11 sts), K 2 (insert a marker between these sts), 1 YO, K 1, 1 YO, K 34-36-38-40-42-44, 1 YO, K 1, 1 YO, K 2 (insert a marker between these sts), A.2, K 2 (insert a marker between these sts), 1 YO, K 1, 1 YO, K 17-18-19-20-21-22. Continue this pattern, and inc for RAGLAN as explained above, first inc is now done. REMEMBER THE KNITTING TENSION When A.2 has been worked vertically - see marking for your size, there are 242-262-286-314-346-374 sts on round, inc are now done. Work next round as follows: Work 38-42-46-52-58-64 sts (= half back piece), slip the next 45-47-51-53-57-59 sts on a stitch holder (= sleeve), cast on 8 sts under sleeve, work the next 76-84-92-104-116-128 sts (= front piece), slip the next 45-47-51-53-57-59 sts on a stitch holder (= sleeve), cast on 8 new sts under sleeve, work the last 38-42-46-52-58-64 sts (= half back piece). BODY: There are now 168-184-200-224-248-272 sts on body. Continue in stocking st. Insert a marker in each side, in the middle of the 8 new sts that were cast on. NOW MEASURE PIECE FROM HERE. When piece measures 4 cm, dec 1 st on each side of marker (= 4 sts dec), repeat dec every 4-4-4-5-5-5 cm 3 more times = 152-168-184-208-232-256 sts. When piece measures 22-23-24-25-26-27 cm, inc 1 st on each side of each marker (= 4 sts inc), repeat inc every 2 cm 5 more times = 176-192-208-232-256-280 sts. When piece measures 36-37-38-39-40-41 cm, work 2 ridges in GARTER ST - see explanation above, over all sts. Cast off K 1/P 1 (to avoid a wavy cast-off edge), piece measures approx. 55-57-59-61-63-65 cm from cast-on edge. SLEEVE: Worked in the round. Slip sts from sleeve back on double pointed needles size 4 mm, pick up 1 st in each of the 8 sts under sleeve = 53-55-59-61-65-67 sts. Insert 1 marker mid under sleeve = beg of round. NOW MEASURE PIECE FROM HERE! Then work as follows: 6-7-1-2-4-5 sts in stocking st, A.3 over the next 40-40-56-56-56-56 sts (beg A.3 where A.2 ends for your size), 7-8-2-3-5-6 sts in stocking st. When piece measures 4 cm, dec 1 st on each side of marker. Work the sts that do not fit the pattern in stocking st, make sure that no of dec and inc in pattern is correct. Repeat dec every 7-7-5-5-3-3 cm 2-2-3-3-4-4 more times = 47-49-51-53-55-57 sts. When piece measures 24-23-23-22-22-21 cm, work A.1 over all sts, then cast off. Work the other sleeve the same way. |
|||||||||||||||||||
Diagram explanations |
|||||||||||||||||||
|
|||||||||||||||||||
 |
|||||||||||||||||||
 |
|||||||||||||||||||
Have you finished this pattern?Tag your pictures with #dropspattern #seanymphsweater or submit them to the #dropsfan gallery. Do you need help with this pattern?You'll find 17 tutorial videos, a Comments/Questions area and more by visiting the pattern on garnstudio.com. © 1982-2026 DROPS Design A/S. We reserve all rights. This document, including all its sub-sections, has copyrights. Read more about what you can do with our patterns at the bottom of each pattern on our site. |
|||||||||||||||||||






With over 40 years in knitting and crochet design, DROPS Design offers one of the most extensive collections of free patterns on the internet - translated to 17 languages. As of today we count 333 catalogues and 12525 patterns translated into English (UK/cm). 12525
We work hard to bring you the best knitting and crochet have to offer, inspiration and advice as well as great quality yarns at incredible prices! Would you like to use our patterns for other than personal use? You can read what you are allowed to do in the Copyright text at the bottom of all our patterns. Happy crafting!
Post a comment to pattern DROPS 168-1
We would love to hear what you have to say about this pattern!
If you want to leave a question, please make sure you select the correct category in the form below, to speed up the answering process. Required fields are marked *.