
Popular categories
Looking for a yarn?


Comments / Questions (21)
![]() Małgorzata Urban wrote:
Małgorzata Urban wrote:
Karczek jest przerabiany ściegiem francuskim (1-szy rząd = na lewej stronie robótki): przerobić 5-5-1-1-3-1 rzędów bez zamykania oczek, dalej zamykać 1 o. na przemian, raz po lewej, a raz po prawej stronie każdego markera w sumie 20-21-23-25-25-27 razy co 4 rzędy = 136-150-166.........co oznacza na przemian , czy w pierwszym 4 rzędzie zamykam tylko z lewej strony każdego markera, przerabiam kolejne 4 rzędy i zamykam tylko z prawej strony każdego markera itd
01.02.2021 - 18:08DROPS Design answered:
Witaj Małgosiu, jak zamykasz oczka 1-szy raz to zamykasz 1 o. zawsze z lewej strony każdego markera. 4 rzędy później zamykasz 1 o. z prawej strony każdego markera, itd. Miłej pracy!
01.02.2021 - 20:02
![]() Maria Grazia wrote:
Maria Grazia wrote:
Salve! Ringrazio per la cortese e tempestiva risposta, ma sono riuscita a capire il passaggio che non mi era , inizialmente, chiaro. Cordiali saluti
09.10.2019 - 21:03
![]() Maria Grazia wrote:
Maria Grazia wrote:
Salve! Gradirei sapere se la diminuzione a destra e quella a sinistra vanno eseguite , ciascuna, ogni 4 ferri. Mille ringraziamenti
08.10.2019 - 16:49DROPS Design answered:
Buonasera Maria Grazia, ci spiega esattamente il punto che non le è chiaro? A quali diminuzioni fa riferimento? Buon lavoro!
08.10.2019 - 19:35
![]() Maria Grazia wrote:
Maria Grazia wrote:
Fascinoso e facile da indossare : semplicemente bellissimo. Grazie
14.05.2019 - 18:12
![]() Tina Jaque wrote:
Tina Jaque wrote:
Som svar på jeres svar...har altså fundet opskriften på nettet og under den står der en rettelse.. kan bare ikke se hvor i opskriften og istedet for hvad rettelsen skal erstatte.. ? Så fatter ikkke i svarer at opskriften er korrekt??
14.08.2018 - 21:36DROPS Design answered:
Hej Tina, Opskriften på nettet er rettet, og når du skriver opskriften ud så får den rettede opskrift. De som har et ældre katalog eller som har skrevet opskriften ud før rettelsen (se dato) bør skrive den nye opskrift ud :)
15.08.2018 - 08:12
![]() Tina Jaque wrote:
Tina Jaque wrote:
Hej. Har købt garntil denne lækre trøje.. kan simpelthen ikke forstå HVOR OG ISTEDET FOR HVAD rettelsen er.. mon det muligt at modtage opskrift der helt korrekt på mail ellers har jeg ikke mod på at gå igang med denne lækre trøje. Venlig hilsen Tina Jaque
06.08.2018 - 22:53DROPS Design answered:
Hej Tina, opskriften på nettet er korrekt, så det er bare at gå igang. God fornøjelse!
14.08.2018 - 14:53
![]() Cecilia wrote:
Cecilia wrote:
Hola, estoy tejiendo esta chaqueta y voy a hacerla toda lisa (sin los M1A, M1B y M1C). Según indicáis hay que menguar los puntos para la sisa cuando la labor misa 43 para talla L pero al consultar el dibujo con las medidas indicáis 62 (para talla L) hasta la sisa. ¿De qué medida me dio de los 43 o de los 62? (Son casi 20 de diferencia) Gracias
14.01.2015 - 08:18DROPS Design answered:
Hola Cecilia. 62 cm es el largo total y 62 cm - 19 cm (la sisa) = 43 cm cuando empezamos a cerrar para la sisa.
14.01.2015 - 23:05
![]() Monica wrote:
Monica wrote:
Jag råkade skriva min fråga under kommentarer, jag hoppas att ni kan läsa den där och svara.
10.08.2013 - 21:21DROPS Design answered:
Minskningarna görs på vart 4:e varv och då på varannan sida, så det blir alltså 8 varv mellan varje höger- resp. vänsterminskning. Lycka till!
29.08.2013 - 12:08
![]() Monica wrote:
Monica wrote:
Jag undrar om ihoptagningarna på oket: det står "...sedan minskas 1 m växelvis på höger och vänster sida om varje markör på vart 4:e v totalt 21 ggr" Ska jag minska vänster vart 4:e varv och höger vart 4:e varv, alltså en minskning vartannat varv, eller blir det 8 varv mellan varje höger- resp. vänsterminskning?
25.07.2013 - 20:33Jacqueline McKay wrote:
Could please verify that the tension of 24 stitched x32rows = 10x10cms with 3mm needles is correct to give a result of 82 cms for the finished size of pattern 130-33 with 412 stitches cast on for small size.
09.03.2013 - 03:11DROPS Design answered:
Dear Mrs McKay, you cast on first 412 sts in size S, work in rib K2/P4, then dec P1 in each P section when work measures 4 cm = 282 sts. When work measures 6 cm, continue with needle size 3 mm in st st inc 62 sts evenly = 220 sts including 10 sts front band each side. You then have the right measurements. Happy knitting!
09.03.2013 - 09:38
|
|||||||||||||||||||
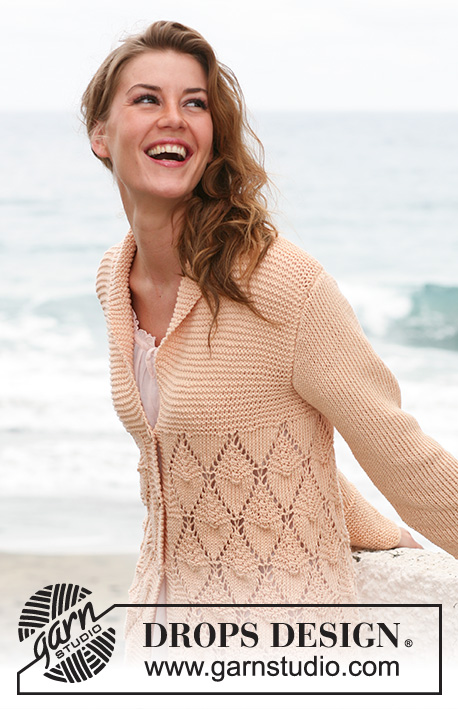
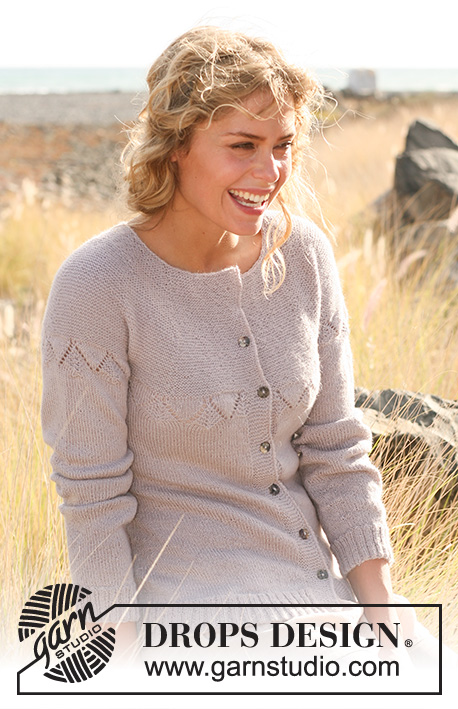
Frosted Pearl#forestpearlcardigan |
|||||||||||||||||||
 |
 |
||||||||||||||||||
Knitted DROPS jacket with raglan sleeves with lace pattern in "Alpaca". Size: S - XXXL.
DROPS 130-33 |
|||||||||||||||||||
|
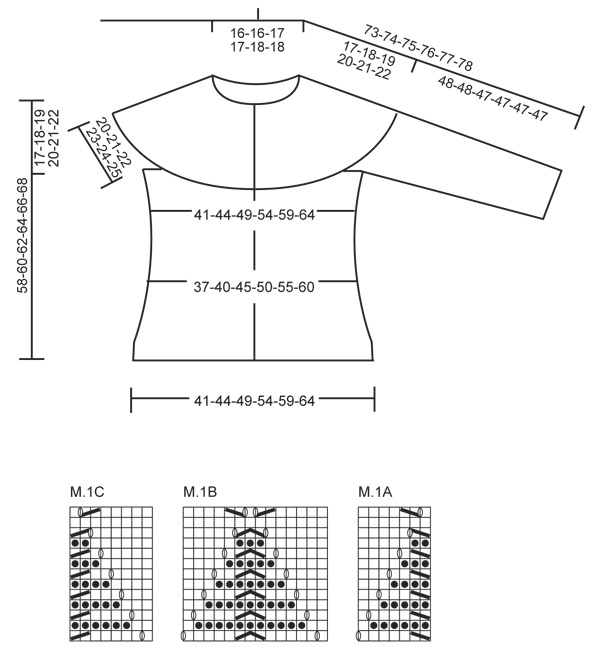
GARTER ST (back and forth on needle): K all rows. GARTER ST (in the round): *K 1 round and P 1 round*, repeat from *-*. BUTTON HOLES: Cast off for button holes on right front band. 1 button hole = cast off 5th st from mid front. Cast on 1 new st over the cast off st. Cast off for button holes when piece measures: SIZE S: 8, 16, 24, 32, 40, 48, 56 cm. SIZE M: 10, 18, 26, 34, 42, 50, 58 cm. SIZE L: 12, 20, 28, 36, 44, 52, 60 cm. SIZE XL: 8, 17, 26, 35, 44, 53, 62 cm. SIZE XXL: 10, 19, 28, 37, 46, 55, 64 cm. SIZE XXXL: 12, 21, 30, 39, 48, 57, 66 cm. PATTERN: See diagram M.1A (= 7 sts), M.1B (= 14 sts) and M.1C (= 8 sts). The diagram shows the pattern from RS. KNITTING TIP: If knitting tension is incorrect in height and the knitting is too tight, the raglan sleeve will be too short and the armholes too small. This can be adjusted by working 1 extra row without dec evenly spaced between dec. -------------------------------------------------------- JACKET: Worked back and forth on circular needle from mid front. Cast on 412-448-490-538-598-652 sts (incl 10 band sts each side) on circular needle 2.5 mm with Alpaca (large no of sts to avoid a tight rib). P 1 row from WS. Continue to work rib from RS as follows: 10 band sts (K on every row until finished measurements), * K2, P4 *, repeat from *-* and finish with K2 and 10 band sts. When piece measures 2 cm, dec 1 st in every P section, repeat dec when piece measures 4 cm = 282-306-334-366-406-442 sts. Continue with rib K2/P2. When rib measures 6 cm, switch to circular needle size 3 mm. K 1 row from RS while AT THE SAME TIME dec 62-70-74-82-98-110 sts evenly = 220-236-260-284-308-332 sts. Continue in stocking st with 10 sts in garter st each side. REMEMBER THE KNITTING TENSION! Insert a marker each side, 61-65-71-77-83-89 sts in from mid front (back piece = 98-106-118-130-142-154 sts). Continue in stocking st and band sts in garter st. When piece measures 8-10-12-8-10-12 cm, cast off for first BUTTON HOLE on right front band - see explanation above! AT THE SAME TIME when piece measures 12 cm, dec 1 st each side of the marker in each side. Repeat the dec every 2 cm a total of 5 times = 200-216-240-264-288-312 sts. When piece measures 24 cm, inc 1 st each side of the marker in each side. Repeat the inc every 2½-3-3-3½-3½-4 cm a total of 5 times = 220-236-260-284-308-332 sts. Continue to work in stocking st until piece measures 36-37-38-39-40-41 cm. Now K 1 row from RS while AT THE SAME TIME adjusting no of sts to 217-231-259-287-301-329 sts (inc/dec evenly but not over the band sts). P 1 row from WS. On next row from RS work PATTERN as follows - see explanation above: 10 sts in garter st, M.1A (= 7 sts), M.1B (= 14 sts) until 18 sts remain, finish with M.1C (= 8 sts) and 10 sts in garter st. Continue with pattern. When M.1 has been worked 1 time vertically, P 1 row from WS while AT THE SAME TIME adjusting the no of sts back to 220-236-260-284-308-332 sts (piece now measures approx. 41-42-43-44-45-46 cm). K next row from RS while AT THE SAME TIME casting off 12 sts for armhole each side (i.e. 6 sts each side of every marker) = 196-212-236-260-284-308 sts. Put piece aside. SLEEVE: Worked in the round on double pointed needles. Cast on 90-90-95-95-100-100 sts on double pointed needles size 2.5 mm with Alpaca. K 1 round. Continue to work rib as follows: * K2, P3 *, repeat from *-*. When piece measures 2 cm, dec 1 st in every P section = 72-72-76-76-80-80 sts. Continue with rib K2/P2. When rib measures 5 cm, switch to double pointed needles size 3 mm. K 1 round while AT THE SAME TIME dec 16-14-16-12-14-14 sts evenly = 56-58-60-64-66-66 sts. Insert a marker at beg of round = mid under sleeve. When piece measures 7 cm, inc 1 st each side of marker every 2½-2½-2-2-2-1½ cm a total of 13-14-16-17-17-20 times = 82-86-92-98-100-106 sts. When piece measures 44-44-43-43-43-43 cm, K 1 round while AT THE SAME TIME adjusting the no of sts to 84-84-98-98-98-112 sts (inc/dec evenly on the round). Continue working M.1B over all sts. When M.1B has been worked 1 time vertically, K 1 round while AT THE SAME TIME adjusting the no of sts back to 82-86-92-98-100-106 sts (piece now measures approx. 47-47-46-46-46-46 cm - NOTE! Shorter measurements in the larger sizes because of broader shoulder width). K next round while AT THE SAME TIME casting off the 12 sts mid under sleeve (= 6 sts each side of marker) = 70-74-80-86-88-94 sts. Put piece aside and knit another sleeve. YOKE: Slip sleeves on to same circular needle as body where armholes were cast off = 336-360-396-432-460-496 sts. Switch to circular needle 2.5 mm and insert 10-10-10-10-11-11 markers in the piece as follows: Insert 1 marker after 33-36-36-40-40-43 sts, then insert 9-9-9-9-10-10 markers with 30-32-36-39-38-41 sts between each, after last marker there are 33-36-36-41-40-43 sts. READ KNITTING TIP! The yoke is worked in garter st (1st row = from WS): Work 5-5-1-1-3-1 rows without dec, then dec 1 st alternately on the left and right side of every marker on every 4th row a total of 20-21-23-25-25-27 times = 136-150-166-182-185-199 sts. NECKLINE: K 1 row from RS while AT THE SAME TIME dec 6-20-32-44-43-53 sts evenly = 130-130-134-138-142-146 sts. Now work an elevation in the back of neck. K all rows. Work as follows from WS: Work 75-75-77-79-81-83 sts, turn and work 20 sts back. Turn and work 30 sts. Turn and work 40 sts. Turn and work 50 sts. Turn and work 60 sts. Turn and work 70 sts. Turn and work 80 sts. Turn and work 90 sts. Turn and work 100 sts. Turn and work 110 sts. Turn and work 120 sts. Turn and K all sts on the needle. K 6 rows over all sts. Cast off. ASSEMBLY: Sew the openings under the sleeves. Sew the button on to left front piece. |
|||||||||||||||||||
Diagram explanations |
|||||||||||||||||||
|
|||||||||||||||||||
 |
|||||||||||||||||||
Have you finished this pattern?Tag your pictures with #dropspattern #forestpearlcardigan or submit them to the #dropsfan gallery. Do you need help with this pattern?You'll find 21 tutorial videos, a Comments/Questions area and more by visiting the pattern on garnstudio.com. © 1982-2026 DROPS Design A/S. We reserve all rights. This document, including all its sub-sections, has copyrights. Read more about what you can do with our patterns at the bottom of each pattern on our site. |
|||||||||||||||||||


With over 40 years in knitting and crochet design, DROPS Design offers one of the most extensive collections of free patterns on the internet - translated to 17 languages. As of today we count 324 catalogues and 12290 patterns translated into English (UK/cm). 12290
We work hard to bring you the best knitting and crochet have to offer, inspiration and advice as well as great quality yarns at incredible prices! Would you like to use our patterns for other than personal use? You can read what you are allowed to do in the Copyright text at the bottom of all our patterns. Happy crafting!
Post a comment to pattern DROPS 130-33
We would love to hear what you have to say about this pattern!
If you want to leave a question, please make sure you select the correct category in the form below, to speed up the answering process. Required fields are marked *.