
Popular categories
Looking for a yarn?


Comments / Questions (28)
![]() Barbara wrote:
Barbara wrote:
In the Materials list it says "DROPS POINTED NEEDLES size 5 mm / US 8 " as opposed to the circular needles. So, is the "DROPS POINTED NEEDLES" a single or double-pointed needle? I checked comments and read through the pattern but it wasn't clear. Thank you for your guidance.
07.12.2025 - 17:26DROPS Design answered:
Hi Barbara, there are single pointed needles no 5 for stocking stitch (you can use circular needles I you prefer). The circular needles no 4,5 are for rib because you will need more room to place all the stitches there. Happy knitting!
07.12.2025 - 18:54
![]() Joy wrote:
Joy wrote:
Is it possible to only use 1 thread to make it a lighter weight cardigan?
29.01.2023 - 02:49DROPS Design answered:
Dear Joy, to work with a single thread of the same yarn, you would need to work another pattern. You can work with a single thread of another yarn, from Yarn Group C. Happy knitting!
29.01.2023 - 20:29
![]() Rosita wrote:
Rosita wrote:
Buongiorno ho un altro quesito da porvi, volendolo realizzare molto più corto, (40cm per poi iniziare gli scalfi) seguendo tg. L, avviare 180 maglie solo per il dietro mi verrebbe esageratamente largo, devo avviarne molte meno? Quante? Grazie, buongiorno
08.02.2022 - 14:22DROPS Design answered:
Buonasera Rosita, per un aiuto così personalizzato può rivolgersi al suo rivenditore DROPS di fiducia. Buon lavoro!
08.02.2022 - 23:29
![]() Rosita🙋 wrote:
Rosita🙋 wrote:
Buongiorno, grazie per avermi risposto, vorrei realizzarlo più corto, il modello inizia dal basso verso l'alto? Come posso regolarmente per farlo più corto? Grazie, saluti
15.10.2020 - 00:11DROPS Design answered:
Buongiorno Rosita. Si lavora dal basso verso l'alto. Per un cardigan più corto, è sufficiente che intrecci le maglie per gli scalfi all'altezza desiderata e non a quella indicata nel testo. Buon lavoro!
15.10.2020 - 11:10
![]() Rosita wrote:
Rosita wrote:
Ciao🙋 vorrei eseguire questo bellissimo modello ma in versione più corta come un maglione, non riesco a capire questi passaggi :" M.1A (= 9 m) finché non rimangano 8 m, terminare con M.1B (= 7 m) e 1 m vivagno al PUNTO LEGACCIO. Continuare così. Dopo M.1 rimangono 85-90-100-110-120-130 m sul ferro " Grazie
12.10.2020 - 16:19DROPS Design answered:
Buongiorno Rosita. Deve ripetere M.1A (che è formato da 9 maglie) finchè non rimangono 8 m sul ferro; lavora queste 8 m come segue: diagramma M.1B sulle prime 7 m e finisce il ferro con 1 m vivagno che lavora a legaccio. Quando ha lavorato tutte le righe dei diagrammi M.1a e M.1B, sui ferri rimangono le maglie indicate (p.es nella taglia S, rimangono 85 m). Buon lavoro!
12.10.2020 - 23:06
![]() Anna wrote:
Anna wrote:
Hallo, ich stricke Gr. M und komme gerade am Kragen nicht weiter. Dort steht, dass ich nach 32 M 5 Maschen zunehmen soll. Dann klappt das doch mit dem Bündchenmuster 3re/3li nicht mehr? Vielen Dank vorab!
17.07.2017 - 22:30DROPS Design answered:
Liebe Anna, es stimmt, in diesem Li-Partie werden Sie 4 li anstatt 3 li haben, die Bündchen so weiter stricken, dh 3re/3li und über diese Maschen 3 re/4 li. Viel Spaß beim stricken!
18.07.2017 - 08:43Lorraine wrote:
A beautiful garment. I need to make it in wool as I can't wear alpaca. Can you suggest a yarn I could use?
17.02.2016 - 04:19
![]() Petra678 wrote:
Petra678 wrote:
Sehr schöne Jacke - obwohl noch ziemlicher Anfänger versuch ich es einfach mal....
10.10.2011 - 20:27
![]() GT wrote:
GT wrote:
Sehr schöne Jacke!! Kompliment
29.03.2010 - 12:38
![]() Jajja wrote:
Jajja wrote:
Oj! vad jag kommer spara pengar denna vår. Av alla nya mönster är denna kofta det enda snygga. Resten av nyheterna är bara " skåprensning". Inget som er "waoo"-känsla. Bara "gäääsp"
03.02.2010 - 12:51
|
|||||||||||||
Carnation#carnationcardigan |
|||||||||||||
 |
 |
||||||||||||
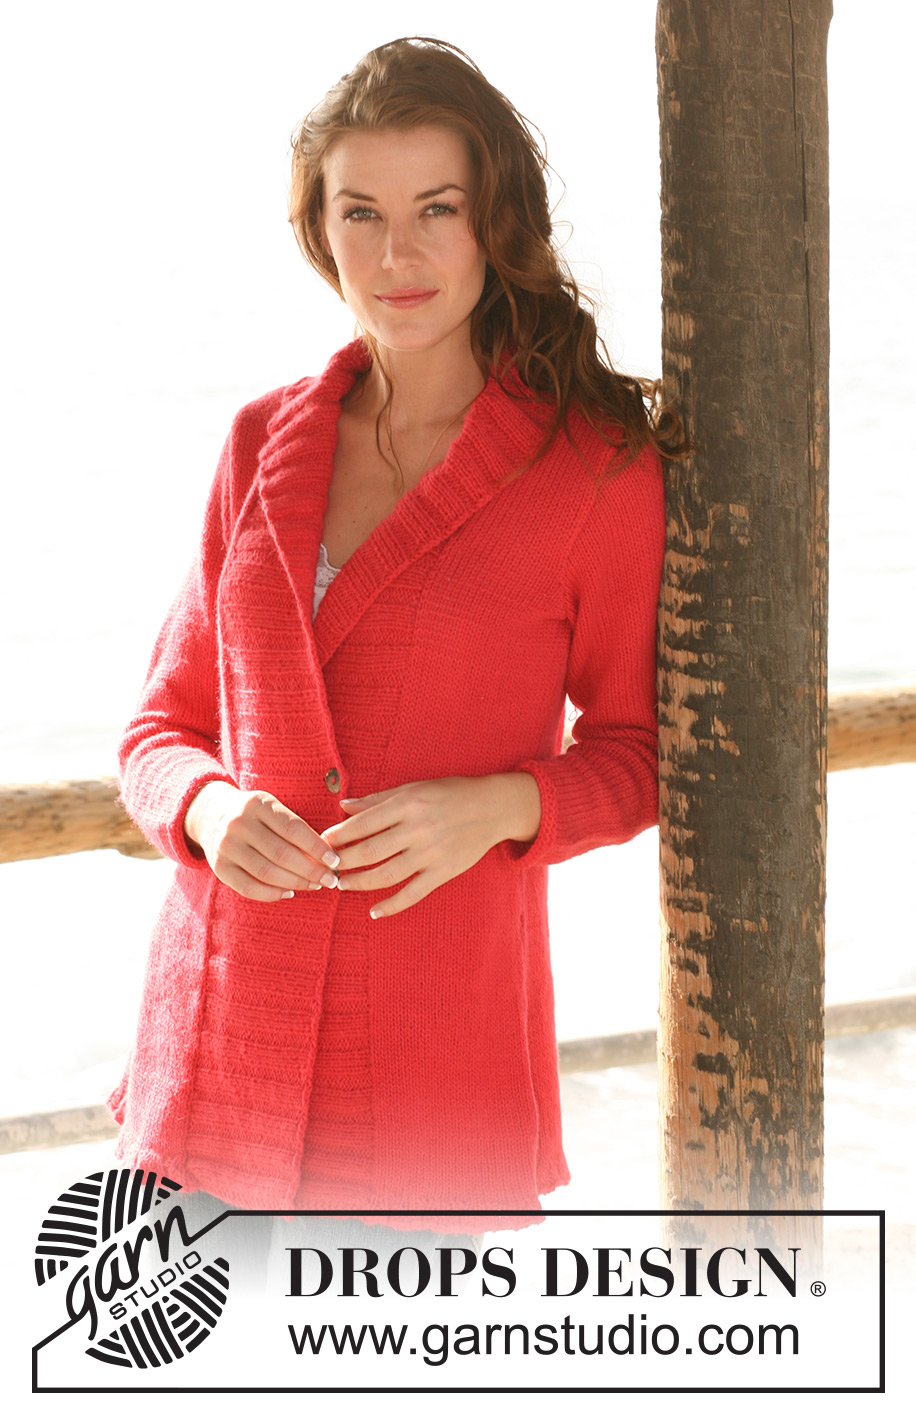
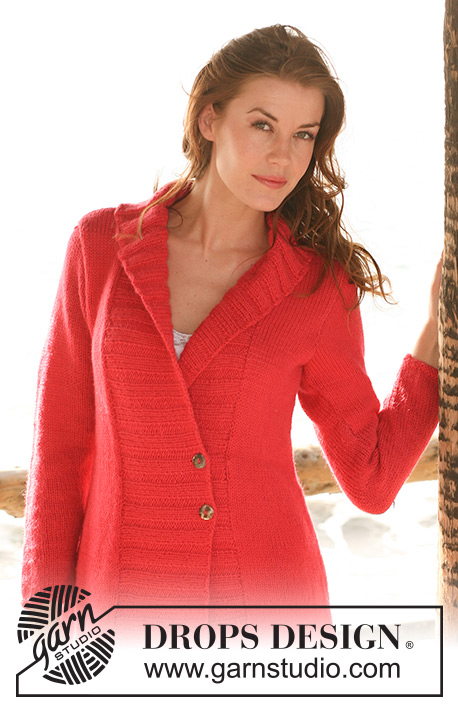
Knitted DROPS jacket with rib in 2 threads ”Alpaca”. Size S - XXXL.
DROPS 120-12 |
|||||||||||||
|
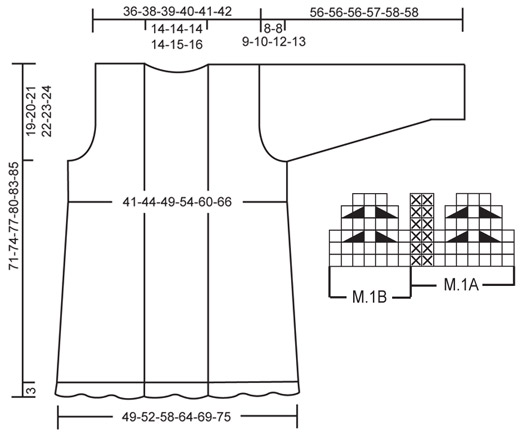
GARTER ST (back and forth on needle): K all rows. PATTERN: See diagram M.1. Diagram shows the pattern from RS. MEASUREMENT TIP: Because of the weight of the yarn make all measurements while the garment is hanging, otherwise it will be too long when worn. BUTTONHOLES: Make 2 buttonholes on right front band approx 33-35-37-39-43-46 and 41-43-45-48-52-55 cm from shoulder (or where you prefer the buttons). 1 BUTTONHOLE = cast off 1 st and cast on 1 new st on next row (for neatest result make buttonhole in P section from RS). --------------------------------------------------------- --------------------------------------------------------- BACK PIECE: Cast on 153-162-180-198-216-234 sts (includes 1 edge st each side) on circular needle size 4.5 mm with 2 threads Alpaca. Work first row as follows from RS: 1 edge st in GARTER ST - see above, M.1A (= 9 sts) until 8 sts remain, finish with M.1B (= 7 sts) and 1 edge st in GARTER ST. Continue in pattern like this. After M.1 there are 85-90-100-110-120-130 sts left on needle. Change to needle size 5 mm and continue in stocking st with 1 garter st each side. REMEMBER THE KNITTING TENSION! When piece measures 6 cm dec 1 st each side and repeat the dec on every 5.5-5.5-6-5-5-5.5 cm a total of 7-7-7-8-8-8 times = 71-76-86-94-104-114 sts. When piece measures 52-54-56-58-60-61 cm - see MEASUREMENT TIP – cast off for armhole each side at beg of every row: 3 sts 1-1-1-1-2-2 times, 2 sts 0-1-2-3-3-5 times and 1 st 2-1-3-4-5-5 times = 61-64-66-68-70-72 sts. When piece measures 69-72-75-78-81-83 cm cast off the middle 21-22-22-22-24-26 sts for neck and complete each shoulder separately. Cast off 1 st on neckline on next row = 19-20-21-22-22-22 sts left on shoulder. Cast off when piece measures 71-74-77-80-83-85 cm. RIGHT FRONT PIECE: Cast on 56-65-74-83-83-92 sts (includes 1 edge st each side) on circular needle size 4.5 mm with 2 threads Alpaca. Work first row as follows from RS: 1 edge st in garter st, M.1A (= 9 sts) until 1 st remain, finish with 1 edge st in garter st. Continue in pattern like this. After M.1 there are 32-37-42-47-47-52 sts left on needle. Change to needle size 5 mm and continue in stocking st with 1 garter st each side, AT THE SAME TIME on first row dec 1-4-4-4-0-1 sts evenly = 31-33-38-43-47-51 sts. When piece measures 6 cm dec at the side as described for back piece = 24-26-31-35-39-43 sts. When piece measures 52-54-56-58-60-61 cm - REMEMBER MEASUREMENT TIP – cast off for armhole at the beg of every row from the side as described for back piece = 19-20-21-22-22-22 sts left on needle. Cast off when piece measures 71-74-77-80-83-85 cm. LEFT FRONT PIECE: Like right front piece, but mirrored. SLEEVE: Worked back and forth on needle. Cast on 36-38-40-42-44-46 sts (includes 1 edge st each side) on circular needle size 4.5 mm with 2 threads Alpaca. Work 4 rows garter st. Change to needle size 5 mm and continue in stocking st with 1 edge st in garter st each side. When piece measures 5-6-6-6-6-8 cm inc 1 st each side and repeat the inc on every 4-3.5-3-3-2.5-2 cm a total of 11-12-13-14-16-17 times = 58-62-66-70-76-80 sts. When piece measures 48-48-47-47-46-45 cm – NOTE: Less for the larger sizes because of longer sleeve cap and wider shoulder- cast off for sleeve cap each side at the beg of every row: 3 sts 1 time, 2 sts 3-3-3-2-2-2 times, 1 st 2-2-3-4-5-6 times, then 2 sts each side until piece measures 55-55-55-56-57-57 cm, now cast off 3 sts 1 time each side and cast off remaining sts. Piece measures approx 56-56-56-57-58-58 cm. ASSEMBLY: Sew shoulder seams. Set in sleeves. Sew sleeve and side seams inside 1 edge st. FRONT BAND/COLLAR: Pick up from RS: 161-167-173-179-185-191 sts along right front piece from bottom edge to mid back on circular needle size 4.5 mm with 2 threads Alpaca. Work rib as follows with start mid back (= WS): 2 garter sts, rib K3/P3 until 3 sts remain, work these in garter st. Continue in rib like this with K over K, P over P and garter st over garter st. When front band measures 4-4-4-4-4-3 cm insert a marker after 32-32-32-38-38-38 sts from mid back. Continue in rib as before, AT THE SAME TIME inc 1 st in each P-section (as seen from RS) on the 32-32-32-38-38-38 sts = 5-5-5-6-6-6 inc sts (to make collar sit nicely on neckline). When front band measures 7 cm for all sizes inc 1 st in each K-section on the same 37-37-37-44-44-44 sts. Repeat the inc in each P-section when front band measures 10-10-10-10-10-11 cm and in each K-section when front band measures 13-13-13-13-14-15 cm. AT THE SAME TIME when front band measures 13-13-13-13-14-15 cm make 2 buttonholes – SEE ABOVE. When front band measures 14-14-14-14-15-16 cm cast off all sts with K over K and P over P. Repeat along left front piece as follows: pick up sts from RS from mid back and down along front piece and work first row from WS as follows: 3 garter sts, rib P3/K3 until 2 sts remain and work these in garter st. NOTE: do not make buttonholes. Sew front bands tog mid back in outer loops of sts and sew collar to neckline. NOTE: When folding front band/collar over back piece there will be 4 garter sts mid back with K3 each side. Sew buttons to left front band. |
|||||||||||||
Diagram explanations |
|||||||||||||
|
|||||||||||||
 |
|||||||||||||
Have you finished this pattern?Tag your pictures with #dropspattern #carnationcardigan or submit them to the #dropsfan gallery. Do you need help with this pattern?You'll find 20 tutorial videos, a Comments/Questions area and more by visiting the pattern on garnstudio.com. © 1982-2026 DROPS Design A/S. We reserve all rights. This document, including all its sub-sections, has copyrights. Read more about what you can do with our patterns at the bottom of each pattern on our site. |
|||||||||||||


With over 40 years in knitting and crochet design, DROPS Design offers one of the most extensive collections of free patterns on the internet - translated to 17 languages. As of today we count 324 catalogues and 12290 patterns translated into English (UK/cm). 12290
We work hard to bring you the best knitting and crochet have to offer, inspiration and advice as well as great quality yarns at incredible prices! Would you like to use our patterns for other than personal use? You can read what you are allowed to do in the Copyright text at the bottom of all our patterns. Happy crafting!
Post a comment to pattern DROPS 120-12
We would love to hear what you have to say about this pattern!
If you want to leave a question, please make sure you select the correct category in the form below, to speed up the answering process. Required fields are marked *.