
Popular categories
Looking for a yarn?


Comments / Questions (5)
![]() Dianna wrote:
Dianna wrote:
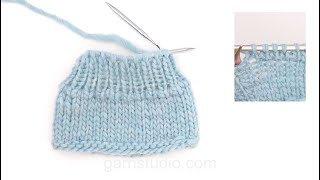
Hello, I would like to know if you have a tutorial for the neck stitches after the first two rounds are knitted? I do not know if what I am doing is correct or how it is supposed to look. If I could see a visual it would help. Thanks
16.04.2026 - 06:20DROPS Design answered:
Dear Dianna, sure we do, in this video we show how to work this round. Happy knitting!
16.04.2026 - 09:13
![]() Stefania wrote:
Stefania wrote:
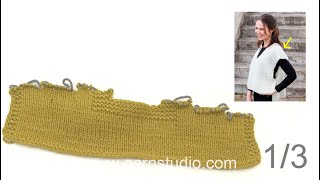
Buongiorno, faccio un po’ fatica a capire come lavorare le maniche. Il lavoro a ferri corti è solo sulla parte in alto della manica? Come si raccorda poi con gli altri punti? Non vengono tipo dei buchi?
20.01.2026 - 16:10DROPS Design answered:
Buonasera Stefania, deve tirare bene il filo per non avere nei buchi nella parte a ferri accorciati. Buon lavoro!
01.02.2026 - 20:37
![]() Lola wrote:
Lola wrote:
Dobrý den, tento svetr je pletený dokola? A na konci se nesešívá?
18.12.2025 - 06:48DROPS Design answered:
Dobrý den, Lolo, ano, pleteme v kruhových řadách a sešívání prakticky odpadá. Hodně zdaru! Hana
25.12.2025 - 22:07
![]() Elie wrote:
Elie wrote:
Merci pour votre réponse. Il serait bien d'ajouter un filtre de difficulté à vos modèles. Je suis débutante et j'aimerais pouvoir trier les modèles que vous proposez afin de connaître ceux que je suis capable de tricoter. Merci :)
17.10.2025 - 15:28
![]() Elie wrote:
Elie wrote:
Quelles sont les mensurations du modèle en photo et la taille tricotée du pull porté s'il vous plaît ?
15.10.2025 - 23:05DROPS Design answered:
Bonjour Elie, le pull en photo a la taille S ou M. Comment choisir votre taille, vous trouverez ICI. Bon tricot!
16.10.2025 - 09:02
|
|
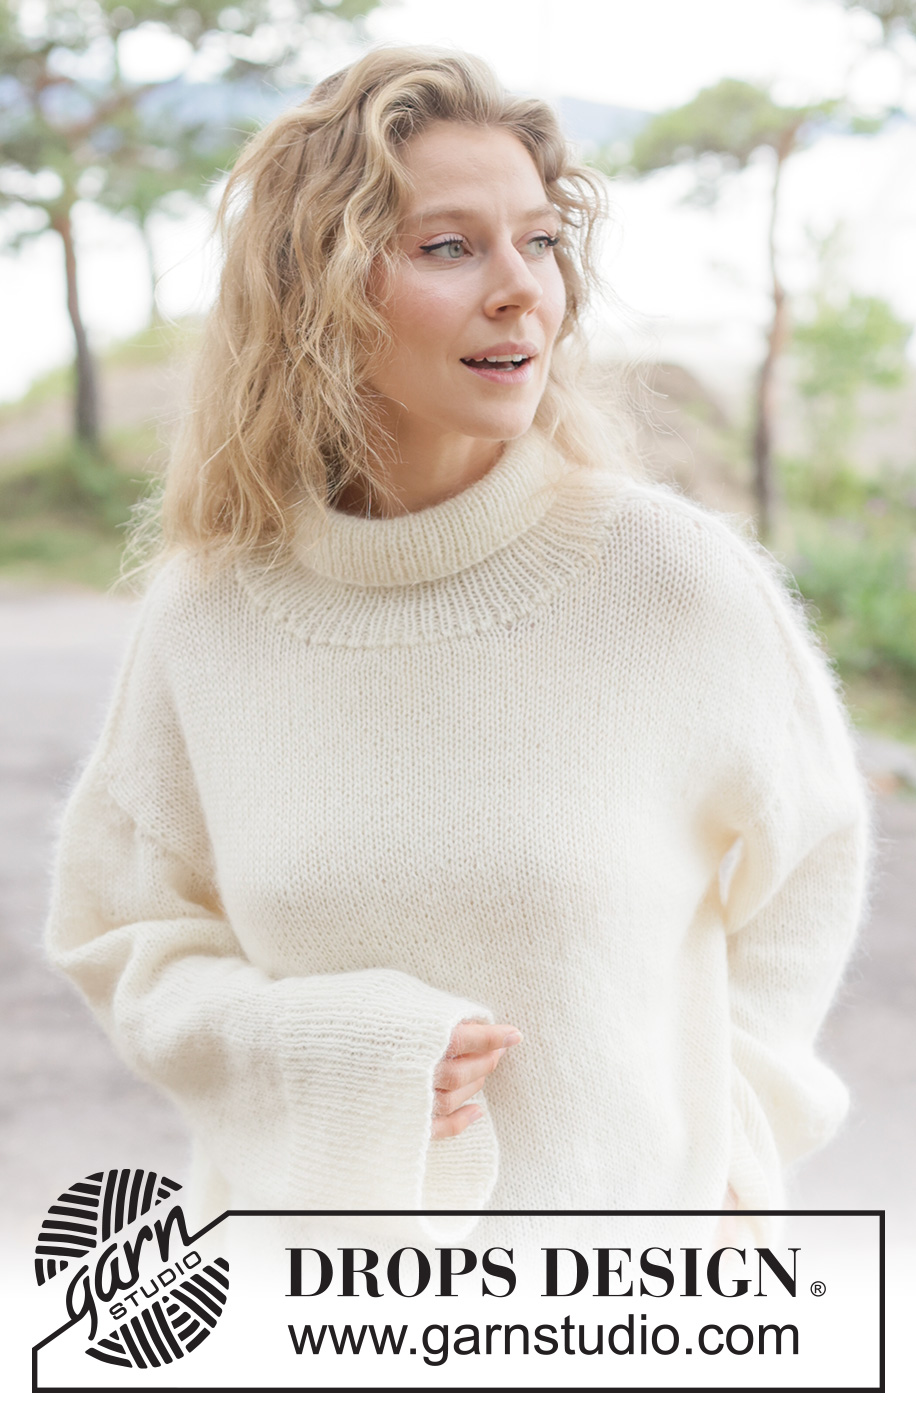
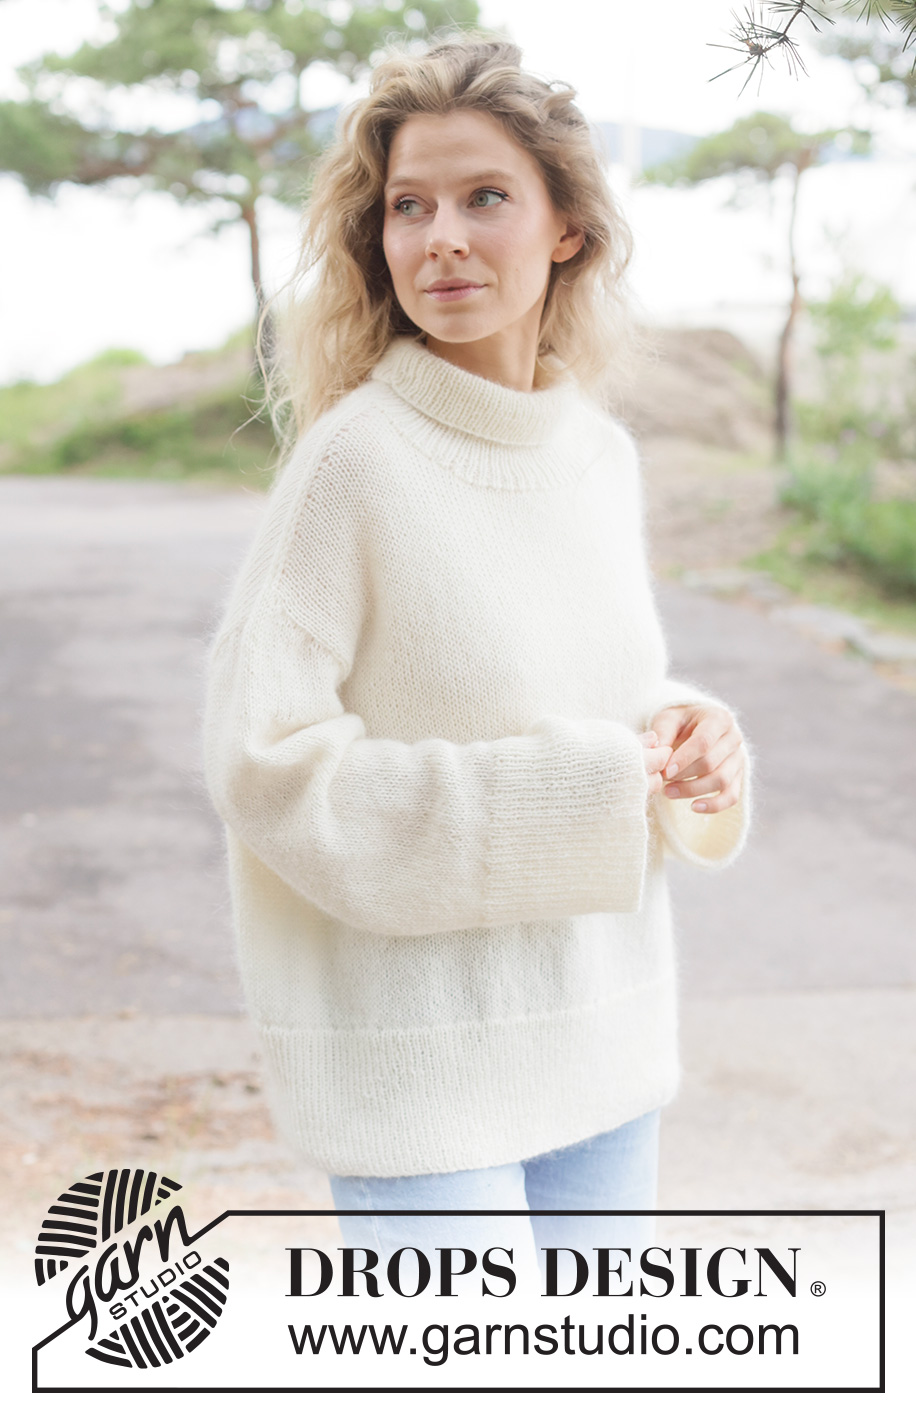
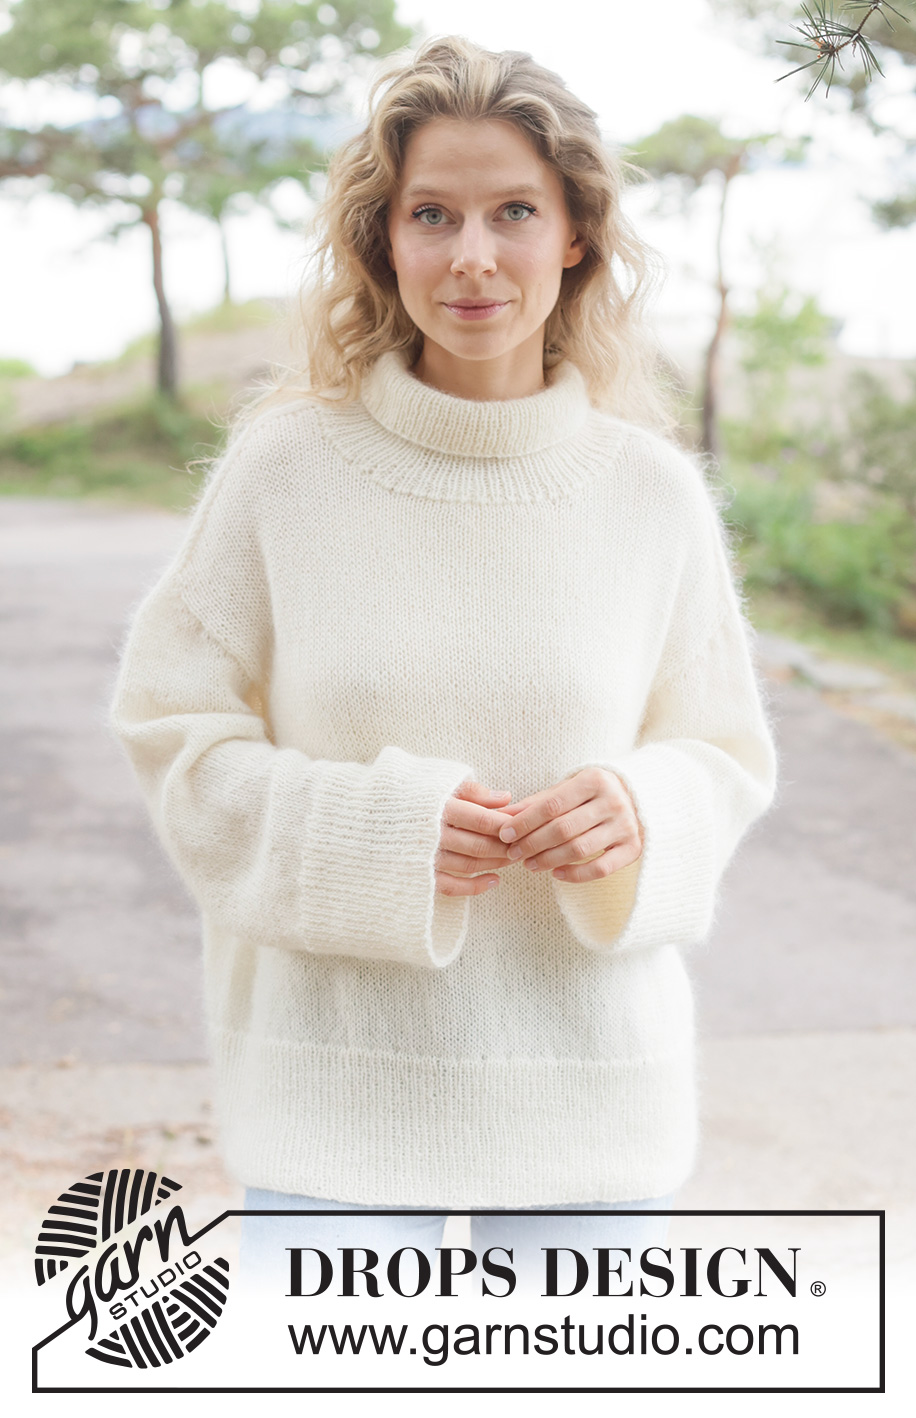
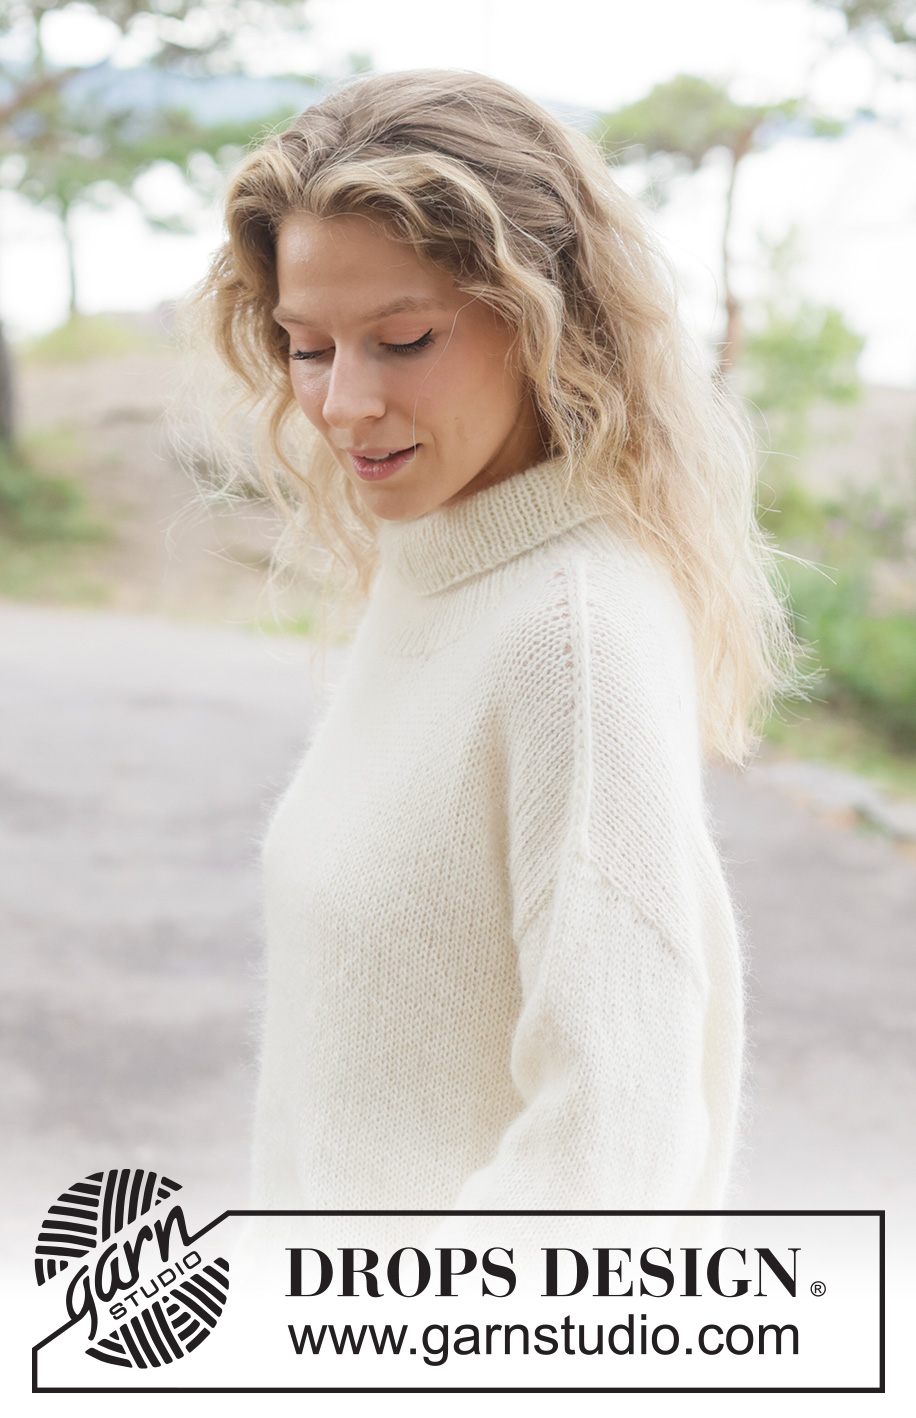
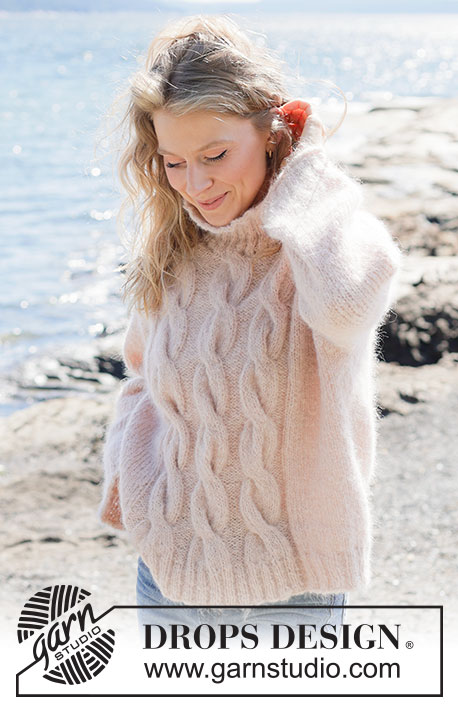
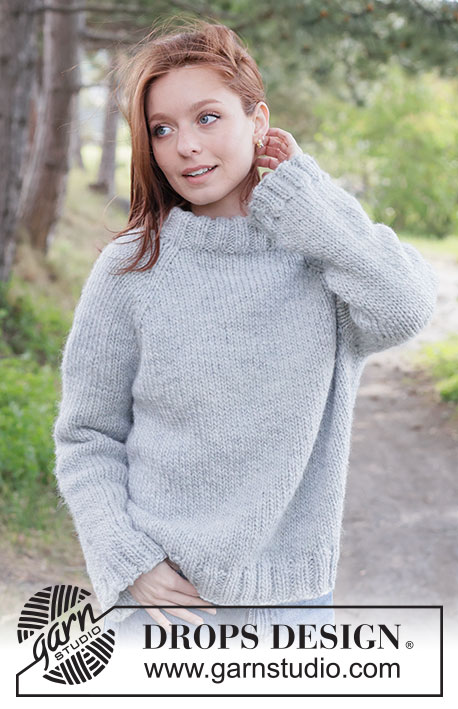
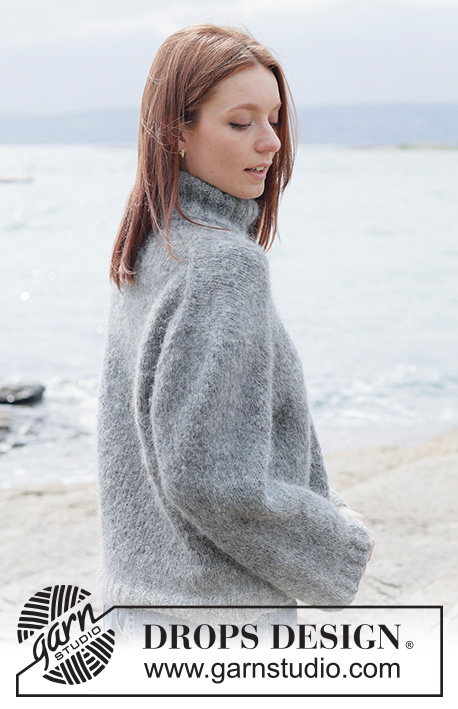
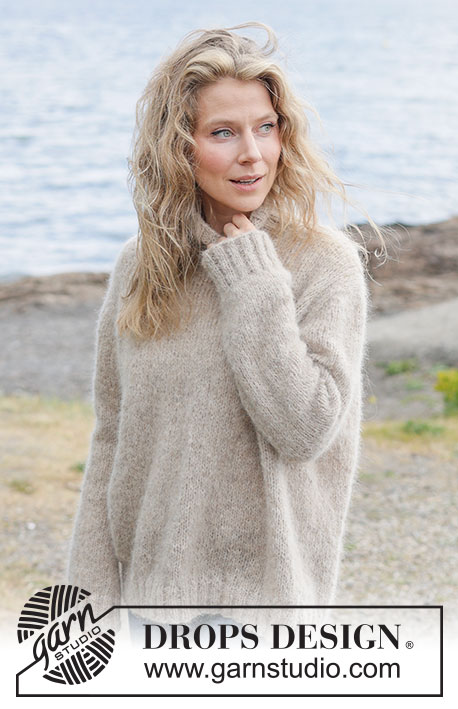
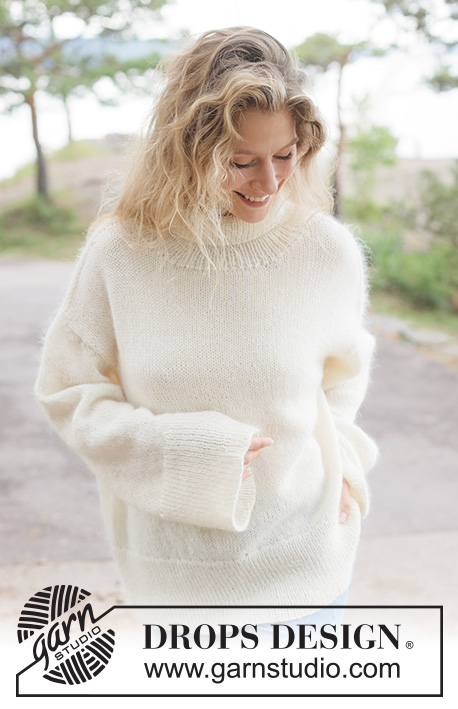
Winter Meringue Sweater#wintermeringuesweater |
|
 |
 |
Knitted oversized jumper in DROPS Nord and DROPS Kid-Silk. Piece is knitted bottom up, in stocking stitch with diagonal shoulders, high collar and I-cord. Size XS – XXXL.
DROPS 262-2 |
|
|
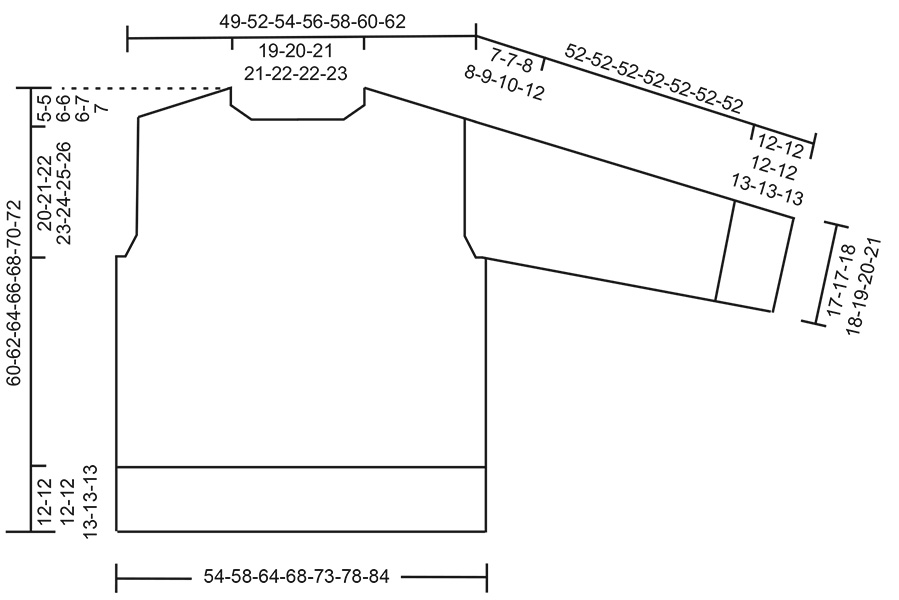
---------------------------------------------------------- EXPLANATION FOR THE PATTERN: ---------------------------------------------------------- I-CORD CAST-OFF: Use circular needle size 4.5 mm and cast on 3 stitches on right needle with a strand of each quality (= 2 strands). Slip the 3 stitches from right needle on to left needle so that the working yarn is 3 stitches in on left needle. ROW 1 (= right side): Knit 2, knit the next 3 stitches twisted together (i.e. cast off 1 stitch from front piece and 1 stitch from back piece). Slip the 3 stitches from right needle back on left needle. Do not turn piece (the working yarn tightens the piece when working to form a little tube). Repeat 1st ROW until only 3 stitches remain in total. Cast off and fasten the yarn. KNITTING TIP: When working short row there will be a small hole when turning the piece - the hole can be closed by tightening the yarn or using the technique German Short Rows as follows: Slip first stitch purlwise. Place strand over right needle and tighten well at the back (should lead to two loops on needle). Work these loops together on next row. DECREASE TIP: Decrease 1 stitch on each side of marker thread as follows: Work until 3 stitches remain before marker thread, knit 2 together, knit 2 (marker thread is between these 2 stitches), slip 1 stitch knitwise, knit 1, pass slipped stitch over stitch worked (= 2 stitches decreased). ---------------------------------------------------------- START THE PIECE HERE: ---------------------------------------------------------- JUMPER - SHORT OVERVIEW OF THE PIECE: In this pattern needles of different length have been used, begin with fitting length for number of stitches and switch as needed. Piece is worked in the round on circular needle, from the bottom and up to armholes. Divide the piece for front piece and back piece and finish each part separately back and forth. Cast off shoulder stitches from front piece and back piece together with I-cord. Pick up stitches for sleeves around the armholes. First work back and forth with short rows to form a sleeve cap, then work sleeves downwards in the round on needle. Finish by picking up stitches around the neck and work a neck edge in the round. BODY: Cast on 280-302-332-354-380-406-436 stitches on circular needle size 3.5 mm with DROPS Nord and DROPS Kid-Silk (= 2 strands). Work rib (= knit 1/purl 1) for 12-12-12-12-13-13-13 cm. Switch to circular needle size 4.5 mm. Knit 1 round while decreasing 86-94-102-110-118-126-134 stitches evenly = 194-208-230-244-262-280-302 stitches. Work in stocking stitch until piece measures 35-36-36-37-38-38-39 cm. Remember to follow the knitting tension! Now decrease for armholes and divide the piece into front piece and back piece. DIVISION AT ARMHOLES: On next round divide the piece for front piece and back piece, work as follows: Cast off the first 4-4-6-8-10-12-14 stitches on round for armhole, knit the next 93-100-109-114-121-128-137 next stitches, cast off the next 4-4-6-8-10-12-14 stitches for armhole, knit the last 93-100-109-114-121-128-137 stitches. Now work front piece and back piece back and forth on needle until finished measurements. BACK PIECE: = 93-100-109-114-121-128-137 stitches. Work in stocking stitch back and forth while decreasing stitches for armholes in each side on every row from right side as follows: Knit 3, slip 1 stitch, knit 1, pass slipped stitch over stitch worked, work until 5 stitches remain, knit 2 together, knit 3 (= 2 stitches decreased). Decrease like this on every row from right side 2-3-6-7-8-10-13 times in total = 89-94-97-100-105-108-111 stitches. When piece measures 55-57-58-60-62-63-65 cm, continue as follows: ROW 1 (= right side): Work until 4 stitches remain, turn piece. ROW 2 (= wrong side): Work until 4 stitches remain, turn piece. ROW 3 (= right side): Work until 8 stitches remain (i.e. 4 stitches before last turn), turn piece. ROW 4 (= wrong side): Work until 8 stitches remain (i.e. 4 stitches before last turn), turn piece. ROW 5 (= right side): Knit 22-24-25-26-28-29-30, cast off the next 29-30-31-32-33-34-35 stitches, knit until 12 stitches remain (i.e. 4 stitches before last turn), turn and continue on left shoulder back piece (stitches for right shoulder is resting on the needle). LEFT SHOULDER BACK PIECE: ROW 1 (= wrong side): Purl all stitches. ROW 2 (= right side): Cast off the first 2 stitches, work until 16 stitches remain (i.e. 4 stitches before last turn), turn piece. ROW 3 (= wrong side): Purl all stitches. ROW 4 (= right side): Cast off the first stitch, work until 20 stitches remain (i.e. 4 stitches before last turn), turn piece. ROW 5 (= wrong side): Purl all stitches. ROW 6 (= right side): Knit until 4 stitches before last turn, turn piece. ROW 7 (= wrong side): Purl all stitches. Work 6th and 7th ROW 1-1-2-2-2-3-3 times in total. Put all the 27-29-30-31-33-34-35 stitches from left shoulder back piece on a thread, they are cast off later together with stitches from left shoulder on front piece. RIGHT SHOULDER BACK PIECE: Begin from wrong side and work over all stitches from right shoulder on back piece as follows: ROW 1 (= wrong side): Purl until 12 stitches remain (i.e. 4 stitches before last turn), turn piece. ROW 2 (= right side): Knit all stitches. ROW 3 (= wrong side): Cast off the first 2 stitches, purl until 12 stitches remain (i.e. 4 stitches before last turn), turn piece. ROW 4 (= right side): Knit all stitches. ROW 5 (= wrong side): Cast off the first stitch, purl until 20 stitches remain (i.e. 4 stitches before last turn), turn piece. ROW 6 (= right side): Knit all stitches. ROW 7 (= wrong side): Purl until 4 stitches before last turn, turn piece. ROW 8 (= right side): Knit all stitches. Work 7th and 8th ROW 1-1-2-2-2-3-3 times in total. Put all the 27-29-30-31-33-34-35 stitches from right shoulder back piece on a thread, they are cast off later together with right shoulder on front piece. FRONT PIECE: = 93-100-109-114-121-128-137 stitches. Work as on back piece until piece measures 55-57-58-60-62-63-65 cm = 89-94-97-100-105-108-111 stitches. Work last row from wrong side while at the same time cast off the middle 17-18-19-20-21-22-23 stitches. Do not cut the yarn, continue to work over left shoulder on front piece as explained below (stitches for right shoulder are on the needle). LEFT SHOULDER FRONT PIECE: = 36-38-39-40-42-43-44 stitches. ROW 1 (= right side): Knit all stitches. ROW 2 (= wrong side): Cast off the first 3 stitches, work until 4 stitches remain, turn piece. ROW 3 (= right side): Knit all stitches. ROW 4 (= wrong side): Cast off the first 2 stitches, work until 8 stitches remain (i.e. 4 stitches before last turn), turn piece. ROW 5 (= right side): Knit all stitches. ROW 6 (= wrong side): Cast off the first 2 stitches, work until 12 stitches remain (i.e. 4 stitches before last turn), turn piece. ROW 7 (= right side): Knit all stitches. ROW 8 (= wrong side): Cast off the first stitch, work until 16 stitches remain (i.e. 4 stitches before last turn), turn piece. ROW 9 (= right side): Knit all stitches. ROW 10 (= wrong side): Cast off the first stitch, work until 20 stitches remain (i.e. 4 stitches before last turn), turn piece. ROW 11 (= right side): Knit all stitches. ROW 12 (= wrong side): Work until 4 stitches before last turn, turn piece. ROW 13 (= right side): Knit all stitches. Work 12th and 13th ROW 1-1-2-2-2-3-3 times in total. Put all the 27-29-30-31-33-34-35 stitches from left shoulder front piece on a thread, they are cast off later together with stitches from left shoulder on back piece. RIGHT SHOULDER: = 36-38-39-40-42-43-44 stitches. Begin from right side and work over stitches from right shoulder on front piece as follows: ROW 1 (= right side): Cast off the first 3 stitches, work until 4 stitches remain, turn piece. ROW 2 (= wrong side): Purl all stitches. ROW 3 (= right side): Cast off the first 2 stitches, work until 8 stitches remain (i.e. 4 stitches before last turn), turn piece. ROW 4 (= wrong side): Purl all stitches. ROW 5 (= right side): Cast off the first 2 stitches, work until 12 stitches remain (i.e. 4 stitches before last turn), turn piece. ROW 6 (= wrong side): Purl all stitches. ROW 7 (= right side): Cast off the first stitch, work until 16 stitches remain (i.e. 4 stitches before last turn), turn piece. ROW 8 (= wrong side): Purl all stitches. ROW 9 (= right side): Cast off the first stitch, work until 20 stitches remain (i.e. 4 stitches before last turn), turn piece. ROW 10 (= wrong side): Purl all stitches. ROW 11 (= right side): Work until 4 stitches before last turn, turn piece. ROW 12 (= wrong side): Purl all stitches. Work 11th and 12th ROW 1-1-2-2-2-3-3 times in total. Put all the 27-29-30-31-33-34-35 stitches from right shoulder front piece on a thread, they are cast off later together with stitches from right shoulder on back piece. ASSEMBLY: Cast off shoulder stitches with stitch from both front piece and back piece. First slip all stitches from right shoulder front piece and right shoulder back piece on same needle so that every other stitch on needle belongs to front piece and back piece = 54-58-60-62-66-68-70 stitches. Cast off from right side seen from front piece with I-CORD CAST-OFF - read explanation above. Cast off with I-cord the same way as on left shoulder. SLEEVES: Sleeve is worked from the armhole and down. Place piece flat and insert 1 marker at the top of armhole = mid on top shoulder. Pick up stitches around the armhole, use circular needle size 3.5 mm, and begin in the middle of the stitches cast off under sleeve - pick up 68-72-80-88-94-100-106 stitches - adjust to pick up same number of stitches on each side of marker. Switch to circular needle size 4.5 mm. Now work in stocking stitch back and forth with short rows over sleeve cap to get a better shape on sleeve, begin round mid under sleeve as follows: ROW 1 (= right side): Work 4 stitches past marker on top of shoulder, turn piece – read KNITTING TIP. ROW 2 (= wrong side): Work 4 stitches past marker, turn piece. ROW 3 (= right side): Work 3 stitches past last turn, turn piece. ROW 4 (= wrong side): Work 3 stitches past last turn, turn piece. Repeat ROWS 3 and 4. Work until 16-16-18-20-22-24-28 turns have been done in total (= 8-8-9-10-11-12-14 times in each side and last row is worked from wrong side). AFTER LAST TURN: The last time 4th row is worked finish row by turning piece, then work from right side until beginning of round (mid under sleeve). Insert 1 marker thread mid under sleeve, this is used when decreasing stitches under sleeve. Move marker thread upwards when working. Now work in the round in stocking stitch over all stitches while AT THE SAME TIME decreasing under sleeve, read DECREASE TIP and decrease like this: When sleeve measures 1 cm mid under sleeve, decrease 2 stitches 2-2-3-4-5-6-7 times on every other round, then decrease 2 stitches every 12-8-5-3½-3-2½-2 cm 2-3-5-7-7-8-9 times in total = 60-62-64-66-70-72-74 stitches on row. Work until sleeve measures 40-40-40-40-39-39-39 cm from mid on top of shoulder - sleeve measures approx. 33-33-32-32-30-29-27 cm from mid under sleeve. Switch to double pointed needles size 3.5 mm and work rib (= knit 1/purl 1) while AT THE SAME TIME increasing 26-26-30-30-32-32-32 stitches evenly on 1st round = 86-88-94-96-102-104-106 stitches. When rib measures 12-12-12-12-13-13-13 cm, cast off with knit over knit and purl over purl. Sleeve measures approx. 52-52-52-52-52-52-52 cm from mid on top of shoulder. NECK EDGE: Use circular needle size 3.5 mm and 1 strand of each quality (= 2 strands), pick up stitches around the neck from right side as follows: Begin at one shoulder line and pick up approx. 124-128-140-140-146-152-156 stitches – number of stitches must be divisible by 2. Knit 2 rounds. On next round work every stitch as follows: Find the stitch that is 2 rounds directly below next stitch on needle, pick up this stitch in upper loop from wrong side and pass loop up on left needle. Knit loop and first stitch together. Repeat the entire round. Work rib (= knit 1/purl 1) in the round for 16-16-16-16-17-17-17 cm. Cast off somewhat loosely with knit over knit and purl over purl and fold the neck edge towards the right side. |
|
 |
|
Have you finished this pattern?Tag your pictures with #dropspattern #wintermeringuesweater or submit them to the #dropsfan gallery. Do you need help with this pattern?You'll find 29 tutorial videos, a Comments/Questions area and more by visiting the pattern on garnstudio.com. © 1982-2026 DROPS Design A/S. We reserve all rights. This document, including all its sub-sections, has copyrights. Read more about what you can do with our patterns at the bottom of each pattern on our site. |
|


With over 40 years in knitting and crochet design, DROPS Design offers one of the most extensive collections of free patterns on the internet - translated to 17 languages. As of today we count 325 catalogues and 12298 patterns translated into English (UK/cm). 12298
We work hard to bring you the best knitting and crochet have to offer, inspiration and advice as well as great quality yarns at incredible prices! Would you like to use our patterns for other than personal use? You can read what you are allowed to do in the Copyright text at the bottom of all our patterns. Happy crafting!
Post a comment to pattern DROPS 262-2
We would love to hear what you have to say about this pattern!
If you want to leave a question, please make sure you select the correct category in the form below, to speed up the answering process. Required fields are marked *.