
Popular categories
Looking for a yarn?


Comments / Questions (63)
![]() Isabel wrote:
Isabel wrote:
Hello! I'm knitting a size M and splitting for sleeves now, and I'm a bit confused. My round starts on the right side of back piece as the pattern suggests, I knit one and separated the the 48 stitches which leaves me mid arm panel. This has made the arms wonky and shift to one side and is not even with the rest of the sweater. Any suggestions on what I'm doing wrong?
16.04.2026 - 08:51DROPS Design answered:
Dear Isabel, the rounds on yoke started with the raglan stitch at the transition between back piece and right sleeve, and this stitch belongs to back piece, so that you should have for sleeve: 8+8+16+8+8=48 sts and the next stitch before marker thread belongs to front piece. Hope this can help. Happy knitting!
16.04.2026 - 16:35
![]() Chantal wrote:
Chantal wrote:
Bonjour, Pouvez-vous m’indiquer les quantités requises si se souhaite remplacer la Nepal (700gr) par de l’alpaca + kid mohair en taille L Merci beaucoup et bonne journee
29.03.2026 - 14:39DROPS Design answered:
Bonjour Chantal, vous pouvez utiliser notre nouveau convertisseur pour avoir les quantités exactes requises pour les deux laines. Bon tricot!
07.04.2026 - 12:56
![]() Marjo wrote:
Marjo wrote:
Ik heb de hals gebreis. Maar ik snap ik het volgende niet. Voeg een markeerdraad in na 37 steken. Dat moet dan midden voor zijn. Waar vanaf tel ik de markeerdraden voor de raglan.
16.03.2026 - 10:21DROPS Design answered:
Dag Marjo,
Je telt vanaf waar je bent begonnen met breien, je kunt dit zien aan waar de draad van het opzetten zit.
11.04.2026 - 13:22
![]() LAURA wrote:
LAURA wrote:
Buongiorno, sono una principiante e vorrei provare questo modello, che mi piace molto. Ho già fatto un maglione simile e mi sono accorta che sarebbe meglio inserire i ferri accorciati per il collo anatomico. Nella spiegazione mi pare non sia previsto. Avete un altro modello simile con collo anatomico? Altrimenti come faccio a inserirlo in questo? Grazie mille
14.03.2026 - 11:56DROPS Design answered:
Buonasera Laura, pul rivolgersi al suo rivenditore DROPS di fiducia per un'assistenza così personalizzata. Buon lavoro!
15.03.2026 - 19:09
![]() Tineke wrote:
Tineke wrote:
Opzet hals met 104 steken, vervolgens 2 recht , 2 averecht niet uit. Hoe dit op te lossen ivm raglanmouw
09.03.2026 - 17:49DROPS Design answered:
Dag Tineke,
Als je de hals 2 recht, 2 averecht breit, brei je 26 keer een herhalend patroon van 4 steken. Vervolgens lopen 2 steken recht van de hals door in de raglanlijnen.
09.03.2026 - 20:46
![]() Veronica wrote:
Veronica wrote:
Intendevo come procedere con il lavoro, non capisco come continuare il lavoro in modo alternato (ripetere questi aumenti per un totale di 18 volte sul davanti e dietro (9 volte sulle maniche)). Grazie mille!
05.03.2026 - 14:24DROPS Design answered:
Buonasera Veronica, in quel punto vengono spiegati gli aumenti per il corpo e le maniche, che sono diversi. Per il corpo si aumenta ogni 2 ferri e per le maniche ogni 4 ferri, quindi significa che ogni 2 ferri aumenterà solo 4 maglie e ogni 4 ferri ne aumenterà 8. Buon lavoro!
06.03.2026 - 19:28
![]() Veronica wrote:
Veronica wrote:
Vorrei chiedere un chiarimento riguardo gli aumenti del raglan: ogni 2 giri sul davanti e dietro e ogni 4 giri sulle maniche (in modo alternato 4 e 8 aumenti su ogni giro di aumenti).
04.03.2026 - 21:17DROPS Design answered:
Buonasera Veronica, che tipo di chiarimento necessita? In quel punto vengono spiegati gli aumenti per il raglan, che sono diversi per il corpo e per le maniche. Buon lavoro!
04.03.2026 - 22:47
![]() Denise wrote:
Denise wrote:
This was a fun pattern to make. I'm not that familiar with website patterns and once I figured out you had videos to show how to add stitches it was great. I plan to make the sweater again. I was surprised that it is a heavy sweater, it looked lighter in the photos. I added a kangaroo pouch to the front. I plan to have this sweater on working in my veggie garden this spring. Thank you for the pattern.
26.02.2026 - 16:14
![]() Irene wrote:
Irene wrote:
Could you please clarify how to measure this: "the yoke measures approx. 22 cm from the marker mid-front" Specifically, from the marker mid-front, how do I measure it?
23.02.2026 - 19:20DROPS Design answered:
Hi Irene, NECK: ...Insert 1 marker after the first 29-31-31-37-37-39 stitches (approx. mid-front); the piece is now measured from here. This marker should remain at the same place (in a round just after the neck). You will measure yoke lenght from this point (marker) downwards, in a straight line. Happy knitting!
08.04.2026 - 16:06
![]() LA wrote:
LA wrote:
How would I add short rows to this pattern to improve the fit? Where would they work best without dramatically complicating the raglan increases? TIA!
15.02.2026 - 18:02
|
|
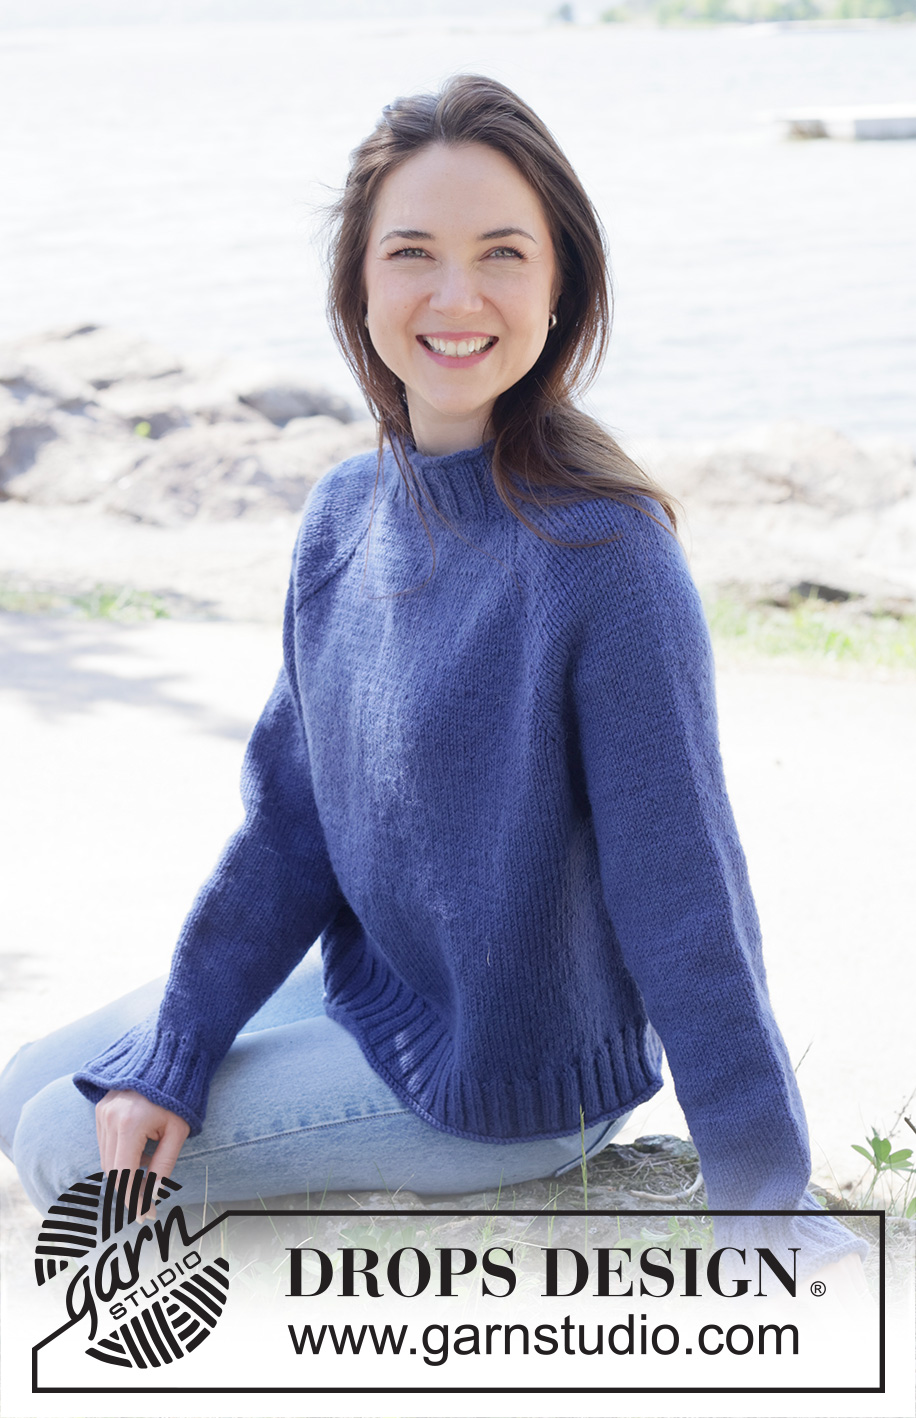
Midnight Glow#midnightglowsweater |
|
 |
 |
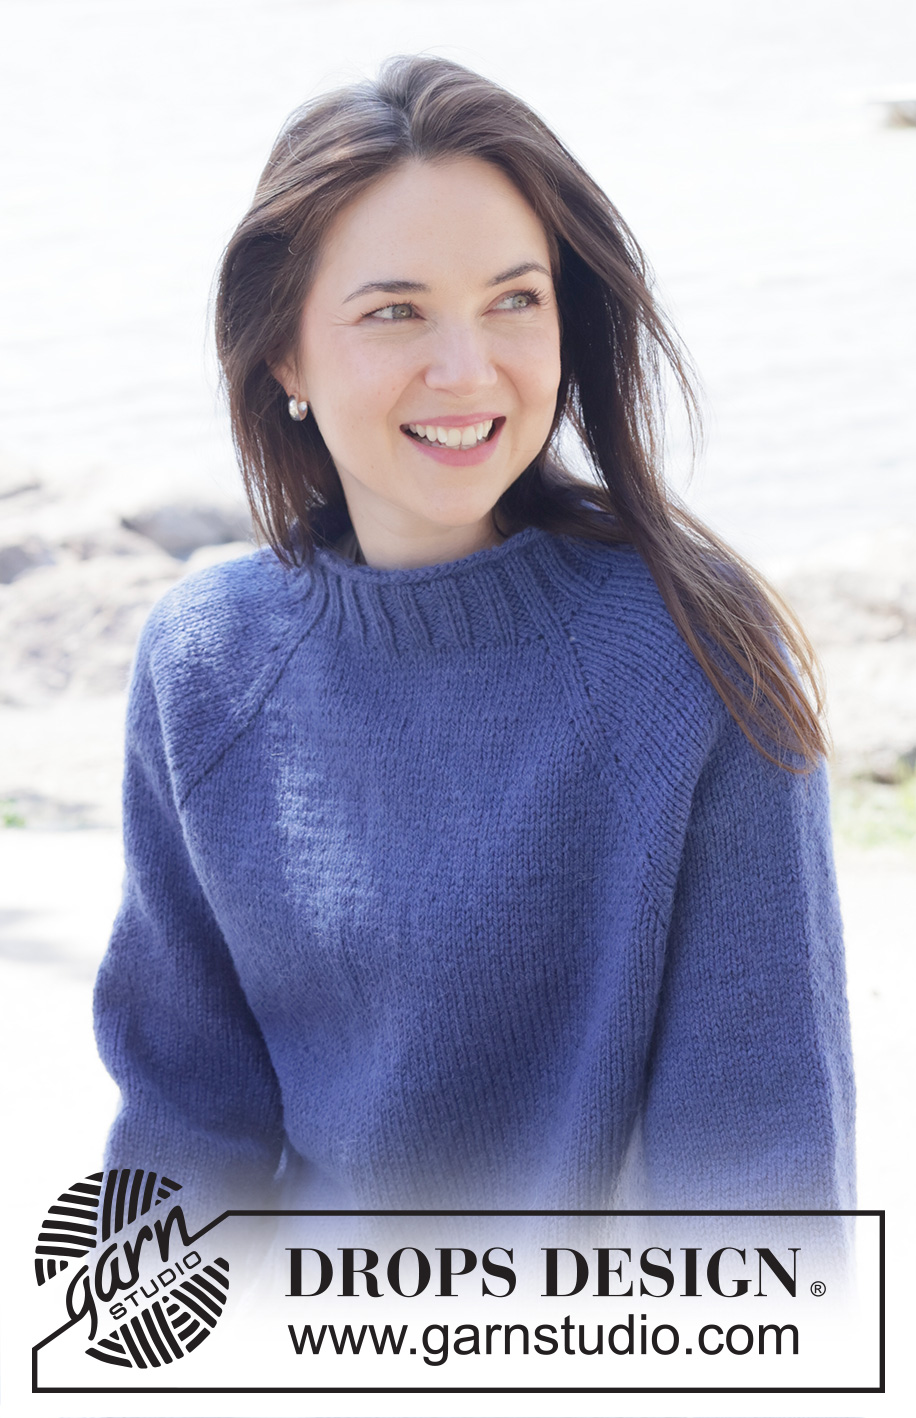
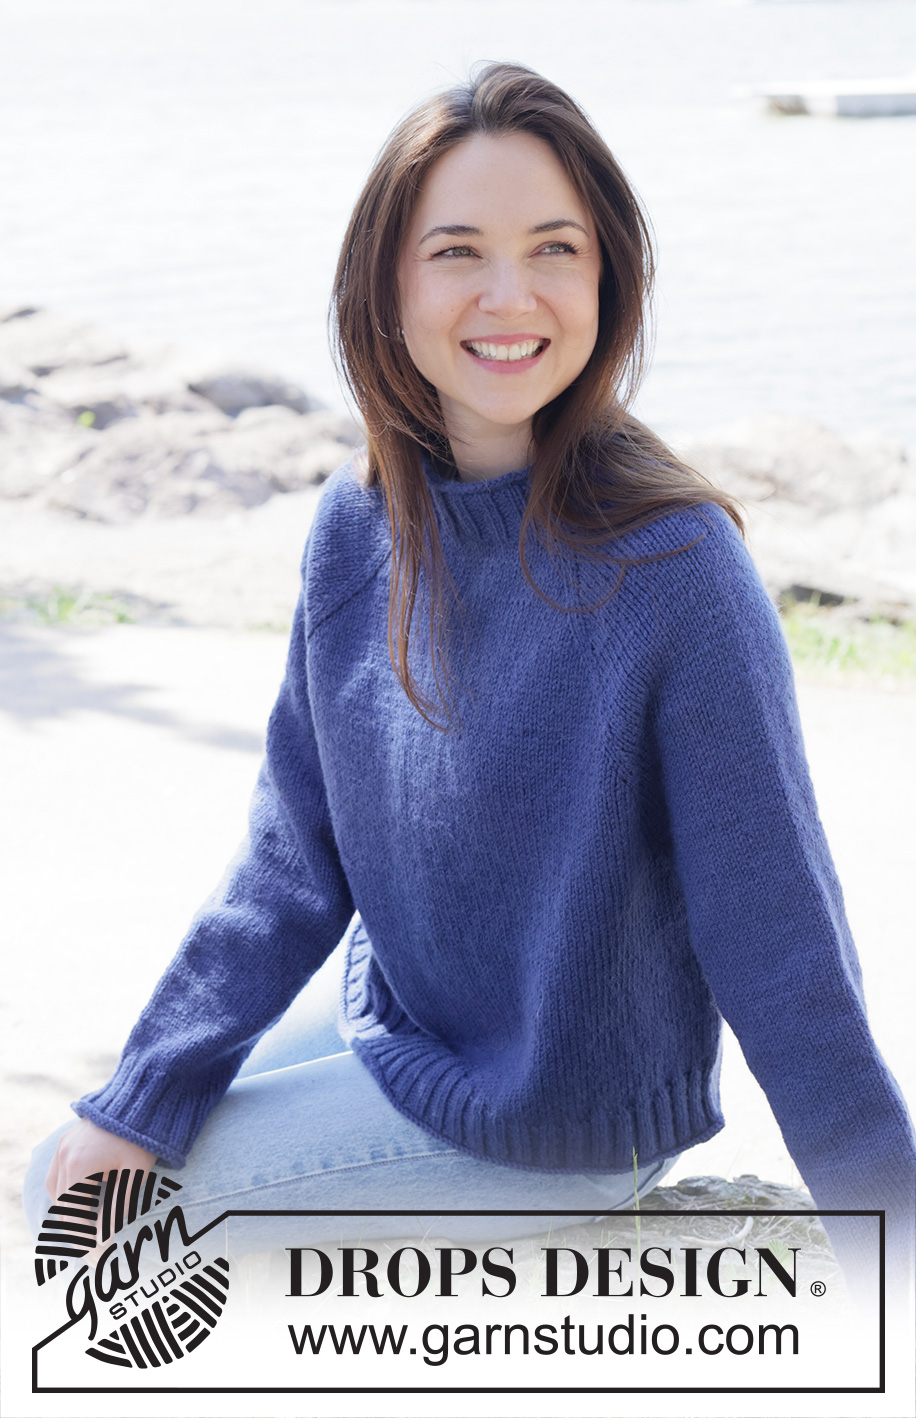
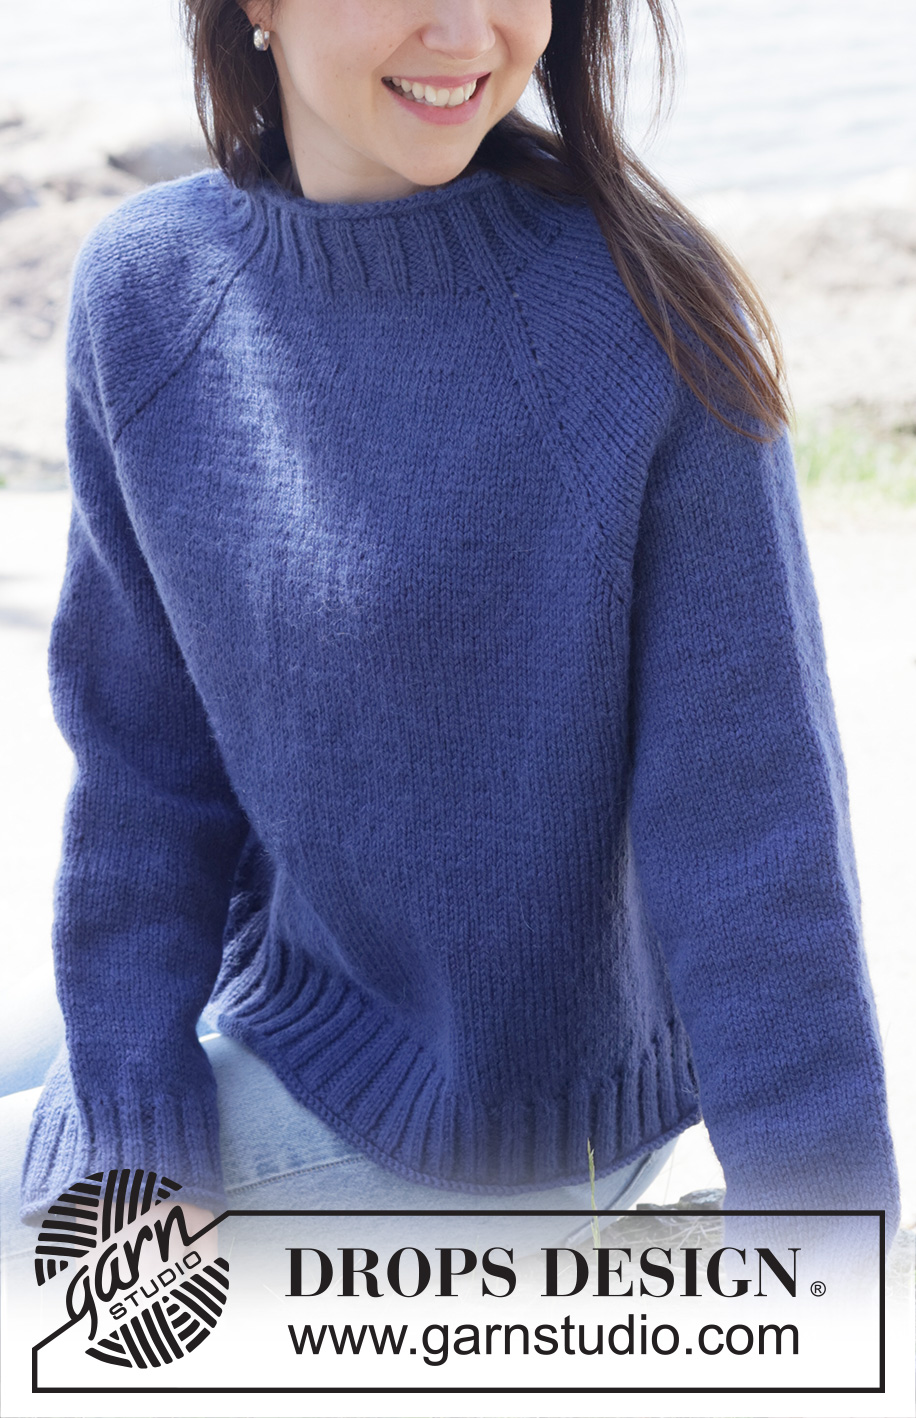
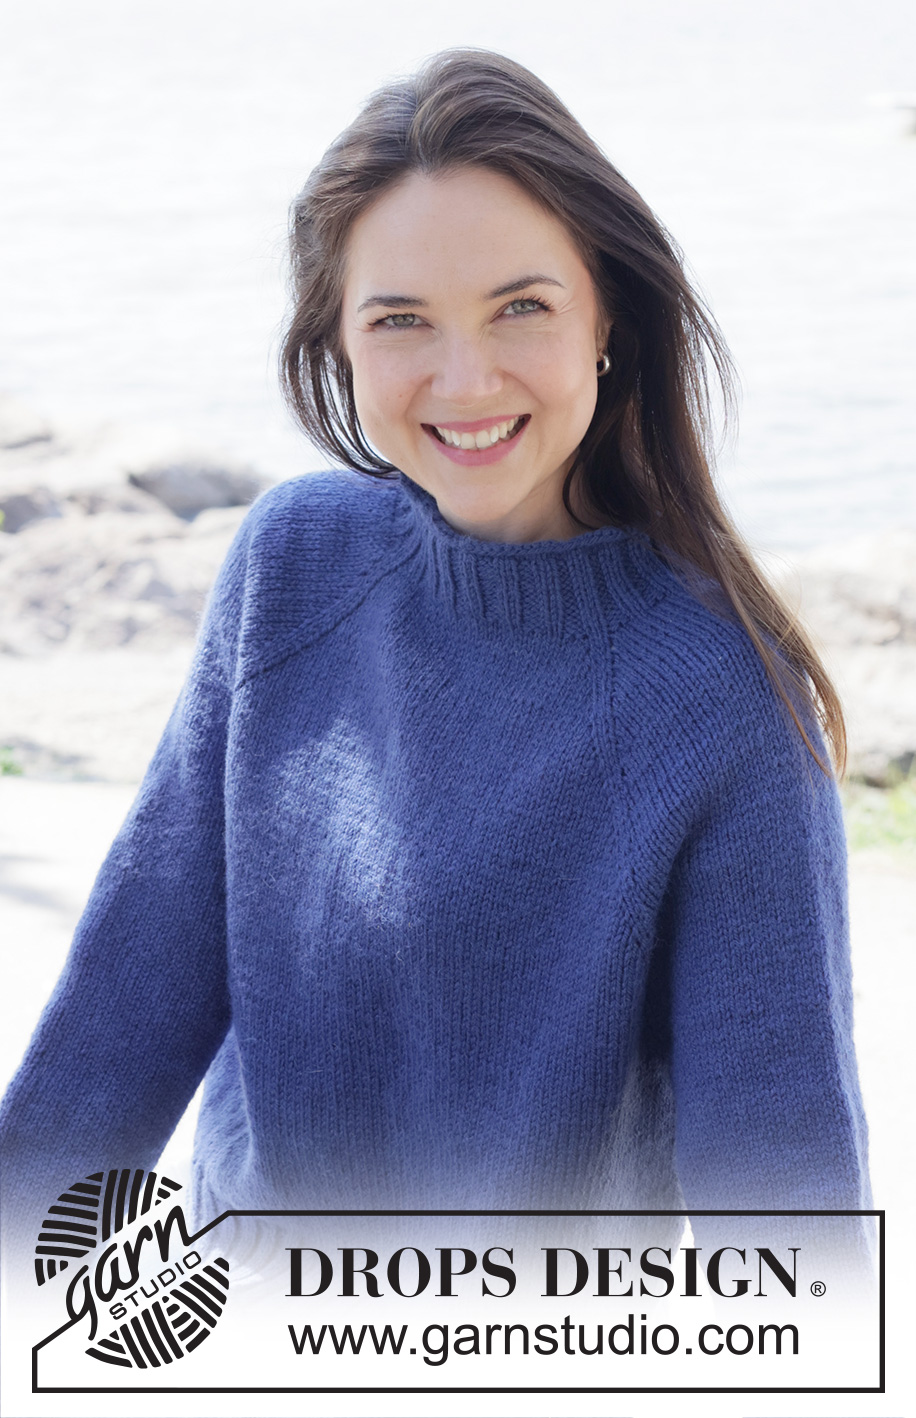
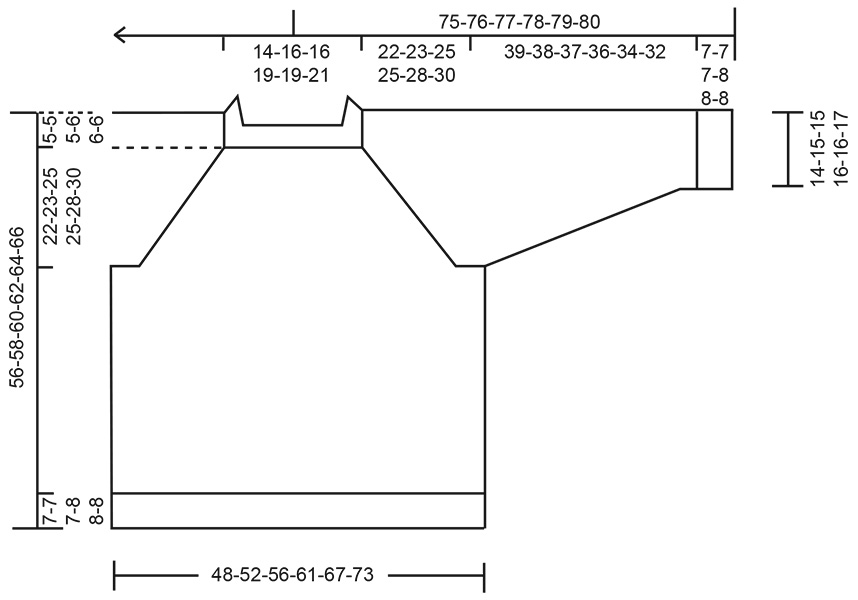
Knitted jumper in DROPS Nepal. The piece is worked top down with raglan and rolled edges. Sizes S - XXXL.
DROPS 254-39 |
|
|
------------------------------------------------------- EXPLANATIONS FOR THE PATTERN: ------------------------------------------------------- RAGLAN: Increase 1 stitch by making 1 yarn over, which is then worked on the next round as follows: BEFORE MARKER-THREAD: Slip the yarn-over off the left needle and replace it twisted (insert the left needle through the back when replacing it). Knit the front loop of the yarn-over to avoid a hole. Then work the new stitch in stocking stitch. AFTER MARKER-THREAD: Knit the yarn-over through the back loop to avoid a hole. Then work the new stitch in stocking stitch. DECREASE TIP: Decrease 1 stitch on each side of the marker-thread as follows: Work until there are 3 stitches left before the marker-thread, knit 2 together, knit 2 (marker-thread sits between these 2 stitches), slip 1 stitch knit-wise, knit 1 and pass the slipped stitch over the knitted stitch (2 stitches decreased). INCREASE TIP-1 (evenly spaced): To work out how to increase evenly, count the total number of stitches on the needle (e.g., 164 stitches) and divide by the number of increases to be made (e.g., 20) = 8.2. In this example, increase by making 1 yarn-over after approx. each 8th stitch. On the next round work the yarn overs twisted to avoid holes. ------------------------------------------------------- START THE PIECE HERE: ------------------------------------------------------- JUMPER – SHORT OVERVIEW OF THE PIECE. The pattern uses both long and short needles; start with the length which fits the number of stitches and change when necessary. The neck and yoke are worked in the round with circular needle, from the right back shoulder, top down. When the yoke is finished, it is divided for the body and sleeves. The body is continued in the round, while the sleeves wait. The sleeves are worked in the round, top down. NECK: Cast on 80-88-88-104-104-112 stitches with circular needle size 5 mm and DROPS Nepal. Change to circular needle size 4 mm (casting on with a larger needle size makes the cast-on edge elastic) and knit 4 rounds. The beginning of the round is the right back shoulder. Work rib in the round (knit 2, purl 2) for 6-6-6-7-7-7 cm. Insert 1 marker after the first 29-31-31-37-37-39 stitches (approx. mid-front); the piece is now measured from here. YOKE: Insert 4 marker-threads, without working the piece and inserting each thread between 2 knitted stitches from the rib (these are raglan-stitches which are continued in stocking stitch). Count 1 stitch and insert 1 marker-thread before the next stitch, count 16-16-16-20-20-20 stitches (= sleeve), insert 1 marker-thread before the next stitch, count 24-28-28-32-32-36 stitches (= front piece), insert 1 marker-thread before the next stitch, count 16-16-16-20-20-20 stitches (= sleeve), insert 1 marker-thread before the next stitch, there are 24-28-28-32-32-36 stitches left (= back piece). Change to circular needle size 5 mm and work stocking stitch in the round. AT THE SAME TIME increase for RAGLAN – read description above, before/after the 2 raglan-stitches by each marker-thread (in each transition between the body and sleeves) every 2nd round a total of 8-8-11-9-7-7 times = 144-152-176-176-160-168 stitches (= 8 increased stitches on each increase-round). Remember to maintain the knitting tension. Then increase for raglan as follows: Every 2nd round on the front and back pieces and every 4th round on the sleeves (= alternately 4 and 8 increased stitches on each increase-round). Repeat these increases a total of 16-16-16-18-24-26 times on the front and back pieces (8-8-8-9-12-13 times on the sleeves). After the last increase there are 240-248-272-284-304-324 stitches and the yoke measures approx. 22-22-25-25-28-30 cm from the marker mid-front. Continue working without further increases until the yoke measures 22-23-25-25-28-30 cm from the marker. Now divide for the body and sleeves. DIVIDE FOR BODY AND SLEEVES: On the next round work as follows: Knit 1 (belongs to the back piece), place the next 48-48-54-56-58-60 stitches on a thread for the sleeve, cast on 10-12-14-18-20-22 stitches (in side mid-under sleeve), knit 72-76-82-86-94-102 (= front piece), place the next 48-48-54-56-58-60 stitches on a thread for the sleeve, cast on 10-12-14-18-20-22 stitches (in side mid-under sleeve), knit the last 71-75-81-85-93-101 stitches (= back piece). The body and sleeves are finished separately and the next round begins under the sleeve. BODY: = 164-176-192-208-228-248 stitches. Insert 1 marker in the middle of the 10-12-14-18-20-22 cast-on stitches under the sleeve. Work to the marker and continue stocking stitch in the round until the piece measures 44-46-48-48-50-52 cm from the marker mid-front. Change to circular needle size 4 mm and work rib (knit 2, purl 2), AT THE SAME TIME increasing 20-20-24-24-28-28 stitches evenly on the first round – read INCREASE TIP = 184-196-216-232-256-276 stitches. When the rib measures 6-6-6-7-7-7 cm, knit 4 rounds, then cast off a little loosely with knit. The jumper measures approx. 51-53-55-56-58-60 cm from the marker mid-front and approx. 56-58-60-62-64-66 cm from top of shoulder. SLEEVES: Place the 48-48-54-56-58-60 sleeve-stitches from the thread on one side of the piece on short circular needle size 5 mm and knit up 1 stitch in each of the 10-12-14-18-20-22 stitches cast on under the sleeve = 58-60-68-74-78-82 stitches. Insert a marker-thread in the middle of the 10-12-14-18-20-22 stitches under the sleeve. Start at the marker-thread and work stocking stitch in the round. When the sleeve measures 3 cm, decrease under the sleeve – read DECREASE TIP. Decrease 2 stitches every 7-7-4-3-2½-2 cm a total of 5-5-8-10-11-12 times = 48-50-52-54-56-58 stitches. Continue working until the sleeve measures 39-39-38-36-34-32 cm from the division. Change to double pointed needles size 4 mm. Work rib (knit 2, purl 2), AT THE SAME TIME increase 4-6-4-6-4-6 stitches evenly on the first round = 52-56-56-60-60-64 stitches. When the rib measures 6-6-6-7-7-7 cm, knit 4 rounds, then cast off a little loosely with knit. The sleeve measures approx. 46-46-45-44-42-40 cm from the division. |
|
 |
|
Have you finished this pattern?Tag your pictures with #dropspattern #midnightglowsweater or submit them to the #dropsfan gallery. Do you need help with this pattern?You'll find 28 tutorial videos, a Comments/Questions area and more by visiting the pattern on garnstudio.com. © 1982-2026 DROPS Design A/S. We reserve all rights. This document, including all its sub-sections, has copyrights. Read more about what you can do with our patterns at the bottom of each pattern on our site. |
|


With over 40 years in knitting and crochet design, DROPS Design offers one of the most extensive collections of free patterns on the internet - translated to 17 languages. As of today we count 324 catalogues and 12290 patterns translated into English (UK/cm). 12290
We work hard to bring you the best knitting and crochet have to offer, inspiration and advice as well as great quality yarns at incredible prices! Would you like to use our patterns for other than personal use? You can read what you are allowed to do in the Copyright text at the bottom of all our patterns. Happy crafting!
Post a comment to pattern DROPS 254-39
We would love to hear what you have to say about this pattern!
If you want to leave a question, please make sure you select the correct category in the form below, to speed up the answering process. Required fields are marked *.