
Popular categories
Looking for a yarn?


Comments / Questions (125)
![]() Marie wrote:
Marie wrote:
Hi, I atill do not understand. For the yoke what does it mean to increase for one round for the sleeves and the next for the body? Which stitch markers are those? I increase in one round (body) then knit for a round without increase, in the next increase (sleeve)? Thank you.
18.02.2025 - 15:11DROPS Design answered:
Dear Marie, when you have to increase alternately 4 and 8 sts you will work like this: *work 1 round increasing only on body: 1 st at the beg + at the end of both front/back pieces, 1 round without increase, 1 round increasing on both sleeves and body: 1 st at the beg + at the end of each sleeves + front/back pieces, 1 round without increasing*, work these 4 rounds a total of 4-4-4-4-2-2 times = you have increased 8-8-8-8-4-4 times for body and only 4-4-4-4-2-2 times for sleeves. Happy knitting!
20.02.2025 - 14:19
![]() Marie wrote:
Marie wrote:
Hi, I am starting with the yoke and I am a bit confused with the increases. Should the increase only be done on one side of the stitch marker on the back and the front part and then in the next round it’s in the other side of the stitch marker for the sleeves? And also in the fifth and the sixth round, I am just going to net without doing any increases right? Thank you
15.02.2025 - 01:24DROPS Design answered:
Dear Marie, when starting yoke you first work short rows for neckline increasing at the same time on ach side of all markers, on 1st row as you start from mid back you will increase on each side of 2 markers only - but on 5th row y ou will increase on each side of the last 2 markers so that you will have increased the same number of times on each side of each marker = 2 times in all sizes - from wrong side do not increase. After 5th row has been worked, you are back on mid back and now continue in the round. Happy knitting!
17.02.2025 - 13:57
![]() Panna wrote:
Panna wrote:
Hi, When inserting the markers after the neck, I would still have 3 leftover stiches. What is going on? (S size)
12.02.2025 - 00:55DROPS Design answered:
Hi Panna, The markers are inserted into stitches (not between stitches): 10 + 1 (marker-stitch) +15 + 1 +19 + 1 + 15 + 1 +9 = 72 stitches. Happy knitting!
12.02.2025 - 06:15
![]() Heidi Hammes wrote:
Heidi Hammes wrote:
Hallo, stricke die grösse XL. Beim Rumpf steht Kurz vor dem bündchen 1 reihe rechts stricken und dabei 42 maschen verteilt zunehmen. Das irritiert mich. Soll ich nicht 42 maschen ABNEHMEN? Ich bitte um eine Rückantwort. Vielen Dank. Lg Heidi
08.02.2025 - 21:40
![]() Heidi Hammes wrote:
Heidi Hammes wrote:
Hallo, stricke die grösse XL. Beim Rumpf steht Kurz vor dem bündchen 1 reihe rechts stricken und dabei 42 maschen verteilt zunehmen. Das irritiert mich. Soll ich nicht 42 maschen ABNEHMEN? Ich bitte um eine Rückantwort. Vielen Dank. Lg Heidi
08.02.2025 - 21:38DROPS Design answered:
Liebe Heidi, hier muss man wirklich zunehmen: man braucht mehr Maschen für Bünden mit kleineren Nadeln als fürs Glattrechts und kleinere Nadeln, deshalb wird man vor Bündchen zunehmen und so wird das Bündchen die untere Kante nicht zusammenziehen. Viel Spaß beim Stricken!
10.02.2025 - 10:18
![]() Claudia wrote:
Claudia wrote:
Buongiorno, non mi è chiaro cosa significa, all'avvio del collo doppio, ferri circolari corti n° 4,5 e 6 mm tenuti insieme. Grazie.
04.02.2025 - 15:18DROPS Design answered:
Buonasera Claudia, deve usare una punta dei ferri n° 4,5 mm e una 6 mm insieme per l'avvio delle maglie, in modo da avviarle più morbide. Buon lavoro!
13.02.2025 - 23:04
![]() Nicole wrote:
Nicole wrote:
Bonjour Lorsque je tricote et que je n'ai pas la même échantillon Je fais la règle de trois Comment fais t'on pour déterminer le nombre de rangs à augmenter (je sais combien en enlever mais comme un exemple tous les 7 rangs et 8 rangs ) Merci
04.02.2025 - 14:33DROPS Design answered:
Bonjour Nicole, vous pouvez utiliser également la règle de 3 dans ce cas là aussi; s'il vous faut plus de rangs, ajoutez des rangs entre les augmentations - ou bien tricotez simplement comme indiqué et continuez (sans augmenter) jusqu'à la hauteur indiquée pour l'empiècement , s'il vous faut moins de rangs, retirer des rangs entre les augmentations des raglans. Bon tricot!
04.02.2025 - 15:29
![]() Saana wrote:
Saana wrote:
Hei! Millainen mitoitus tässä paidassa on? Paljonko pitäisi istua väljää? Yritän valita oikeaa kokoa.
01.02.2025 - 17:10DROPS Design answered:
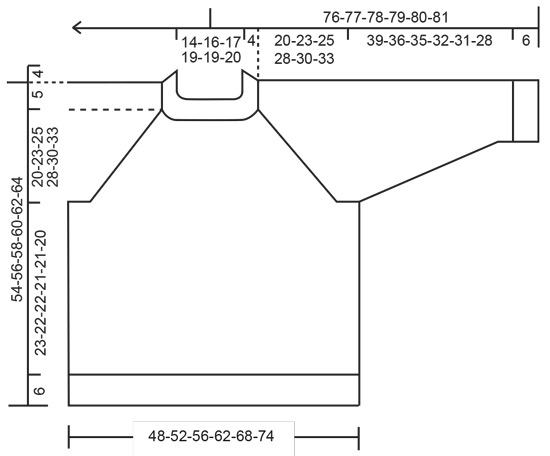
Hei, löydät puseron mitat ohjeen alaosan mittapiirroksesta.
03.02.2025 - 18:08
![]() Fanneke wrote:
Fanneke wrote:
Ik kwam er idd achter dat de steekmarkeerders er tussen zaten, dus dat heb ik nu goed gedaan. Maar nu na de verkorte toeren en meerderen voor de raglan heb ik weer 4 stk meer op het rugpand. Wat doe ik weer verkeerd?
27.01.2025 - 22:28DROPS Design answered:
Dag Fanneke,
Dat komt omdat je tijdens het breien van de verkorte toeren meerderingen voor de raglan op het achterpand hebt gemaakt. In totaal komen er 16 steken bij na de verkorte toeren (4 steken op naald 1, 8 steken op naald 3 en 4 steken op naald 5).
29.01.2025 - 12:55
![]() Hammes Heidi wrote:
Hammes Heidi wrote:
Hallo, stricken gtösse XL. Habe 264 maschen wie gewünscht, jetzt werden Rumpfteil und ärmel aufgeteilt. 41 maschen stricken (halbes rückenteil),,dann 51 maschen für den 1. Ärmel still legen. So Ihre anleitung. Wenn ich 41 maschen stricke bin ich mehrere maschen vorbei an der Raglan masche der letzten Reihe. Ist das so richtig? Über eine baldige Rückmeldung würde ich mich freuen, dann kann ich weiter stricken. Dankeschön. Lg Heidi
24.01.2025 - 16:58DROPS Design answered:
Liebe Heidi, ja so stimmt es, die Raglanmaschen + die 4 ersten und die 4 letzten Maschen von jedem Ärmel gehören zum Rumpf, so hat man die richtige Breite. Viel Spaß beim Stricken!
27.01.2025 - 08:14
|
|
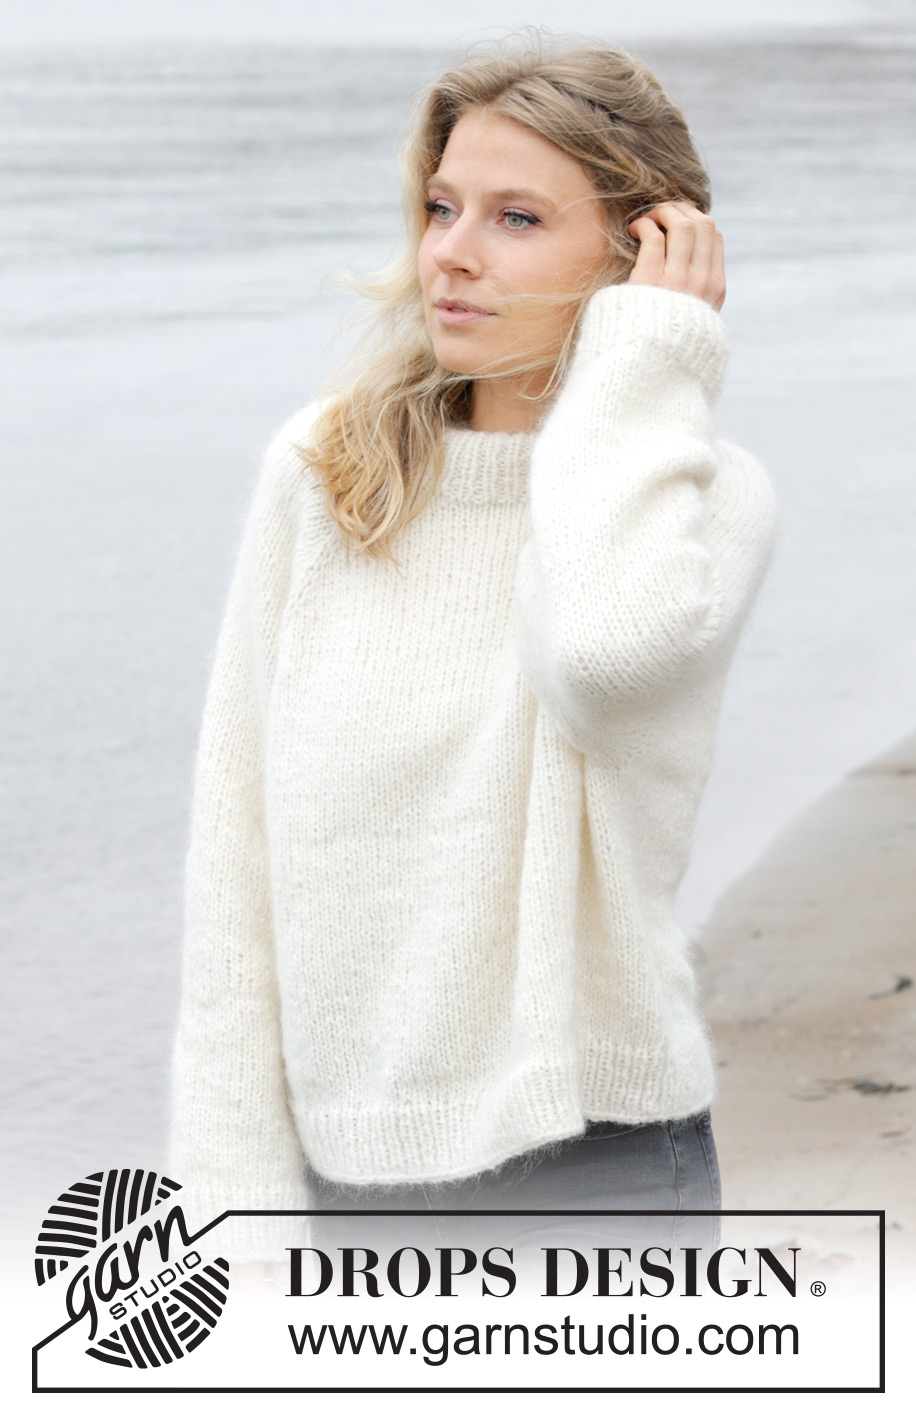
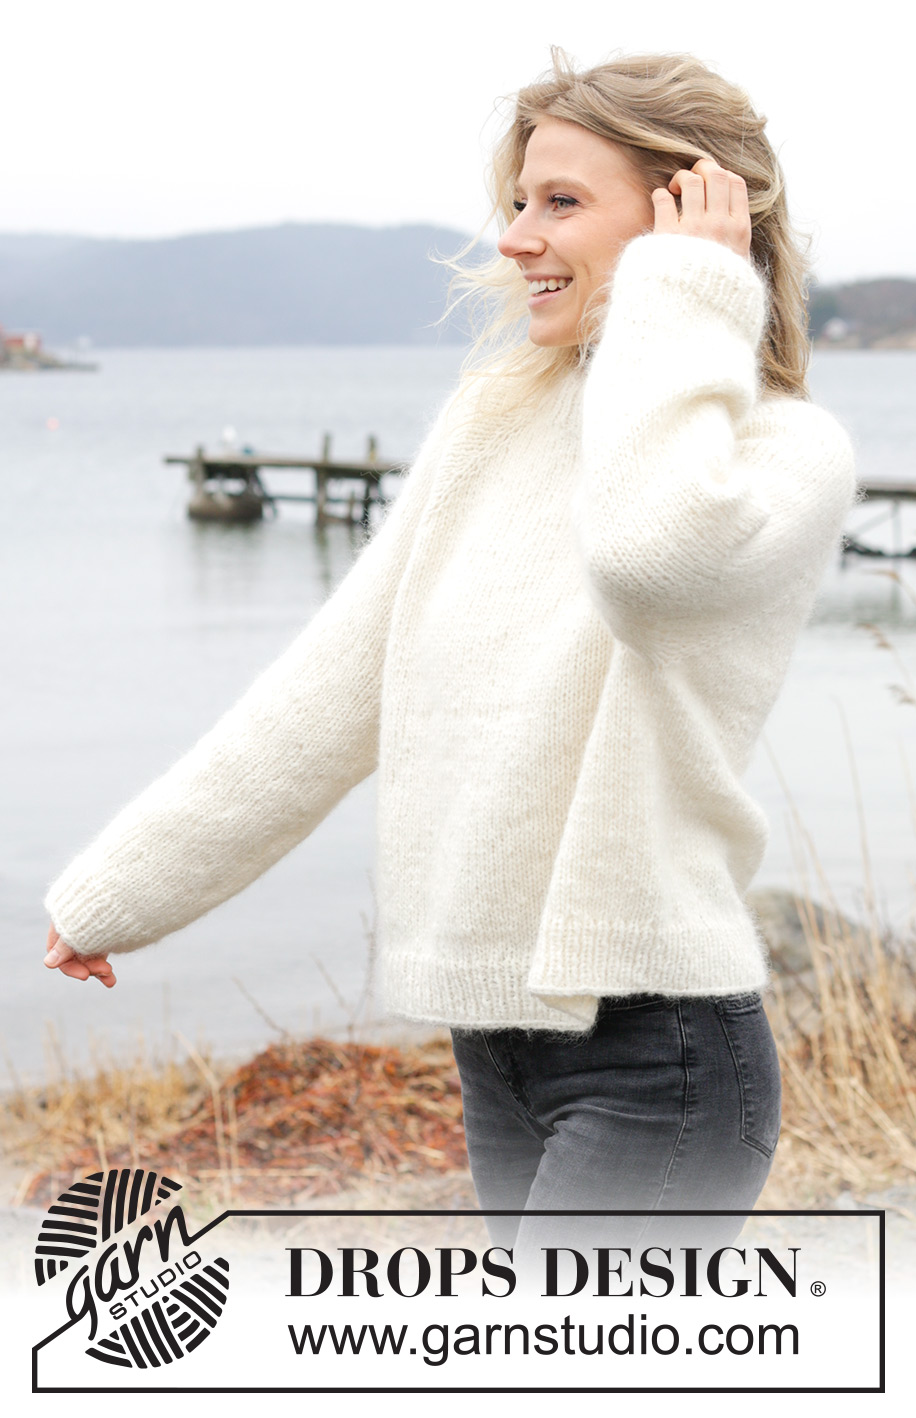
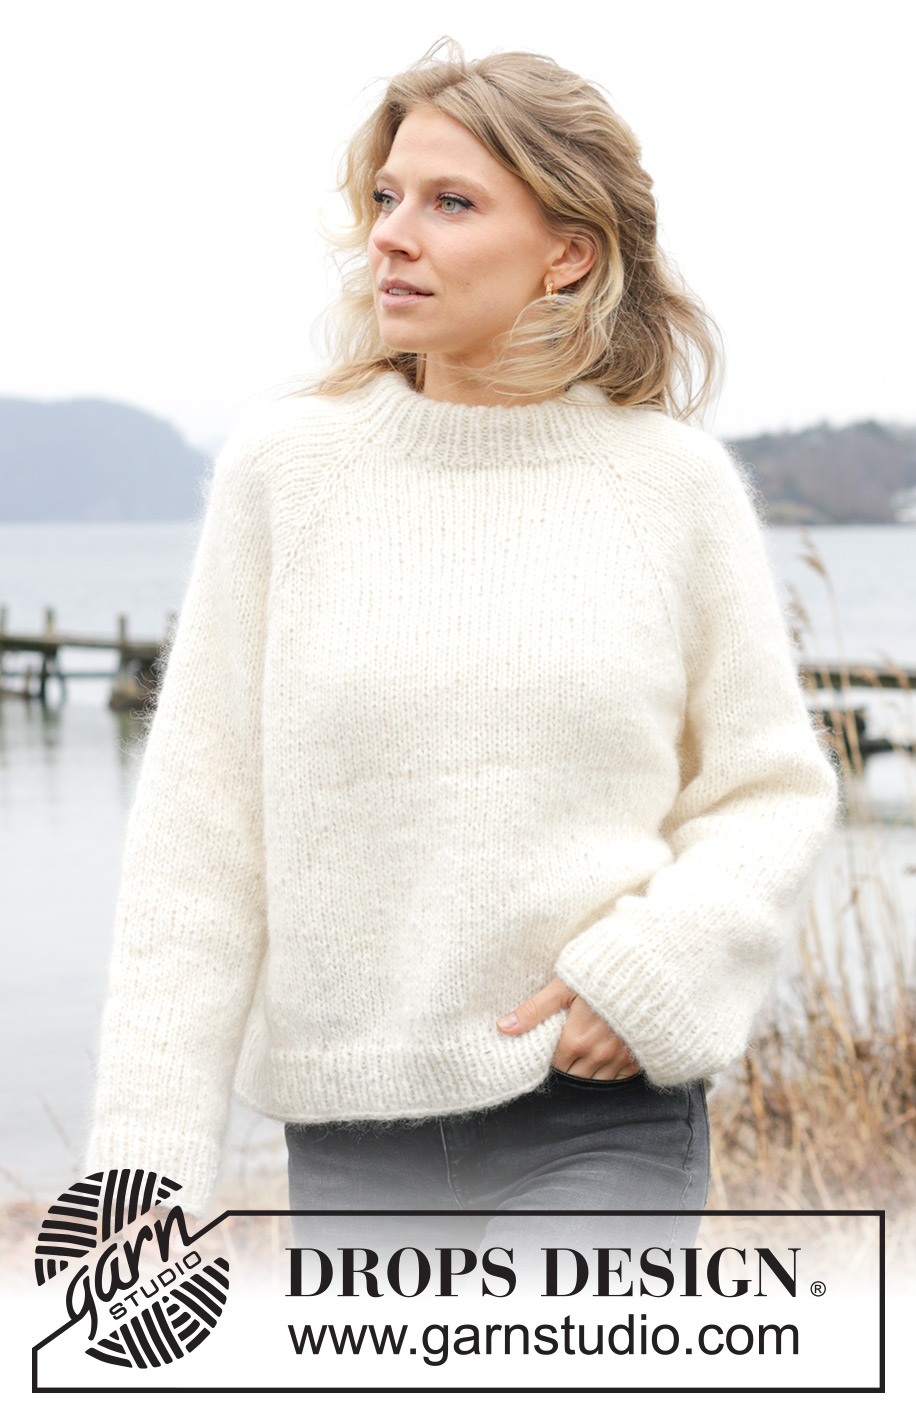
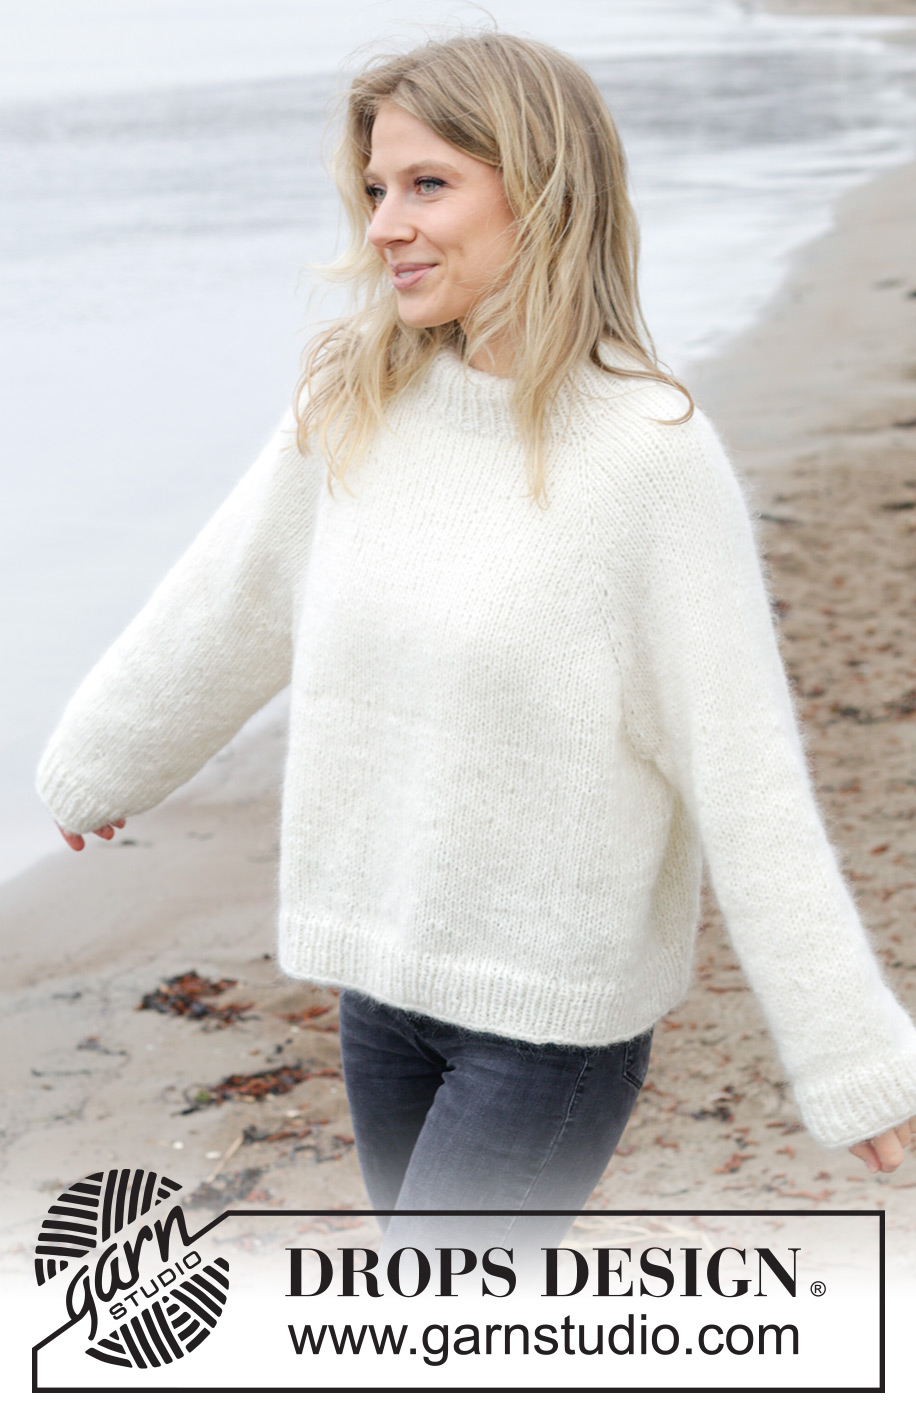
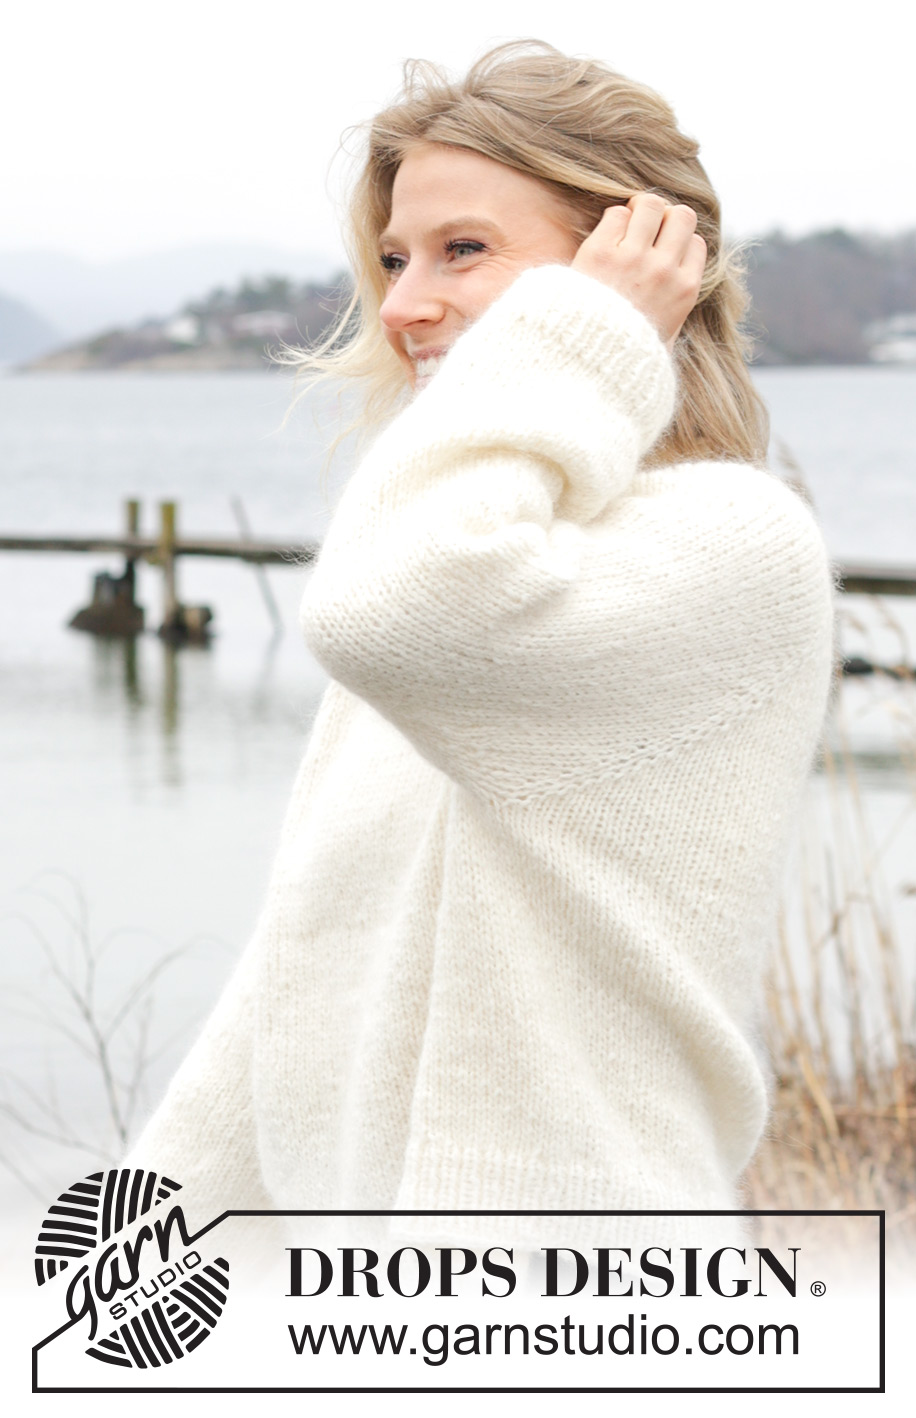
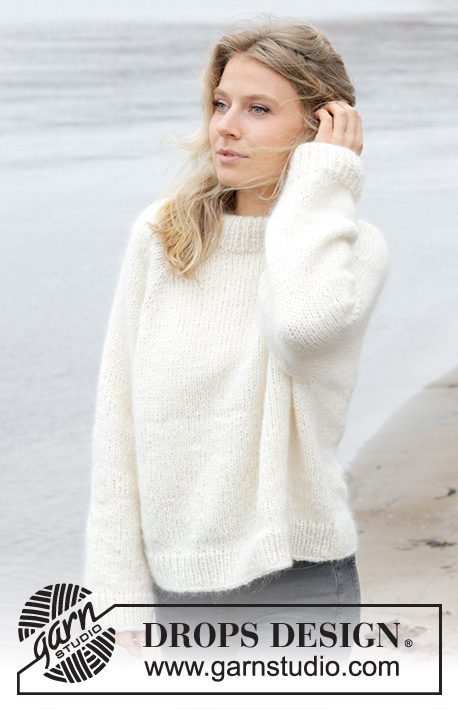
Sweet November#sweetnovembersweater |
|
 |
 |
Knitted jumper in DROPS Air and DROPS Kid-Silk. The piece is worked top down with raglan. Sizes XS - XXL.
DROPS 243-13 |
|
|
------------------------------------------------------- EXPLANATIONS FOR THE PATTERN: ------------------------------------------------------- RAGLAN: Increase 1 stitch before/after the marker-stitch, in each transition between the body and sleeves, by making 1 yarn over. When working back and forth the yarn overs are worked as follows from the wrong side: BEFORE MARKER: Purl the back loop = no hole. AFTER MARKER: Slip the yarn over and place it back on the left needle the other way round (insert the left needle through the back when replacing it). Purl the front loop = no hole. When working in the round the yarn overs are worked as follows on the next round: BEFORE MARKER: Slip the yarn over and place it back on the left needle the other way round (insert the left needle through the back when replacing it). Knit the front loop (stitch twists to the right) = no hole. AFTER MARKER: Knit the back loop (stitch twists to the left) = no hole. DECREASE TIP (for sleeves): Start 3 stitches before the marker-thread, knit 2 together, knit 2 (marker-thread sits between these 2 stitches), slip 1 stitch knit-wise, knit 1 and pass the slipped stitch over the knitted stitch. ------------------------------------------------------- START THE PIECE HERE: ------------------------------------------------------- JUMPER – SHORT OVERVIEW OF THE PIECE: The neck and yoke are worked in the round with circular needle, top down. The yoke is divided for body and sleeves and the body is continued in the round with circular needle. The sleeves are worked with short circular needle/double pointed needles. DOUBLE NECK: Cast on 68-72-76-80-80-84 stitches with 1 strand DROPS Air and 1 strand DROPS Kid-Silk using short circular needles size 4.5 and 6 mm held together. Remove the needle size 6 mm keeping the stitches on needle size 4.5 mm (this gives you an elastic cast-on edge). Work rib in the round (knit 1, purl 1) for 9 cm. Fold the neck double to the inside and work 1 more round of rib, working every 2nd stitch together with its corresponding stitch on the cast-on edge. You now have a double neck. Insert 4 markers without working the stitches and each marker being inserted in a knitted stitch (not between stitches). The markers are used when increasing for raglan. Insert 1 marker-thread at the beginning of the round = approx. mid-back. Count 10-10-12-12-12-14 stitches (approx. half back piece), insert marker-1 in the next stitch, count 15 stitches (sleeve), insert marker-2 in the next stitch, count 17-19-21-23-23-25 stitches (front piece), insert marker-3 in the next stitch, count 15 stitches (sleeve), insert marker-4 in the next stitch, count 7-9-9-11-11-11 stitches (approx. half back piece) NECKLINE: Change to circular needle size 6 mm and work short rows from mid-back as follows: ROW 1 (right side): Knit and increase for RAGLAN – read description above, on each side of the first 2 marker-stitches (4 stitches increased), turn when you have knitted 3 stitches past marker-stitch 2. ROW 2 (wrong side): Purl and turn when you have worked 3 stitches past the last marker-stitch. ROW 3 (right side): Knit and increase for raglan on each side of the all marker-stitches (8 stitches increased), turn when you have knitted 2 stitches past the previous turn. ROW 4 (wrong side): Purl and turn when you have purled 2 stitches past the previous turn. ROW 5 (right side): Knit and increase for raglan on each side of the first 2 marker-stitches (4 stitches increased), knit to mid-back. The short rows are finished and you have increased 2 times for raglan by each marker-stitch = 84-88-92-96-96-100 stitches. Knit 1 round. YOKE: Start mid-back and continue with stocking stitch in the round over all stitches. AT THE SAME TIME continue increasing for raglan every 2nd round a total of 8-10-12-14-20-22 times (including the increases on the short rows) = 132-152-172-192-240-260 stitches. Then continue increasing for raglan but every 2nd increase is only on the body (4 increased stitches) i.e., increase on the body every 2nd round and on the sleeves every 4th round. Increase like this 8-8-8-8-4-4 times on the body (4-4-4-4-2-2 times on the sleeves). You have increased a total of 16-18-20-22-24-26 times on the body and 12-14-16-18-22-24 times on the sleeves. There are 180-200-220-240-264-284 stitches and the yoke measures approx. 20-23-25-28-30-33 cm from mid-back (after neck edge). Continue working, if necessary, to the correct length. On the next round divide for the body and sleeves as follows: Knit 29-31-35-37-41-45 (approx. half back piece), place the next 35-39-43-47-51-55 stitches on a thread for the sleeve, cast on 12-12-12-14-14-16 stitches (in side under sleeve), knit 55-61-67-73-81-87 (front piece), place the next 35-39-43-47-51-55 stitches on a thread for the sleeve, cast on 12-12-12-14-14-16 stitches (in side under sleeve), knit the last 26-30-32-36-40-42 stitches (approx. half back piece). The body and sleeves are finished separately. The piece is now measured from here! BODY: = 134-146-158-174-190-206 stitches. Continue with stocking stitch in the round for a further 23-22-22-21-21-20 cm. Knit 1 round and increase 30-30-32-36-42-46 stitches evenly spaced = 164-176-190-210-232-252 stitches. Change to circular needle size 4.5 mm. Work rib (knit 1, purl 1) for 6 cm. Cast off. The jumper measures approx. 54-56-58-60-62-64 cm from the shoulder down. SLEEVES: Place the 35-39-43-47-51-55 stitches from the thread on the one side of the piece on short circular needle/double pointed needles size 6 mm and knit up 1 stitch in each of the new stitches cast on under the sleeve = 47-51-55-61-65-71 stitches. Insert a marker-thread in the middle of the 12-12-12-14-14-16 stitches under the sleeve. Allow the thread to follow your work onwards, it is used when decreasing under the sleeve. Start at the marker-thread and work stocking stitch in the round. When the sleeve measures 4 cm from division, decrease 2 stitches mid under sleeve – read DECREASE TIP. Decrease like this every 15-7-5½-3-2½-2 cm a total of 3-5-6-9-10-12 times = 41-41-43-43-45-47 stitches. Continue working until the sleeve measures 39-36-35-32-31-28 cm from the division. Knit 1 round and increase 7-7-7-9-9-9 stitches evenly spaced = 48-48-50-52-54-56 stitches. Change to double pointed needles size 4.5 mm and work rib (knit 1, purl 1) for 6 cm. Cast off. The sleeve measures approx. 45-42-41-38-37-34 cm from the division. Work the other sleeve in the same way. |
|
 |
|
Have you finished this pattern?Tag your pictures with #dropspattern #sweetnovembersweater or submit them to the #dropsfan gallery. Do you need help with this pattern?You'll find 32 tutorial videos, a Comments/Questions area and more by visiting the pattern on garnstudio.com. © 1982-2026 DROPS Design A/S. We reserve all rights. This document, including all its sub-sections, has copyrights. Read more about what you can do with our patterns at the bottom of each pattern on our site. |
|


With over 40 years in knitting and crochet design, DROPS Design offers one of the most extensive collections of free patterns on the internet - translated to 17 languages. As of today we count 324 catalogues and 12290 patterns translated into English (UK/cm). 12290
We work hard to bring you the best knitting and crochet have to offer, inspiration and advice as well as great quality yarns at incredible prices! Would you like to use our patterns for other than personal use? You can read what you are allowed to do in the Copyright text at the bottom of all our patterns. Happy crafting!
Post a comment to pattern DROPS 243-13
We would love to hear what you have to say about this pattern!
If you want to leave a question, please make sure you select the correct category in the form below, to speed up the answering process. Required fields are marked *.