
Popular categories
Looking for a yarn?


Comments / Questions (54)
![]() Kristina wrote:
Kristina wrote:
När jag skall mäta höjden (48 cm i storlek M) på fram-och bakstycke, varifrån ska jag då mäta? I beskrivningen står ”Överst på framstycket mot halsen” men det är inte helt klart för mig exakt var detta är? Mitt fram, i sidan, längs sidan/armen som man mätte framstycket?
02.07.2025 - 08:04DROPS Design answered:
Hej Kristina, du kan se på måleskitsen hvor øverst på framstycket mod halsen er (øverste punkt) :)
02.07.2025 - 12:09
![]() LAURENCE PILO wrote:
LAURENCE PILO wrote:
Ne tenez pas compte de mon msg précédent j'ai vu vos tutos top merci
23.03.2025 - 23:27
![]() LAURENCE PILO wrote:
LAURENCE PILO wrote:
Bonjour lorsque vous dites "Relever 14-16-18-18-20-20 mailles à 1 maille du bord le long de l’épaule gauche du dos (relever 1 maille dans chaque rang le long du bord, du haut du dos). on doit relever 18m sur toute la longueur ou seulement sur une partie ?
23.03.2025 - 23:21
![]() Christine wrote:
Christine wrote:
Bonjour, très joli modèle, merci. En, xxxl Au début du dos, je termine les augmentations avec 68 m. sur un rang envers, rg suivant sur endroit. . Je ne peux donc pas tricoter un rg envers sur envers à la suite avant de mesurer l'emmenchure ? Est-ce le 1er rg qu'il fallait faire à l'endroit puis un rg envers sur envers comme indiqué ?Pouvez vous m'expliquer svp. Sinon je vais continuer et mesurer l'emmenchure tout de suite après les augmentations. Merci d'avance
23.02.2025 - 00:30DROPS Design answered:
Cf réponse ci-dessous :)
24.02.2025 - 08:38
![]() Christine wrote:
Christine wrote:
Bonjour, très joli modèle, merci. Au début du dos, je termine les augmentations avec 68 m. sur un rang envers, rg suivant sur endroit. . Je ne peux donc pas tricoter un rg envers sur envers à la suite avant de mesurer l'emmenchure ? Est-ce le 1er rg qu'il fallait faire à l'endroit puis un rg envers sur envers comme indiqué ?Pouvez vous m'expliquer svp. Sinon je vais continuer et mesurer l'emmenchure tout de suite après les augmentations. Merci d'avance
22.02.2025 - 22:33DROPS Design answered:
Bonjour Christine, vous avez tout à fait raison, après les dernières augmentations, on continue simplement en jersey jusqu'à la hauteur indiquée, les explications sont à jour, merci pour votre retour. Bonne continuation!
24.02.2025 - 08:33
![]() Proust Stéphanie wrote:
Proust Stéphanie wrote:
Bonjour. Je suis débutante et aimerais tricoter ce joli débardeur. Suis je obligée d\'utiliser des aiguilles circulaires et de commencer par le haut ? Ne puis je pas tricoter comme un pull normal en partant des côtes en bas puis monter ? Je n\'ai pas du tout compris les explications. Merci à vous.
10.01.2025 - 13:15DROPS Design answered:
Bonjour Mme Proust, si vous débutez, il sera bien plus simple de suivre les explications telles quelles, vous retrouverez sous les onglets vidéos/leçons comment tricoter les différentes étapes/techniques de ce modèle Bon tricot!
10.01.2025 - 15:59
![]() Susanne Anderberg wrote:
Susanne Anderberg wrote:
Jag stickar Pink salt vest och undrar vart är ytterst längs ärmhålet? Som jag skall mäta 22 cm ifrån på bakstycket.
25.12.2024 - 16:14DROPS Design answered:
Hei Susanne. Mål ytterst langs kanten til ermhullet. mvh DROPS Design
03.01.2025 - 09:40
![]() Tamela Seitz wrote:
Tamela Seitz wrote:
Can’t wait to started knitting this pattern
03.12.2024 - 16:02
![]() Aims wrote:
Aims wrote:
I would like to crochet this instead. Any guidance on how to crochet it
15.10.2024 - 15:12DROPS Design answered:
Dear Aims, we only have a knitted version for this pattern, please find all our crochet patterns for vest here. Happy crocheting!
15.10.2024 - 16:58
![]() Anna wrote:
Anna wrote:
Bonjour, Concernant le dos, quand il s’agit de mesurer le long de l’emmanchure, on parle bien de démarrer la mesure après les dernières augmentations ? Merci beaucoup
10.10.2024 - 14:02DROPS Design answered:
Bonjour Anna, tout à fait, mesurez le long de la partie "droite" après les augmentations - retrouvez une vidéo et une leçon en haut de page pour visualiser le dos et les autres parties de ce type de modèles. Bon tricot!
10.10.2024 - 16:12
|
|
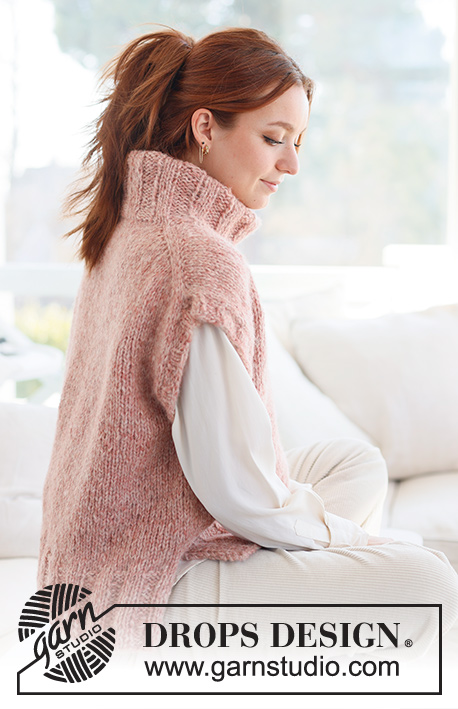
Pink Salt Vest#pinksaltvest |
|
 |
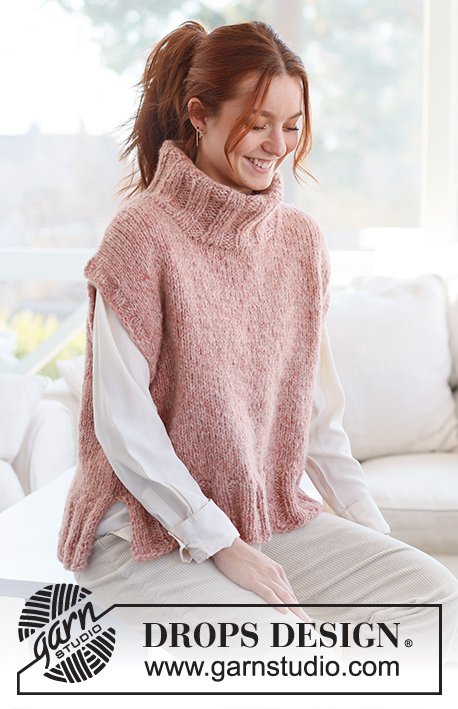 |
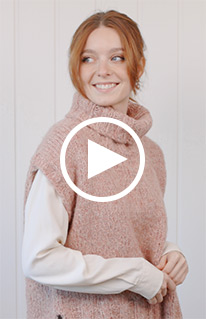
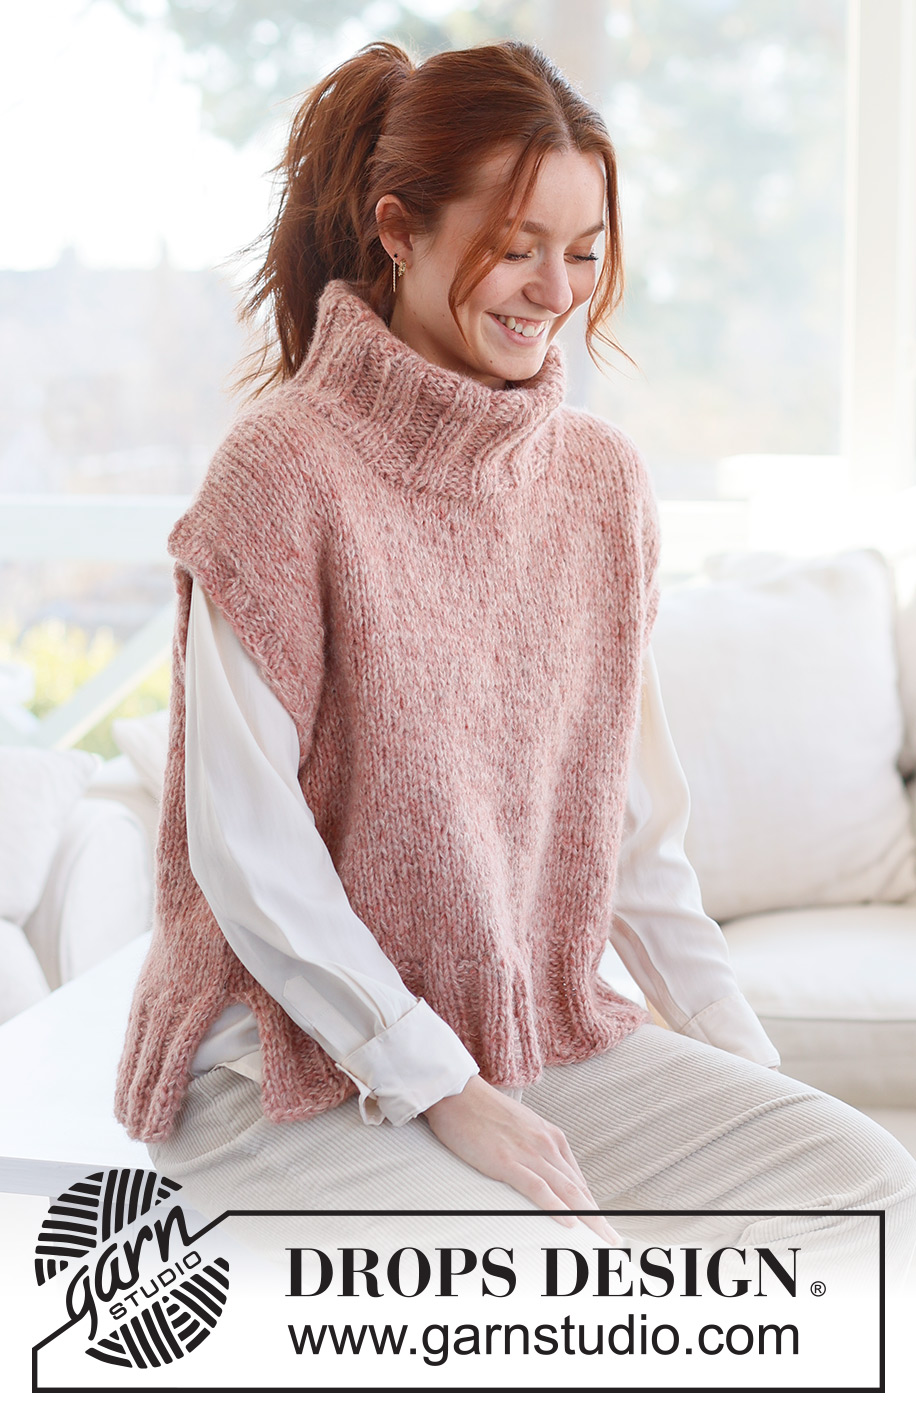
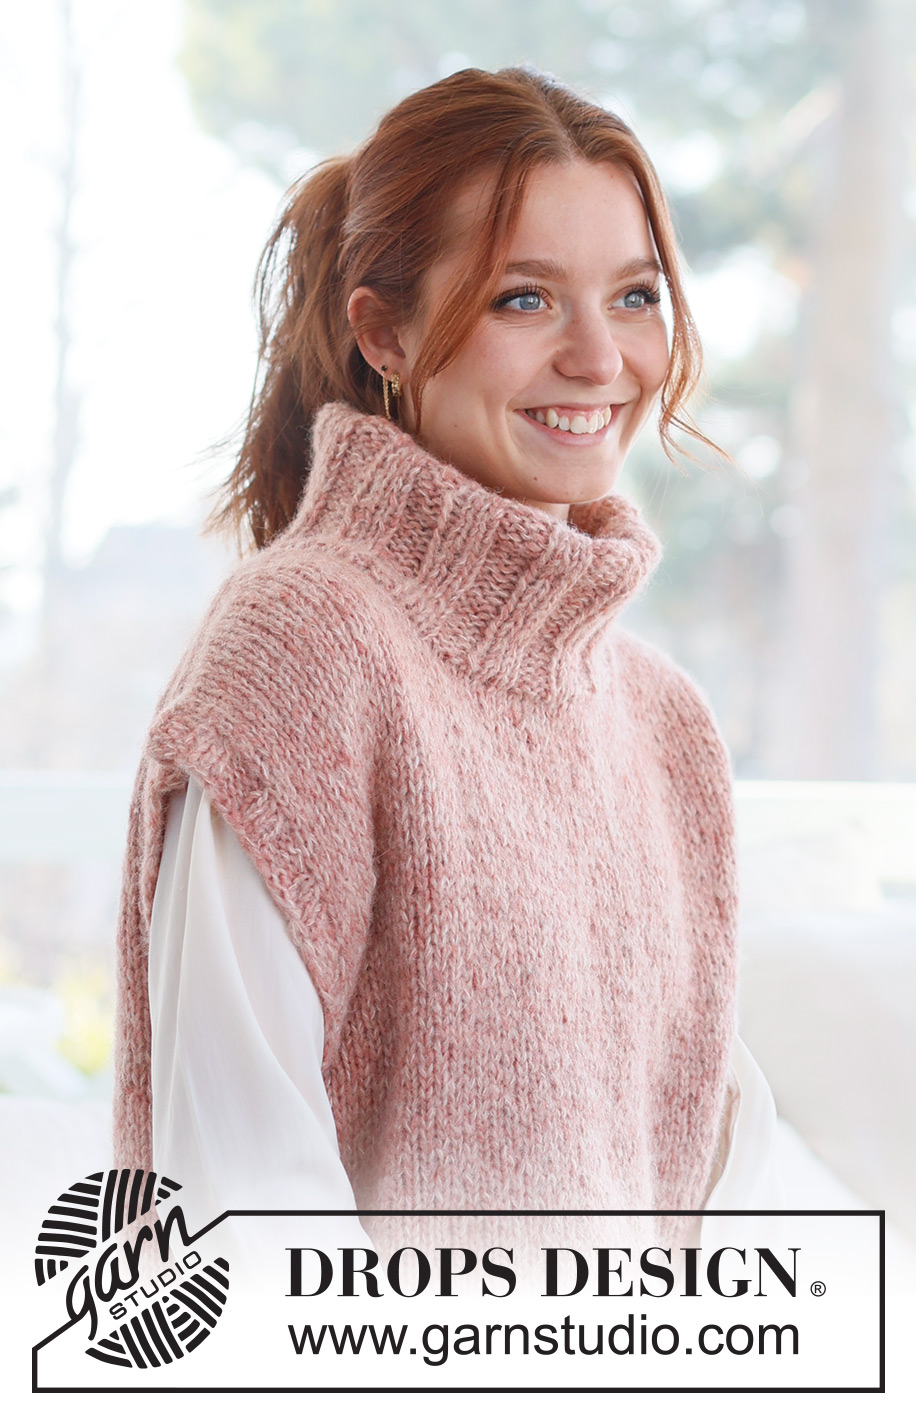
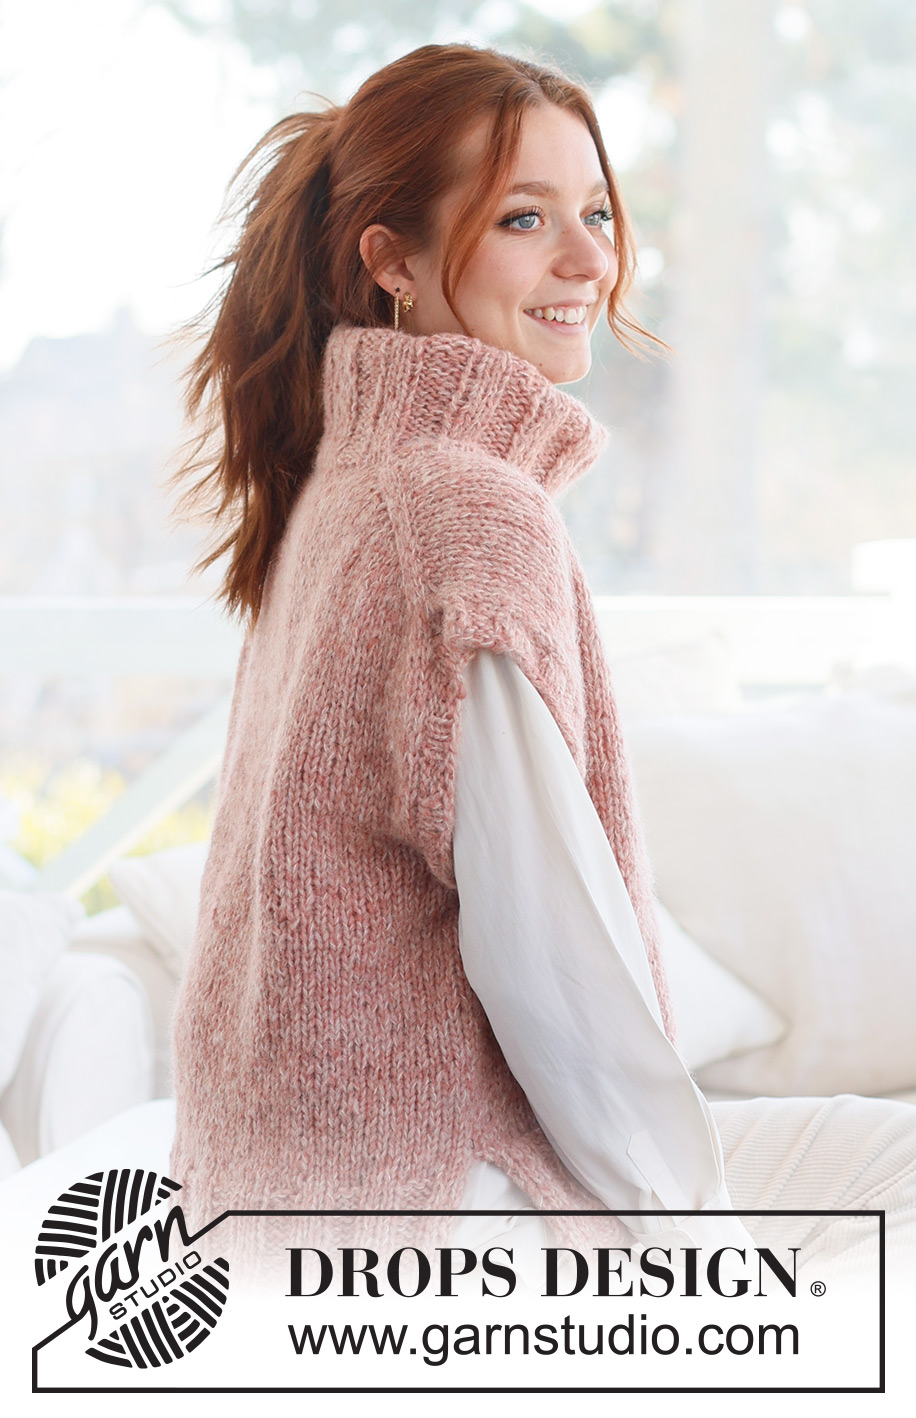
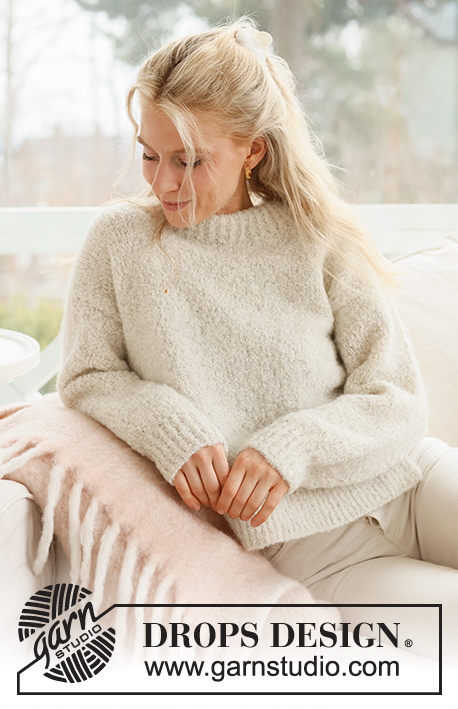
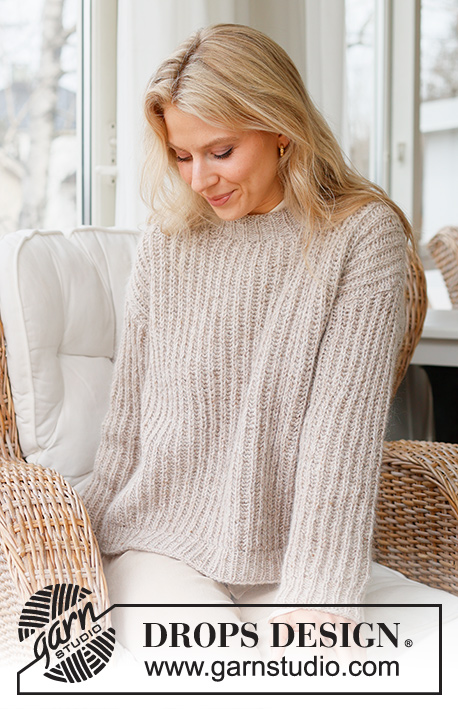
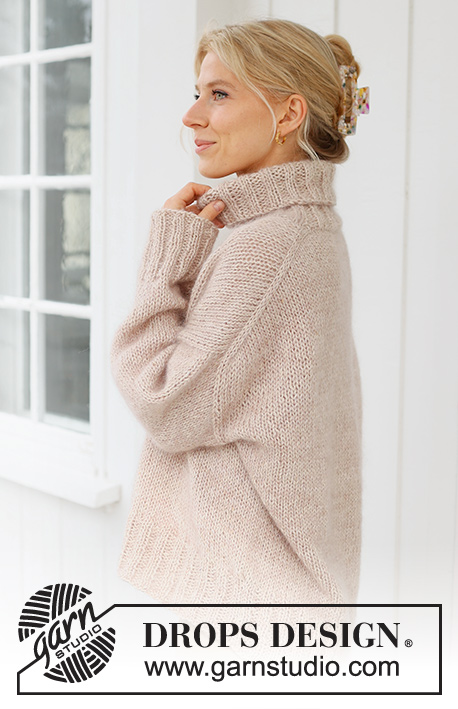
Knitted vest in DROPS Air and DROPS Brushed Alpaca Silk. The piece is worked top down with European shoulders / diagonal shoulders and high neck. Sizes S - XXXL.
DROPS 237-3 |
|
|
------------------------------------------------------- EXPLANATIONS FOR THE PATTERN: ------------------------------------------------------- RIDGE/GARTER STITCH (worked back and forth): Knit all rows. 1 ridge = knit 2 rows. ØKETIPS FRA RETTEN: Øk mot venstre ETTER MERKET: Bruk venstre pinne til å plukke opp tråden mellom 2 masker fra pinnen under, tråden plukkes opp forfra og masken strikkes rett i maskeleddet som ligger bak pinnen. Øk mot høyre FØR MERKET: Bruk venstre pinne til å plukke opp tråden mellom 2 masker fra pinnen under, tråden plukkes opp bakfra og masken strikkes rett i maskeleddet som ligger foran pinnen. ØKETIPS FRA VRANGEN: Øk mot høyre ETTER MERKET: Bruk venstre pinne til å plukke opp tråden mellom 2 masker fra pinnen under, tråden plukkes opp bakfra og masken strikkes vrang i maskeleddet som ligger foran pinnen. Øk mot venstre FØR MERKET: Bruk venstre pinne til å plukke opp tråden mellom 2 masker fra pinnen under, tråden plukkes opp forfra og masken strikkes vrang i maskeleddet som ligger bak pinnen. ------------------------------------------------------- START THE PIECE HERE: ------------------------------------------------------- VEST – SHORT OVERVIEW OF THE PIECE: VEST – SHORT OVERVIEW OF THE PIECE: The pattern uses both long and short needles; start with the length which fits the number of stitches and change when necessary. The piece is started back and forth, casting on stitches at the back of the neck and working the back piece top down while increasing stitches on each side for the shoulders, which become slightly diagonal. The back piece is worked as far as the armholes. The front piece is then worked in 2 sections, knitting up stitches along 1 back shoulder, increasing for the neckline. This is repeated on the other shoulder. The 2 front sections are joined when the neckline is finished and worked until the armholes are finished. The front and back pieces are then joined and the body worked in the round. Stitches are knitted up around the neckline and the neck is worked in the round, then folded double to the inside. Stitches are knitted up around the armholes for the sleeve edge. BACK PIECE: Cast on 24-24-24-26-26-28 stitches with circular needle size 8 mm and 1 strand of each quality (2 strands). Purl 1 row from the wrong side. Insert 1 marker after the 4th stitch from each side. The markers should sit outside the outermost 4 stitches on each row onwards. Work stocking stitch back and forth. AT THE SAME TIME increase AFTER the marker at the beginning of the row and BEFORE the marker at the end of the row – read INCREASE TIP FROM RIGHT SIDE. On the next row (wrong side) increase in the same way – read INCREASE TIP FROM WRONG SIDE. Continue increasing like this from both the right and wrong side a total of 14-16-18-18-20-20 times = 52-56-60-62-66-68 stitches. The piece is now measured from here! Then work stocking stitch until the piece measures 22-22-23-24-25-26 cm, down the armhole. Cut the yarn, put stitches on a thread or on an extra needle and work the front piece as explained below FRONT PIECE: Star with left shoulder (when the garment is worn). Knit up 14-16-18-18-20-20 stitches inside the outermost stitch along the left shoulder on the back piece (when the garment is worn, knitting up 1 stitch in each row along the edge). Work stocking stitch back and forth for 5 cm. Now increase stitches at the beginning of each row from the right side for the neck, but inside 3 stitches (instead of 4 stitches previously) – remember INCREASE FROM THE RIGHT SIDE. Increase 1 stitch 4 times = 18-20-22-22-24-24 stitches. Purl 1 row from the wrong side. Cut the yarn, put stitches on a thread or on an extra needle. Work the right shoulder as explained below. Work the right shoulder: Knit up 14-16-18-18-20-20 stitches inside the outermost stitch along the right shoulder on the back piece. Work stocking stitch back and forth for 5 cm. Now increase stitches at the end of each row from the right side, inside 3 stitches (instead of 4 previously) – remember INCREASE FROM THE RIGHT SIDE. Increase 1 stitch 4 times = 18-20-22-22-24-24 stitches. Purl back from the wrong side after the last increase. Work the next row from the right side as follows: Knit the 18-20-22-22-24-24 stitches from the right front piece, cast on 16-16-16-18-18-20 stitches for the neck at the end of the row then knit the 18-20-22-22-24-24 stitches from the left front piece = 52-56-60-62-66-68 stitches. Work stocking stitch back and forth until the front piece measures 26-28-29-30-31-32 cm, along the armhole. Now join the front and back pieces for the body. BODY: Work stocking stitch over the 52-56-60-62-66-68 stitches from the front piece and cast on 4-4-4-8-10-14 stitches at the end of the row (= side), work stocking stitch over the 52-56-60-62-66-68 stitches from the back piece and cast on 4-4-4-8-10-14 stitches at the end of the row = 112-120-128-140-152-164 stitches. Work stocking stitch in the round until the piece measures 46-48-50-52-54-56 cm from the top of the front piece. Now divide the piece for a split in each side. Place the 56-60-64-70-76-82 stitches from the front piece on a thread or extra needle and work the back piece. BACK PIECE: Change to circular needle size 7 mm, knit 1 row from the right side and increase 9-11-13-13-13-13 stitches evenly spaced = 65-71-77-83-89-95 stitches. Work the next row as follows from the wrong side: 1 edge stitch in GARTER STITCH – read description above, * purl 3, knit 3 *, work from *-* until there are 4 stitches left, purl 3, 1 edge stitch in garter stitch. Continue this rib for 10 cm. Cast off. FRONT PIECE: Place the stitches on circular needle size 7 mm and work in the same way as the back piece. NECK: Start on one shoulder and knit up inside the 1 edge stitch, and from the right side, 72 to 90 stitches around the neck using short circular needle size 7 mm. Work rib in the round (knit 3, purl 3) for 20 cm. Cast off a little loosely. The neck can be folded double to the inside and fasten with a couple of stitches in each side. SLEEVE EDGES: Knit up 60 to 78 stitches around the armhole with short circular needle size 7. Work rib in the round (knit 3, purl 3) for 3 cm. Cast off. Work a similar edge around the other armhole. |
|
 |
|
Have you finished this pattern?Tag your pictures with #dropspattern #pinksaltvest or submit them to the #dropsfan gallery. Do you need help with this pattern?You'll find 28 tutorial videos, a Comments/Questions area and more by visiting the pattern on garnstudio.com. © 1982-2026 DROPS Design A/S. We reserve all rights. This document, including all its sub-sections, has copyrights. Read more about what you can do with our patterns at the bottom of each pattern on our site. |
|


With over 40 years in knitting and crochet design, DROPS Design offers one of the most extensive collections of free patterns on the internet - translated to 17 languages. As of today we count 324 catalogues and 12290 patterns translated into English (UK/cm). 12290
We work hard to bring you the best knitting and crochet have to offer, inspiration and advice as well as great quality yarns at incredible prices! Would you like to use our patterns for other than personal use? You can read what you are allowed to do in the Copyright text at the bottom of all our patterns. Happy crafting!
Post a comment to pattern DROPS 237-3
We would love to hear what you have to say about this pattern!
If you want to leave a question, please make sure you select the correct category in the form below, to speed up the answering process. Required fields are marked *.