
Popular categories
Looking for a yarn?


Comments / Questions (56)
![]() Mathilda wrote:
Mathilda wrote:
Vilken storlek på stickor utgår stickfastheten ifrån?
10.05.2025 - 22:04DROPS Design answered:
Hej Mathilda, vi får 11 masker på 10 cm i glatstrik på pind 8 :)
12.05.2025 - 11:29
![]() Jolanta Jurasinska wrote:
Jolanta Jurasinska wrote:
You`ve already helped me, a seasoned knitter I thought, but I´m stuck again.with the chaperon bleu pattern at the part before the hood. "finished back and forth" makes no sense to me although I´m an English teacher and Scots born. I´m totally lost and cannot find any tutorials. Help please!!! Thanks
26.04.2025 - 14:24DROPS Design answered:
Dear Jolanta, the piece was worked in the round before, but the remaining part of the yoke will be worked back and forth, that is, worked in rows, turning at the end of each row. So the yoke will be finished (completed) back and forth (in rows, instead of in the round as before). Happy knitting!
27.04.2025 - 12:18
![]() Annelina wrote:
Annelina wrote:
Forstår ikke: Strik 1 maske op på bagsiden af hver af de 6 næste masker. Vend. Hvad skal jeg gøre her?
25.04.2025 - 13:00DROPS Design answered:
Hej Annelina, her ser du hvordan du strikker masker op på bagsiden: Strik masker op på bagsiden
30.04.2025 - 14:18
![]() Jolanta Jurasinska wrote:
Jolanta Jurasinska wrote:
I´m a bit confused as how to arrange the 4 pieces ( back, front plus 2 sleeves) on the circular needle.1. back and front and then the 2 sleeves or 2. the sleeves between the back and front or 3. back+ sleeve, front+ sleeve. hope you understand my explanation. thankx jolanta
07.04.2025 - 18:54DROPS Design answered:
Hi Jolanta, The sleeves are placed on the circular needle between the front piece and back piece: Front piece, sleeve, back piece, sleeve. Regards, Drops Team.
08.04.2025 - 06:55
![]() Larah wrote:
Larah wrote:
I have actually already knitted this pattern and it fits well. Can you recommend a pullover similar to this that does not have a hood? Thank you.
06.02.2025 - 21:09DROPS Design answered:
Dear Larah, please find all our patterns for jumpers with same tension and stocking stitch here - feel free to add or remove filters. Happy knitting!
07.02.2025 - 15:41
![]() Helena Hedman wrote:
Helena Hedman wrote:
Hej! Stickar storlek L där ärmen enligt beskrivningen ska vara 38 cm när avmaskning under armen ska göras,, men det innebär att ärmen blir ca 15 cm under ärmhållet. Tänker att det blir väldigt långt ner och blir klumpigt när tröjan används under en jacka. Kan jag förlänga ärmen innan den stickas ihop med fram- och bakstycket och justera reglanstickniningen på något vis så att avståndet mellan ärmen under armhålet och armen inte blir så stort? Mvh Helena
31.12.2024 - 13:18DROPS Design answered:
Hei Helena. Anbefaler deg å ta mål av en genser du allerede har (og liker) og sammenlign de målene med målskissen til denne genseren. Er forskjellen så stor? Design avd har dessverre ingen mulighet til å forandre/tilpasse en oppskrift til en allerede skrevet oppskrift. mvh DROPS Design
07.01.2025 - 09:43
![]() Sandrine wrote:
Sandrine wrote:
Hi, kann ich den Pullover auch mit 2 unterschiedlichen Garnen der Garngruppe C stricken? Ich würde gerne Drops Nepal mit Drops Brushed Alpaca Silk kombinieren oder ist das nicht zu empfehlen? Viele Grüße
23.10.2024 - 23:54DROPS Design answered:
Liebe Sandrine, ja schon - bitte (also wie immer) die Maschenprobe beachten und die Nadelgrösse anpassen, wenn es nötig ist. Hier lesen Sie mehr wie man die neue Garnmenge kalkulieren soll. Viel Spaß beim Stricken!
24.10.2024 - 09:49
![]() Hannah wrote:
Hannah wrote:
Hi! I am knitting this sweater in a size large. I am confused when beginning the raglan. I began my row at the end of the back piece and beginning of the sleeve (where the first stitch in the round is the sleeve). When beginning the raglan, would I move the beginning of my row and use a stitch from the back piece or knit until I get to the next marker at sleeve/front transition and decrease there?
17.09.2024 - 07:55DROPS Design answered:
Dear Hannah, when beginning raglan, start decreasing at the beg of round when 1 stitch before the beginning of the round remain, and work as explained under RAGLAN, this means, slip The last stith of the round + the first stitch of next round as if to knit together, knit next stitch and psso. Insert the marker in this stitch. Happy knitting!
17.09.2024 - 09:14
![]() Rosa wrote:
Rosa wrote:
Hej, Hvornår skal de 6 masker tages ud? “1.PIND (retsiden): Strik ret over alle masker og tag ind til raglan som før til der er 3 masker tilbage før mærketråden midt foran. Strik 1 maske op på bagsiden af hver af de 6 næste masker. Vend.”
23.08.2024 - 10:53DROPS Design answered:
Hei Rosa. Det er ingen nye masker som er lagt opp, men du skal strikke på baksiden / på vrangsiden av de 6 neste masken. På denne måten vil du få en overlapp i front. mvh DROPS Design
26.08.2024 - 09:22
![]() Trine wrote:
Trine wrote:
Jeg er igang med “bærestykket”. Jeg har 68 masker som man skal have inden man starter på pind 1, 2 og 3 , hvor man skal ende på 58 masker. I hver omgang med raglan tager man 8 masker ind, dvs når man strikker pind 1 og 3 burde man have taget 16 masker ind, altså ende med at have 52 masker. Hvordan kan det blive til 58 masker?
04.06.2024 - 22:44DROPS Design answered:
Hej Trine, du har 68 masker, - 8 m raglan = 60 m, strikker 6 nye masker op = 66 m - 8 raglan = 58 m :)
05.06.2024 - 11:19
|
|
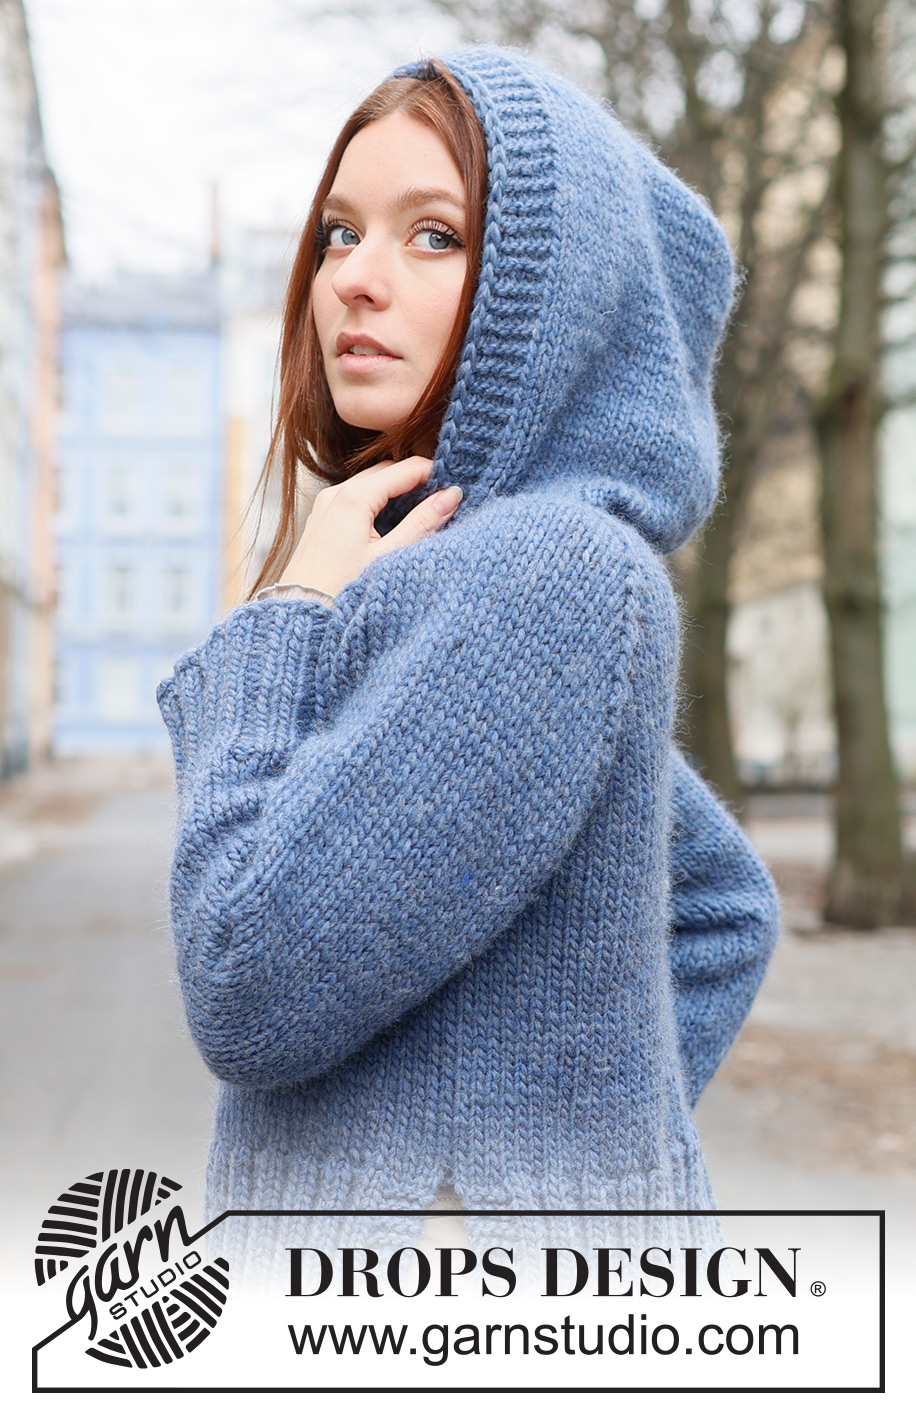
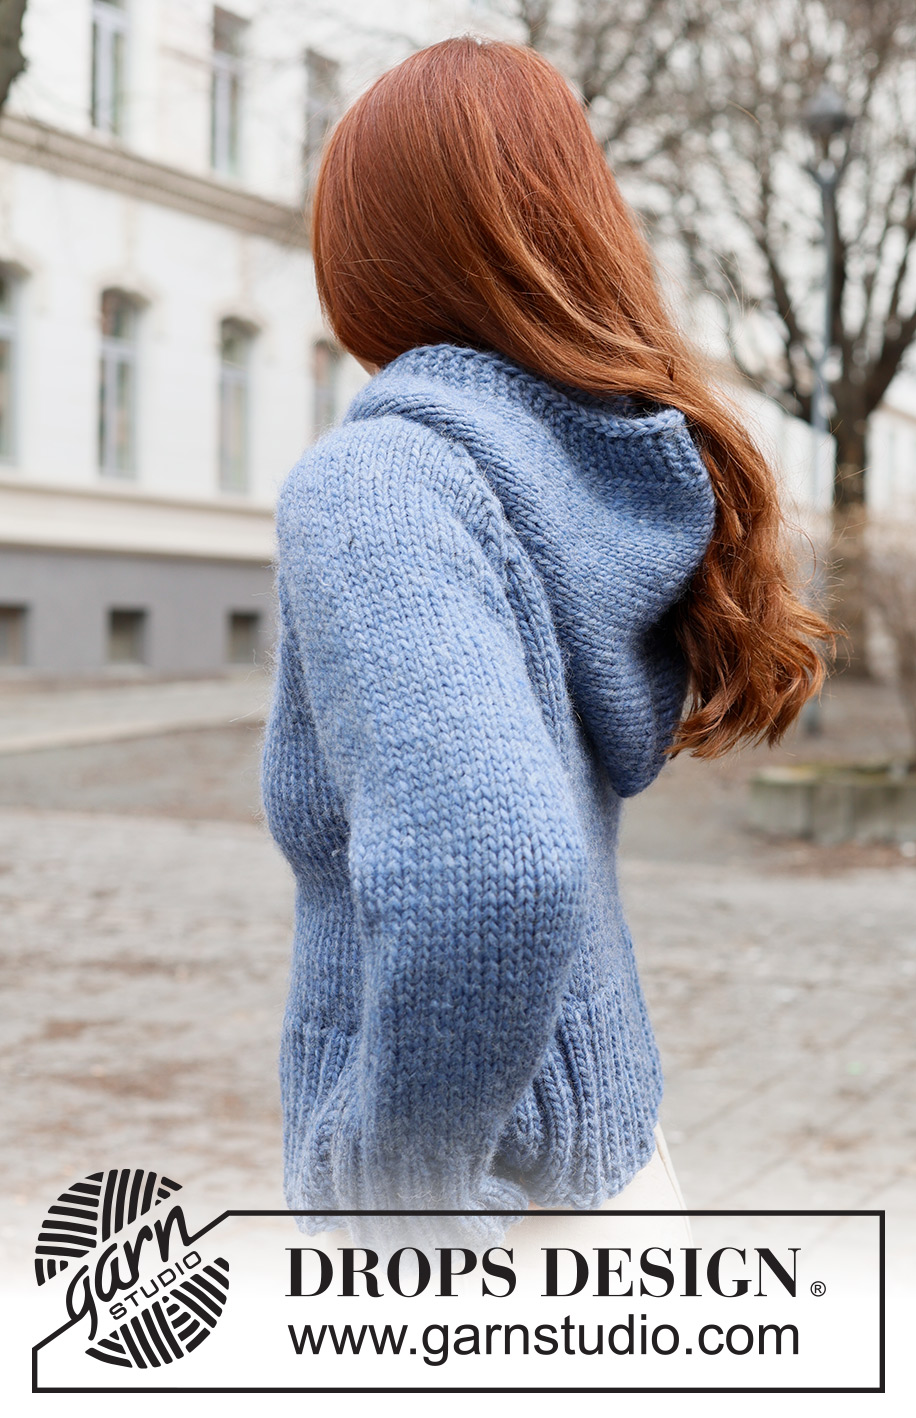
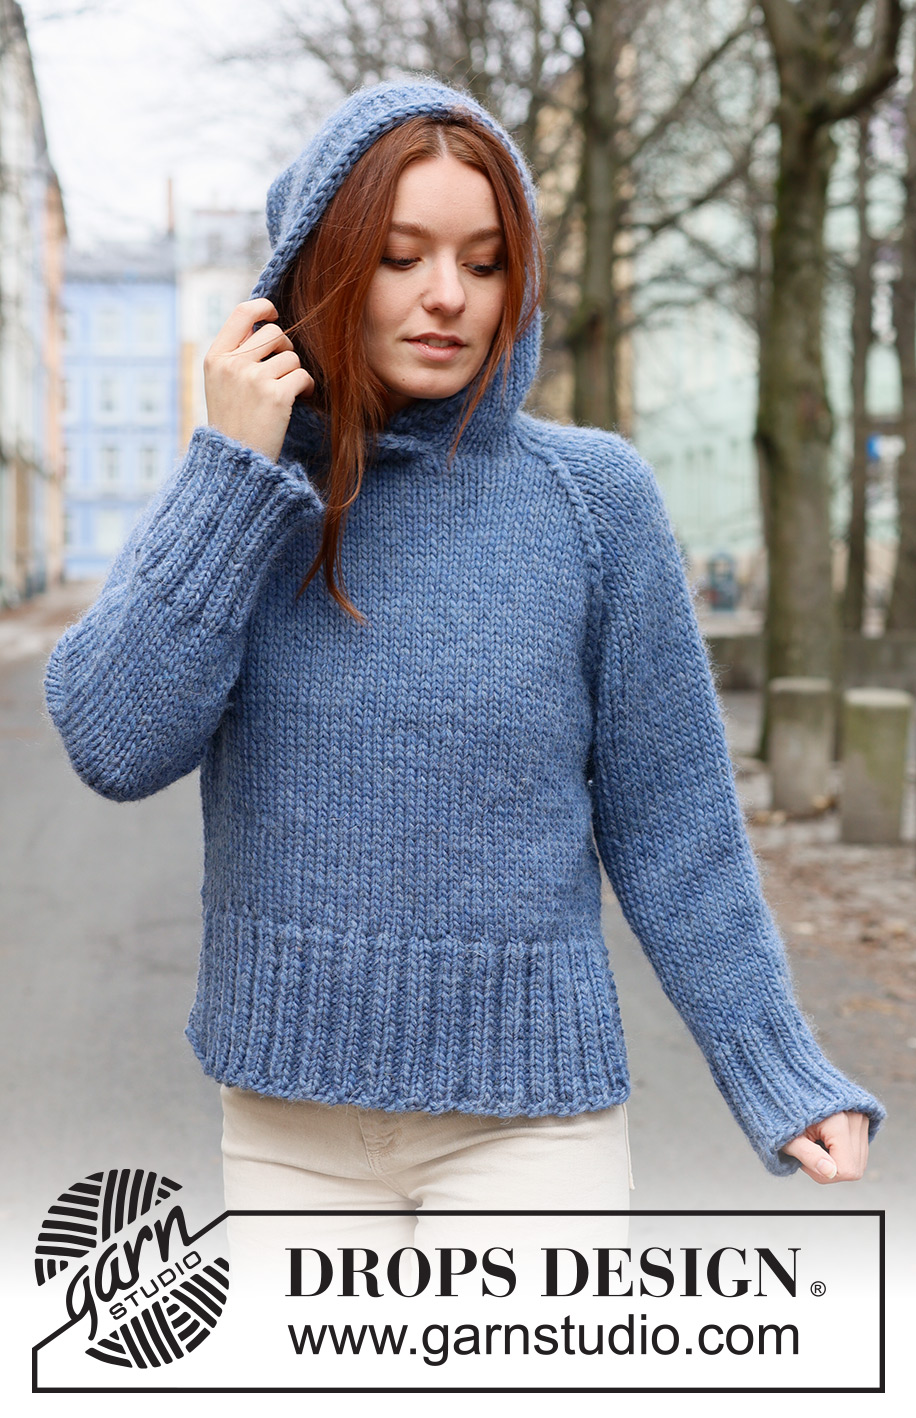
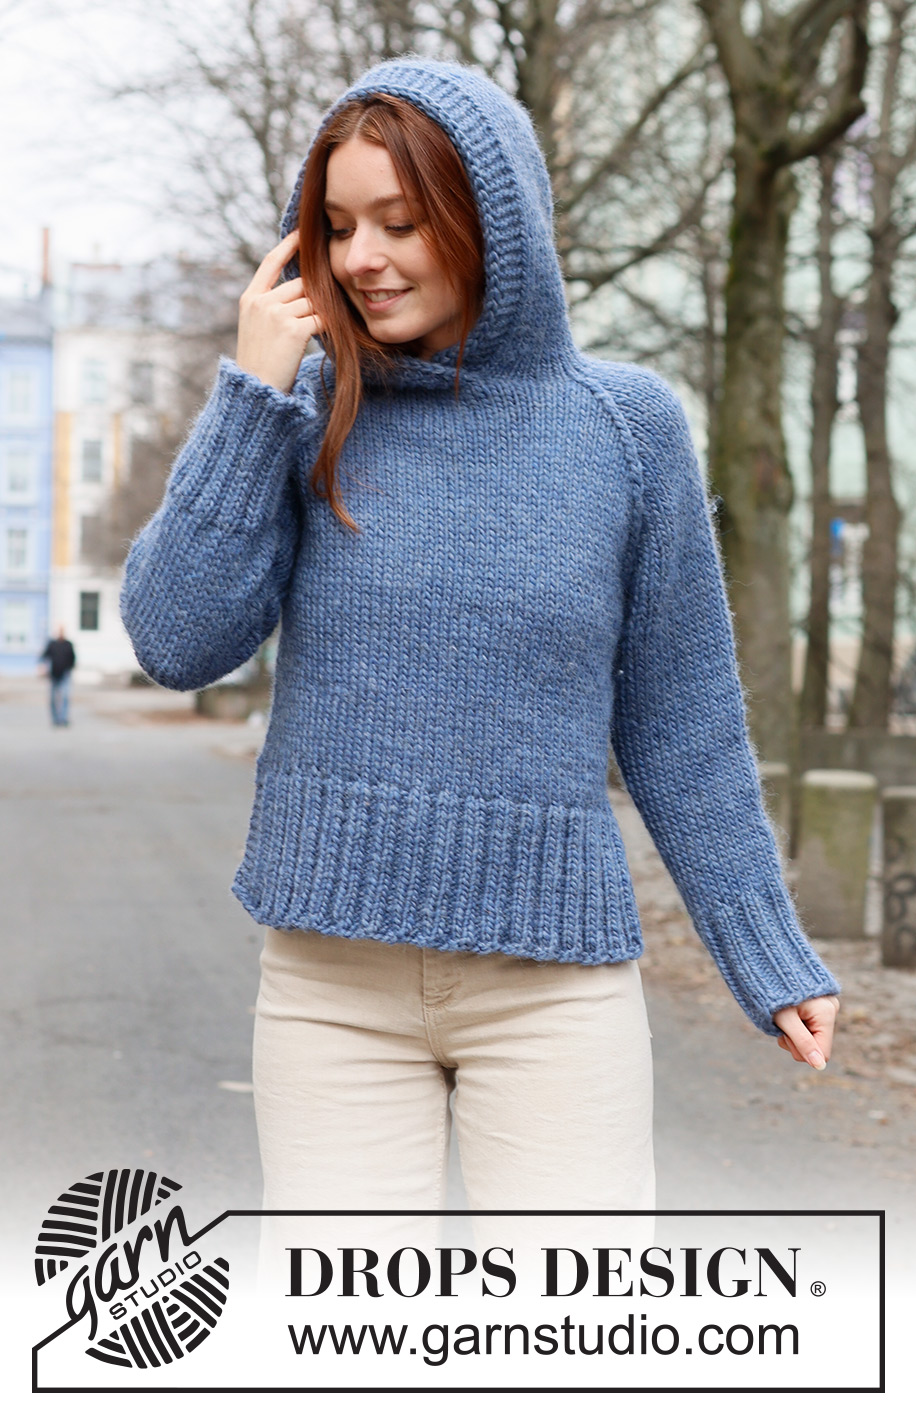
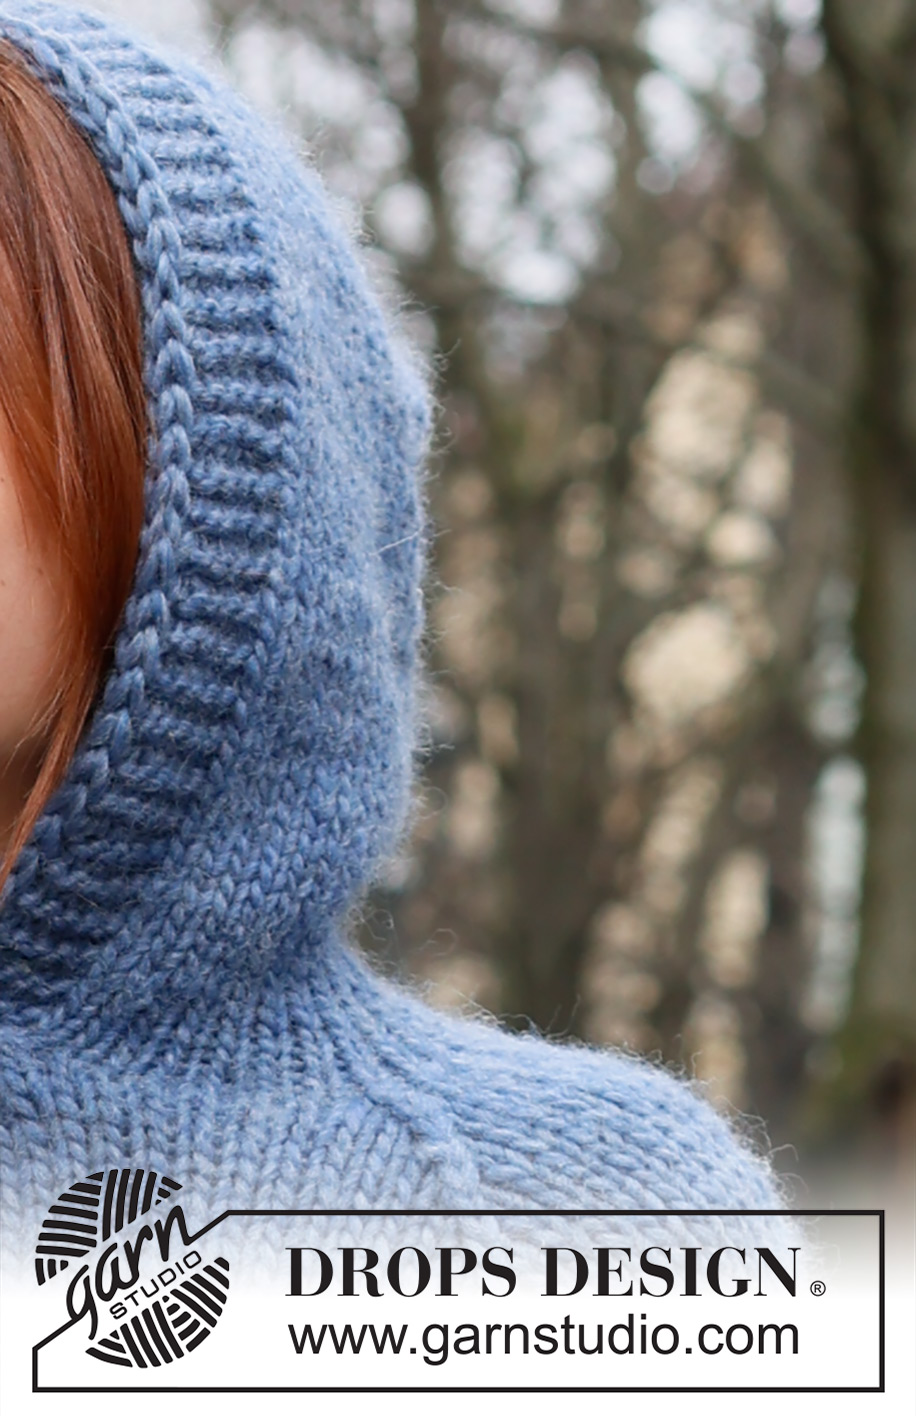
Chaperon Bleu#chaperonbleusweater |
|
 |
 |
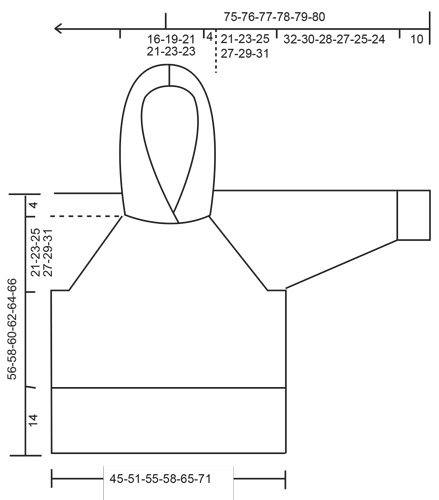
Knitted jumper in DROPS Snow. The piece is worked bottom up in stocking stitch with raglan and a hood. Sizes S - XXXL.
DROPS 236-4 |
|
|
------------------------------------------------------- EXPLANATIONS FOR THE PATTERN: ------------------------------------------------------- RIDGE/GARTER STITCH (worked back and forth): Knit all rows. 1 ridge = knit 2 rows. INCREASE TIP-1 (for sleeves): Work until there are 2 stitches left before the marker, 1 yarn over, knit 4 (marker sits between these 4 stitches), 1 yarn over. On the next round knit the yarn overs twisted to avoid holes. Then work the new stitches in stocking stitch. INCREASE TIP-2 (for hood): Work until there are 2 stitches left before the marker thread, 1 yarn over, knit 4 (marker thread sits between these 4 stitches), 1 yarn over. On the next row work the yarn overs twisted to avoid holes. Then work the new stitches in stocking stitch. RAGLAN: Decrease to raglan in each transition between body and sleeves as follows: Work until there is 1 stitch left before marker-stitch, slip 2 stitches as if to knit together, knit 1, pass the slipped stitches over the knitted stitch. Repeat at each marker (8 stitches decreased on the row). ------------------------------------------------------- START THE PIECE HERE: ------------------------------------------------------- JUMPER - SHORT OVERVIEW OF THE PIECE: The front and back pieces are worked separately, back and forth, bottom up until the split is finished. Both pieces are placed on the same circular needle and the piece is continued in the round as far as the armholes. The sleeves are worked in the round with double pointed needles/short circular needle, bottom up, then placed on the same circular needle as the body. The yoke is continued in the round. The hood is worked back and forth to finish. BACK PIECE: Cast on 62-70-74-78-86-94 stitches with circular needle size 7 mm and DROPS Snow. Purl 1 row from the wrong side. Then work rib as follows: 4 stitches in GARTER STITCH – read description above, * knit 2, purl 2 *, work from *-* until there are 6 stitches left, knit 2 and 4 stitches in garter stitch. Work this rib back and forth for 14 cm, finishing after a row from the wrong side. Lay the piece to one side. FRONT PIECE: Cast on and work in the same way as the back piece. BODY: Place the front and back pieces on the same circular needle size 8 mm and knit 1 round where you decrease 24-28-28-28-28-32 stitches evenly spaced = 100-112-120-128-144-156 stitches. Insert 1 marker at the beginning of the round and 1 marker after 50-56-60-64-72-78 stitches (sides). Work stocking stitch in the round. REMEMBER THE KNITTING TENSION! When the piece measures 31 cm, cast off 6-6-6-8-8-10 stitches for the armholes on each side (cast off 3-3-3-4-4-5 stitches on each side of each marker) = 44-50-54-56-64-68 stitches on the front and back pieces. Lay the piece to one side and work the sleeves. SLEEVES: Cast on 32-32-36-36-40-40 stitches with double pointed needles size 7 mm and DROPS Snow. Knit 1 round, then work rib (knit 2, purl 2) in the round for 10 cm. Change to double pointed needles size 8 mm. Insert 1 marker at the beginning of the round (mid-under sleeve). Allow the marker to follow your work onwards; it is used when increasing under the sleeve. Work stocking stitch in the round. When the sleeve measures 12 cm from the cast-on edge, increase 1 stitch on each side of the marker – read INCREASE TIP. Increase like this every 8-6-7-4-3-2 cm a total of 4-5-4-6-7-10 times = 40-42-44-48-54-60 stitches. When the sleeve measures 42-40-38-37-35-34 cm, cast off 6-6-6-8-8-10 stitches under the sleeve (3-3-3-4-4-5 stitches on each side of the marker) = 34-36-38-40-46-50 stitches. Lay the piece to one side and work the other sleeve in the same way. YOKE: Place the sleeves onto the same circular needle as the body, where stitches were cast off for the armholes = 156-172-184-192-220-236 stitches. Insert 2 markers in the outermost stitch on each side of both the front and back pieces (4 markers). These are used when decreasing for raglan. Start at the transition between the back piece and the right sleeve and work stocking stitch in the round. When the yoke measures 3-4-5-5-4-3 cm, begin to decrease for RAGLAN – read description above. Decrease like this every 2nd round a total of 11-12-13-14-17-19 times = 68-76-80-80-84-84 stitches. Insert 1 marker-thread mid-front and 1 marker-thread mid-back. Cut the strand. Start 3 stitches before the marker-thread mid-front – the piece is now finished back and forth. ROW 1 (right side): Knit and decrease for raglan until there are 3 stitches left before the marker-thread mid-front. Knit up 1 stitch behind each of the next 6 stitches. Turn. ROW 2 (wrong side): Knit 5, purl until there are 5 stitches left, knit 5. On the next row from the right side decrease for raglan for the last time (you have decreased a total of 13-14-15-16-19-21 times) and there are 58-66-70-70-74-74 stitches. The yoke measures approx. 21-23-25-27-29-31 cm. HOOD: Work stocking stitch with 5 stitches in garter stitch on each side, AT THE SAME TIME increase 1 stitch on each side of the marker-thread mid-back and 1 stitch on each side of both raglan-lines on the front piece (6 stitches increased) – read INCREASE TIP-2. Increase like this 1 more time on the next row from the right side = 70-78-82-82-86-86 stitches. Continue with stocking stitch and garter stitch until the hood measures 37-38-39-40-41-42 cm. Cast off. Fold the hood and sew it together at the top. I-CORD EDGE: Work an edge around the hood as follows: Use 2 double pointed needles size 8 mm and cast on 2 stitches, knit up 1 stitch in the outermost loop of the bottom ridge on the right side of the hood (when the garment is worn) = 3 stitches on the needle. *Push the stitches back to the beginning of the needle and work again from the right side without turning. Knit 2, slip the next stitch as if to knit, knit up a new stitch in the next ridge on the hood, pass the slipped stitch over the knitted-up stitch *, work from *-* until an edge has been worked around the hood. NOTE! Knit up 1 stitch in each ridge, if this makes the edge tight, knit up 1 more stitch evenly along the hood. Knit together the last 3 stitches on the row, cut the strand, pull it through the remaining stitch and fasten. ASSEMBLY: Sew the openings under the sleeves. |
|
 |
|
Have you finished this pattern?Tag your pictures with #dropspattern #chaperonbleusweater or submit them to the #dropsfan gallery. Do you need help with this pattern?You'll find 29 tutorial videos, a Comments/Questions area and more by visiting the pattern on garnstudio.com. © 1982-2026 DROPS Design A/S. We reserve all rights. This document, including all its sub-sections, has copyrights. Read more about what you can do with our patterns at the bottom of each pattern on our site. |
|


With over 40 years in knitting and crochet design, DROPS Design offers one of the most extensive collections of free patterns on the internet - translated to 17 languages. As of today we count 324 catalogues and 12290 patterns translated into English (UK/cm). 12290
We work hard to bring you the best knitting and crochet have to offer, inspiration and advice as well as great quality yarns at incredible prices! Would you like to use our patterns for other than personal use? You can read what you are allowed to do in the Copyright text at the bottom of all our patterns. Happy crafting!
Post a comment to pattern DROPS 236-4
We would love to hear what you have to say about this pattern!
If you want to leave a question, please make sure you select the correct category in the form below, to speed up the answering process. Required fields are marked *.