
Popular categories
Looking for a yarn?


Comments / Questions (152)
![]() Margaretha Lagerdahl Ekemfalck wrote:
Margaretha Lagerdahl Ekemfalck wrote:
Hur gör jag ökningarna på ärmen. Markören sitter i en slätstickad maska och skall ökas en maska på var sida om den. Men HUR skall mönster A4 kunna stickas runt mittenmaskan?
28.10.2025 - 22:52DROPS Design answered:
Hei Margaretha. Sticka maskan med markör i (denna maskan stickas alltid som första maskan i A.4), gör 1 omslag om stickan, sticka mönster som förut fram till maskan med markör i, gör 1 omslag om stickan (= 2 maskor ökade). På nästa varv stickas omslagen vridna, så att det inte blir hål. Sedan stickas de ökade maskorna fortlöpande in A.9/A.10 till du får plats med hela rapporten, sedan stickas de nästa ökade maskorna i A.4. mvh DROPS Design
10.11.2025 - 12:57
![]() Emily Kennedy wrote:
Emily Kennedy wrote:
Hello! I’ve just finished the ribbing. I’m trying to put markers between sections, but it seems the 304 count for size L isn’t that number (before decrease) before the decrease. Your sections are 31 + 14 + 26 + 18 + 14 + 62 + 14 + 18 + 26 + 14 + 31 = 286 stitches before decreasing. What am I missing? Someone else might have asked this in a different language. If so, pardon. Thank you in advance!
28.10.2025 - 22:03DROPS Design answered:
Hi, Emily, the sections in size L before the decreasing is like this: 31 + 14(A.1) + 18(A.2) + 26(A.3) + 18(A.2) + 14(A.1) + 62 + 14(A.1) + 18(A.2) + 26(A.3) + 18(A.2) + 14(A.1) + 31 = 304. Happy knitting!
29.10.2025 - 08:09
![]() Trudy De Koe wrote:
Trudy De Koe wrote:
Ik moet markeerdraad invoegen in de eerste steek en in de 128e steek. Moet dat in contrastkleur. En is dat gewoon een extra steek. Er staan nu 254 steken op de naald na de boord. Dan worden het 156 steken. Help!!
30.09.2025 - 21:41DROPS Design answered:
Dag Trudy,
De markeerdraden geven de zijkanten aan en het is inderdaad handig om deze in een contrasterende kleur te doen. Je plaatst de markeerdraad in een bestaande steek. Het zou ook een (gekleurde) veiligheidsspeld of paperclip kunnen zijn.
01.10.2025 - 22:26
![]() Margaretha Lagerdahl wrote:
Margaretha Lagerdahl wrote:
Vad är färdiga måtten på plagget i storlek Small. Om det är för stort kan man göra den mindre? Kroppens bystvidd är 90 cm
14.09.2025 - 18:32DROPS Design answered:
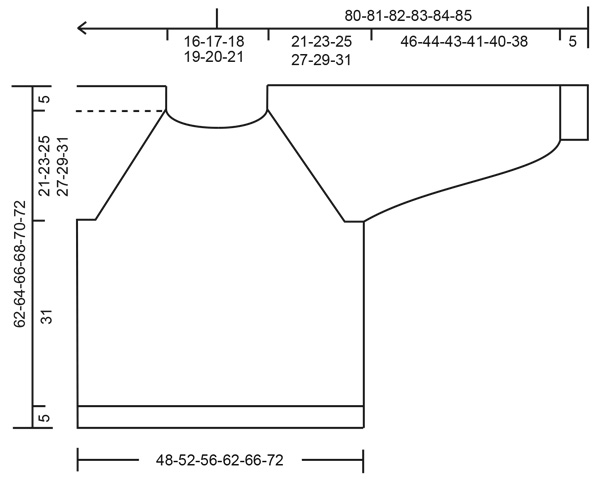
Hej Margaretha. Du hittar plaggets mått i cm i alla storlekar på måttskissen längst ner på mönstret. Mvh DROPS Design
15.09.2025 - 14:33
![]() Maria wrote:
Maria wrote:
Is there a woman's version of this?
29.06.2025 - 03:39DROPS Design answered:
Dear Maria, here is a similar pattern for women. Happy knitting!
29.06.2025 - 19:09
![]() Maria wrote:
Maria wrote:
Where are the chest sizes in numbers to choose from? They aren't showing at the top near the sizing and quantities of yarn needed.
21.06.2025 - 08:11DROPS Design answered:
Dear Maria, all measurements you can see by the sketch under the pattern text, at the bottom part of page. Happy knitting!
21.06.2025 - 08:17
![]() Carol McMillan wrote:
Carol McMillan wrote:
Do you finish the raglan decreases before starting the front neck decreases? Or start the neck decreases before the raglan decreases are completed?
16.05.2025 - 04:28DROPS Design answered:
Hi Carol, The decreases for the neckline begin before the raglan decreases are finished. Regards Drops Team.
16.05.2025 - 06:50
![]() Carol McMillan wrote:
Carol McMillan wrote:
This pattern needs to be fixed. It has the patttern listed twice the second instance is in 2 columns. Please fix.
13.05.2025 - 01:54DROPS Design answered:
Dear Mrs McMillan, thanks for noticing, this will be fixed asap. Happy knitting!
13.05.2025 - 08:20
![]() Arina wrote:
Arina wrote:
I don't understand how the following is meant when making the arm; "NOTE: The increased stitches are first worked in A.9/A.10 until there is room for a complete repeat, then worked in A.4." can you elaborate on this?
03.05.2025 - 12:23DROPS Design answered:
Dear Arina, when working the first rounds on sleeve you start A.9 with the stitch shown with the mark for your size and work from the right towards the left - when increasing you will work the new stitches as shown from the left towards the right so that diagram is complete; same for A.10, work A.10 to the mark for your size and work the new stitches as shown in the last stitches in diagram from the right towards the left so that diagram is complete. Happy knitting!
05.05.2025 - 09:31
![]() Inge Ersted Frederiksen wrote:
Inge Ersted Frederiksen wrote:
Jeg har strikket rigtig mange dejlige trøjer fra jeres opskrifter, hvor resultatet er blevet super godt. Med denne opskrift er jeg meget i tvivl om propertionerne er ok - også fordi jeg strikker XXXL, hvilket gør, at den bliver meget bred men ikke særlig lang. 36 cm fra bunden og op til ærmegabet er meget lidt til så stor en str. Han er 205 cm høj. Det samlede mål på trøjen - 72 cm i længden passer næsten til ham. Kan I hjælpe mig?
29.04.2025 - 10:49DROPS Design answered:
Hei Inge. Anbefaler deg å se på en genser du allerede har og liker størrelsen og deretter sammenligne de målene med målskissen til Ice Island genseren. Kanskje må du gå ned i str, men strikke den lengre? mvh DROPS Design
05.05.2025 - 13:07
|
|||||||||||||||||||||||||||||||
Ice Island#iceislandsweater |
|||||||||||||||||||||||||||||||
 |
 |
||||||||||||||||||||||||||||||
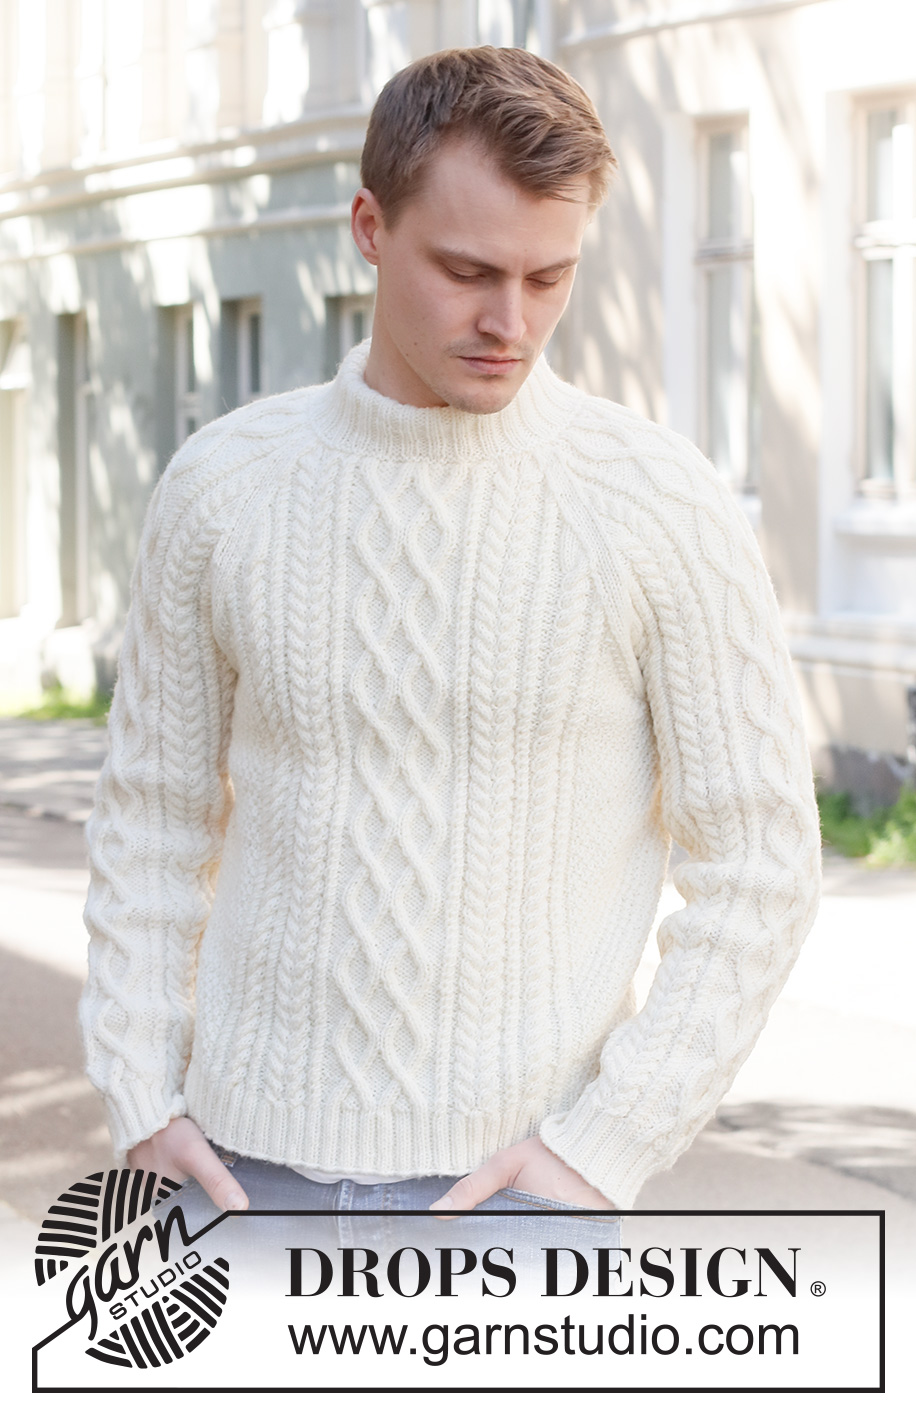
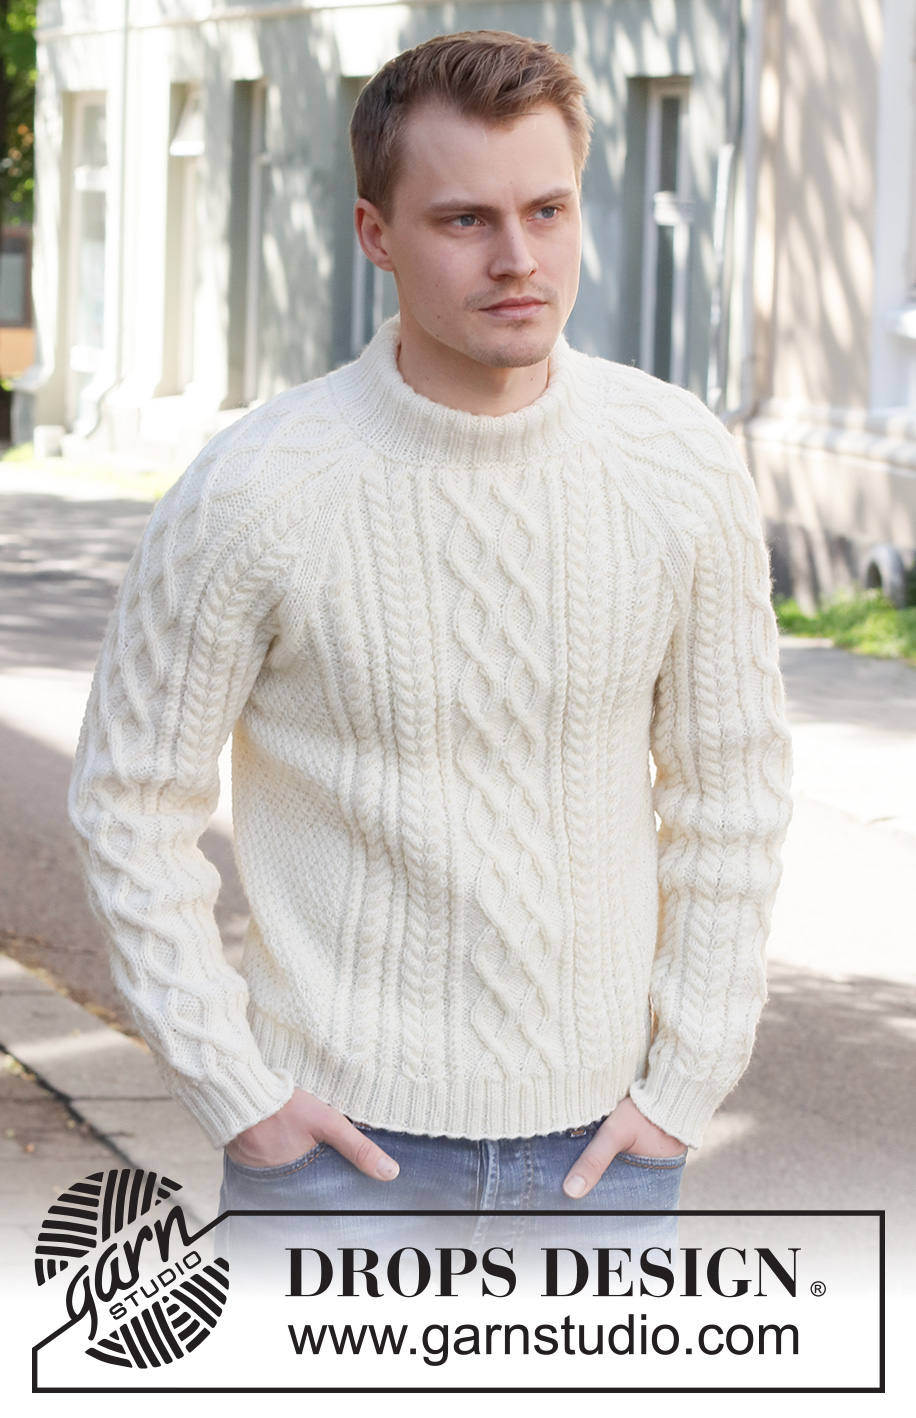
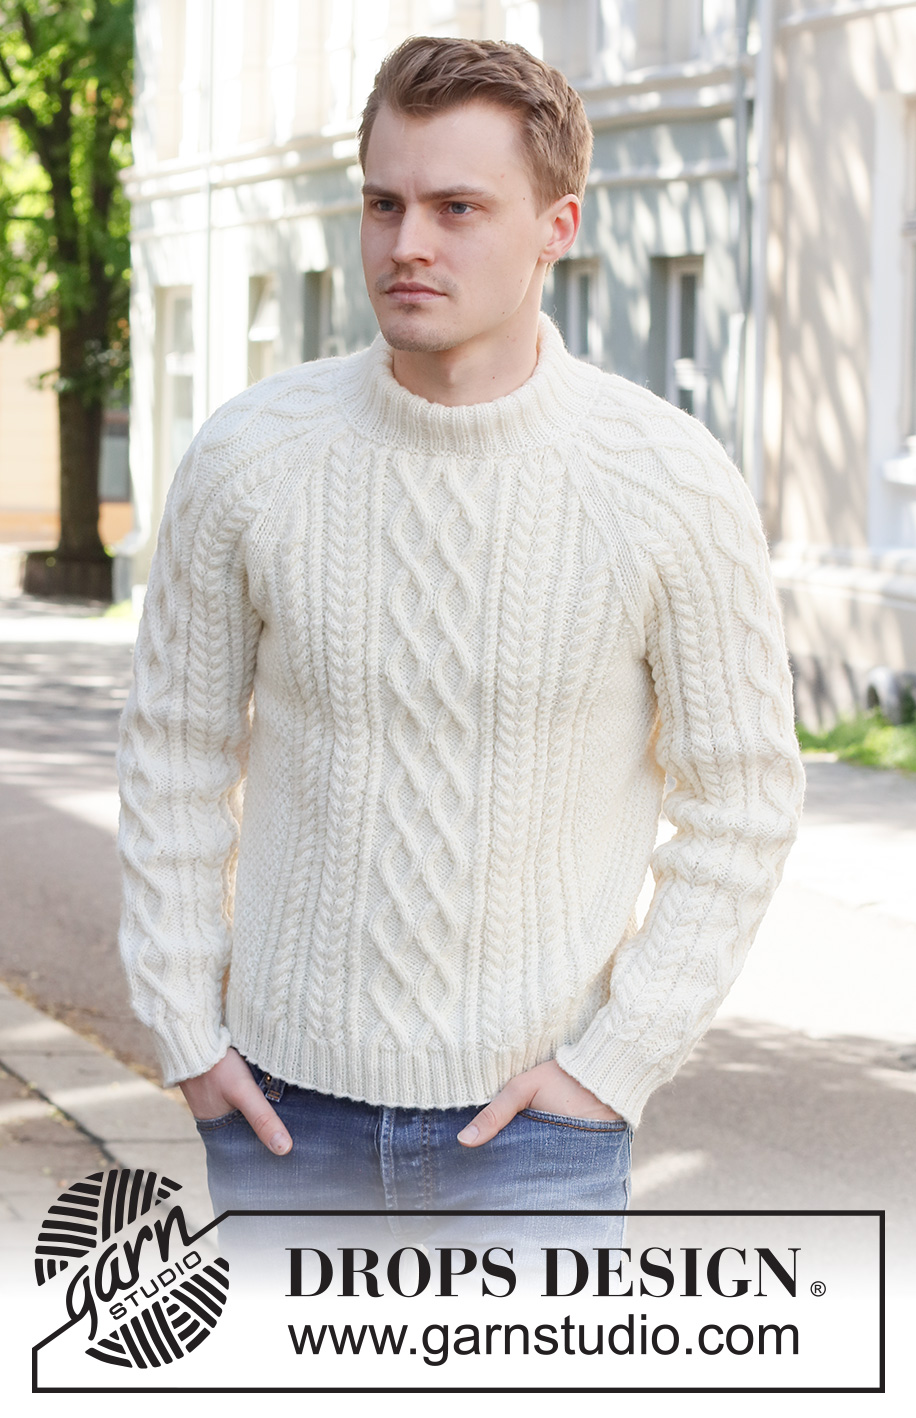
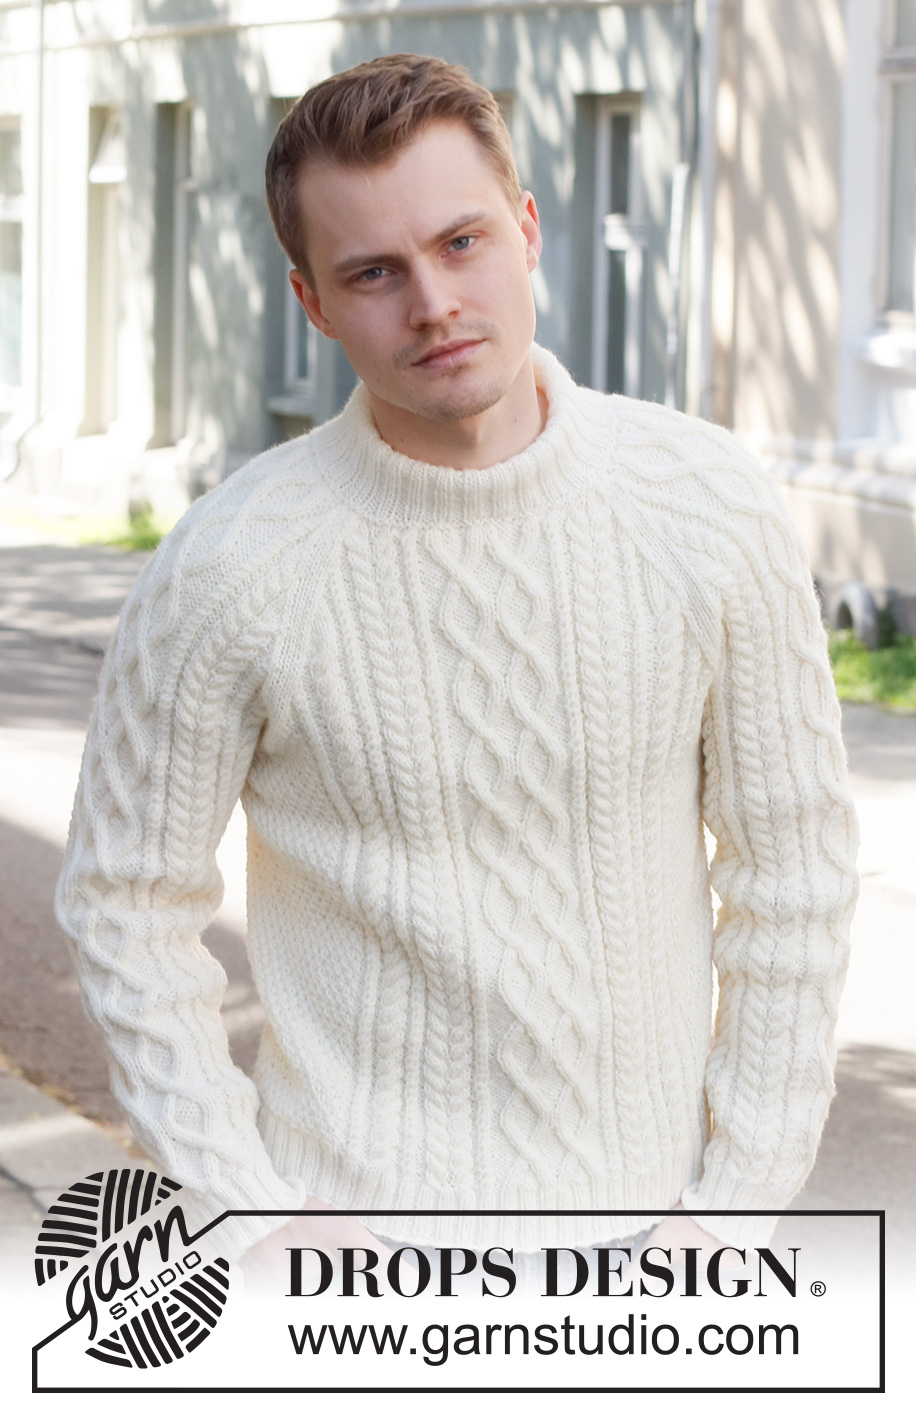
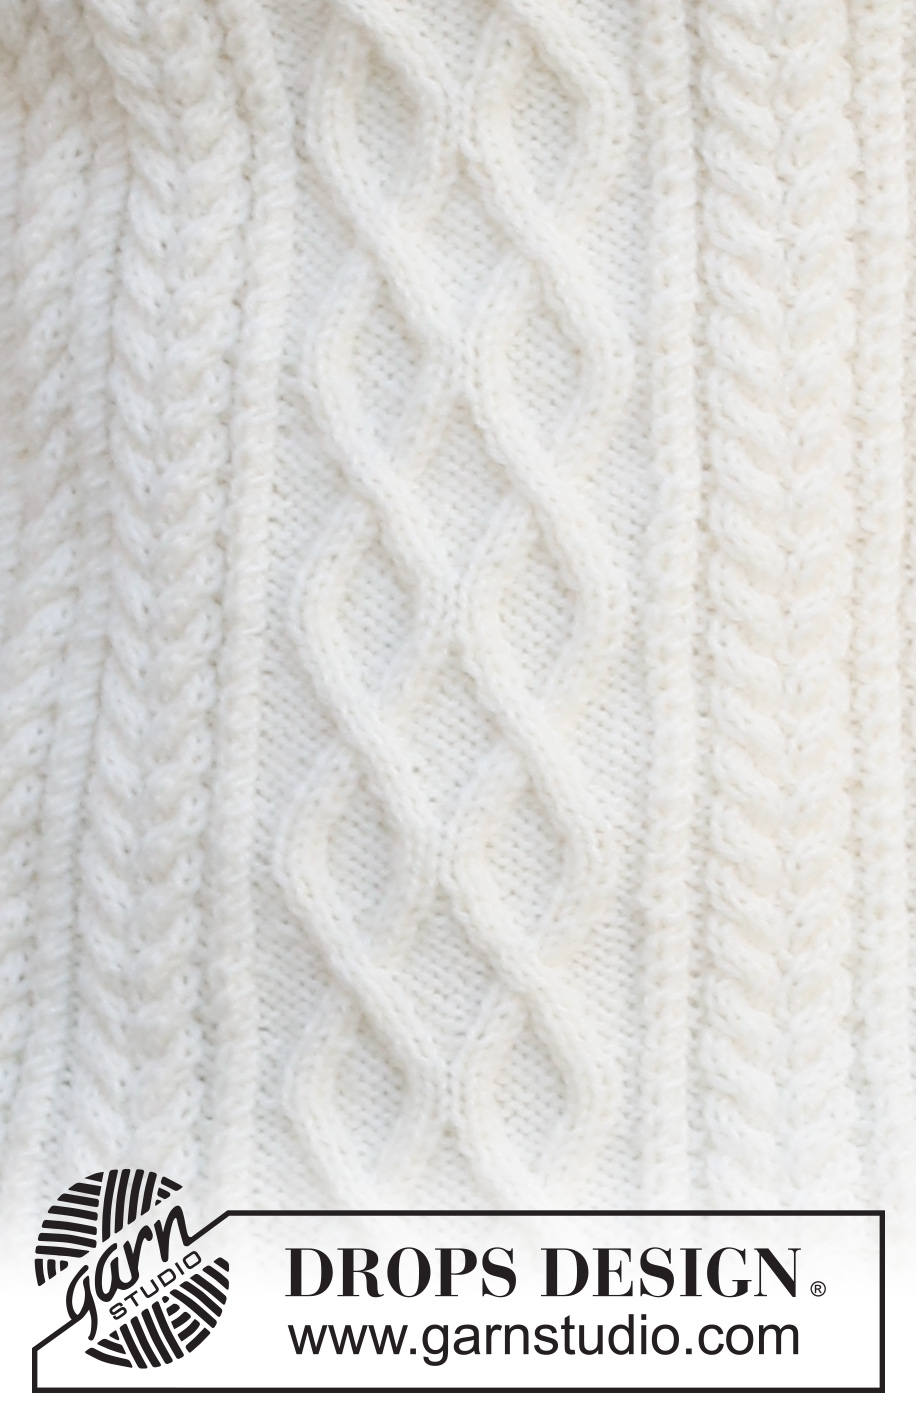
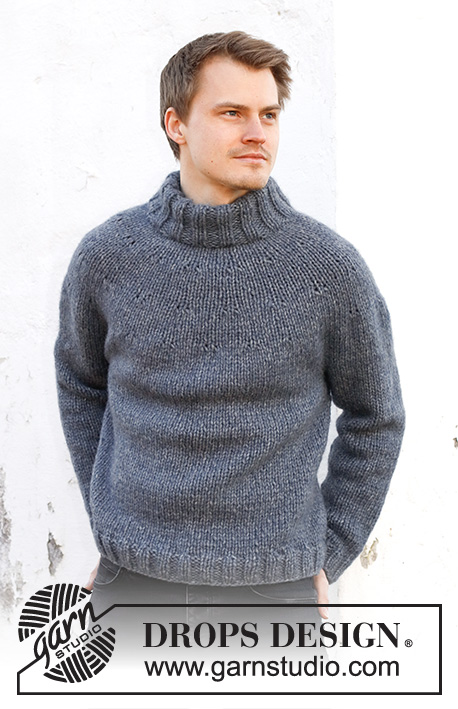
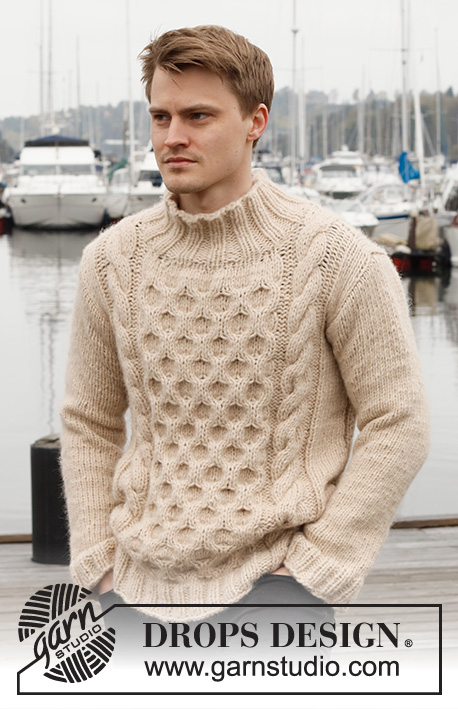
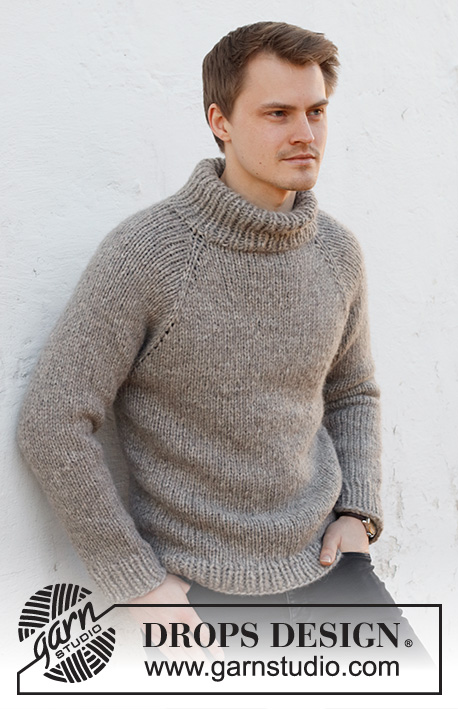
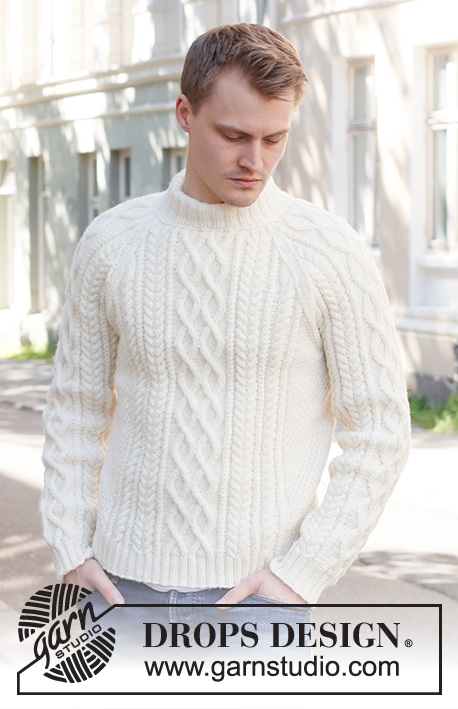
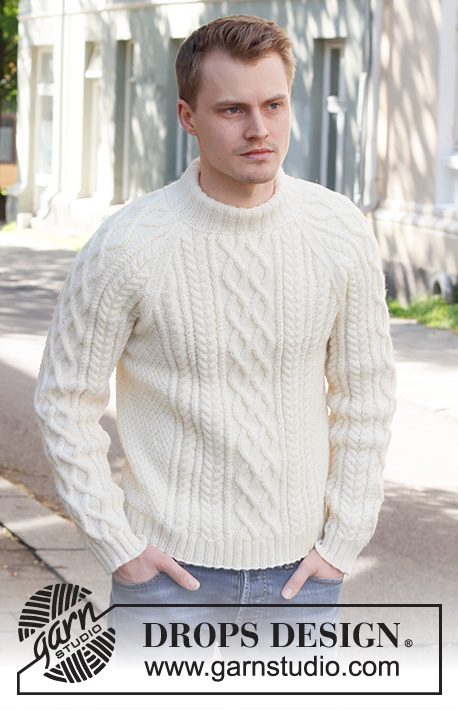
Knitted jumper for men in DROPS Karisma. The piece is worked with raglan, cables and double neck. Sizes S - XXXL.
DROPS 224-10 |
|||||||||||||||||||||||||||||||
|
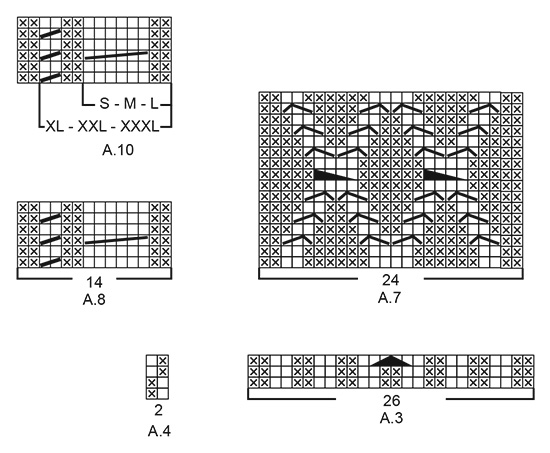
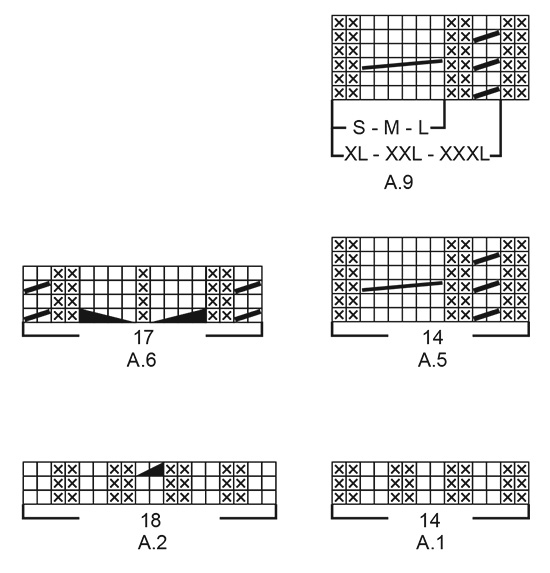
------------------------------------------------------- EXPLANATIONS FOR THE PATTERN: ------------------------------------------------------- KNITTING TIP: In sizes XL, XXL and XXXL, there will be 4 purl stitches next to each other when A.1 is worked 2 times in width. So the rib will match under A.5/A.8, which is worked after the rib. PATTERN: See diagrams A.1 to A.10. The diagrams show all rows in the pattern from the right side. DECREASE/INCREASE TIP (evenly spaced): To work out how to decrease/increase evenly, count the number of stitches to be decreased/increased over (e.g. 23 stitches), and divide by the number of decreases/increases to be made (e.g. 6) = 3.8. In this example, decrease by knitting together approx. each 3rd and 4th stitch. When increasing, make 1 yarn over after approx. each 4th stitch. On the next round work the yarn overs twisted to avoid holes. INCREASE TIP (sleeves): Increase 2 stitches under the sleeve by making 1 yarn over on each side of the marker-stitch as follows: Work the marker-stitch (always the first stitch in A.4), 1 yarn over, pattern as far as the marker-stitch, 1 yarn over (= 2 stitches increased). On the next round work the yarn overs twisted to avoid holes. Then work the new stitches into A.9/A.10 until you have room for a complete repeat, then work the stitches in A.4. RAGLAN: Decrease to raglan on each side of the marker, in each transition between body and sleeves as follows. FROM RIGHT SIDE: AFTER THE MARKER: Knit 1, slip 1 stitch as if to knit, knit 1 and pass the slipped stitch over the knitted stitch (= 1 stitch decreased) BEFORE THE MARKER: Work until there are 3 stitches left before the marker, knit 2 together, knit 1 (= 1 stitch decreased). FROM WRONG SIDE: AFTER THE MARKER: Purl 1, purl 2 together (= 1 stitch decreased) BEFORE THE MARKER: Work until there are 3 stitches left before the marker, purl 2 twisted together, purl 1 (= 1 stitch decreased). ------------------------------------------------------- START THE PIECE HERE: ------------------------------------------------------- JUMPER – SHORT OVERVIEW OF THE PIECE: The body is worked in the round with circular needle as far as the armholes. The sleeves are worked in the round with double pointed needles/short circular needle, bottom up. The body and sleeves are placed on the same circular needle and the yoke worked, decreasing to raglan at the same time. Stiches are cast off for the neck mid-front and the piece continued back and forth. The neck is worked to finish. BODY: Cast on 272-288-304-344-360-392 stitches with circular needle size 3.5 mm and DROPS Karisma. Knit 1 round. Then work the following rib: Purl 1, knit 2, * purl 2, knit 2 *, work from *-* over the next 20-24-28-24-28-36 stitches, work A.1 over the next 14-14-14-28-28-28 stitches (= 1-1-1-2-2-2 repeats of 14 stitches – read KNITTING TIP), A.2 (= 18 stitches), A.3 (= 26 stitches), A.2, A.1 over the next 14-14-14-28-28-28 stitches (= 1-1-1-2-2-2 repeats of 14 stitches – read KNITTING TIP), * knit 2, purl 2 *, work from *-* over the next 44-52-60-52-60-76 stitches, knit 2, A.1 over the next 14-14-14-28-28-28 stitches – remember KNITTING TIP, A.2, A.3, A.2, A.1 over the next 14-14-14-28-28-28 stitches – remember KNITTING TIP, * knit 2, purl 2 *, work from *-* over the next 20-24-28-24-28-36 stitches, knit 2 and purl 1. Continue this rib – NOTE: In diagrams A.2 and A.3 repeat the first 2 rounds onwards. When 1 round remains before the piece measures 5 cm, decrease stitches as follows: Work stocking stitch over the first 23-27-31-27-31-39 stitches and decrease 6-6-6-6-6-8 stitches evenly over these stitches – read DECREASE/INCREASE TIP, work A.1 as before over the next 14-14-14-28-28-28 stitches, work the last round in A.2 (= 18 stitches, 1 stitch decreased), work the last round in A.3 (= 26 stitches, 2 stitches decreased), work the last round in A.2 (= 18 stitches, 1 stitch decreased), A.1 as before over the next 14-14-14-28-28-28 stitches, work stocking stitch over the next 46-54-62-54-62-78 stitches and decrease 13-13-13-13-13-17 stitches evenly over these stitches, A.1 as before over the next 14-14-14-28-28-28 stitches, work the last round in A.2 (= 18 stitches, 1 stitch decreased), work the last round in A.3 (= 26 stitches, 2 stitches decreased), work the last round in A.2 (= 18 stitches, 1 stitch decreased), A.1 as before over the next 14-14-14-28-28-28 stitches, work stocking stitch over the last 23-27-31-27-31-39 stitches and decrease 7-7-7-7-7-9 stitches evenly over these stitches = 238-254-270-310-326-350 stitches. The rib is now finished. Insert 1 marker in the first stitch and 1 marker in the 120th-128th-136th-156th-164th-176th stitch (= sides). Allow these markers to follow your work onwards; they are used when casting off for the armholes. Change to circular needle size 4.5 mm. Work the next round as follows: A.4 over the first 17-21-25-21-25-31 stitches, A.5 over the next 14-14-14-28-28-28 stitches (= 1-1-1-2-2-2 repeats of 14 stitches), A.6 (= 17 stitches), A.7 (= 24 stitches), A.6, A.8 over the next 14-14-14-28-28-28 stitches (= 1-1-1-2-2-2 repeats of 14 stitches), A.4 over the next 33-41-49-41-49-61 stitches (marker sits in the middle of these stitches), A.5 over the next 14-14-14-28-28-28 stitches, A.6, A.7, A.6, A.8 over the next 14-14-14-28-28-28 stitches and A.4 over the last 16-20-24-20-24-30 stitches. Continue this pattern. REMEMBER THE KNITTING TENSION! When the piece measures 36 cm in all sizes, cast off for the armholes as described below. There is approx. 26-28-30-32-34-36 cm left to finished length. Adjust so that next round is an odd numbered row in the diagrams, and cast off the first 6-6-7-7-8-8 stitches, continue the pattern until there are 5-5-6-6-7-7 stitches left before the second marker-stitch, cast off 11-11-13-13-15-15 stitches, work until there are 5-5-6-6-7-7 stitches left on the round and cast off 5-5-6-6-7-7 stitches = 108-116-122-142-148-160 stitches on the front piece and 108-116-122-142-148-160 stitches on the back piece. Cut the strand. Lay the piece to one side and work the sleeves. SLEEVES: Cast on 56-60-60-64-64-68 stitches with double pointed needles size 3.5 mm and DROPS Karisma. Knit 1 round, then work rib in the round (knit 2, purl 2) for 5 cm. Knit 1 round where you increase 19-15-15-19-19-15 stitches evenly spaced – remember DECREASE/INCREASE TIP = 75-75-75-83-83-83 stitches. Insert 1 marker in the first stitch – allow the marker to follow your work onwards; it is used when increasing under the sleeve. Change to double pointed needles size 4.5 mm. Work the next round with pattern as follows: A.4 over the first stitch (marker-stitch), A.9 (= 8-8-8-12-12-12 stitches – start the diagram by the mark for your size and work from right to left), A.6 (= 17 stitches), A.7 (= 24 stitches), A.6, A.10 (= 8-8-8-12-12-12 stitches – start at the first stitch in A.10 and work from right to left as far as the mark for your size). Continue this pattern. When the piece measures 8-10-7-8-9-6 cm, increase 2 stitches under the sleeve – read INCREASE TIP. Increase like this every 4-2½-2½-2½-2-2 cm a total of 11-15-17-15-17-19 times = 97-105-109-113-117-121 stitches – NOTE: The increased stitches are first worked in A.9/A.10 until there is room for a complete repeat, then worked in A.4. Continue working until the sleeve measures approx. 51-49-48-46-45-43 cm (shorter measurements in larger sizes due to wider neck and longer yoke). Try the sleeve on and work to desired length. Adjust so that the next round is an odd numbered row in the diagrams and cast off for the armhole as follows: Cast off the first 6-6-7-7-8-8 stitches, work as before until there are 5-5-6-6-7-7 stitches left and cast off the last 5-5-6-6-7-7 stitches = 86-94-96-100-102-106 stitches. Cut the strand. Work the other sleeve in the same way. YOKE: Place the sleeves on the same circular needle size 4.5 mm as the body, where stitches were cast off for the armholes (without working the stitches) = 388-420-436-484-500-532 stitches. Insert a marker thread in each transition between the body and sleeves = 4 marker threads. Allow the threads to follow your work onwards; they are used when decreasing to raglan. Start at the transition between the back piece and the left sleeve – you can insert a marker here to show the start of the round. Continue the pattern as before, with 2 stitches in stocking stitch on each side of all 4 marker threads. OVERVIEW OF THE NEXT SECTION: On the next round start to decrease to raglan; you will also cast off stitches for the neck mid-front and finish working back and forth from mid-front. When there are not enough stitches for the cables, work stocking stitch over these stitches. Read RAGLAN and NECK before continuing. RAGLAN: Decrease to RAGLAN on each side of all 4 marker threads – read description above. Decrease every 2nd round a total of 24-27-30-32-36-38 times, then every round 7-7-6-7-4-4 times. NECK: When the piece measures 55-57-59-60-62-64 cm (adjust so the next round is an odd round in the diagrams), decrease 6-6-6-10-10-10 stitches evenly over the middle 24-24-24-32-32-32 in front – remember DECREASE/INCREASE TIP. Then place the middle 30-32-34-42-46-54 stitches on a thread for the neck. Work to the beginning of the round. Cut the strand. Start from the wrong side, by the neck and continue the pattern back and forth. AT THE SAME TIME cast off at the beginning of each row from the neck as follows: 2 stitches 1 time and 1 stitch 1-1-1-2-2-2 times on each side. After all the decreases to raglan and neck there are 98-104-102-112-116-124 stitches on the needle. Cut the strand. DOUBLE NECK: Start mid-back and knit up 134-142-142-162-170-186 stitches around the neck (including the stitches on the thread and on the needle) with short circular needle size 3.5 mm and DROPS Karisma. On the next round decrease stitches to avoid the neck being too loose – knit 1 round and decrease to 104-108-112-116-120-124 stitches evenly spaced. Purl 1 round and knit 1 round. Work the next round as follows: Knit 1, * purl 2, knit 2 *, work from *-* until there are 3 stitches left, purl 2 and knit 1. Continue this rib until the neck measures 8-8-8-10-10-10 cm. On the next round increase all purl-2 to purl-3 by making 1 yarn over after each purled section (the yarn overs are purled twisted on the next round to avoid holes). Continue working until the neck measures 11-11-11-13-13-13 cm. Switch to circular needle size 4.5 mm and cast off loosely with knit over knit and purl over purl. Fold the neck double to the inside and sew down. To avoid the neck being tight and rolling outwards, it is important that the seam is elastic. ASSEMBLY: Sew the opening under each sleeve. |
|||||||||||||||||||||||||||||||
Diagram explanations |
|||||||||||||||||||||||||||||||
|
|||||||||||||||||||||||||||||||
 |
|||||||||||||||||||||||||||||||
 |
|||||||||||||||||||||||||||||||
 |
|||||||||||||||||||||||||||||||
Have you finished this pattern?Tag your pictures with #dropspattern #iceislandsweater or submit them to the #dropsfan gallery. Do you need help with this pattern?You'll find 29 tutorial videos, a Comments/Questions area and more by visiting the pattern on garnstudio.com. © 1982-2026 DROPS Design A/S. We reserve all rights. This document, including all its sub-sections, has copyrights. Read more about what you can do with our patterns at the bottom of each pattern on our site. |
|||||||||||||||||||||||||||||||


With over 40 years in knitting and crochet design, DROPS Design offers one of the most extensive collections of free patterns on the internet - translated to 17 languages. As of today we count 324 catalogues and 12290 patterns translated into English (UK/cm). 12290
We work hard to bring you the best knitting and crochet have to offer, inspiration and advice as well as great quality yarns at incredible prices! Would you like to use our patterns for other than personal use? You can read what you are allowed to do in the Copyright text at the bottom of all our patterns. Happy crafting!
Post a comment to pattern DROPS 224-10
We would love to hear what you have to say about this pattern!
If you want to leave a question, please make sure you select the correct category in the form below, to speed up the answering process. Required fields are marked *.