
Popular categories
Looking for a yarn?


Comments / Questions (85)
![]() Veronika wrote:
Veronika wrote:
Wie soll man bei 4 Luftmaschen zu Beginn die Musterfolge A2,A1 (= 2 Stäbchen) 6x in der ersten Runde häkeln?
28.08.2025 - 14:48DROPS Design answered:
Liebe Veronika, bei der 1. Runde wird man nur die 2 Stäbchen A.1 6 Mal wiederholen; bei der 2. Runde beginnt A.2: (A.2 häkeln, dann A.1) und so weiterhäkeln, dh: (3 Luftmaschen = A.2, 1 Stäbchen in die nächste Masche, 2 Stäbchen in die nächste Masche = A.1); dann (1 Stäbchen in die nächste Masche = A.2; 1 Stäbchen in die selbe Masche + 2 Stäbchen in die nächste Masche = A.1), und so weiterhäkeln. Viel Spaß beim Häkeln!
29.08.2025 - 07:55
![]() R C wrote:
R C wrote:
Hej Er det rigtig forstået at fra anden omgang (a2+a1) hækles a2= 3 luftmaske + a1 =3 stangmasker, igen a2= 3 luftmasker +a1 3 stangmasker gentag helevejen rundt? og hvor mange masker skal der så være? MVH R C
22.08.2025 - 13:42DROPS Design answered:
Hei R C. Det stemmer. Du hekler A.2 + A.1 totalt 6 ganger i bredden. Så på 2. omgang vil man ha 3 luftmasker x 6 (A.2) og 3 staver x 6 (A.1). Og f.eks på 5. omgang vil man ha 3 luftmasker + 3 staver x 6 (A.2) og 6 staver x 6 (A.1). mvh DROPS Design
15.09.2025 - 14:07
![]() Loren wrote:
Loren wrote:
Bonjour Pouvez-Vous m’aider ? Je n’arrive pas à comprendre le 6ème rang. Lorsqu’on fait les 2 mailles en l’air il faut toujours sauter une bride du rang précédent ? Merci
20.07.2025 - 16:44DROPS Design answered:
Bonjour Loren, de quel diagramme parlez-vous?
21.07.2025 - 13:05
![]() Grit wrote:
Grit wrote:
Hallo, ich habe für den Hut 100% Baumwolle genommen. Hast du den gestärkt mit Sprühstärke oder ähnlichem? Sodass er die Form schön hält. LG Grit
15.07.2025 - 15:13DROPS Design answered:
Liebe Grit, das können Sie machen oder einfach diese Technik benutzen. Viel Spaß beim Fertigstellen!
24.07.2025 - 14:38
![]() Małgorzata wrote:
Małgorzata wrote:
Proszę mi powiedzieć ile oczek powinno być w drugim okrążeniu. Jeżeli w trzecim ma być 30 plus 3 oczka łańcuszka zamiast pierwszego słupka, tzn. Że w kolejnych powtórzeniach tego okrążenia nie przerabiamy słupka zamiast trzech oczek? Wg. Schematu wychodzi w trzecim okrążeniu 36 słupków. Z wcześniejszych odpowiedzi rozumiem że w drugim okrążeniu jest 12 słupków
04.07.2025 - 22:44DROPS Design answered:
Witaj Małgorzato, właśnie skorygowałam poprzednią odpowiedź. Zatem: 2-gie okrążenie: 4x6=24 sł (w tym 3 początkowe oł). 3-cie okr.: 6x6=36 sł (w tym 3 początkowe oł). 4-te okr.: 8x6=48sł (w tym początkowe oł). 5-te okr.: 10x6=60 sł (w tym 3 początkowe oł). Pozdrawiamy!
08.07.2025 - 12:47
![]() Monika wrote:
Monika wrote:
Dziękuję za odpowiedź, ale skąd biorą się te "+3" słupki? W kazdym okrążeniu? Bardzo bym chciała zrobić ten kapelusz, ale nie mogę rozczytać tego początku
03.07.2025 - 11:32DROPS Design answered:
Witaj Moniko, to nie są 3 słupki, tylko 1 słupek (3 oczka łańcuszka zwykle zastępują pierwszy słupek). Na schemacie A.2 oznaczony jako 3 krótkie kreseczki jedna nad drugą. Zobacz jeszcze wskazówkę: 'gdy powtarzamy schemat A.2 należy przerobić 1 słupek na początku - zamiast 3 oczek łańcuszka'. Pozdrawiamy!
03.07.2025 - 13:06
![]() Monika wrote:
Monika wrote:
Czy możecie podać, ile powinno być słupków w 3, 4 i 5 okrążeniu?
03.07.2025 - 00:06DROPS Design answered:
Witaj Moniko, 3-cie okr.: 6x6=36 sł (w tym 3 początkowe oł). 4-te okr.: 8x6=48sł (w tym początkowe oł). 5-te okr.: 10x6=60 sł (w tym 3 początkowe oł). Pozdrawiamy!
03.07.2025 - 09:10
![]() Lilianne wrote:
Lilianne wrote:
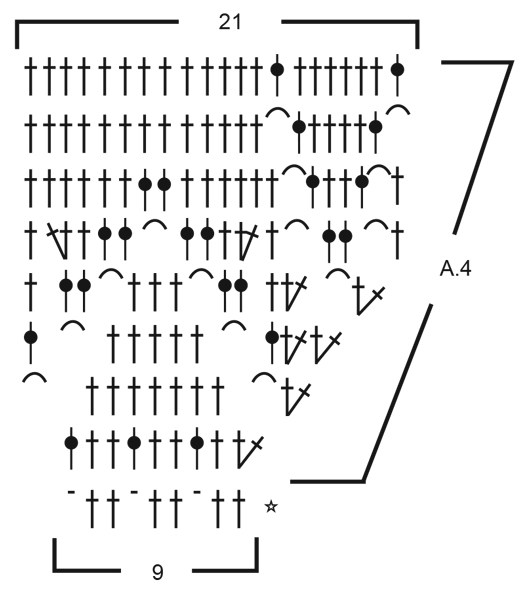
In Charts A3 and A4 there are no 3 chains and ss to start or end a row ,in 2nd last row am supposed to start with 2 chains how ?Am just asking out of curiosity cause i know how to solve the issue.
10.06.2025 - 20:21DROPS Design answered:
Dear Lilianne, remember the CROCHET INFO at the beginning of the pattern: you should replace the first treble crochet (UK English terminology) with 3 chains at the beginning of every round. On the next to last row in A.4 you can consider these 3 chains being the last treble crochet of the round or make them extra as you prefer. Happy crocheting!
11.06.2025 - 07:59
![]() Valeria wrote:
Valeria wrote:
Crochet patterns in general are very easy to follow and understand, here I found myself adjusting and counting how to make it work. In the end I used it more as inspiration. Please consider for future hat projects to present the full circle of the first part of the hat, in order for us to be able to make it work. Thank you!
18.05.2025 - 12:50
![]() Silke Reischl wrote:
Silke Reischl wrote:
Hallo, welche Stärke wird denn für den Draht der Krempe empfohlen?
27.04.2025 - 20:11DROPS Design answered:
Liebe Frau Reischl, vielleicht kann Ihnen dieses Video helfen? Viel Spaß beim Häkeln!
28.04.2025 - 08:42
|
||||||||||||||||||||||||||||
Always Bright#alwaysbrighthat |
||||||||||||||||||||||||||||
 |
 |
|||||||||||||||||||||||||||
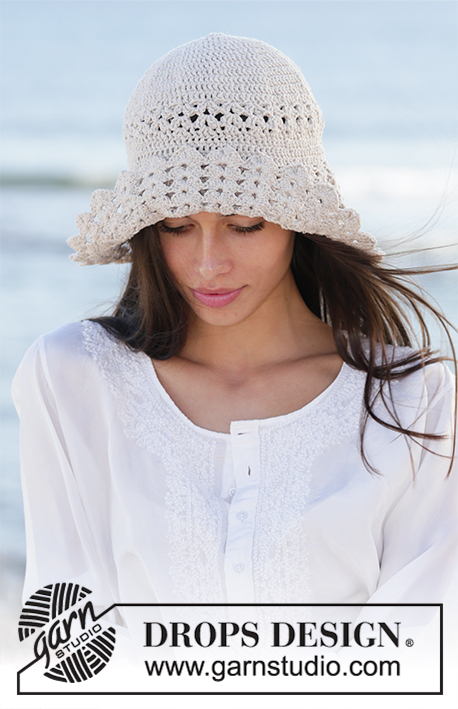
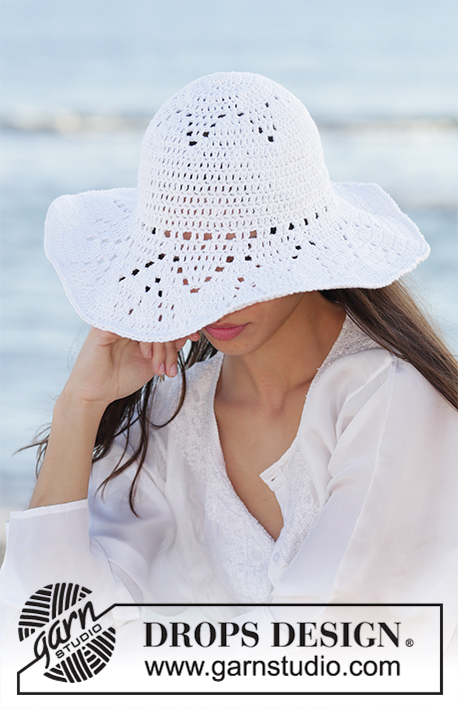
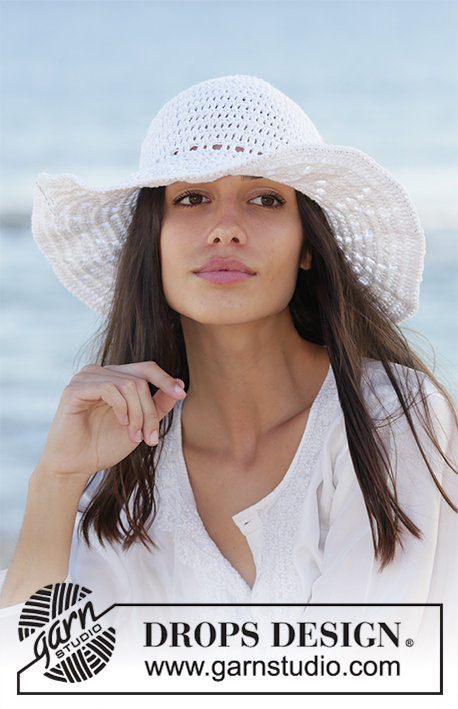
Crocheted hat in DROPS Bomull-Lin or DROPS Paris. Piece is crocheted top down with treble crochets and lace pattern.
DROPS 199-14 |
||||||||||||||||||||||||||||
|
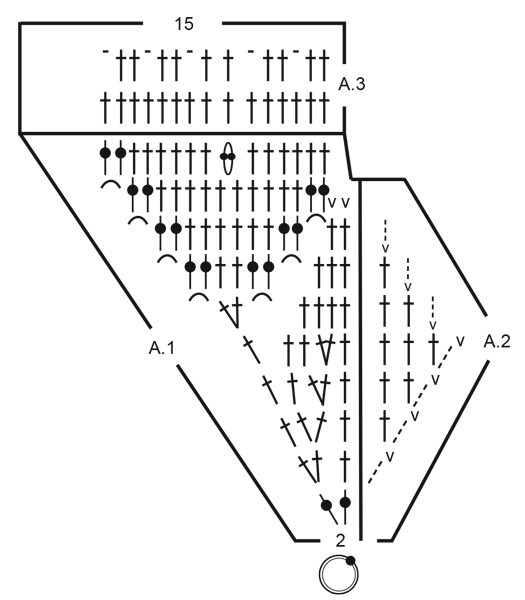
---------------------------------------------------------- EXPLANATION FOR THE PATTERN: ---------------------------------------------------------- PATTERN: See diagrams A.1 to A.4. CROCHET INFORMATION: Replace first treble crochet on round with 3 chain stitches. Finish round with 1 slip stitch in third chain stitch from beginning of round. (When A.2 is repeated, work the 3 chain stitches as 1 treble crochet). DECREASE TIP: Decrease 1 treble crochet by working the next 2 treble crochets together as follows: Work 1 treble crochet but wait with last pull through (= 2 loops on hook), then work next treble but now pull last yarn over through all 3 loops on hook. INCREASE TIP: Increase 1 treble crochet by working 2 treble crochets in same treble crochet. ---------------------------------------------------------- START THE PIECE HERE: ---------------------------------------------------------- HAT - SHORT OVERVIEW OF THE PIECE: Work in the round top down. HAT: Work 4 chain stitches on hook size 3.5 mm with Bomull-Lin or Paris and form a ring with 1 slip stitch in first chain stitch. Read CROCHET INFO! Work * A.2, A.1 *, work from *-* 6 times in total in width (there are no stitches in A.2 on first round). REMEMBER THE CROCHET TENSION! When A.1 and A.2 have been worked vertically, there are 90 treble crochets on round. Work 1st round in A.3 and repeat this round until piece measures approx. 16 cm from the top and down. Work last round in A.3 (= eyelet row). Then work brim as explained below: BRIM: Work A.4 in the round (= 10 repetitions of 9 stitches). When A.4 has been worked vertically, there are 210 stitches on round. Place a thin steel wire along the edge of brim. Work 1 double crochet in every treble crochet the entire round while AT THE SAME TIME working around steel wire. This is done to make the hat more stiff along the edge. Adjust the length on wire according to desired measurements on brim. Twine the steel wire ends together and hide them in the stitches. Cut and fasten the yarn. |
||||||||||||||||||||||||||||
Diagram explanations |
||||||||||||||||||||||||||||
|
||||||||||||||||||||||||||||
 |
||||||||||||||||||||||||||||
 |
||||||||||||||||||||||||||||
Have you finished this pattern?Tag your pictures with #dropspattern #alwaysbrighthat or submit them to the #dropsfan gallery. Do you need help with this pattern?You'll find 13 tutorial videos, a Comments/Questions area and more by visiting the pattern on garnstudio.com. © 1982-2026 DROPS Design A/S. We reserve all rights. This document, including all its sub-sections, has copyrights. Read more about what you can do with our patterns at the bottom of each pattern on our site. |
||||||||||||||||||||||||||||


With over 40 years in knitting and crochet design, DROPS Design offers one of the most extensive collections of free patterns on the internet - translated to 17 languages. As of today we count 324 catalogues and 12290 patterns translated into English (UK/cm). 12290
We work hard to bring you the best knitting and crochet have to offer, inspiration and advice as well as great quality yarns at incredible prices! Would you like to use our patterns for other than personal use? You can read what you are allowed to do in the Copyright text at the bottom of all our patterns. Happy crafting!
Post a comment to pattern DROPS 199-14
We would love to hear what you have to say about this pattern!
If you want to leave a question, please make sure you select the correct category in the form below, to speed up the answering process. Required fields are marked *.