
Popular categories
Looking for a yarn?



































Comments / Questions (118)
 Helen Skauge wrote:
Jeg lurer pa hvilken str jeg skal strikke, men jeg kan ikke finne malene pa de ulike str. Hvor finner jeg det?
13.10.2026 - 22:25DROPS Design answered:
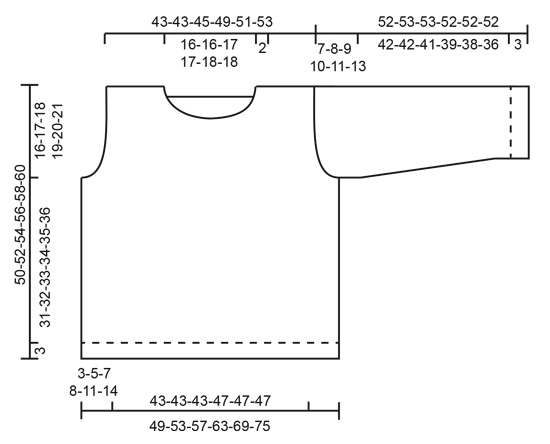
Hej Helen, du finder måleskitsen nederst i opskriften, nedenunder diagrammerne :)
14.10.2026 - 12:16
Tine wrote:
Hei, går det an å gjøre oppskriften om til en jakke/ cardigan? Hvor mye anbefales da å legge opp ( masketall) for forstykkene ? Trekker jeg fra masketall til vrangborden til knappene ( f.eks. 5 masker bredde ) ?
22.08.2026 - 12:46DROPS Design answered:
Hei Tine, Ja det er mulig, men da må du plusse på 5 masker til den ene stolpen som skal legges opp på den andre. Hilsen Drops Team.
25.08.2026 - 06:46
 Jessie wrote:
Når jeg skal til at montere blusen og der står at jeg skal tage 74 masker op til halskanten, er det inkl. eller ekskl. de masker der stadig er på tråd til hals fra forstykket?
29.07.2026 - 18:55DROPS Design answered:
Hei Jessie, Det inkluderer maskene på tråden. Hilsen Drops Team.
30.07.2026 - 07:01
 Isabelle wrote:
Bonjour J’ai laissé de côté un petit moment mon tricot et je suis arrivée au diminutions des emmanchures j’ai fais mon dos je suis au devant je sais qu’il faut que je diminue 4 mailles de ch côté pour commencer mais je me souviens plus si je dois rabattre au début du rang 4x1 m ou 2x2 m ens pour effectuer ses diminutions Merci
02.07.2026 - 16:39DROPS Design answered:
Bonjour Isabelle, pour les emmanchures vous allez rabattre (en L): 4 m au début des 2 rangs suivants ( = 1 x 4 m de chaque côté), puis 2 m au début des 2 rangs suivants (= 1 x 2 m de chaque côté) et enfin 3 x 1 m au début des 6 rangs suivants (= 3 x 1 m de chaque côté). Bon tricot!
03.07.2026 - 07:22
Mette wrote:
Hej, Kan man strikke på rundpind op til ærmegab og så skille arbejdet der? Og samme med ærmer?
30.06.2026 - 09:42DROPS Design answered:
Hei Mette. Design avd. har dessverre ikke muligheten til å tilpasse eller gå igjennom oppskriften slik at man kan strikke den rundt (er litt som må justeres), men lese godt igjennom oppskriften og se om maskeantallet og mønstret vil stemme i den str. du ønsker å strikke. mvh DROPS Design
30.06.2026 - 10:59
 Alice wrote:
Hej. Det verkar vara en enorm storleksskillnad på L och XL. Hur löser man det?
23.06.2026 - 13:05DROPS Design answered:
Hei Alice. Hva mener du med "Hur löser man det"? Enten strikker man str. L og da får man de målene som er oppgitt til str. L eller så strikker man str. XL og får de målene som er oppgitt til str. XL. Det er ingen mellomting. Mønstret må gå opp og da trenger man det maskeantallet som er oppgitt i de forskjellige str. mvh DROPS Design
29.06.2026 - 13:19
Isabelle wrote:
Merci pour votre réponse Du coup j’ai monté 82 m c’est ce que j’avais compris d’après les explications donc il faut que je démonte toutes mes côtes et que je monte 140 m avec les mêmes diminutions que le dos En fait jusqu’au emmanchures c’est identique Merci
03.06.2026 - 09:22DROPS Design answered:
Bonjour Isabelle, tout à fait, vous tricotez le devant exactement comme le dos, la seule différence est que l'encolure va être différente: commencée avant pour qu'elle soit plus profonde. Bon tricot!
04.06.2026 - 08:50
 Marilena wrote:
Vielen Dank für die tolle Anleitung🙏hat alles super geklappt👍 Liebe Grüsse Marilena
02.06.2026 - 21:24
Isabelle wrote:
Bonsoir J’ai monté mes 82 m pour mon devant comme il est indiqué de tricoter comme pour le dos jusqu’à 44 cm Du coup il n’y a pas les diminutions au premier rang après les côtes comme le dos Je monte tout droit avec le diagramme jusqu’à 44 cm ? Sans rien faire
02.06.2026 - 21:19DROPS Design answered:
Bonjour Isabelle, vous tricotez exactement comme pour le dos: vous montez les mailles comme pour le dos, vous tricotez les côtes comme pour le dos, vous diminuez après les côtes comme pour le dos, vous tricotez ensuite le point fantaisie comme pour le dos et vous formez les emmanchures comme pour le dos autrement dit, vous faites tout comme pour le dos jusqu'à ce qu'il reste les 82 m après les emmanchures et vous tricotez jusqu'à 44 cm de hauteur totale pour former l'encolure devant. Bon tricot!
03.06.2026 - 08:46
Isabelle wrote:
Super ouf mon dis est terminé merci pour votre réponse j’ai bien effectué l’épaule avec vos indications et c’était ok J’ai commencé mon devant donc votre aide me sera encore précieuse pour progresser Merci
02.06.2026 - 21:12
|
||||||||||
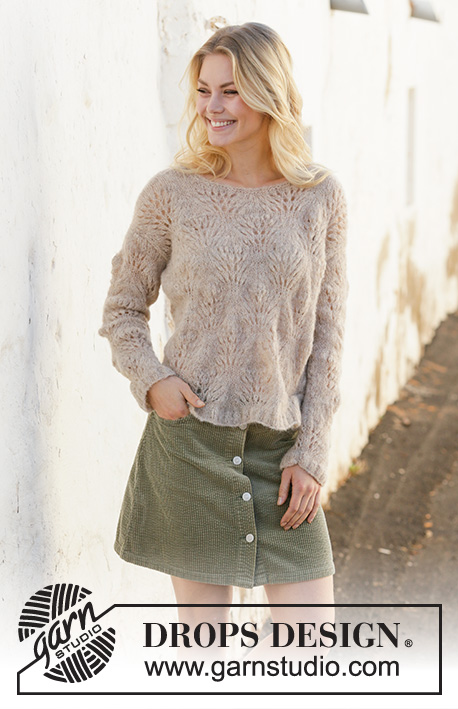
Footprints in the Sand#footprintsinthesandsweater |
||||||||||
 |
 |
|||||||||
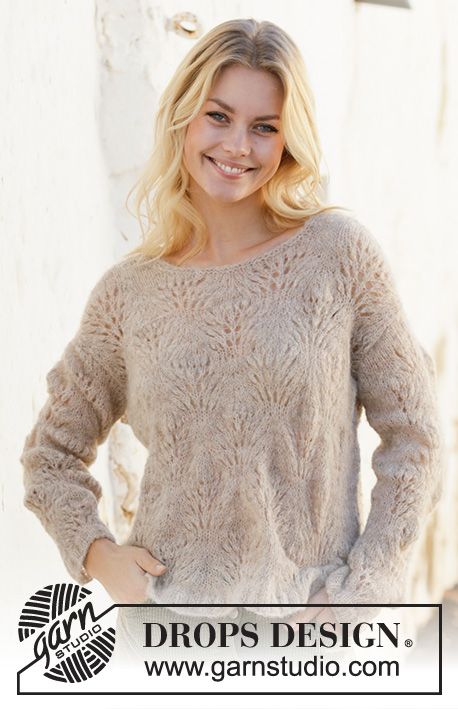
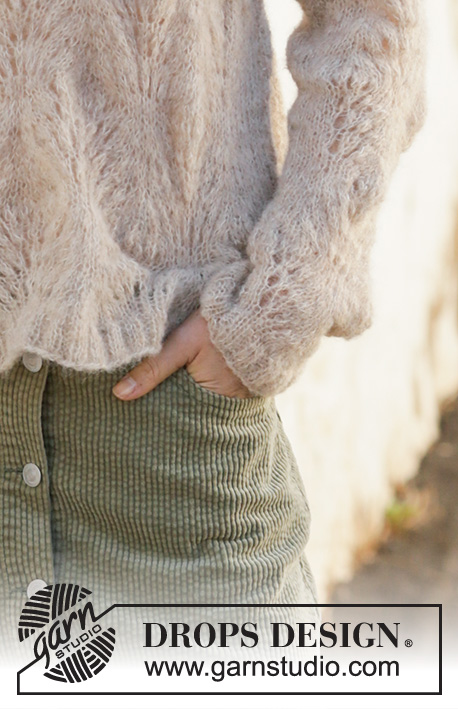
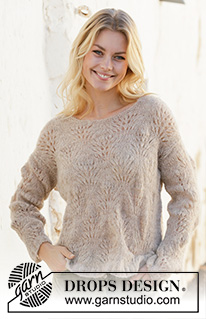
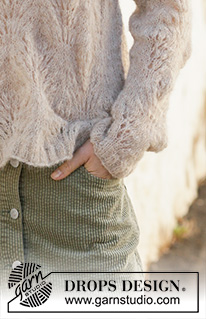
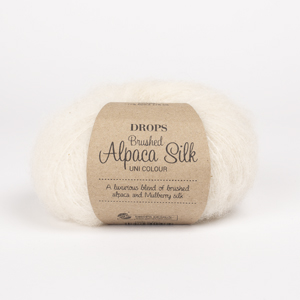
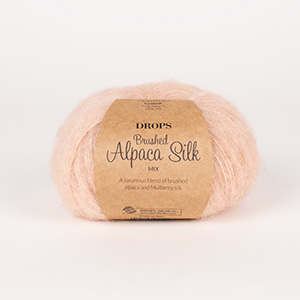
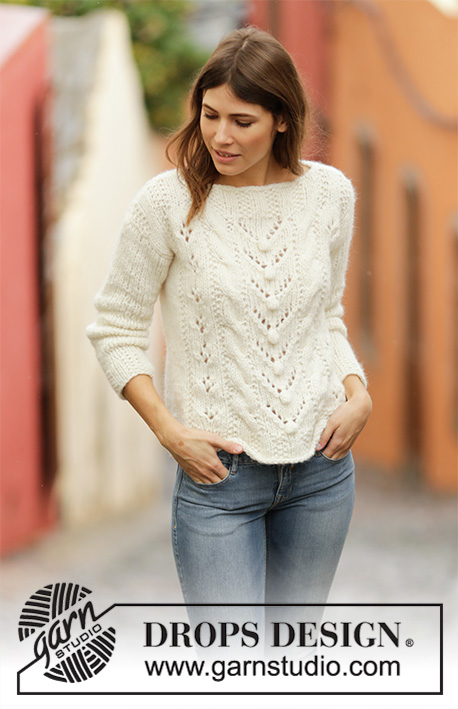
Knitted jumper with wave pattern in DROPS Brushed Alpaca Silk. Sizes S - XXXL.
DROPS 202-3 |
||||||||||
|
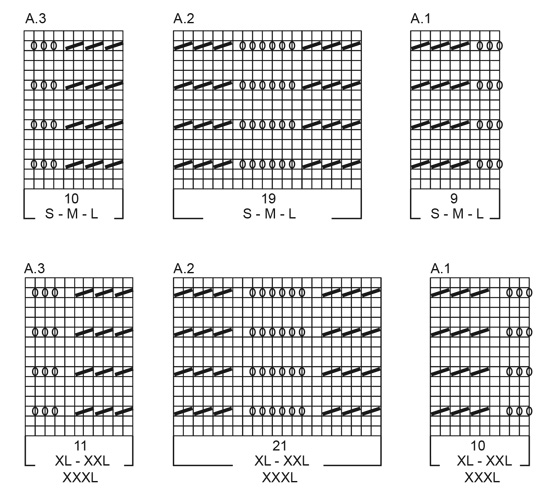
------------------------------------------------------- EXPLANATIONS FOR THE PATTERN: ------------------------------------------------------- RIDGE/GARTER STITCH (worked back and forth): Knit all rows. 1 ridge in height = Knit 2 rows. RIDGE/GARTER STITCH (worked in the round): 1 ridge in height = 2 rounds, i.e. knit 1 round and purl 1 round. PATTERN: See diagrams A.1 to A.3. Choose diagram for your size. The diagrams show all the rows in the pattern seen from the right side. DECREASE TIP (evenly spaced): To work out how to decrease evenly, count the total number of stitches on the needle (e.g.124 stitches) minus edge stitches (= 2 stitches) and divide the remaining stitches by number of decreases to be made (e.g. 36) = 3.38. In this example, decrease by alternately knitting together each 2nd and 3rd stitch and each 3rd and 4th stitch. INCREASE TIP (for sleeves): Increase 1 stitch by making 1 yarn over inside the 1 edge stitch on each side. On the next row work the yarn overs twisted to avoid holes. ------------------------------------------------------- START THE PIECE HERE: ------------------------------------------------------- JUMPER - SHORT OVERVIEW OF THE PIECE: The piece is worked back and forth with circular needle, bottom up and sewn together to finish. BACK PIECE: Cast on 124-132-140-156-172-180 stitches (including 1 edge stitch on each side) with circular needle size 4 mm and Brushed Alpaca Silk. Purl 1 row from the wrong side, then work rib from the right side as follows: 1 edge stitch in GARTER STITCH – read description above, (knit 2, purl 2) until there are 3 stitches left, knit 2 and 1 edge stitch in garter stitch. Continue this rib back and forth for 3 cm – adjust so that the next row is worked from the right side. Knit 1 row with 1 edge stitch in garter stitch on each side where you decrease 36-38-40-44-50-50 stitches evenly spaced – read DECREASE TIP = 88-94-100-112-122-130 stitches. Work 1 row stocking stitch back from the wrong side with 1 edge stitch in garter stitch on each side. Change to circular needle size 5.5 mm. Now work pattern – choose diagram for your size, as follows: 1 edge stitch in garter stitch, stocking stitch over the next 5-8-11-13-18-22 stitches, A.1 over the next 9-9-9-10-10-10 stitches, A.2 over the next 57-57-57-63-63-63 stitches (= 3 repeats in width), A.3 over the next 10-10-10-11-11-11 stitches, 5-8-11-13-18-22 stitches in stocking stitch and 1 edge stitch in garter stitch. Continue back and forth like this until the diagrams have been completed in height. REMEMBER THE KNITTING TENSION! Now work pattern – choose diagram for your size, as follows: 1 edge stitch in garter stitch, 5-8-11-13-18-22 stitches in stocking stitch, A.2 over the next 76-76-76-84-84-84 stitches (= 4 repeats in width), 5-8-11-13-18-22 stitches in stocking stitch and 1 edge stitch in garter stitch. When the diagram has been completed in height, continue this pattern, i.e. work first A.1, A.2 and A.3 as described at the beginning of the piece and then 4 repeats of A.2 in width so that the wave pattern is displaced each time it is worked in height. The remaining stitches are worked in stocking stitch and 1 edge stitch in garter stitch on each side. When the piece measures 34-35-36-37-38-39 cm from the cast-on edge (measure from where the rib at the beginning of the piece slopes downwards/is longest) cast off for armholes in each side as follows: Cast off 4 stitches 1-1-1-1-2-2 times, 2 stitches 0-1-1-2-2-3 times and 1 stitch 1-2-3-3-3-4 times (= 5-8-9-11-15-18 stitches cast off on each side) = 78-78-82-90-92-94 stitches. When the armhole measures approx. 13-14-15-16-17-18 cm from where the casting off began (there is approx. 3 cm left to finished length) cast off the middle 26-26-28-28-30-30 stitches from the right side at the same time as the 2 first and 2 last of these 26-26-28-28-30-30 stitches are knitted together before casting off (= 24-24-26-26-28-28 stitches for neck) = 26-26-27-31-31-32 stitches for shoulder on each side. Continue with as many whole repeats as there is room for in width and the remaining stitches are worked in stocking stitch with 1 edge stitch in garter stitch on each side. AT THE SAME TIME on the next row from the neck cast off 1 stitch = 25-25-26-30-30-31 stitches for shoulder. When the armhole measures 16-17-18-19-20-21 cm work stocking stitch with 1 edge stitch in garter stitch on each side where you decrease 2-2-3-3-3-2 stitches evenly on row = 23-23-23-27-27-29 stitches. Cast off. Make sure that the cast-off edge is not tight. Work the other shoulder in the same way. The piece measures a total of 50-52-54-56-58-60 cm from the shoulder down. FRONT PIECE: Cast on, work pattern and cast off for the armhole in the same way as for the back piece = 78-78-82-90-92-94 stitches. When the piece measures 41-43-44-46-47-49 cm from the cast-on edge work the next row from the right side as follows: Work pattern as before over the first 31-31-33-37-37-38 stitches, knit the next 16-16-16-16-18-18 stitches and at the same time decrease 2 stitches evenly (= 14-14-14-14-16-16 stitches) and place these stitches 14-14-14-14-16-16 on a thread for the neck, work pattern as before over the remaining 31-31-33-37-37-38 stitches. Then work each shoulder separately. Continue with as many repeats of the pattern in width as there is room for and the remaining stitches are worked in stocking stitch with 1 edge stitch in garter stitch on each side. AT THE SAME TIME cast off stitches for the neck on each row as follows: Cast off 3 stitches 1 time, 2 stitches 1 time and 1 stitch 1-1-2-2-2-2 times = 25-25-26-30-30-31 stitches on shoulder. When the armhole measures 16-17-18-19-20-21 cm work stocking stitch with 1 edge stitch in garter stitch on each side where you decrease 2-2-3-3-3-2 stitches evenly on row = 23-23-23-27-27-29 stitches. Cast off. Make sure that the cast-off edge is not tight. Work the other shoulder in the same way. The piece measures a total of 50-52-54-56-58-60 cm from the shoulder down. SLEEVES: The sleeves are worked back and forth with circular needle, bottom up. Cast on 54-54-58-62-66-66 stitches with circular needle size 4 mm and Brushed Alpaca Silk. Purl 1 row from the wrong side and then work rib from the right side as follows: 1 edge stitch in garter stitch, (knit 2, purl 2) until there is 1 stitch left on row and 1 edge stitch in garter stitch. Continue this rib back and forth for 3 cm – adjust so that the next row is worked from the right side. Knit 1 row with 1 edge stitch in garter stitch on each side where you decrease 12-10-12-14-16-16 stitches evenly spaced = 42-44-46-48-50-50 stitches. Work 1 row stocking stitch back from the wrong side with 1 edge stitch in garter stitch on each side. Change to circular needle size 5.5 mm. READ THIS WHOLE SECTION BEFORE CONTINUING. Work pattern – choose diagram for your size, as follows: 1 edge stitch in garter stitch, 1-2-3-2-3-3 stitches in stocking stitch, A.1 over the next 9-9-9-10-10-10 stitches, A.2 over the next 19-19-19-21-21-21 stitches, A.3 over the next 10-10-10-11-11-11 stitches, 1-2-3-2-3-3 stitches stocking stitch and 1 edge stitch in garter stitch. When A.1 to A.3 have been completed in height, work 2 repeats of A.2 in width – choose diagram for your size, over the 38-38-38-42-42-42 stitches in the pattern. When the 2 repeats of A.2 have been completed in height, work A.1, A.2 and A.3 as before over the 38-38-38-42-42-42 stitches with pattern. Continue this pattern upwards, i.e. work alternately in height first A.1, A.2 and A.3 and then A.2 (2 repeats in width). AT THE SAME TIME when the piece measures 9-8-7-7-6-6 cm increase 1 stitch on each side of the piece – read INCREASE TIP (for sleeves). Increase as follows in the different sizes: Size S: Increase every 8 cm a total of 5 times. Size M: Increase alternately every 5 cm and 6 cm a total of 7 times. Size L: Increase alternately every 5 cm and 6 cm a total of 7 times. Size XL: Increase alternately every 4 cm and 5 cm a total of 8 times. Size XXL Increase every 4 cm a total of 9 times. Size XXXL: Increase every 3 cm a total of 11 times. When all the increases are finished there are 52-58-60-64-68-72 stitches on the needle. The new stitches are worked in stocking stitch. When the piece measures 45-45-44-42-41-39 cm (shorter measurements in larger sizes due to wider yoke) continue the pattern as before and cast off stitches for the sleeve cap on the beginning of each row on each side as follows: Cast off 4 stitches 1 time, 2 stitches 2 times, 1 stitch 0-2-2-2-2-4 times, 2 stitches 2-2-4-5-6-5 times and 4 stitches 2-2-1-1-1-1 time = 12-14-16-16-16-20 stitches left. Cast off the remaining stitches. The sleeve measures approx. 52-53-53-52-52-52 cm. Work the other sleeve in the same way. ASSEMBLY: Sew shoulder seams with grafting stitches. Sew sleeves to body inside the 1edge stitch in garter stitch on body and inside the cast-off edge on sleeves. Make sure that the seam is not tight! Sew sleeve and side seams in one go. Repeat on the other side. NECK: Start mid top of shoulder and knit up 74-74-82-82-88-88 stitches with Brushed Alpaca Silk and circular needle size 4 mm. Work 2 ridges and cast off. |
||||||||||
Diagram explanations |
||||||||||
|
||||||||||
 |
||||||||||
 |
||||||||||
Have you finished this pattern?Tag your pictures with #dropspattern #footprintsinthesandsweater or submit them to the #dropsfan gallery. Do you need help with this pattern?You'll find 15 tutorial videos, a Comments/Questions area and more by visiting the pattern on garnstudio.com. © 1982-2026 DROPS Design A/S. We reserve all rights. This document, including all its sub-sections, has copyrights. Read more about what you can do with our patterns at the bottom of each pattern on our site. |
||||||||||






With over 40 years in knitting and crochet design, DROPS Design offers one of the most extensive collections of free patterns on the internet - translated to 17 languages. As of today we count 333 catalogues and 12525 patterns translated into English (UK/cm). 12525
We work hard to bring you the best knitting and crochet have to offer, inspiration and advice as well as great quality yarns at incredible prices! Would you like to use our patterns for other than personal use? You can read what you are allowed to do in the Copyright text at the bottom of all our patterns. Happy crafting!
Post a comment to pattern DROPS 202-3
We would love to hear what you have to say about this pattern!
If you want to leave a question, please make sure you select the correct category in the form below, to speed up the answering process. Required fields are marked *.