Comments / Questions (11)
![]() Claudia wrote:
Claudia wrote:
Non capisco il motivo per cui bisogna dividere il lavoro a metà. Gli altri modelli, ad es. Blue Paris/From Grace non lo prevedono. Grazie per la spiegazione
08.06.2025 - 15:37DROPS Design answered:
Buonasera Claudia, questo modello è stato progettato in questo modo dalle nostre designers. Buon lavoro!
09.06.2025 - 23:58
![]() Claudia wrote:
Claudia wrote:
Ich habe ein Frage zu den verkürzten Reihen. Ich habe mit der Rückreihe begonnen und bin bei den letzten 10 Maschen angelangt. Nun bin ich wieder an einer Rückreihe und man soll nun entgegengesetzte Maschen stricken. Wenn ich nun 10 Maschen stricke komme ich an eine Umschlagmasche aus der letzten Reihe an und soll dort wieder einen Umschlag machen. Strickt man dann erst die Umschlagmasche und macht danach eine neue Umschlagmasche und wendet die Arbeit?
09.05.2025 - 16:09DROPS Design answered:
Liebe Claudia, es liegt an der Technik, die Sie für die verkürzten Reihen benutzt haben, Hauptsache ist jetzt, daß Sie Immer 10 Maschen mehr stricken. Viel Spaß beim Stricken!
12.05.2025 - 08:54
![]() Anna wrote:
Anna wrote:
Witam. Chciałam zapytać o wzór warkocza w momencie przerabiania rzędów skróconych(razem z powrotnymi rzędami jest ich 22- więc jeżeli ostatni rząd przed rzędami skróconymi przerabiam motywem warkocza- to na końcu rzędów skróconych warkocz wypada mi o jeden rząd wcześniej niż w pełnych rzędach). Pytanie dotyczy rozmiaru S
06.12.2023 - 17:13DROPS Design answered:
Witaj Anno, dokładnie. Ta różnica nie będzie widoczna. Pozdrawiamy!
07.12.2023 - 15:20
![]() Enrica wrote:
Enrica wrote:
Non ho trovato la sezione in cui viene spiegato per dare al capo più larghezza sul dietro.
15.10.2023 - 08:54DROPS Design answered:
Buonasera Enrica, può trovare la sezione a ferri accorciati all'inizio del lavoro. Buon lavoro!
19.10.2023 - 23:31
![]() Tone Kurås wrote:
Tone Kurås wrote:
Når man skal gjøre forkortede pinner motsatt vei, dvs. starte med å strikke 10 m så vende, og gradvis øke til 60 m, skal man da også vende på samme måte som tidligere, dvs. med løkke rundt vendemaske eller skal man bare snu og strikke rett tilbake?
01.08.2022 - 14:03DROPS Design answered:
Hei Tone, Ja, fortsette å vende på samme måten, slik at det ikke blir hull på enden av alle forkortede pinner. God fornøyelse!
02.08.2022 - 06:55
![]() Christiane wrote:
Christiane wrote:
Après les rangs raccourcis, les torsades ne se croisent plus sur le même rang, est-ce normal ?
04.05.2019 - 13:19DROPS Design answered:
Bonjour Christiane, (edit réponse) - pouvez-vous nous indiquer la taille que vous tricotez? les torsades devraient tomber juste. Merci!
06.05.2019 - 09:57Maria wrote:
In short rows after the row of 10 sts should I cintinue short rows increasing by ten till 60 sts or make again the whole rows?
20.08.2018 - 10:50DROPS Design answered:
Hi Maria, Once you have 10 stitches left on the row, the short rows are finished. You then continue by working complete rows. Happy knitting!
21.08.2018 - 07:25
![]() Marie wrote:
Marie wrote:
J'ai tricoté les rangs raccourcis comme expliqué mais alors le croisement des torsades ne se fait plus sur le même rang. Comment faire alors lorsqu'elles vont se rejoindre pour l'autre manche ?
18.03.2018 - 16:50
![]() Marie wrote:
Marie wrote:
Bonjour, pour les rangs raccourcis, il faut diminuer 10 m à chaque fois jusqu'à ce qu'il reste 10 m donc 6 rangs aller-retour en rangs raccourcis. Ne faut-il pas continuer en ajoutant 10 m à chaque fois pour la symétrie du tricot du dos ?
14.03.2018 - 09:13
![]() Natascha Eijkmans wrote:
Natascha Eijkmans wrote:
Ik ben na de opzet en breien van de ribbelpatroon het spoor al bijster. Hier zit volgens mij een fout in. Ik weet dat ik zou moeten bijmaken, maar dat staat er nergens. Wel dat ik voor ..... en achter twee steken moet breien, maar het zit op een rondbreinaald ? Daarbij kan ik ook niet terugvinden dat ik de verkorte toer 2x zou moeten maken, wat ik wel verwacht daar het patroon opgesplitst is. Dus een keer op en een keer af, toch?
19.01.2017 - 14:17
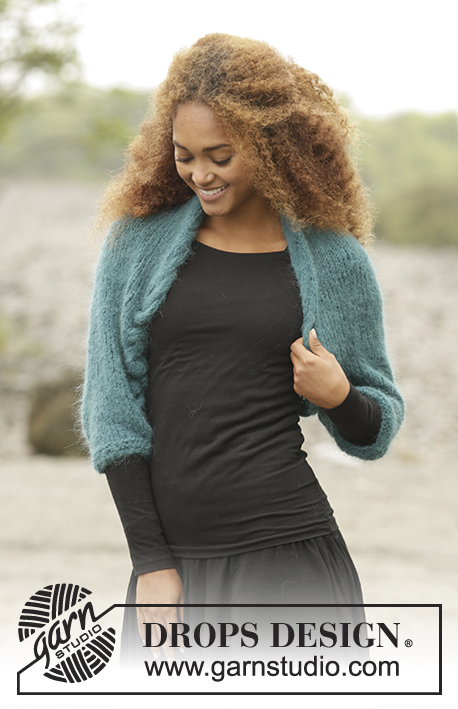
Irish Eyes |
||||||||||||||||
 |
 |
|||||||||||||||
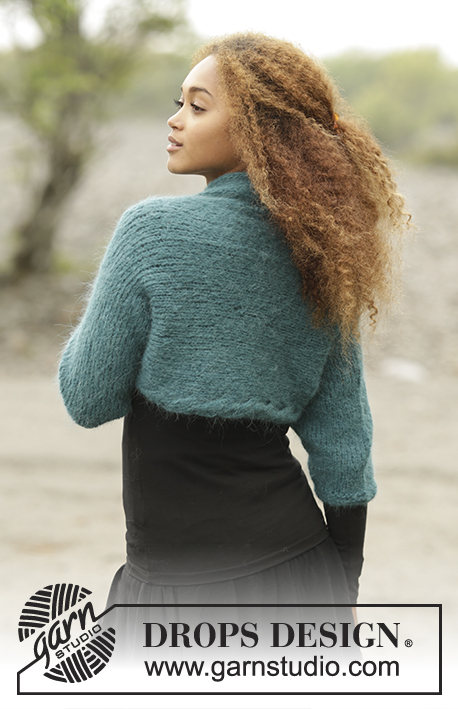
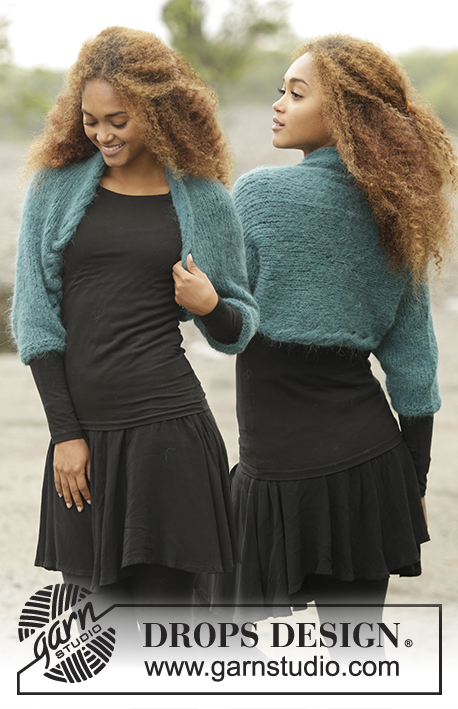
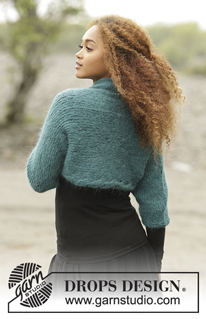
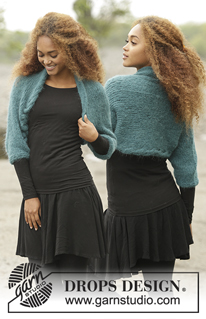
Knitted shoulder piece in DROPS Melody with cables, worked sideways. Size: S - XXXL.
DROPS Extra 0-1352 |
||||||||||||||||
|
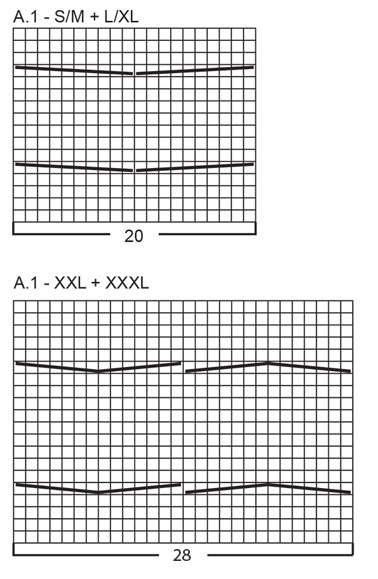
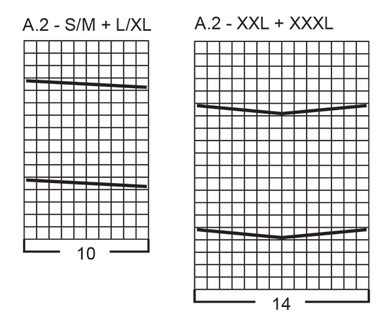
GARTER ST (worked in the round): 1 ridge = 2 rounds. * K 1 round and P 1 round *, repeat from *-*. PATTERN: See diagrams A.1 to A.3 – choose diagram for correct size. The diagrams show all rows in pattern seen from RS. INCREASE TIP (applies to sleeve): Inc 1 st on each side of A.1 mid under sleeve. Inc 1 st by making 1 YO. On next round K YOs twisted to avoid holes. DECREASE TIP (applies to sleeves): Dec 1 st on each side of A.1 mid under sleeve. Dec as follows before A.1: Beg 2 sts before A.1 and K 2 tog. Dec as follows after A.1: Slip 1 st as if to K, K 1, psso. SHORT ROWS: Beg on first row from WS and work as before over the first 60-62-64-68 sts, hold yarn at the front of piece (i.e. towards you). Slip 1 st as if to K, place yarn on the back of piece between sts on right and left needle, pass the slipped st back on left needle, place yarn to the front of piece again, turn piece (a loop is formed around the turning st), work back from RS as before. Turn piece, work as before over the first 50-52-54-58 sts, work short rows as explained above, turn and work back from RS as before. Continue back and forth over 10 sts less on every turn until 10-12-14-18 sts remain on row, turn and work back and forth the same way over the last sts. Now, work short rows reversed, ie: work over 10 sts more on every turn, until you have worked over the first 60-62-64-68 sts again. AT THE SAME TIME: When working over a turning st, work as follows (from WS): Work as before until turning st. Work the turning st P twisted, insert left needle from below and up into loop around turning st, slip loop on left needle and P 2 twisted tog, continue to work as before. ---------------------------------------------------------- SHOULDER PIECE: Worked sideways from arm to arm. Work sleeve in the round on double pointed needles, switch to circular needle when needed, work body back and forth on circular needle. Cast on 36-38-40-44 sts on double pointed needles size 7 mm with Melody. Work 3 ridges in GARTER ST - see explanation above. Work next round as follows: Work 2 sts in each of the first 5-5-7-7 sts on round, K until 5-5-7-7 sts remain and work 2 sts in each of the last 5-5-7-7 sts on round = 46-48-54-58 sts. Switch to double pointed needle size 8 mm and K 1 round but finish when 10-10-14-14 sts remain on round - now round beg here. Work A.1 over the first 20-20-28-28 sts (choose diagram for correct size) and stocking st over the remaining sts. AT THE SAME TIME when piece measures 4 cm, inc 1 st on each side of A.1 - READ INCREASE TIP (= 2 sts inc). Inc like this every 1½ cm 12 times in total in all sizes = 70-72-78-82 sts. REMEMBER THE KNITTING TENSION When piece measures 24-23-23-22 cm, divide piece in the middle of A.1 and work piece back and forth on circular needle as follows: (1st row = RS): Work A.2 over the first 10-10-14-14 sts (choose diagram for correct size), work in stocking st until 10-10-14-14 sts remain and finish with A.3. Continue like this until piece measures 55-57-59-61 cm - insert 1 marker (half way in piece). Now work SHORT ROWS - see explanation above, to give the garment more width at the back. After short rows work back and forth as before over all sts. When piece measures 31-34-36-39 cm from marker (measured at the shortest, i.e. do not measure over short rows – and adjust after one whole repetition of A.2/A.3 vertically), insert 1 new marker – NOW MEASURE PIECE FROM HERE. Now work in the round again over all sts (continue A.1 over the middle 20-20-28-28 sts as before and round beg before A.1). When piece measures 3½-2½-2½-1½ cm from marker, dec 1 st on each side of A.1 – READ DECREASE TIP (= 2 sts dec). Dec like this every 1½ cm 12 times in total = 46-48-54-58 sts (switch to double pointed needles when dec). When piece measures 20-19-19-18 cm from marker (dec should be finished), work all sts in cable K tog 2 by 2 = 36-38-40-44 sts remain on needle. Switch to double pointed needles size 7 mm, work 3 ridges and cast off. |
||||||||||||||||
Diagram explanations |
||||||||||||||||
|
||||||||||||||||
 |
||||||||||||||||
 |
||||||||||||||||
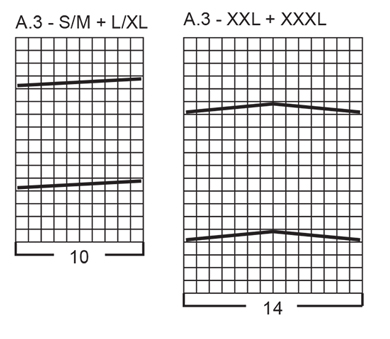 |
||||||||||||||||
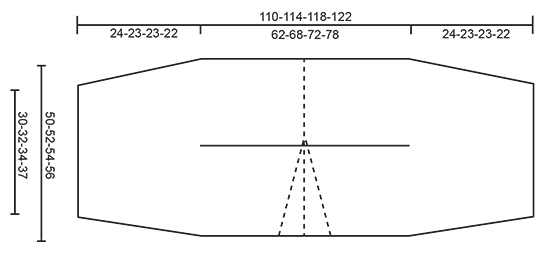 |
||||||||||||||||
Have you finished this pattern?Tag your pictures with #dropspattern or submit them to the #dropsfan gallery. Do you need help with this pattern?You'll find 21 tutorial videos, a Comments/Questions area and more by visiting the pattern on garnstudio.com. © 1982-2026 DROPS Design A/S. We reserve all rights. This document, including all its sub-sections, has copyrights. Read more about what you can do with our patterns at the bottom of each pattern on our site. |
||||||||||||||||




Post a comment to pattern DROPS Extra 0-1352
We would love to hear what you have to say about this pattern!
If you want to leave a question, please make sure you select the correct category in the form below, to speed up the answering process. Required fields are marked *.