
Popular categories
Looking for a yarn?












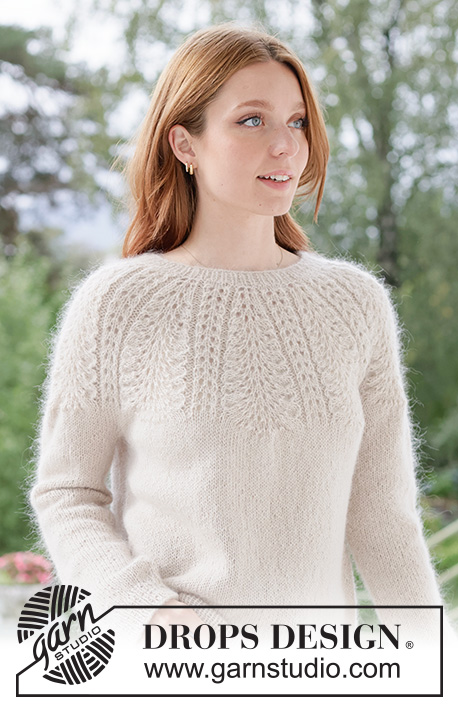
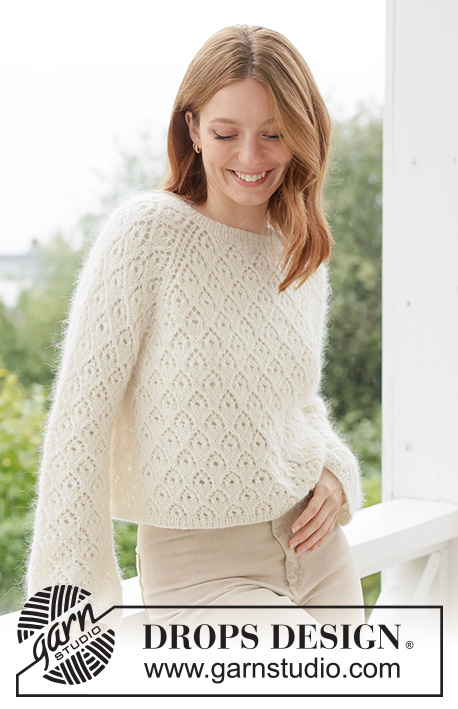



























Comments / Questions (65)
 Victoria wrote:
Strikkes størrelse M og skal begynne på ermene. Jeg fortsetter som før på de 59 maskene men skjønner ikke hvilket mønster de 11 «nye» maskene skal følge?
23.08.2026 - 15:02DROPS Design answered:
Hei Victoria, De nye maskene under ermet strikkes i glattstrikk. Hilsen Drops Team.
25.08.2026 - 06:35
 MARIE-FRANCE ALTMAYER wrote:
Le modèle du nr 266.2 que je veux exécuter je l\'ai édité le 30 juin 2026 Merci pour votre réponse Cordialement Marie-France Altmayer
22.08.2026 - 14:38
Marie-france Altmayer wrote:
Bonjour Je viens de finir les 3 ces de mon col et je m\'aperçois qu\'il me manque en posant mes marqueurs 10 mailles Cordialement Marie-France Altmayer
21.08.2026 - 21:26DROPS Design answered:
Bonjour Mme Altmayer, notez que les 7 mailles de bordure devant sont comprises dans le nombre de mailles de chaque devant, avant le 1er et après le dernier marqueur et que chacun des 4 marqueurs doit être placé dans une maille (et pas entre les mailles), vous aurez ainsi par ex en XS: 17+1+19+1+19+1+19+1+17=95. Bon tricot!
24.08.2026 - 07:41
 Elle wrote:
Hi, volgens mij is voor maat S de verdeling van de steken voor het breien van de pas verkeerd in de Nederlandse versie. De Engelse (UK) versie lijkt wel te kloppen (21-19-27-19-21, met 4 keer een steek voor de markeerdraad, in totaal 111 steken). Ik heb het niet voor de andere maten gecheckt maar misschien goed om dit even na te gaan :)
03.08.2026 - 22:49
 Frida wrote:
Är klar med alla ökningar för storlek S och ska nu sticka i etablerat mönster, vilka diagram är det? Om det är alla de diagrammen man stickat efter tidigare i ökningar, hur blir det nu när ökningarna är klara? Varma hälsningar
31.07.2026 - 19:36DROPS Design answered:
Hei Frida. Det diagrammet du har strikket mellom de diagrammene med økning, det bare gjentas flere ganger.mvh DROPS Design
10.08.2026 - 13:50
Lasserre Audrey wrote:
Bonjour je n'ai pas le bon nombre de mailles de départ sur les demi devant gauche et droite si je suis le diagramme. 25 mailles pour les 1/2 devants au départ du col et 18 mailles si je suis les diagrammes je ne comprends pas Merci
14.07.2026 - 15:12DROPS Design answered:
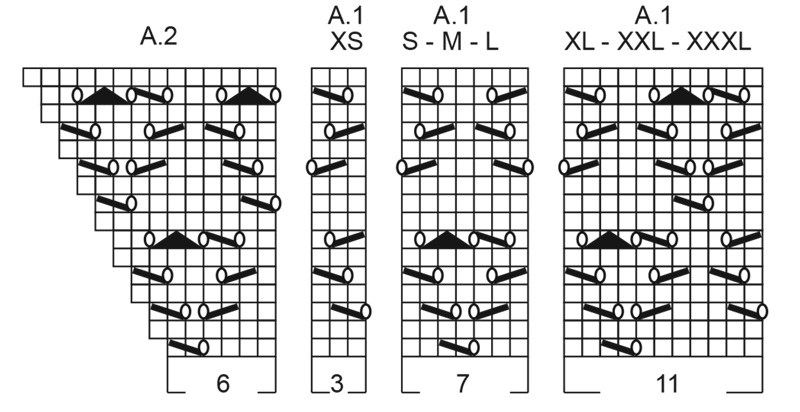
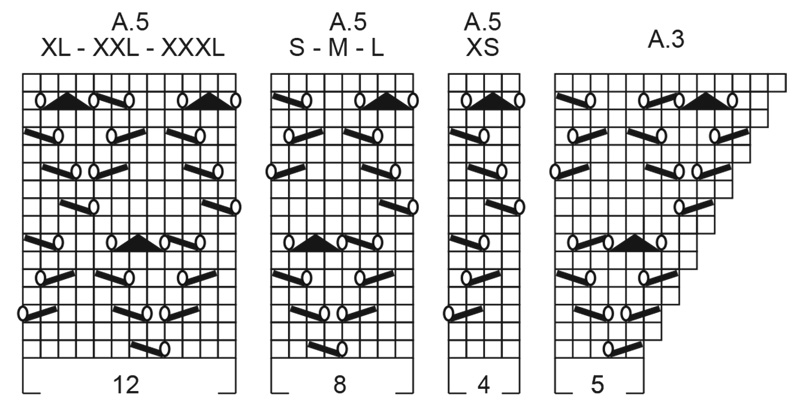
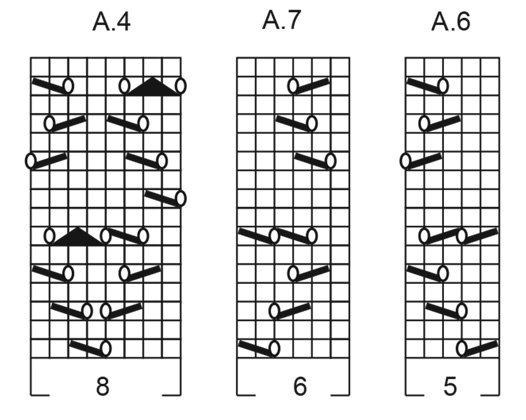
Bonjour Mme Lasserre, les 25 m de chaque devant vont se tricoter ainsi: 7 m de bordure devant, 1 m jersey, 11 m de A.1 et 6 m de A.2 = 7+1+11+6= 25 m pour le devant gauche et: 5 m de A.3, 12 m de A.5, 1 m jersey et 7 m de bordure devant =5+12+1+7=25 m pour le devant droit. Pour les manches vous devez avoir 19 m: 5 m de A.3 + 8 m de A.4 + 6 m de A.2 =5+8+6=19 m. Ceci pour les 3 dernières tailles. Bon tricot!
03.08.2026 - 08:00
Victoria wrote:
Hei, jeg skal begynne å strikke bol i størrelse M. Jeg får det ikke til å gå opp med mønsteret, begynner midt i rapporten. A1- 7 masker, A4- 176 masker og A5- 8 masker
12.07.2026 - 22:10DROPS Design answered:
Hei Victoria, Du har 207 masker på bolen i din størrelse: 7 stolpemasker, 1 maske glattstrikk, 7 masker A.1, strikk A.4 til det er 15 masker igjen (avslutte A.4 der du er i mønsteret på slutten av pinnen), 7 masker A.5, 1 maske glattstrikk og 7 stolpemasker. Hilsen, Drops Team.
13.07.2026 - 05:44
 Shamsu wrote:
The pattern looks really nice to wear
01.07.2026 - 18:07
Birgitta wrote:
Har kört fast efter att jag nu har 239 maskor i stl Medium. Här står det att jag ska sticka halva diagrammet 4 raglanökn. till 42 m på vänster framstycke. Jag har nu 38 m, men får inte det att gå jämt ut fram till raglanmaskan. A1 har 7 m , A2 har... A4 har.... osv Jag får inte ihop det 🤔
12.06.2026 - 09:03DROPS Design answered:
Hei Birgitta. Om du har 38 masker på vänster framstycke, så vil du få 42 masker når diagrammene strikkes ½ gang mer i høyden. Diagrammene består av 16 pinner = ½ gang mer i høyden = 8 pinner og det økes på annenhver pinne = 4 økninger. 38 masker + 4 økninger = 42 masker. De nye maskene strikkes fortløpende inn i mønsteret som vist i diagrammene. Sett maskemarkører mellom hvert diagram, så har du en bedre oversikt at du f.eks har riktig maskeantall etter hver økepinne. mvh DROPS Design
15.06.2026 - 07:14
Anneke wrote:
I am knitting size M. In the paragraph above 'dividing for body and sleeves' it says that on the front and back, there has been a total of 28 increases for raglan, which is the pattern 3 times in hight. Shouldn't that be 3 1/2 times, for size M?
05.06.2026 - 23:02DROPS Design answered:
Dear Anneke, in size M you should have worked 3 1/2 so 3 times 8 sts increased (3 repeats) + 1 time 4 sts increased (half a repeat) = you have increased a total of 24+4=28 times. Happy knitting!
08.06.2026 - 08:35
|
||||||||||||||||
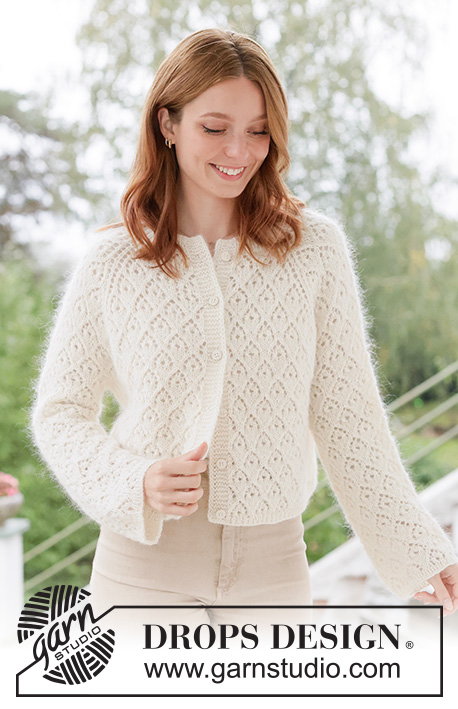
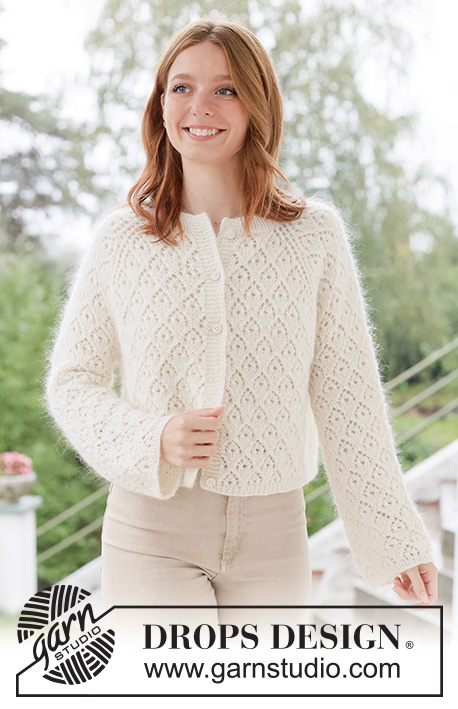
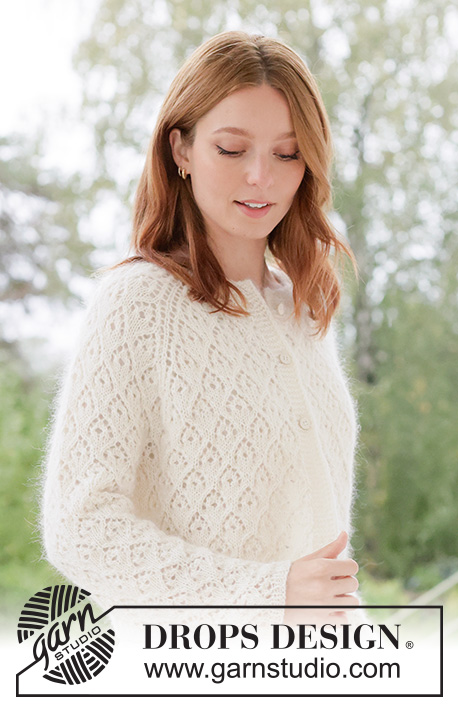
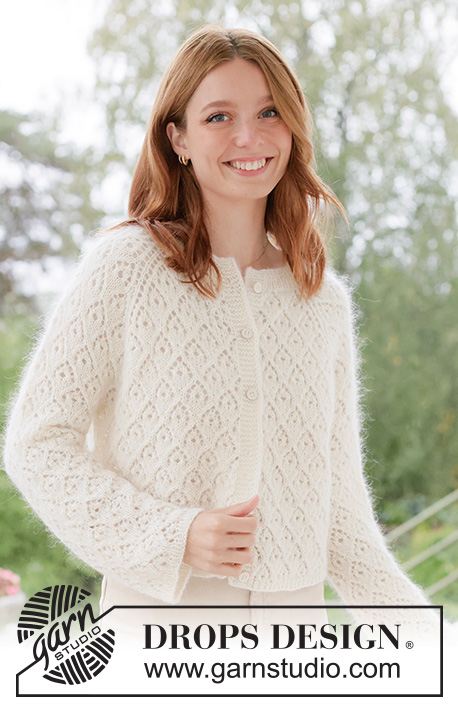
Lace Diamond Cardigan#lacediamondcardigan |
||||||||||||||||
 |
 |
|||||||||||||||
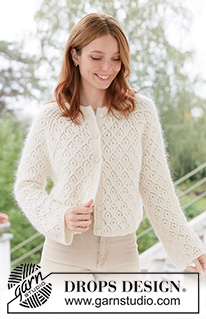
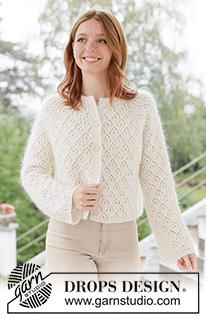
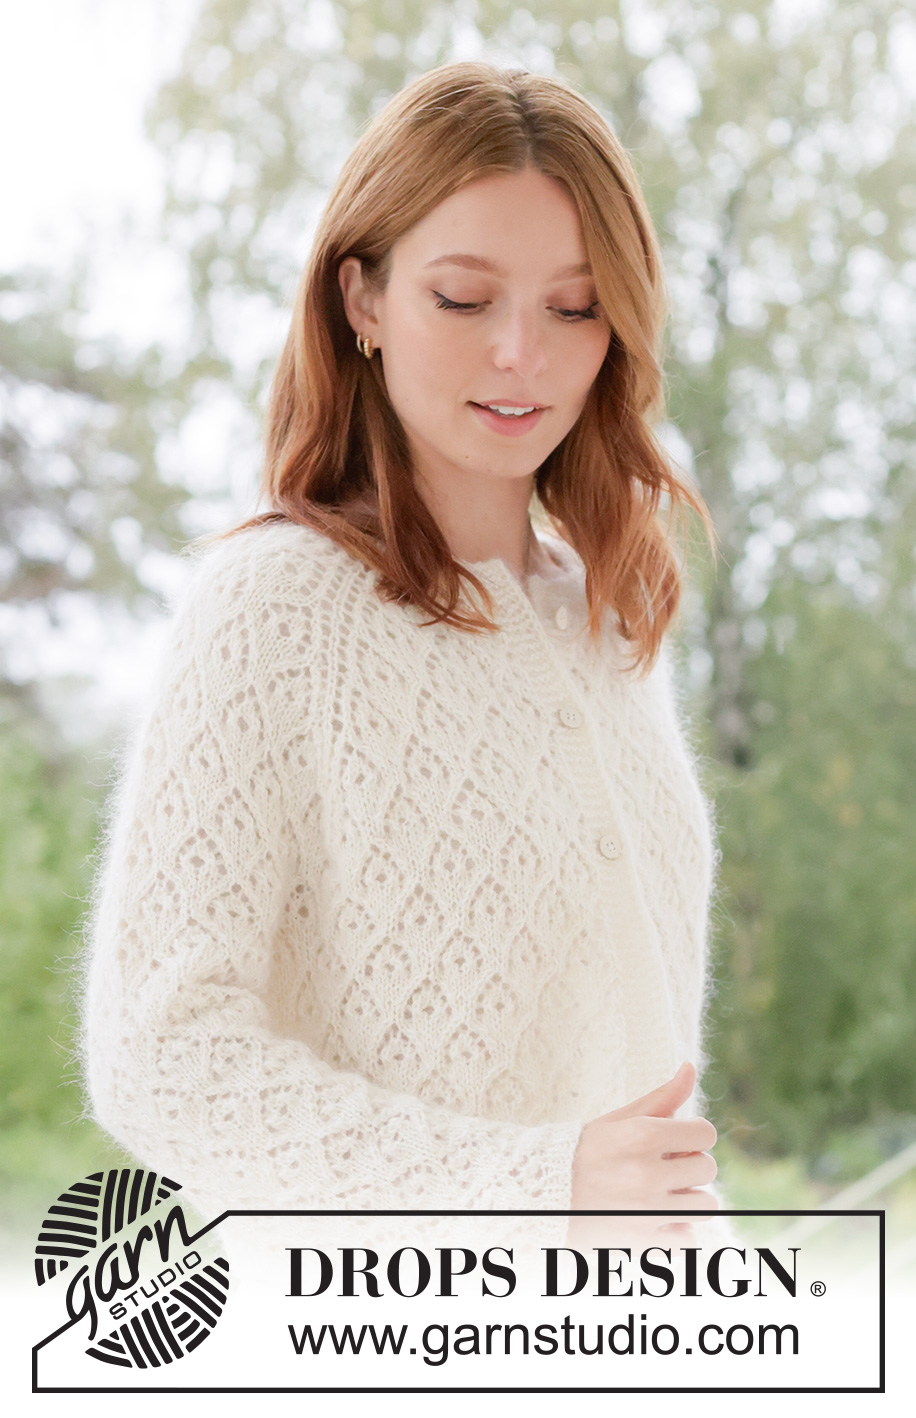
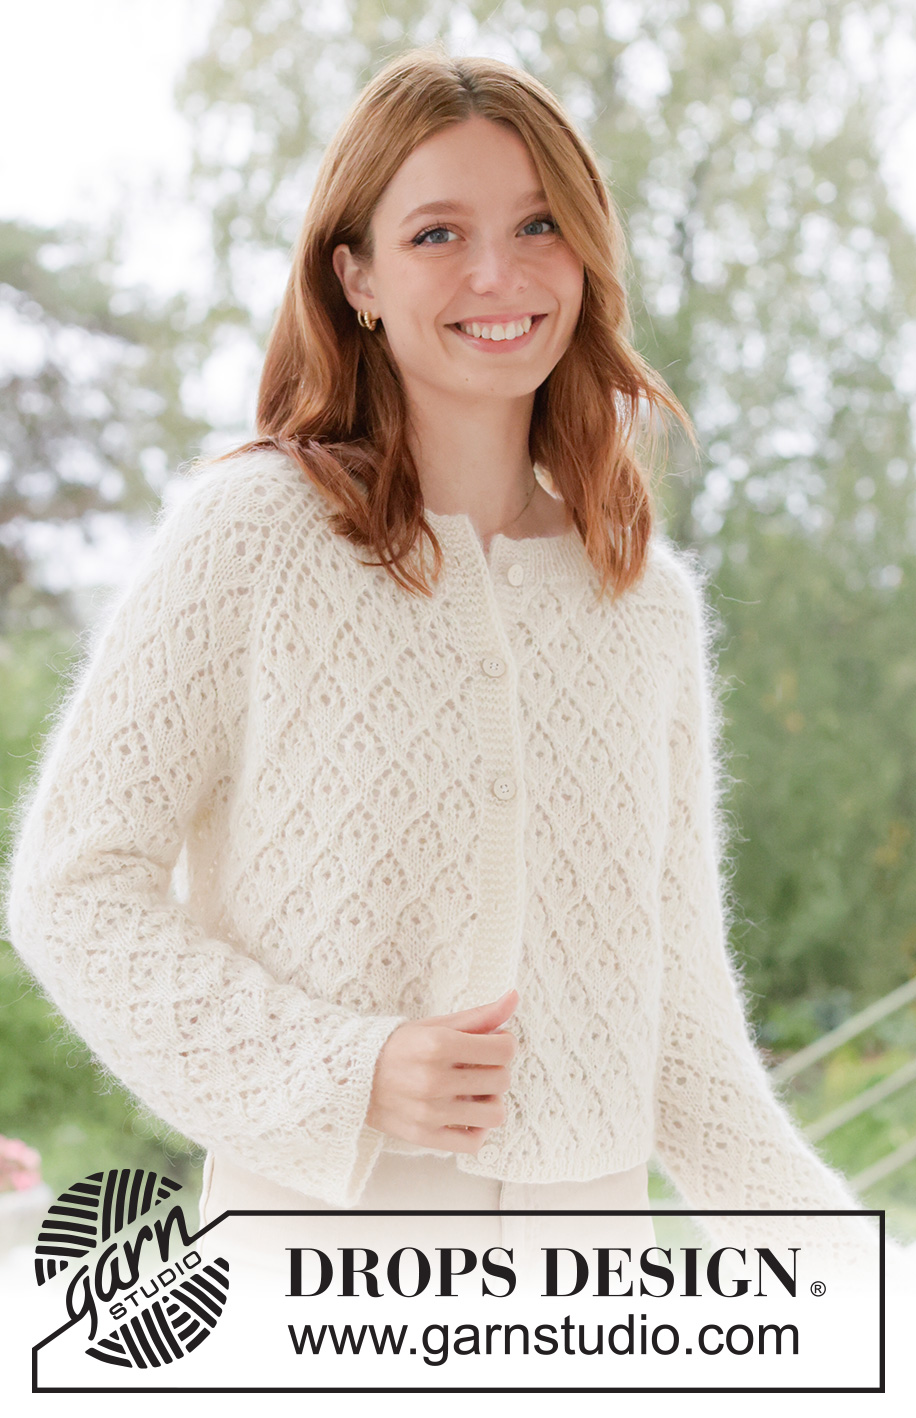
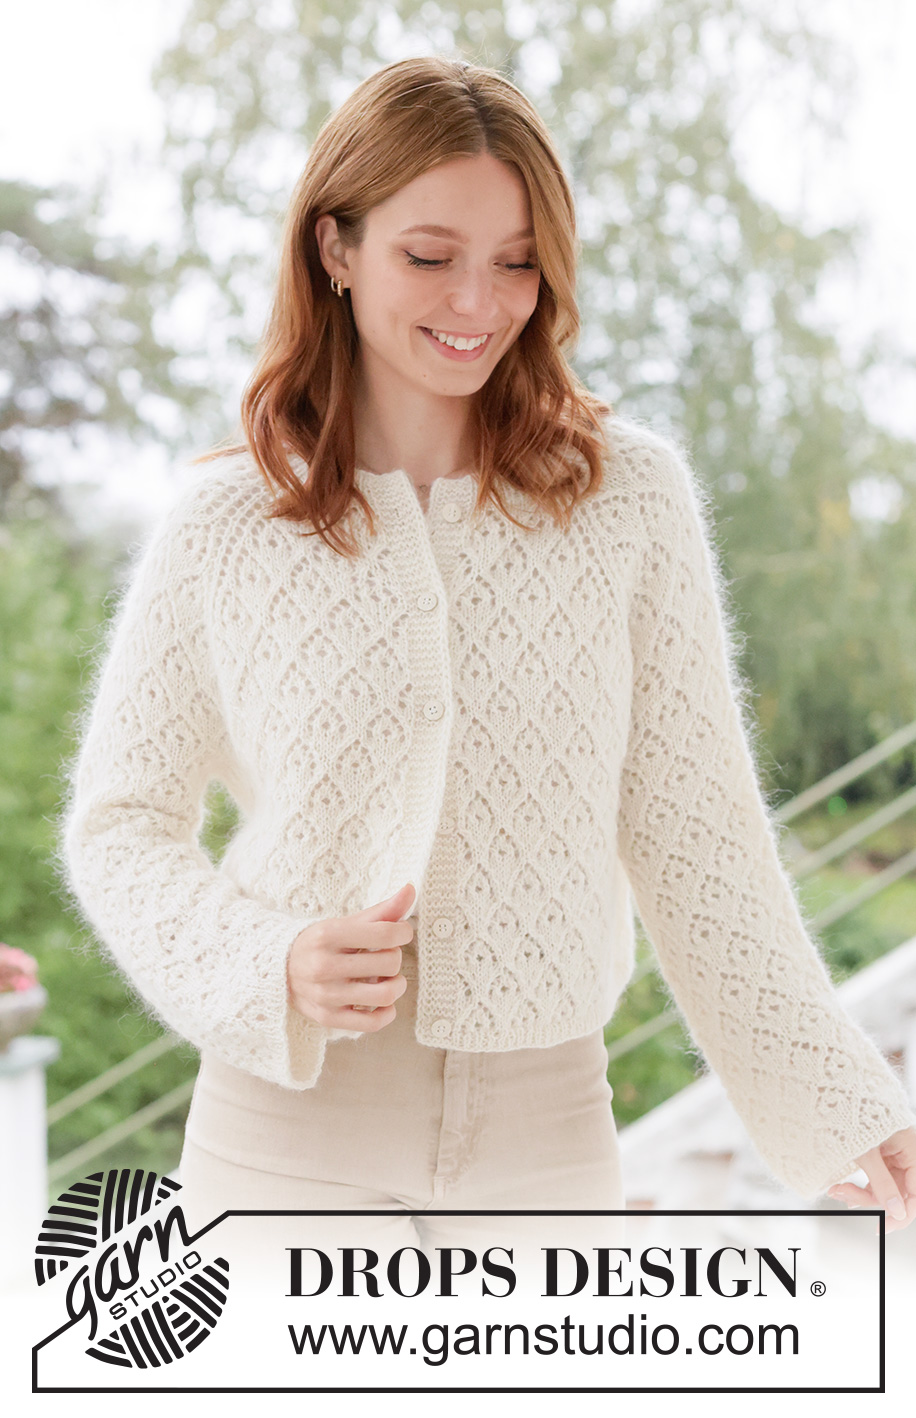
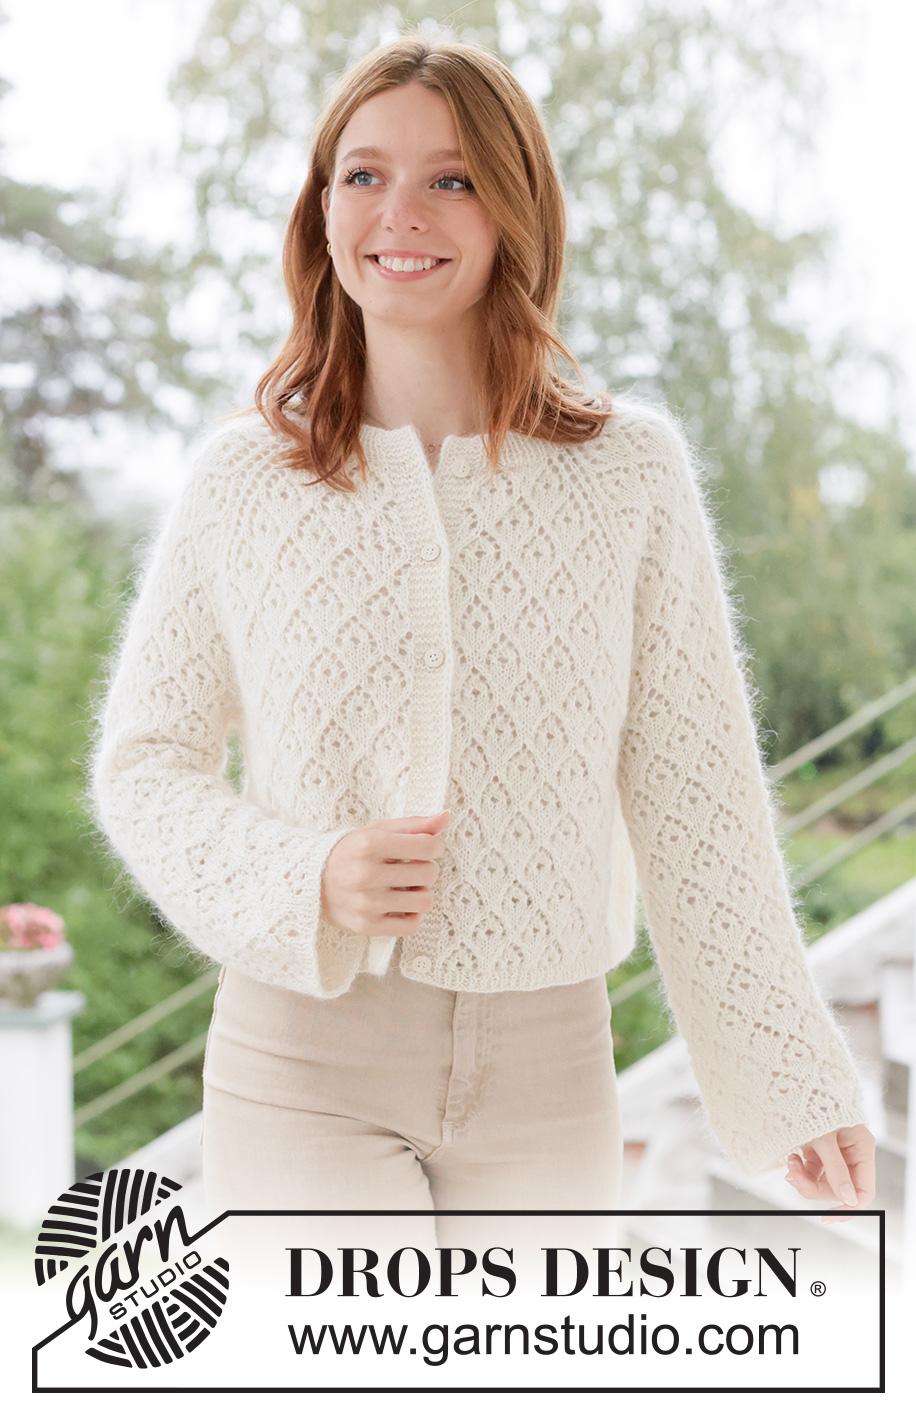
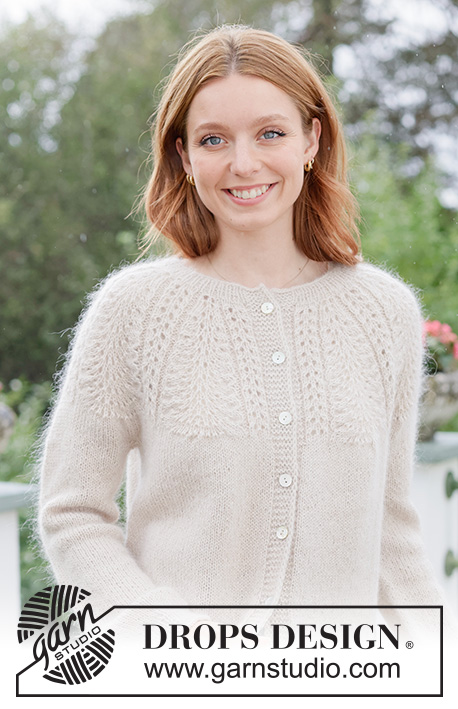
Knitted jacket in DROPS Alpaca and DROPS Kid-Silk. The piece is worked top down with raglan, lace pattern and bands with I-cord. Sizes XS - XXXL.
DROPS 266-2 |
||||||||||||||||
|
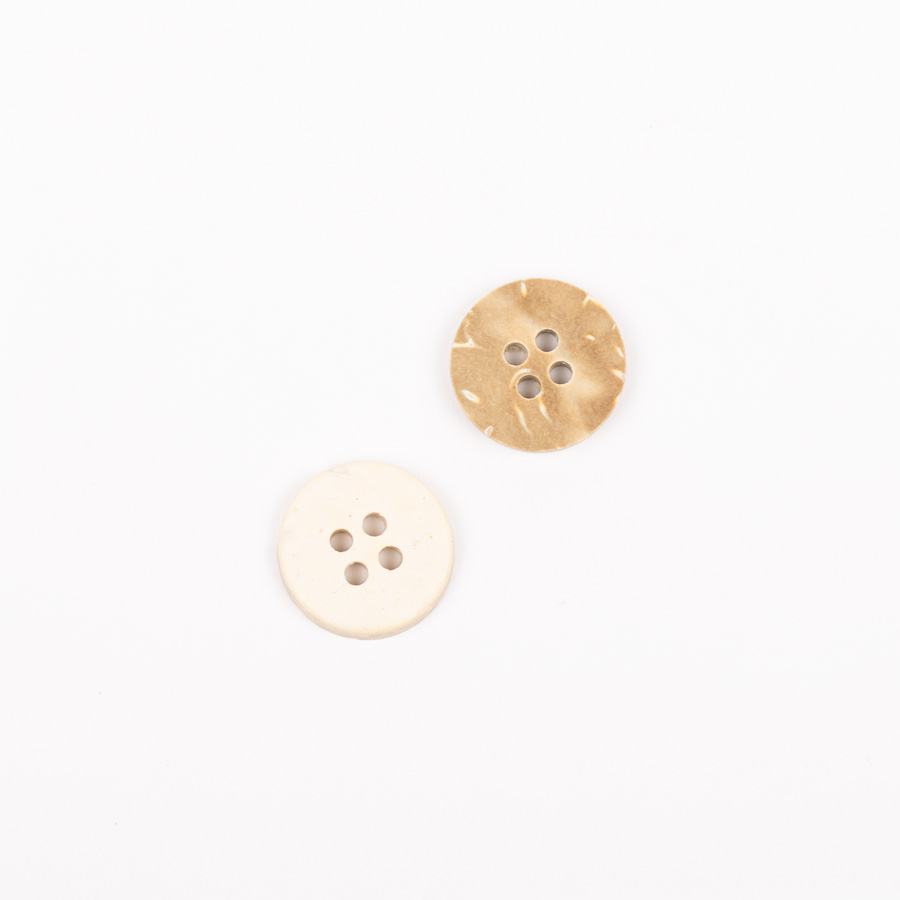
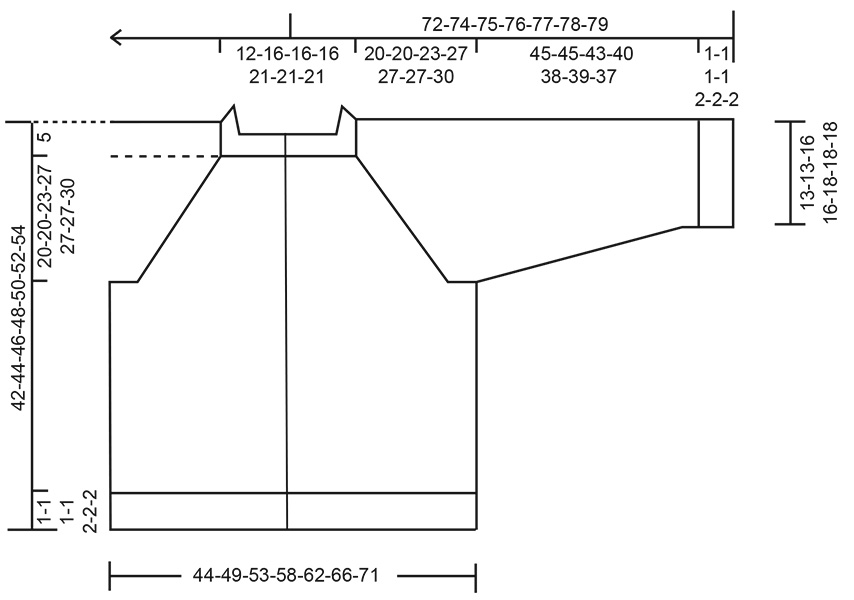
------------------------------------------------------- EXPLANATIONS FOR THE PATTERN: ------------------------------------------------------- GARTER STITCH (worked back and forth): Knit all rows, from both the right and wrong side. 1 ridge in height = knit 2 rows. BANDS WITH I-CORD: BEGINNING OF ROW: Work the band as follows (7 stitches): Slip 1 stitch purl-wise with yarn in front, knit 1, work 5 garter stitches. END OF ROW: Work the band as follows (7 stitches): Work until there are 7 stitches left on the row, work 5 garter stitches, slip 1 stitch purl-wise with yarn in front, knit 1. Work like this from both the right and wrong side. BUTTONHOLES: Work the buttonholes on the right band (when the garment is worn) from the right side, when there are 5 stitches left on the row as follows: ROW 1 (right side): Make 1 yarn over, knit 2 together, knit 1, slip 1 purl-wise with strand in front, knit 1. ROW 2 (wrong side): Work the band as before, knit the yarn over to leave a hole. The first buttonhole is worked on the first row from the right side after the neck is finished. Then work the other 5-5-5-5-5-6-6 buttonholes with 7-7-7½-8-8-7-7½ cm between each one. PATTERN: See diagrams A.1 to A.7. Choose diagram for your size (applies to diagrams A.1 and A.5). The diagrams show all rows in the pattern from the right side. RAGLAN: The raglan-stitches are worked in stocking stitch. Increase 1 stitch by making 1 yarn over. On the next row purl the yarn over from the wrong side to leave a hole, then work the new stitch into the pattern as shown in the diagrams. SLEEVE TIP: When knitting up stitches under the sleeve, you can get a small hole in the transition between stitches on the body and sleeve. This hole can be closed by picking up the strand between 2 stitches and working this strand twisted together with the first stitch between body and sleeve. DECREASE TIP: Decrease 1 stitch on each side of the marker-thread as follows: Work until there are 3 stitches left before the marker-thread, knit 2 together, knit 2 (marker-thread sits between these 2 stitches), slip 1 stitch knit-wise, knit 1 and pass the slipped stitch over the knitted stitch (2 stitches decreased). ------------------------------------------------------- START THE PIECE HERE: ------------------------------------------------------- JACKET – SHORT OVERVIEW OF THE PIECE. The pattern uses both long and short needles; start with the length which fits the number of stitches and change when necessary. The neck and yoke are worked back and forth with circular needle, from mid front and top down. When the yoke is finished, it is divided for body and sleeves and the body continued back and forth, while the sleeves wait. The sleeves are worked in the round, top down. If there is a «0» in your chosen size, skip the information and go straight to the next instruction. NECK: Cast on 95-111-111-111-127-127-127 stitches with circular needle size 3.5 mm, 1 strand DROPS Alpaca and 1 strand DROPS Kid-Silk (2 strands). Work the first row from the wrong side: 7 stitches according to BANDS WITH I-CORD – read explanation above, work rib (purl 1, knit 1) until there are 8 stitches left, purl 1 and 7 stitches according to bands with I-cord. Continue this rib for 3-3-3-4-4-4-4 cm, finishing after a row from the wrong side. Insert 1 marker inside 1 band (mid-front). The piece is measured from here. YOKE: Change to circular needle size 4.5 mm. Insert 4 markers, without working the stitches and each marker inserted in a knitted stitch (raglan-stitch). You increase for raglan on each side of the raglan-stitches. Count 17-21-21-21-25-25-25 stitches (= left front piece), insert marker-1 in the next stitch, count 19-19-19-19-19-19-19 stitches (= sleeve), insert marker-2 in the next stitch, count 19-27-27-27-35-35-35 stitches (= back piece), insert marker-3 in the next stitch, count 19-19-19-19-19-19-19 stitches (= sleeve), insert marker-4 in the next stitch. There are 17-21-21-21-25-25-25 stitches left (= right front piece). Work PATTERN back and forth with the bands as before on each side. AT THE SAME TIME increase for RAGLAN on each side of the raglan-stitches– read descriptions above for pattern and how to increase for raglan. Work as follows from the right side: The band as before, work 1 stitch in stocking stitch, A.1 across 3-7-7-7-11-11-11 stitches, A.2 across 6 stitches (= left front piece), increase for raglan before and after the raglan-stitch, work A.3 across 5 stitches, A.4 across 8 stitches and A.2 across 6 stitches (= sleeve), increase for raglan before and after the raglan-stitch, work A.3 across 5 stitches, A.4 across the next 8-16-16-16-24-24-24 stitches (1-2-2-2-3-3-3 times in width), A.2 across 6 stitches (= back piece), increase for raglan before and after the raglan-stitch, work A.3 across 5 stitches, A.4 across 8 stitches, A.2 across 6 stitches (= sleeve), increase for raglan before and after the raglan-stitch, work A.3 across 5 stitches, A.5 across 4-8-8-8-12-12-12 stitches, 1 stitch in stocking stitch – read BUTTONHOLES, see explanation above and work the band as before. (= right front piece). Continue the pattern and increase for raglan as above every 2nd row, on each side of the raglan-stitches until the diagrams are finished in height. Remember to maintain the knitting tension. You have increased a total of 8 times for raglan = 159-175-175-175-191-191-191 stitches. There are 35 stitches on each sleeve, 37-45-45-45-53-53-53 stitches on the back piece and 26-30-30-30-34-34-34 stitches on each front piece (the raglan-stitches are included in the stitch count for the front and back pieces). Continue increasing for raglan every 2nd row and continue the pattern as follows: Work the band as before, 1 stitch in stocking stitch, A.1 across 3-7-7-7-11-11-11 stitches, A.4 across 8 stitches, A.2 across 6 stitches (= left front piece), increase for raglan before and after the raglan-stitch, work A.3 across 5 stitches, A.4 across 24 stitches A.2 across 6 stitches (= sleeve), increase for raglan before and after the raglan-stitch, work A.3 across 5 stitches, A.4 across the next 24-32-32-32-40-40-40 stitches (3-4-4-4-5-5-5 times in width), A.2 across 6 stitches (= back piece), increase for raglan before and after the raglan-stitch, work A.3 across 5 stitches, A.4 across 24 stitches, A.2 across 6 stitches (= sleeve), increase for raglan before and after the raglan-stitch, work A.3 across 5 stitches, A.4 across 8 stitches, A.5 across 4-8-8-8-12-12-12 stitches, 1 stitch in stocking stitch, and the band as before (= right front piece). Continue the pattern and increase for raglan as above every 2nd row on each side of the raglan-stitches until the diagrams are finished in height. You have increased a total of 16 times for raglan and the diagrams twice in height in all sizes = 223-239-239-239-255-255-255 stitches. In sizes XS and S the sleeve-increases are finished. In sizes M and L continue increasing as before another 4 times (i.e., ½ repeat of the diagrams in height) and in sizes XL, XXL and XXXL increase another 8 times (i.e. 1 more repeat of the diagrams in height). A total of 16-16-20-20-24-24-24 increases for raglan (the diagrams have been worked 2-2-2½-2½-3-3-3 times in height) = 223-239-271-271-319-319-319 stitches: 51-51-59-59-67-67-67 stitches on each sleeve, 53-61-69-69-85-85-85 stitches on the back piece and 34-38-42-42-50-50-50 stitches on each front piece (the raglan-stitches are included in the stitch count for the front and back pieces). The sleeve-increases are finished in all sizes. Now continue to increase only on the front and back pieces. In sizes M and L you are in the middle of a repeat in height. When continuing, the pattern should continue as before on the front and back pieces, but on the sleeves, the pattern should start on the 1st row of the diagrams, as in the other sizes. Continue the pattern and increase for raglan every 2nd row as follows: Work the band as before, 1 stitch in stocking stitch, A.1 across 3-7-7-7-11-11-11 stitches, A.4 across 16-16-16-16-24-24-24 stitches, A.2 across 6-6-10-10-6-6-6 stitches (= left front piece), increase for raglan, knit the raglan-stitch, work A.6 across 5 stitches, A.4 across 40-40-48-48-56-56-56 stitches, A.7 across 6 stitches (= sleeve), knit the raglan-stitch, increase for raglan, work A.3 across 5-5-9-9-5-5-5 stitches, A.4 across 40-48-48-48-72-72-72 stitches (5-6-6-6-9-9-9 times in width), A.2 across 6-6-10-10-6-6-6 stitches (= back piece), increase for raglan, knit the raglan-stitch, work A.6 across 5 stitches, A.4 across 40-40-48-48-56-56-56 stitches, A.7 across 6 stitches (= sleeve), knit the raglan-stitch increase for raglan, work A.3 across 5 stitches, A.4 across 16-16-16-16-24-24-24 stitches, A.5 across 4-8-8-8-12-12-12 stitches, 1 stitch in stocking stitch and the band as before (right front piece). Continue this pattern and increase 8 times for raglan on the front and back pieces (a total of 24-24-28-28-32-32-32 increases for raglan on the front and back pieces) = 255-271-303-303-351-351-351 stitches. In sizes XS, S, M, XL and XXL the raglan-increases on the front and back pieces are finished. In sizes L and XXXL continue the raglan-increases as above another 4 times (i.e., ½ repeat of the diagrams in height). All sizes: A total of 24-24-28-32-32-32-36 increases for raglan on the front and back pieces. The diagrams are worked 3-3-3½-4-4-4-4½ times in height. In some sizes you have worked a ½ repeat in height of the diagrams. Make sure you continue the pattern on the correct row. There are 255-271-303-319-351-351-367 stitches: 51-51-59-59-67-67-67 stitches on each sleeve, 69-77-85-93-101-101-109 stitches on the back piece and 42-46-50-54-58-58-62 stitches on the front pieces. The piece measures approx. 20-20-23-27-27-27-30 cm from the marker mid-front. Now divide for the body and sleeves. DIVIDE FOR BODY AND SLEEVES: Continue the band and pattern across the first 42-46-50-54-58-58-62 stitches (= front piece), place the next 51-51-59-59-67-67-67 stitches on a stitch holder for the sleeve, cast on 11-11-11-11-11-19-19 stitches (mid-under the sleeve), continue the pattern across the next 69-77-85-93-101-101-109 stitches (= back piece), place the next 51-51-59-59-67-67-67 stitches on a stitch holder for the sleeve, cast on 11-11-11-11-11-19-19 stitches (mid-under the sleeve), continue the pattern and band across the last 42-46-50-54-58-58-62 stitches (= front piece). BODY: = 175-191-207-223-239-255-271 stitches. Purl 1 row from the wrong side, with the bands as before. On the next row from the right side, continue the pattern and the bands. The raglan-stitches and the cast-on stitches under each sleeve are worked into the pattern, as follows: Work the band as before, 1 stitch in stocking stitch, A.1 across 3-7-7-7-11-11-11 stitches, A.4 until there are 11-15-15-15-19-19-19 stitches left, work A.5 across 4-8-8-8-12-12-12 stitches, 1 stitch in stocking stitch and the band as before. Continue this pattern until the piece measures 35-37-39-41-42-44-46 cm from the marker mid-front. Finish after a complete or a half repeat of the diagrams in height. Work 2 rows of stocking stitch with the bands as before. On the next row from the right side begin the rib. AT THE SAME TIME increase 18-20-22-24-26-28-30 stitches evenly on the row (do not increase across the bands) = 193-211-229-247-265-283-301 stitches. Work as follows: Change to circular needle size 3.5 mm. Work the band as before, rib (knit 1, purl 1 – remember to increase) until there are 8 stitches left, knit 1 and work the band as before. When the rib measures 1-1-1-1-2-2-2 cm, cast off slightly loosely with knit above knit and purl above purl. The jacket measures approx. 37-39-41-43-45-47-49 cm from the marker mid-front and 42-44-46-48-50-52-54 cm from the shoulder. SLEEVES: Place the 51-51-59-59-67-67-67 sleeve-stitches from one stitch holder onto circular needle size 4,5 mm. Knit up 1 stitch in each of the 11-11-11-11-11-19-19 cast-on stitches under the sleeve - read SLEEVE TIP, and continue the pattern across the sleeve-stitches (making sure you begin on the correct row in the diagrams) = 62-62-70-70-78-86-86 stitches. Insert a marker in the middle stitch of the knitted-up stitches under the sleeve. Work to the marker-stitch (the round begins here). Continue as follows: Knit 5-5-5-5-5-9-9, continue A.6 from the yoke across 5 stitches, A.4 across the next 40-40-48-48-56-56-56 stitches, A.7 across 6 stitches and knit 6-6-6-6-6-10-10. Continue this pattern in the round. AT THE SAME TIME, when the sleeve measures 1 cm from the division, decrease mid-under the sleeve – read DECREASE TIP as follows: Decrease 2 stitches every 1-1-1-1-1-1½-1½ cm a total of 7-7-7-7-7-11-11 times = 48-48-56-56-64-64-64 stitches. After the last decrease, A.4 will fit on the round. Start the round before the marker-stitch and work A.4 in the round until the sleeve measures 44-44-42-39-37-38-36 cm from the division. Finish after a complete or a half repeat of the diagram in height. Knit 2 rounds Change to double pointed needles size 3.5 mm. Work rib (knit 1, purl 1), AT THE SAME TIME increase 6 stitches evenly on the first round = 54-54-62-62-70-70-70 stitches. When the rib measures 1-1-1-1-2-2-2 cm, cast off slightly loosely with rib. The sleeve measures approx. 46-46-44-41-40-41-39 cm from the division. ASSEMBLY: Sew the buttons onto the left band. |
||||||||||||||||
Diagram explanations |
||||||||||||||||
|
||||||||||||||||
 |
||||||||||||||||
 |
||||||||||||||||
 |
||||||||||||||||
 |
||||||||||||||||
Have you finished this pattern?Tag your pictures with #dropspattern #lacediamondcardigan or submit them to the #dropsfan gallery. Do you need help with this pattern?You'll find 23 tutorial videos, a Comments/Questions area and more by visiting the pattern on garnstudio.com. © 1982-2026 DROPS Design A/S. We reserve all rights. This document, including all its sub-sections, has copyrights. Read more about what you can do with our patterns at the bottom of each pattern on our site. |
||||||||||||||||






With over 40 years in knitting and crochet design, DROPS Design offers one of the most extensive collections of free patterns on the internet - translated to 17 languages. As of today we count 333 catalogues and 12532 patterns translated into English (UK/cm). 12532
We work hard to bring you the best knitting and crochet have to offer, inspiration and advice as well as great quality yarns at incredible prices! Would you like to use our patterns for other than personal use? You can read what you are allowed to do in the Copyright text at the bottom of all our patterns. Happy crafting!
Post a comment to pattern DROPS 266-2
We would love to hear what you have to say about this pattern!
If you want to leave a question, please make sure you select the correct category in the form below, to speed up the answering process. Required fields are marked *.