
Popular categories
Looking for a yarn?





































Comments / Questions (18)
 Monica wrote:
Problemet är löst.
09.09.2026 - 11:50DROPS Design answered:
Hei Monica. Så bra, god fornøyelse videre med koftan. mvh DROPS Design
10.09.2026 - 14:01
Monica wrote:
Hej! 1.Vad betyder siffran efter pilen som indikerar ökningsvarv i diagrammet? 2. Ska det bara stickas ett varv i bottenfärgen i S,M, L när man påbörjar oket? På bilderna är det ett bredare parti, vilket jag tror blir snyggare.
05.09.2026 - 16:43DROPS Design answered:
Hej Monica, det står i opskriften ud for OKET, hvor mange masker du skal øge ved de forskellige pile i din størrelse :)
09.09.2026 - 14:03
 Margje wrote:
Ik ben aan het breien met het scandinavischvest u-959 het telpatroon tussen 3 en4 staat 1pen in de kleur naturel maar dan wordt die toch averechts gebreid?????
29.07.2026 - 14:55
Margje wrote:
Ik ben aan het breien met het scandinavischvest u-959 in het telpatroon tussen 3 en 4 staat 1pen in dealer naturel wordt dat dan een averechtse pen?
29.07.2026 - 14:53DROPS Design answered:
Dag Margje,
Dat weet ik zo niet uit mijn hoofd. Als de voorgaande naald aan de goede kant breit, dan brei je deze inderdaad aan de verkeerde kant, maar als je de vorig naald aan de verkeerde breide, brei je deze aan de goede kant.
29.07.2026 - 20:36
Margje Peet wrote:
Ik ben aan het breien met het scandinavischvest u-959 .hebde pas gebreid .heb 139 steken op de Nederlandse en hen 1naald averechts gebreid.moet ik nu gelijk weer meerderen naar 171 steken????
24.07.2026 - 14:29DROPS Design answered:
Dag Margje,
Ja, dat klopt, je meerdert gelijk op de eerste naald weer naar 171 steken.
26.07.2026 - 16:50
 Natja wrote:
Sehr schönes Strickmuster! Danke! Leider spannt die Knopfleiste ein bisschen. Ich hoffe das gibt sich noch ein bisschen beim blocken.
10.01.2026 - 17:31
Birgitta wrote:
Stickas hela mönstret A1 innan delningen för ärm, fram- och bakstycke? Jag är inte färdig med mönstret vid angiven längd, trots att jag gått ner ett halvnummer på stickor och stickfastheten stämmer i bredd. Hur är det tänkt?
06.11.2025 - 07:56DROPS Design answered:
Hej Birgitta, hvis du ikke er færdig med mønsteret, så fortsætter du efter at du har delt arbejdet :)
19.11.2025 - 11:39
 Hellen wrote:
Bel motivo e facile da realizzare. Per me era il primo cardigan mai fatto. L'ho realizzato con la lana LIMA ed è venuto molto bene
20.10.2025 - 13:13
Gabriela wrote:
Guten Tag Habe Schwierigkeiten mit dem Musterdiagramm. Zeigt das Diagramm alle Hin und Rückreihe? Wird es von rechts nach links und von links nach rechts gelesen? Wird in der Rückreihe zugenommen? Herzlichen Dank
05.12.2024 - 15:55DROPS Design answered:
Liebe Gabriela, Diagramme lesen Sie von unten nach oben, rechts nach links bei den Hinreihen und links nach rechts bei den Rückreihen. Zunahmen werden wie im Diagram bearbeitet, die können bei einer Hin oder bei einer Rückreihe entstehen. Viel Spaß beim Stricken!
06.12.2024 - 07:50
 Criissagillie wrote:
I would like to make the jacket.. lengthen it and add a hood. Is there an easy way to add the hood.
18.08.2024 - 17:49DROPS Design answered:
Dear Criissagillie, we don't make custom patterns. To add a hood, remember that you start this pattern from the neck, so you would need a shorter rib neck edge for a hooded jacket and that the hood is added at the end, by picking up the neck edge stitches. You could use the following pattern as a guide: https://www.garnstudio.com/pattern.php?id=687&cid=19. You can also check the following video: https://www.garnstudio.com/video.php?id=171&lang=en. Happy knitting!
18.08.2024 - 23:18
|
||||||||||||||||
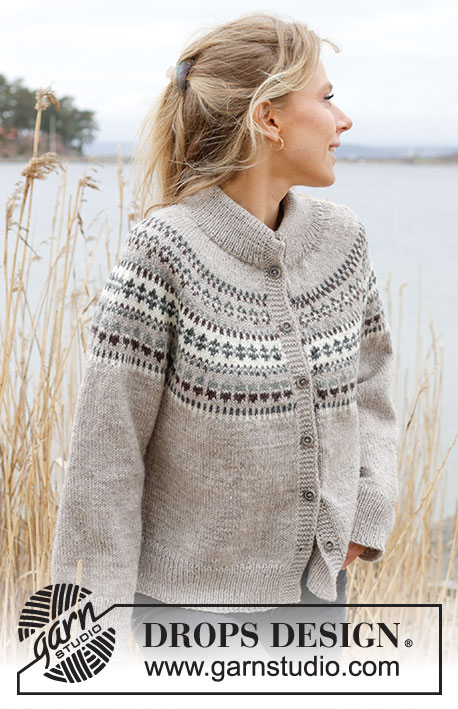
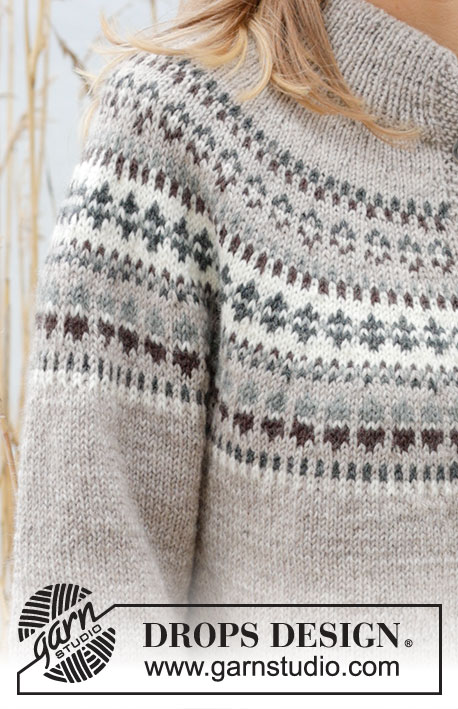
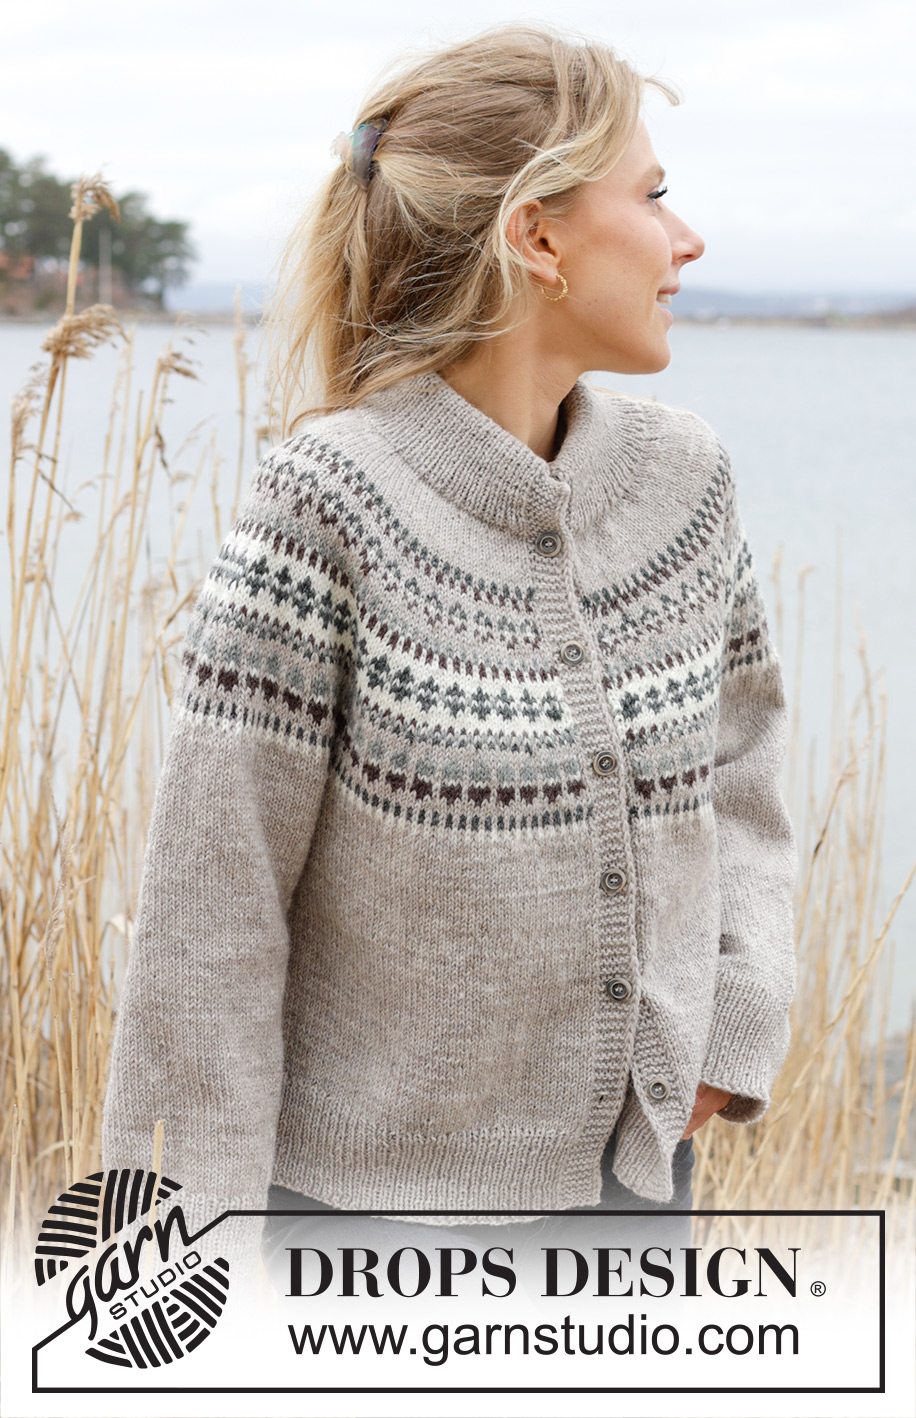
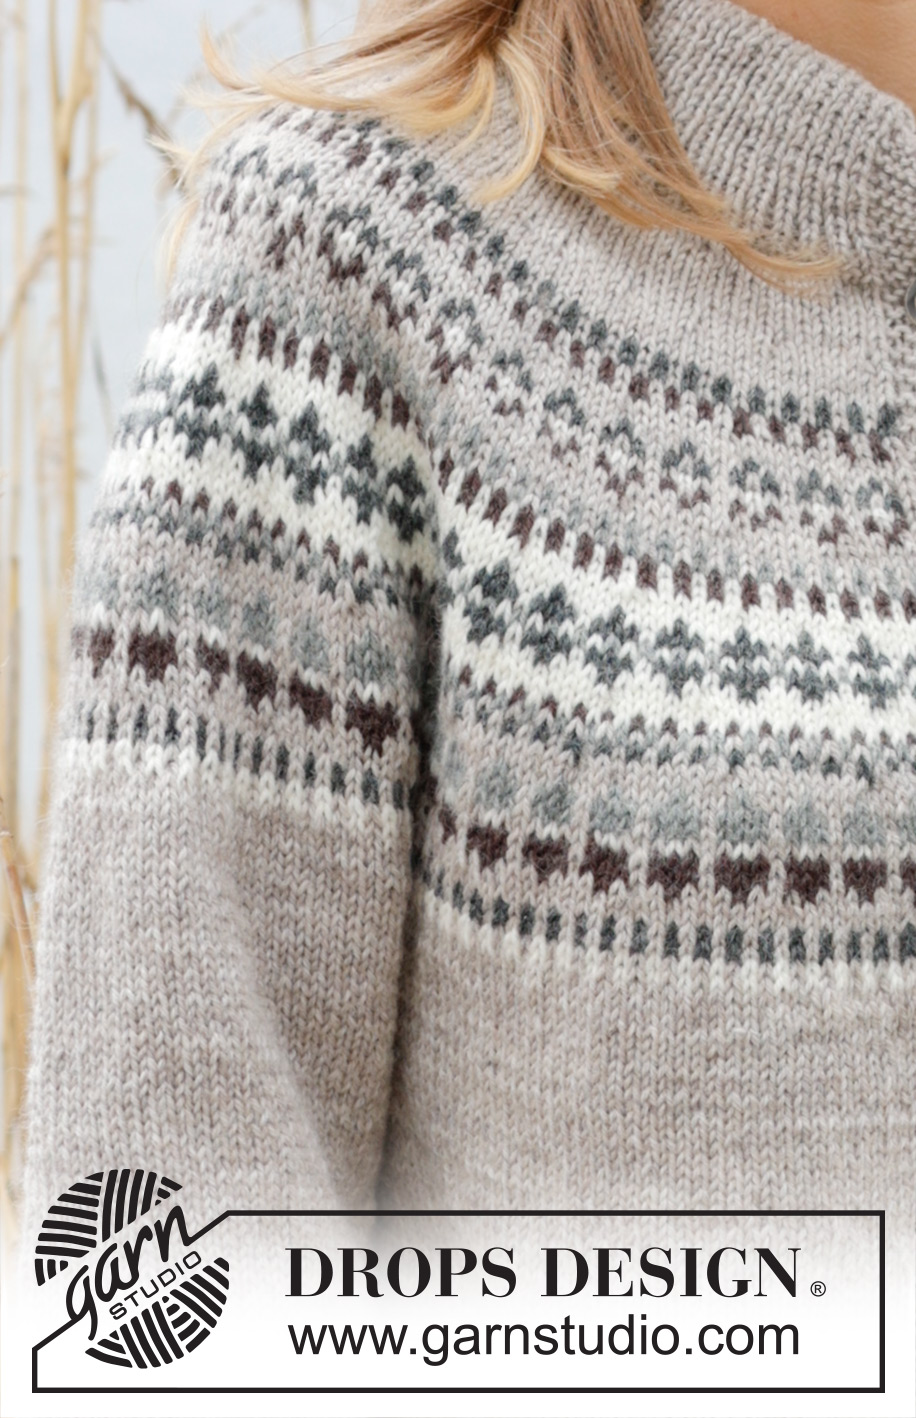
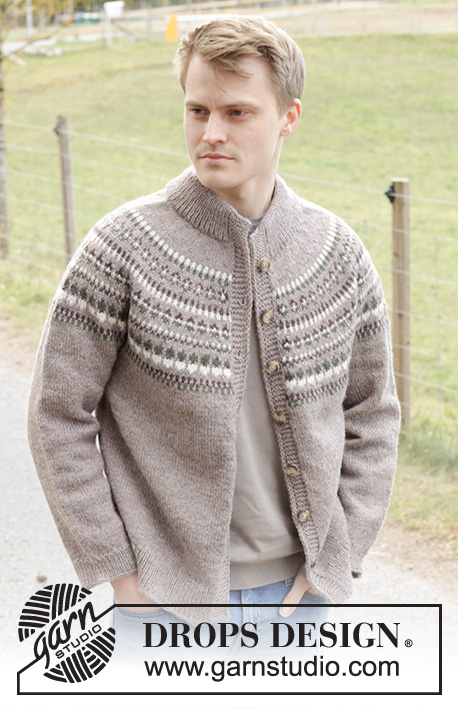
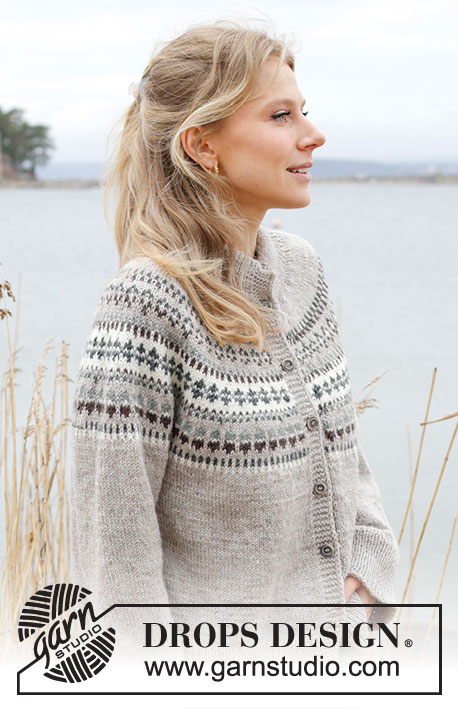
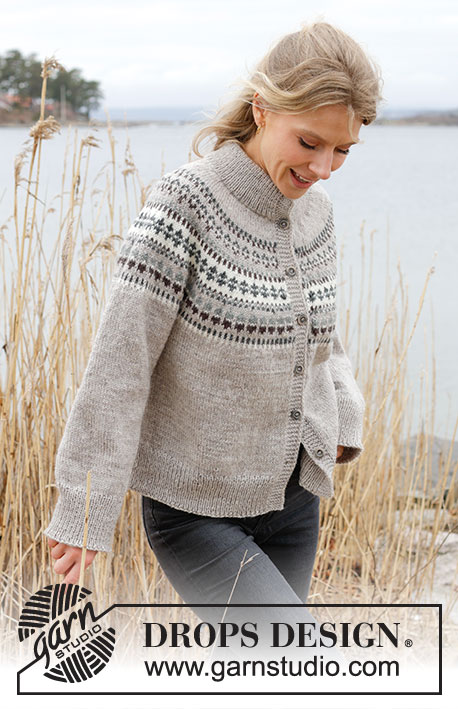
Boreal Circle Cardigan#borealcirclecardigan |
||||||||||||||||
 |
 |
|||||||||||||||
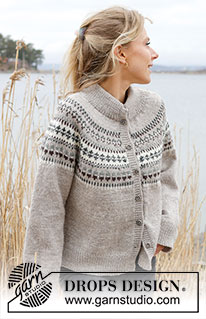
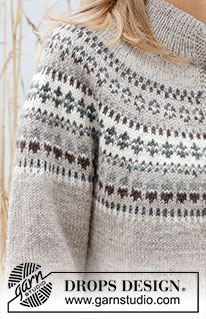
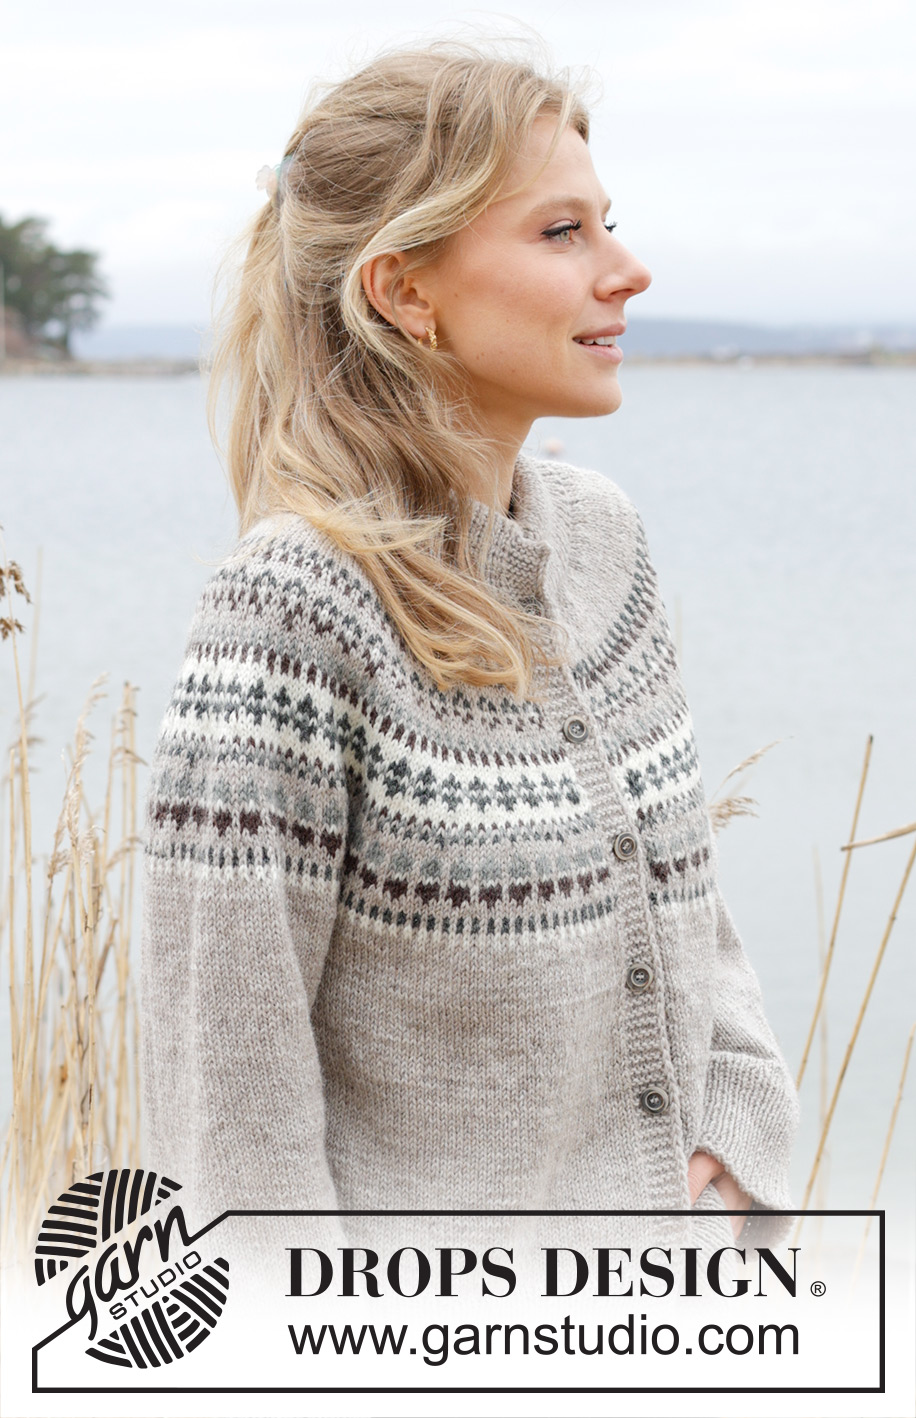
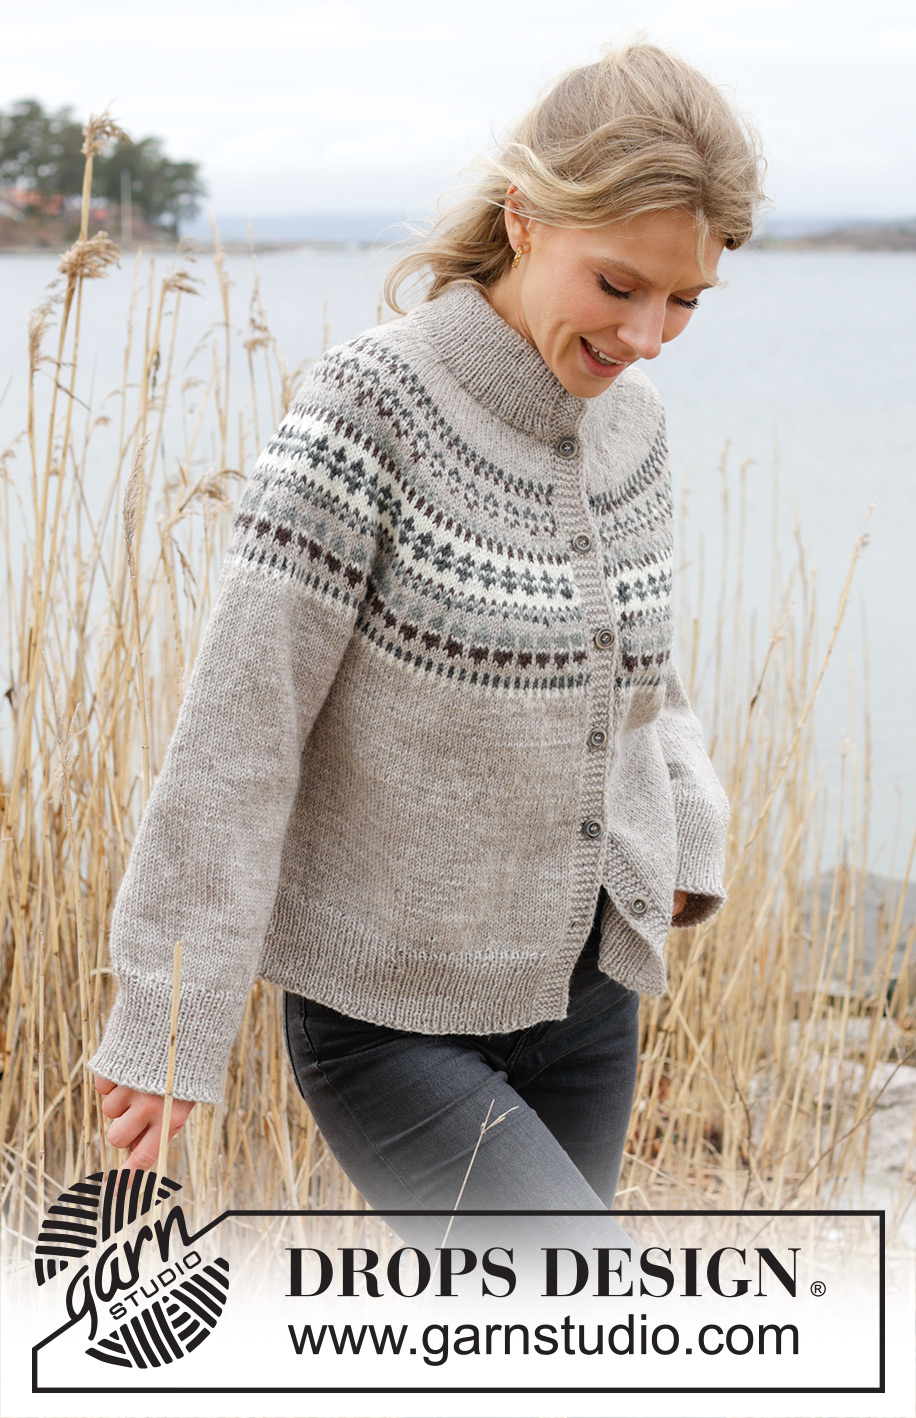
Knitted jacket in DROPS Karisma. The piece is worked top down with round yoke and Nordic pattern. Sizes S - XXXL.
DROPS 245-3 |
||||||||||||||||
|
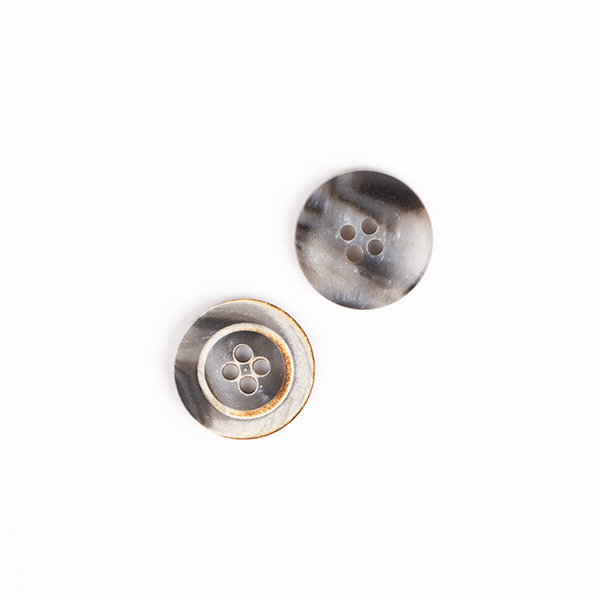
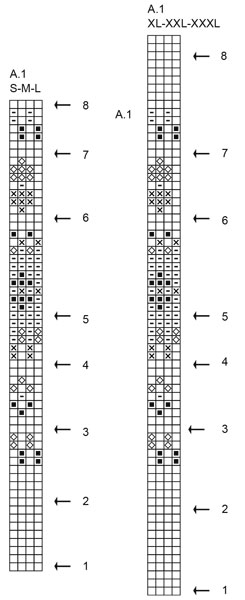
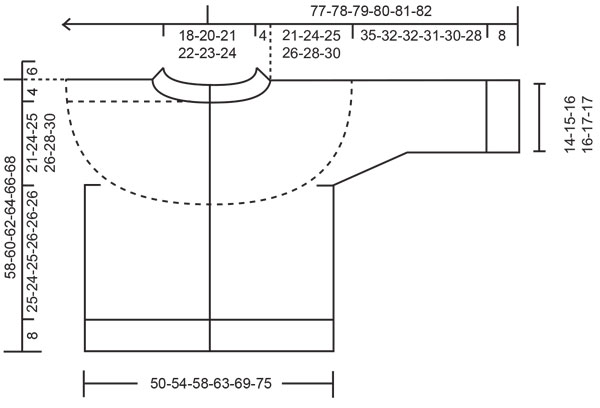
------------------------------------------------------- EXPLANATIONS FOR THE PATTERN: ------------------------------------------------------- GARTER STITCH (worked back and forth): Knit all rows. 1 ridge = knit 2 rows. PATTERN: See diagram A.1. Choose diagram for your size. The pattern is worked in stocking stitch. INCREASE/DECREASE TIP (evenly spaced): To work out how to increase/decrease evenly, count the total number of stitches on needle (e.g., 139 stitches), minus the bands (e.g., 14 stitches) and divide the remaining stitches by the number of increases/decreases to be made (e.g., 16) = 7.8. In this example, increase by making 1 yarn over after alternately each 7th and 8th stitch (approx.). Do not increase over the bands. On the next row work the yarn overs twisted to avoid holes. When decreasing, knit together approx. each 7th and 8th stitch. EDGE STITCHES: At the beginning of each row work 2 edge stitches as follows: Slip 1 stitch purl-wise with the strand in front of the piece, knit 1. At the end of each row work 2 edge stitches as follows: Work until there are 2 stitches left on the row, slip 1 stitch purl-wise with the strand in front of the piece, knit 1. Repeat at the beginning and end of each row. BUTTONHOLES: Work buttonholes on the right band (when the garment is worn). Work from the right side when there are 4 stitches left on the row as follows: Make 1 yarn over, knit 2 together and knit 2. On the next row (wrong side), knit the yarn over to leave a hole. The first buttonhole is worked when the neck is finished. The other 5-5-5-6-6-6 buttonholes are then worked with approx. 9-9½-10-8½-9-9 cm between each one. The bottom buttonhole is worked in the transition between the stocking stitch and rib. DECREASE TIP (for sleeves): Decrease 1 stitch on each side of the marker-thread as follows: Work until there are 3 stitches left before the marker-thread, knit 2 together, knit 2 (marker-thread sits between these 2 stitches), slip 1 stitch knit-wise, knit 1 and pass the slipped stitch over the knitted stitch. ------------------------------------------------------- START THE PIECE HERE: ------------------------------------------------------- JACKET – SHORT OVERVIEW OF THE PIECE. The neck and yoke are worked back and forth with circular needle, from mid front and top down. The yoke is divided for body and sleeves and the body continued back and forth with circular needle. The sleeves are worked in the round with short circular needle/ double pointed needles. NECK: Cast on 127-135-141-145-151-155 stitches, with DROPS Karisma colour light oak, using short circular needles size 3 mm. Purl 1 row from the wrong side. Then work as follows from the right side: 1 GARTER STITCH – read description above, * knit 1, purl 1 *, work from *-* until there are 2 stitches left, knit 1 and 1 garter stitch. Continue this rib for 6 cm. Cast on 6 stitches at the end of the next 2 rows = 139-147-153-157-163-167 stitches. Continue the rib with EDGE STITCHES – read description above - over the 2 outermost stitches on each side and garter stitch over the 5 stitches inside these, i.e., there are 7 band stitches, with 2 of these being edge stitches. The bands are always worked with colour light oak (if light oak is not used in the pattern, twist the strands between the bands and pattern together to avoid a hole; to avoid letting the yarn follow the work over all stitches, you can use a separate small skein for the front band stitches). When the rib measures 12 cm, knit 1 row from the right side and decrease 16-16-18-18-20-20 stitches evenly spaced (do not decrease over the bands) - read INCREASE/DECREASE TIP, on this row also begin to work the BUTTONHOLES – read description above = 123-131-135-139-143-147 stitches. Purl 1 row from the wrong side with the bands worked as before. YOKE: Change to circular needle size 4 mm. Work as follows from the right side: 7 band stitches as before, A.1 until there are 8 stitches left, work the first stitch in A.1 (so the pattern is symmetrical) and 7 band stitches as before. REMEMBER THE KNITTING TENSION! On each row in the diagram marked with an arrow, increase as follows: ARROW 1: Increase 24-28-28-32-36-40 stitches evenly spaced = 147-159-163-171-179-187 stitches. ARROW 2: Increase 24-28-32-36-36-40 stitches evenly spaced = 171-187-195-207-215-227 stitches. ARROW 3: Increase 24-28-32-36-36-40 stitches evenly spaced = 195-215-227-243-251-267 stitches. ARROW 4: Increase 24-28-32-36-36-40 stitches evenly spaced = 219-243-259-279-287-307 stitches. ARROW 5: Increase 28-28-32-36-40-40 stitches evenly spaced = 247-271-291-315-327-347 stitches. ARROW 6: Increase 28-28-32-36-40-40 stitches evenly spaced = 275-299-323-351-367-387 stitches. ARROW 7: Increase 28-32-32-36-40-44 stitches evenly spaced = 303-331-355-387-407-431 stitches. ARROW 8: Increase 31-31-31-35-39-43 stitches evenly spaced = 334-362-386-422-446-474 stitches. Continue with colour light oak and stocking stitch, with 7 band stitches on each side. When the yoke measures 21-24-25-26-28-30 cm after the neck, divide for the body and sleeves as explained below. DIVIDE PIECE FOR BODY AND SLEEVES AS FOLLOWS: Work 56-61-64-69-74-80 stitches as before (front piece), place the next 62-66-72-80-82-84 stitches on a thread for the sleeve, cast on 6-6-8-8-10-12 stitches (in side under sleeve), work 98-108-114-124-134-146 stocking stitches (back piece), place the next 62-66-72-80-82-84 stitches on a thread for the sleeve, cast on 6-6-8-8-10-12 stitches (in side under sleeve), work the last 56-61-64-69-74-80 stitches as before (front piece). The body and sleeves are finished separately. THE PIECE IS NOW MEASURED FROM HERE! BODY: = 222-242-258-278-302-330 stitches. Continue stocking stitch with colour light oak and 7 band stitches on each side for a further 25-24-25-26-26-26 cm. Knit 1 row from the right side and increase 71-73-79-87-97-101 stitches evenly spaced (do not increase over the bands) = 293-315-337-365-399-431 stitches. Change to circular needle size 3 mm. Work as follows from the wrong side: 7 band stitches as before, * purl 1, knit 1 *, work from *-* until there are 8 stitches left, purl 1 and 7 band stitches as before. Continue this rib for 8 cm. Cast off a little loosely with knit from the right side. The jacket measures approx. 58-60-62-64-66-68 cm from the shoulder. SLEEVES: Place the 62-66-72-80-82-84 stitches from the thread on the one side of the piece on short circular needle/double pointed needles size 4 mm and knit up 1 stitch in each of the 6-6-8-8-10-12 stitches cast on under the sleeve = 68-72-80-88-92-96 stitches. Insert a marker-thread in the middle of the new stitches under the sleeve. Start at the marker-thread and work stocking stitch in the round with colour light oak. When the sleeve measures 3 cm, decrease 2 stitches mid-under sleeve – read DECREASE TIP. Decrease like this every 9-8-4-2½-2-2 cm a total of 4-4-7-10-11-12 times = 60-64-66-68-70-72 stitches. Continue working until the sleeve measures 35-32-32-31-30-28 cm from the division (or to desired length. There is approx. 8 cm left). Knit 1 round and increase 20-20-20-22-22-22 stitches evenly spaced = 80-84-86-90-92-94 stitches. Change to double pointed needles size 3 mm and work rib (knit 1, purl 1) for 8 cm. Loosely cast off with knit. The sleeve measures approx. 43-40-40-39-38-36 cm. Work the other sleeve in the same way. ASSEMBLY: Fold the neck double to the inside and sew down. To avoid the neck being tight and rolling outwards, it is important that the seam is elastic. Sew together the openings on the bands with small stitches. Sew the buttons onto the left band. |
||||||||||||||||
Diagram explanations |
||||||||||||||||
|
||||||||||||||||
 |
||||||||||||||||
 |
||||||||||||||||
Have you finished this pattern?Tag your pictures with #dropspattern #borealcirclecardigan or submit them to the #dropsfan gallery. Do you need help with this pattern?You'll find 23 tutorial videos, a Comments/Questions area and more by visiting the pattern on garnstudio.com. © 1982-2026 DROPS Design A/S. We reserve all rights. This document, including all its sub-sections, has copyrights. Read more about what you can do with our patterns at the bottom of each pattern on our site. |
||||||||||||||||






With over 40 years in knitting and crochet design, DROPS Design offers one of the most extensive collections of free patterns on the internet - translated to 17 languages. As of today we count 333 catalogues and 12532 patterns translated into English (UK/cm). 12532
We work hard to bring you the best knitting and crochet have to offer, inspiration and advice as well as great quality yarns at incredible prices! Would you like to use our patterns for other than personal use? You can read what you are allowed to do in the Copyright text at the bottom of all our patterns. Happy crafting!
Post a comment to pattern DROPS 245-3
We would love to hear what you have to say about this pattern!
If you want to leave a question, please make sure you select the correct category in the form below, to speed up the answering process. Required fields are marked *.