
Popular categories
Looking for a yarn?


Comments / Questions (25)
![]() Isolde wrote:
Isolde wrote:
Hallo, het is mij niet echt duidelijk hoe je 6 steken samenbreit. hebben jullie nog een tip?
10.03.2026 - 10:15DROPS Design answered:
Dag Isolde,
In een van de video's die bij het patroon staan wordt uitgelegd hoe je 2 steken samenbreit. Op dezelfde manier kun je 6 steken samenbreien.
10.03.2026 - 19:58
![]() Eva wrote:
Eva wrote:
Om jag stickar ihop 6 maskor som det står i mönstret, då blir det inte några 84 maskor kvar, utan betydligt mindre maskor. Jag skulle ju göra 14 grupper a' 8 maskor. Får inte ihop detta?
27.12.2025 - 13:49DROPS Design answered:
Hei Eva. Vi skal hjelpe deg så godt vi kan, men fint om du kan opplyse hvilken str. du strikker etter. mvh DROPS Design
19.01.2026 - 13:30
![]() Gisela Maas wrote:
Gisela Maas wrote:
Nach den Raglan-Abnahmen sollen noch drei Zentimeter weitergestrickt werden bis zur Teilung. Allerdings entsteht dabei eine hässliche Beule an den jeweiligen Stellen. Kann man das irgendwie umgehen? Liebe Grüße, Gisela
05.12.2025 - 20:41
![]() Eve wrote:
Eve wrote:
Bonjour. Je pense avoir trouvé d'où vient mon problème. Pour la taille 9/10, il est noté 0 augmentation au dernier tour de A1. Ne serait ce pas plutôt 3 augmentations au 1er tour de A1. Merci d'avance pour votre réponse.
24.02.2025 - 14:58DROPS Design answered:
Bonjour Eve, quand A.1 est terminé, vous avez 6 m dans chaque A.1 x 14 = 84 mailles. On va ainsi augmenter 0 mailles = on n'augmente pas en taille 9/10 ans lorsque l'on tricote le dernier tour de A.1. Bon tricot!
24.02.2025 - 16:14
![]() Eve wrote:
Eve wrote:
Bonjour, existe t'il une vidéo d'explication pour le diagramme A1 ? Je n'arrive pas à retomber sur le bon nombre de mailles à l'arrivée. Par avance merci.
24.02.2025 - 13:11
![]() Lucia wrote:
Lucia wrote:
Grazie della risposta ho guardato i video ma la spiegazione dell'ape non c'è
18.02.2025 - 08:05DROPS Design answered:
Buonasera Lucia, per realizzare l'ape può seguire la legenda e le foto in fondo alla pagina. Buon lavoro!
23.02.2025 - 23:56
![]() Lucia wrote:
Lucia wrote:
Buongiorno ho letto le spiegazioni per fare l'ape ma non capisco, non esiste più n video? Grazie
15.02.2025 - 08:57DROPS Design answered:
Buongiorno Lucia, può trovare i video relativi al modello in alto di fianco alle spiegazioni. Buon lavoro!
17.02.2025 - 16:12
![]() Marie wrote:
Marie wrote:
Merci pour votre coup de main
03.06.2024 - 08:57
![]() Marie wrote:
Marie wrote:
Bonjour, J'ai terminé le raglan, cependant une fois toutes les augmentation faites, je suis à 16 cm du bord du col (marqueur) et non à 18 comme indiqué. Dois je continuer à tricoter jusqu'à avoir 18 cm, avant de commencer à séparer les manches du corps ? Je tricote la taille 9/10 ans ?
31.05.2024 - 17:25DROPS Design answered:
Bonjour Marie, tout à fait, continuez simplement en jersey, sans augmenter, jusqu'à ce que l'ouvrage mesure 18 cm. Bon tricot!
03.06.2024 - 07:05
![]() Marie wrote:
Marie wrote:
Merci pour la rapidité de votre réponse ! Comment obtenir les explications en français Bonne soirée
17.05.2024 - 16:48DROPS Design answered:
Bonjour Marie, si les explications de votre modèle ne sont pas en français, cliquez sur le menu déroulant à côté de l'icone imprimante pour sélectionner "français"; ou bien ici pour ce modèle Bon tricot!
21.05.2024 - 12:03
|
|||||||||||||||||||||||||
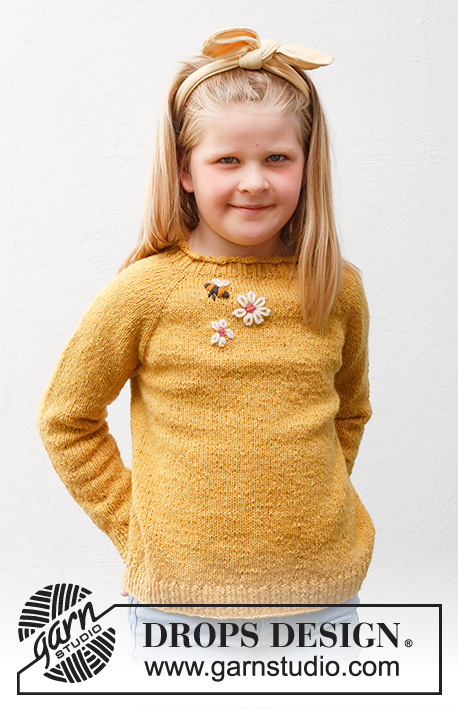
Bee Season Jumper#beeseasonjumper |
|||||||||||||||||||||||||
 |
 |
||||||||||||||||||||||||
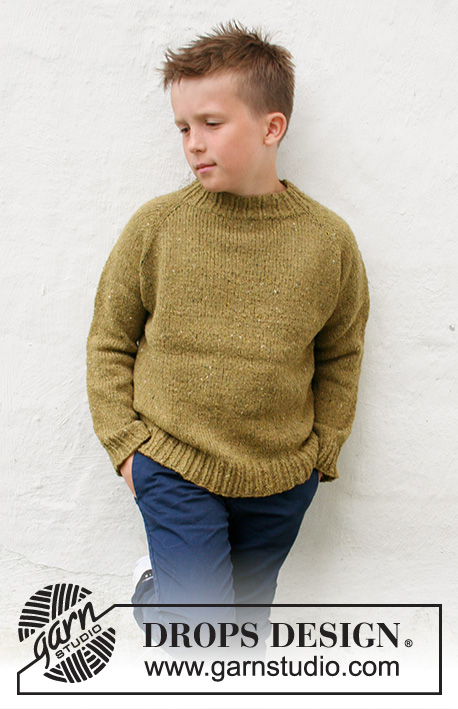
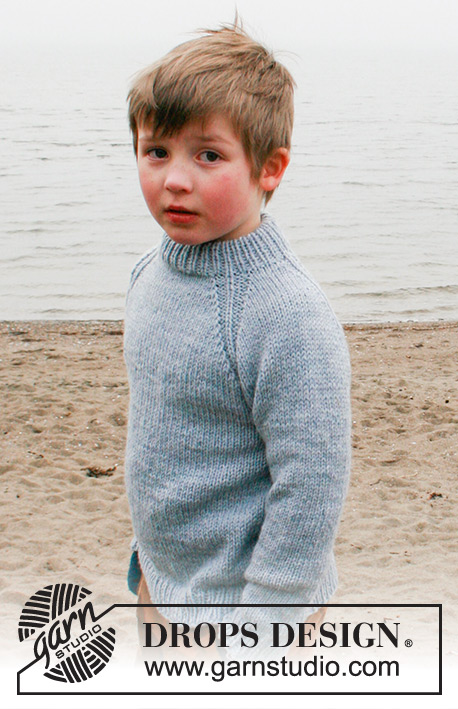
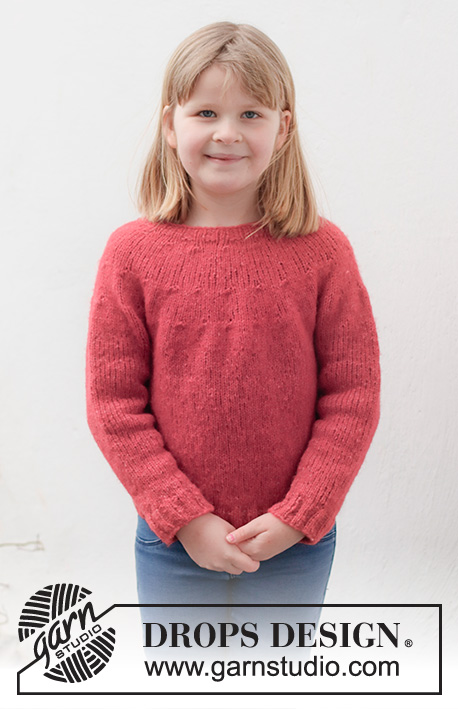
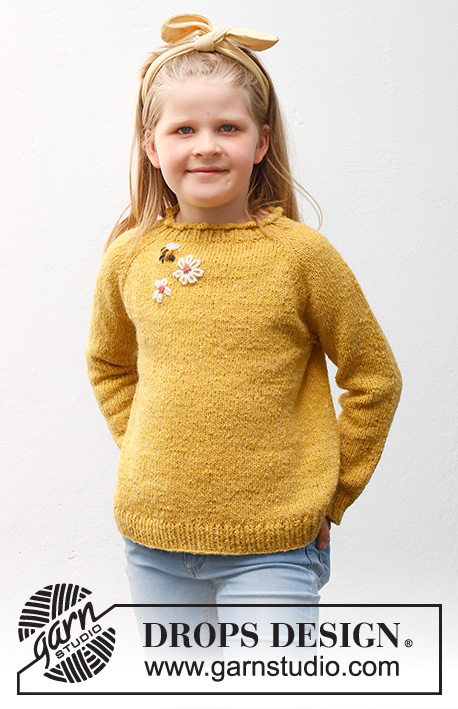
Knitted jumper for children in DROPS Soft Tweed. The piece is worked top down, with raglan and embroidered flowers and a bee. Sizes 3-14 years.
DROPS Children 40-1 |
|||||||||||||||||||||||||
|
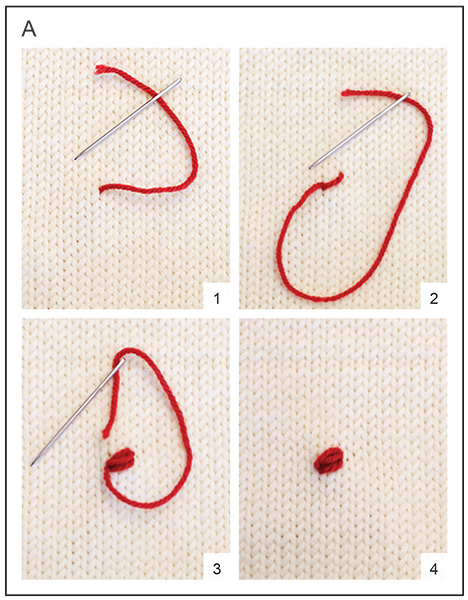
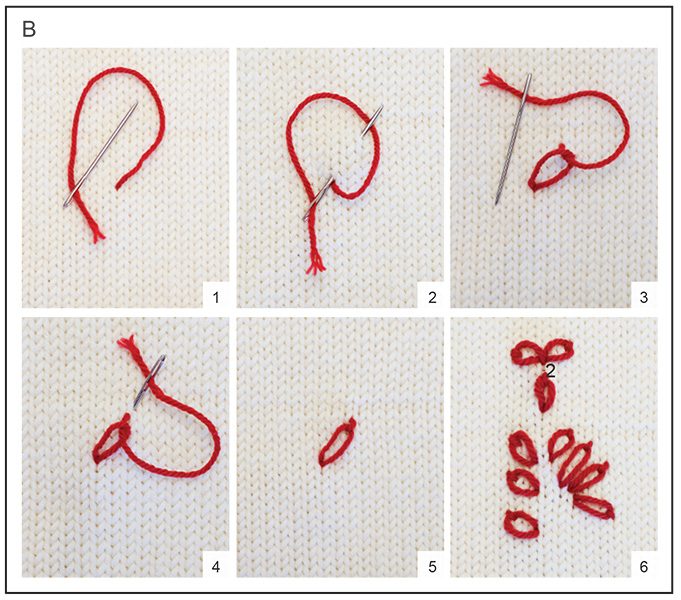
------------------------------------------------------- EXPLANATIONS FOR THE PATTERN: ------------------------------------------------------- PATTERN: See diagrams A.1 and A.2. INCREASE TIP (evenly spaced): To work out how to increase evenly, count the total number of stitches on the needle (e.g. 76 stitches) and divide by the number of increases to be made (e.g. 16) = 4.75. In this example, increase by making 1 yarn over after approx. each 5th stitch. On the next round knit the yarn overs twisted to avoid holes. RAGLAN: Increase 1 stitch on each side of the 4 markers as follows (= 8 stitches increased on the round): Work until there is 1 stitch left before the marker, make 1 yarn over, knit 2 (marker sits between these 2 stitches), 1 yarn over. On the next round knit the yarn overs twisted to avoid holes. Then work the new stitches in stocking stitch. DECREASE TIP (for sleeves): Decrease 1 stitch on either side of the marker thread as follows: Work until there are 3 stitches left before the marker thread, knit 2 together, knit 2 (marker thread sits between these 2 stitches), slip 1 stitch as if to knit, knit 1 and pass the slipped stitch over the knitted stitch. CASTING-OFF TIP: To avoid the cast-off edge being tight you can cast off with a larger size needle. If the edge is still tight, make 1 yarn over after each 4th stitch at the same time as casting off; the yarn overs are cast off as normal stitches. ------------------------------------------------------- START THE PIECE HERE: ------------------------------------------------------- JUMPER – SHORT OVERVIEW OF THE PIECE: The neck and yoke are worked in the round with double pointed needles/circular needle, top down. The yoke is divided for body and sleeves and the body is continued in the round with circular needle. The sleeves are worked with double pointed needles. Two flowers and a bee are embroidered onto the front piece to finish. NECK: Cast on 104-104-104-112-112-112 stitches with double pointed needles/short circular needle size 3 mm and DROPS Soft Tweed. Knit 1 round, then work A.1 (13-13-13-14-14-14 repeats of 8 stitches) on the round. On the last round in A.1, increase 0-3-3-0-3-3 stitches evenly spaced = 78-81-81-84-87-87 stitches. Now work A.2. When the piece measures 4 cm insert 1 marker at the beginning of the round. The piece is now measured from here! YOKE: Change to circular needle size 4 mm. Knit 1 round where you increase 14-15-15-16-17-17 stitches evenly spaced – read INCREASE TIP = 92-96-96-100-104-104 stitches. Insert 4 new markers as described below, without working the stitches and each marker inserted between 2 stitches. These markers are used when increasing to raglan. Beginning of round = mid-back. Count 17-18-18-19-20-20 stitches (between back piece and sleeve), insert marker 1 here. Count 12 stitches and insert marker 2 (= sleeve). Count 34-36-36-38-40-40 stitches and insert marker 3 (= front piece). Count 12 stitches and insert marker 4 (= sleeve). There are 17-18-18-19-20-20 stitches left on the round (= half back piece). REMEMBER THE KNITTING TENSION! Work stocking stitch in the round, AT THE SAME TIME, on the first round begin to increase for RAGLAN – read description above. Increase like this every 2nd round a total of 16-17-19-20-21-23 times = 220-232-248-260-272-288 stitches. Continue working until the piece measures 12-13-14-15-16-18 cm from the marker on the neck. Now divide the yoke for the body and sleeves; work as far as marker 1 (= half back piece), place the next 44-46-50-52-54-58 stitches on a thread for the sleeve (without working them), cast on 6 stitches under the sleeve, work the next 66-70-74-78-82-86 stitches (= front piece), place the next 44-46-50-52-54-58 stitches on a thread for the sleeve (without working them), cast on 6 stitches under the sleeve, work to the end of the round (= 66-70-74-78-82-86 stitches for back piece). The body and sleeves are finished separately. Remove the markers. THE PIECE IS NOW MEASURED FROM HERE! BODY: = 144-152-160-168-176-184 stitches. Continue with stocking stitch until the piece measures 21-24-27-30-32-33 cm from the division. There is approx. 4 cm left to finished length; try the jumper on and work to desired length. To avoid the following rib being tight, knit 1 round where you increase 27-28-32-33-37-35 stitches evenly spaced = 171-180-192-201-213-219 stitches. Change to circular needle size 3 mm and work A.2 for 4 cm. Cast off with knit over knit and purl over purl – read CASTING-OFF TIP. The jumper measures approx. 40-44-48-52-55-58 cm from the shoulder down. SLEEVES: Place the 44-46-50-52-54-58 stitches from the thread on the one side of the piece on double pointed needles size 4 mm and knit up 1 stitch in each of the 6 stitches cast on under the sleeve = 50-52-56-58-60-64 stitches. Insert a marker thread in the middle of the 6 stitches under the sleeve (= 3 new stitches on each side of the marker thread). Allow the thread to follow your work onwards; it will be used when decreasing under the sleeve. Start at the marker thread and work stocking stitch in the round. When the sleeve measures 3 cm, decrease 1 stitch on each side of the marker thread – read DECREASE TIP. Decrease like this every 4-5-5-6-7-6½ cm a total of 4-4-5-5-5-6 times = 42-44-46-48-50-52 stitches. Continue working without further decreases until the sleeve measures 22-27-31-35-39-42 cm from the division. There is approx. 4 cm left to finished length; try the jumper on and work to desired length. Knit 1 round where you increase 9-10-8-9-10-8 stitches evenly spaced = 51-54-54-57-60-60 stitches. Change to double pointed needles size 3 mm. Work A.2 for 4 cm. Cast off with knit over knit and purl over purl – remember CASTING-OFF TIP. The sleeve measures approx. 25-29-33-37-41-45 cm from the division. Work the other sleeve in the same way. FLOWERS AND BEE: 1 bee and 2 flowers are embroidered onto the front piece – see photo. The bee is embroidered with a single strand, flat stitch and in stripes; 2 wings are worked on top with chain stitch. 2 different flowers are embroidered. BEE – BODY WITH ANTHRACITE: Start with 1 strand of anthracite - see diagram C and diagram explanations. Start 4-5 cm below the neck and 8-10 cm from the left raglan-line on the front piece. Embroider 2 flat stitches diagonally up to the right and close together, each stitch 0,5 cm long. Move 0.5 cm diagonally up to the left, and work 4 flat stitches close together parallel to the first 2 stitches and each 1 cm long (= middle of bee), move another 0.5 cm and embroider 2 flat stitches close together parallel to the middle stitches, each 0.5 cm long. Now embroider legs under the 4 middle stitches, working 2 flat stitches, each 0.5 cm long. BEE – BODY WITH DARK MUSTARD: Change to 1 strand of dark mustard. Embroider flat stitches between the middle and the front of the bee - 4 flat stitches, the same length as the anthracite stitches they are close to. Then do the same between the middle and the back of the bee. BEE - WINGS: Use 1 strand of white; the wings consist of 2 chain stitches, both starting from the same hole. Work as follows: STITCH 1: Work 1 chain stitch of 1-1.5 cm in length, pointing slightly backwards - see diagram B and diagram explanations. STITCH 2: Work 1 chain stitch of 1-1.5 cm in length, pointing slightly forwards. FLOWER-1 (7 petals): Start by working a back-stitch knot with the colour rose - see diagram A and diagram explanations – the knot is worked to approx. 1 cm in diameter and 3 cm from the bee, diagonally down to the right. This is the middle of the flower. Work chain stitches around the knot with white - see diagram B and diagram explanations; work 7 stitches around the knot, each 1.5 cm long. Cut and fasten the strands. FLOWER-2 (5 petals): Start by working a back-stitch knot with the colour rose - see diagram A and diagram explanations – the knot is worked to approx. 1 cm in diameter and 5 cm from the middle of flower-1, diagonally down to the left. This is the middle of the flower. Work chain stitches around the knot with white - see diagram B and diagram explanations; work 5 stitches around the knot, each 1 cm long. Cut and fasten the strands. |
|||||||||||||||||||||||||
Diagram explanations |
|||||||||||||||||||||||||
|
|||||||||||||||||||||||||
 |
|||||||||||||||||||||||||
 |
|||||||||||||||||||||||||
 |
|||||||||||||||||||||||||
 |
|||||||||||||||||||||||||
Have you finished this pattern?Tag your pictures with #dropspattern #beeseasonjumper or submit them to the #dropsfan gallery. Do you need help with this pattern?You'll find 30 tutorial videos, a Comments/Questions area and more by visiting the pattern on garnstudio.com. © 1982-2026 DROPS Design A/S. We reserve all rights. This document, including all its sub-sections, has copyrights. Read more about what you can do with our patterns at the bottom of each pattern on our site. |
|||||||||||||||||||||||||


With over 40 years in knitting and crochet design, DROPS Design offers one of the most extensive collections of free patterns on the internet - translated to 17 languages. As of today we count 324 catalogues and 12290 patterns translated into English (UK/cm). 12290
We work hard to bring you the best knitting and crochet have to offer, inspiration and advice as well as great quality yarns at incredible prices! Would you like to use our patterns for other than personal use? You can read what you are allowed to do in the Copyright text at the bottom of all our patterns. Happy crafting!
Post a comment to pattern DROPS Children 40-1
We would love to hear what you have to say about this pattern!
If you want to leave a question, please make sure you select the correct category in the form below, to speed up the answering process. Required fields are marked *.