Comments / Questions (23)
![]() Anne Lise wrote:
Anne Lise wrote:
Takk for svaret, firstår det nå.
13.11.2025 - 14:38
![]() Anne-Lise wrote:
Anne-Lise wrote:
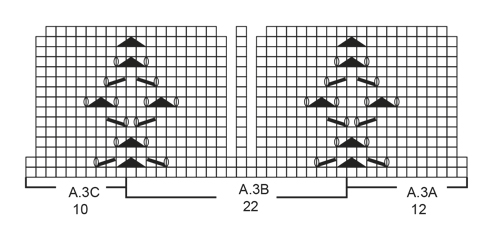
Skal det felles masker i midten fra 3 omgang/rad i diagram A.3B, der det er tomrom oppover i diagrammet. Takk for svar
12.11.2025 - 11:57DROPS Design answered:
Hei Anne-Lise, Ja, mønsteret i midten av omgang/rad 2 i A.3B betyr at du feller masker (som er deretter borte og blir til tomrom i diagrammet oppover). Så du bare strikker videre over tomrommet. Hilsen Drops Team.
13.11.2025 - 07:04
![]() ANNA THEODORIDOU wrote:
ANNA THEODORIDOU wrote:
Hi and sorry for my poor english. I begin to knit this marvelous top and after the front and back, I begin to knit the sleeve and it result small, then I notice that in the image the sleeve seems to have increases who not appear in the text. Is somethig wrong? thank you very mach. Anna.
17.10.2025 - 16:12
![]() Charlotte wrote:
Charlotte wrote:
Jeg har brug for forklaring på række 11 i A. B1 Hvordan skal sidste maske strikkes? Det ser ud som om at det er midt i en “strik to masker sammen”
21.07.2025 - 10:25DROPS Design answered:
Hei Charlotte. Når du strikker A.1B for siste gang , strikkes siste maske sammen med første maske av A.1C = 2 ret sammen. mvh DROPS Design
11.08.2025 - 10:57
![]() Fiona wrote:
Fiona wrote:
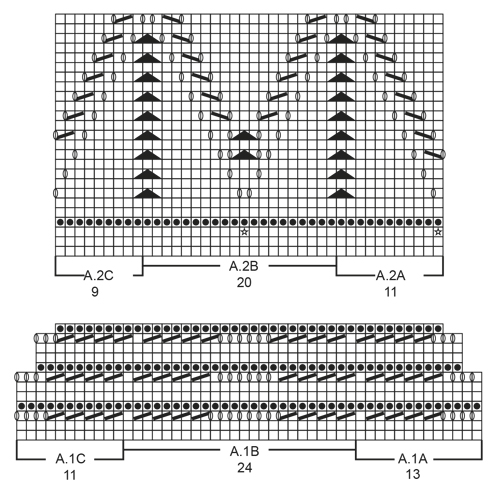
On the A1A, A1B and A1C pattern, on rows 8, 9, 10 and 11 there are less stitches at each end of the pattern, are these decrease rows? Is this also the case for row 12? Many thanks, Fiona
13.05.2025 - 20:14DROPS Design answered:
Dear Fiona, on the 7th row (2nd lace pattern row) you will decrease stitches in each diagram: A.1A, A.1B and A.1C so that there will be less stitches in each repeat. Then again on next to last row some stitches will be decreased. You will work more decreases than you will make yarn over in each repeat A, B and C so that the number of sts will decrease. Happy knitting!
14.05.2025 - 07:43
![]() Valeria wrote:
Valeria wrote:
Salve, non capisco come intrecciare le maglie da ciascun lato per gli scalfi. C’è scritto come segue: Intrecciare 3 maglie 0-1-1-1-1-2 volte, 2 maglie 2-2-3-5-7-7 volte e 1 maglia 1-1-2-3-4-6 volte . Per la prima taglia non si capisce come si devono fare le diminuzioni. Inoltre le diminuzioni vanno fatte sul diritto solamente o sia a diritto che a rovescio? Io sono ferma dopo le prime 16 diminuzioni ( 8 e 8 da ogni lato) degli scalfi. Grazie valeria
24.04.2024 - 17:58DROPS Design answered:
Buonasera Valeria, per la prima taglia deve intrecciare 2 maglie 2 volte e 1 maglia 1 volta = rimangono 83 maglie. Deve intrecciare le maglie all'inizio di ogni ferro a ogni lato come indicato. Buon lavoro!
01.05.2024 - 21:52
![]() Trix wrote:
Trix wrote:
Ik brei niet met rondbreinaalden maar met naalden met knop. A1 begint met 4 omslagen. Hoe doe je dat als die niet tussen steken zitten?
23.03.2023 - 22:35DROPS Design answered:
Dag Trix,
Als je niet op de rondbreinaald breit, en de panden los van elkaar heen en weer breit, zet je aan elke zijkant 1 extra steek op als kantsteek. Deze kantsteken worden weggewerkt bij het in elkaar zetten van het werk.
24.03.2023 - 19:15
![]() Eva-Britt Gundersen wrote:
Eva-Britt Gundersen wrote:
Kan jeg bruke pandora bomullsgarn til denne modellen?
26.04.2022 - 22:14DROPS Design answered:
Hei Eva-Britt, Det er avhengig av tykkelsen på garnet og om det er likt med Drops Safran. Uansett, er det lurt å strikke en prøvelapp før du begynner og justere pinnestørrelsen hvis nødvendig. God fornøyelse!
27.04.2022 - 07:01
![]() Unni wrote:
Unni wrote:
Hei igjen, jeg strikker str.M. Jeg trenger en grundig forklaring av 11. runden ( omgangen ). Vennlig hilsen Unni.
14.06.2021 - 20:54DROPS Design answered:
Hej Unni, 11.omgang (jeg udgår fra at du mener A.1) strikkes således: A.1A: (1r,1oms) x 3, 2 sammen x 4, A.1B: 1r, (2sammen) x 4, (1oms, 1r) x 5, 1oms, 2sammen x 4 gentag A.1B og sidst A.1C: 1r, 2sammen x 4, 1oms, 1r, 1oms, 1r, 1oms. Det vil sige du får 2 masker mindre i hver rapport af A.1B, sæt gerne et mærke imellem rapporterne :)
16.06.2021 - 12:29
![]() Miep wrote:
Miep wrote:
Als je zoals hier veel steken moet opzetten kan het handig zijn om na bv elke 50 steken een kort draadje van afstekende kleur tussen de steken te leggen. Raak je de tel kwijt hoef je niet zo ver terug . Met vriendelijke groet , Miep van de Graaf
13.06.2021 - 15:41
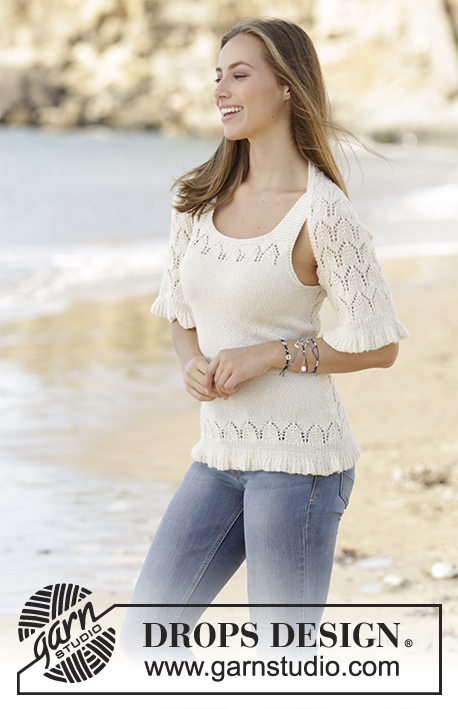
Istanbul#istanbultop |
||||||||||||||||||||||
 |
 |
|||||||||||||||||||||
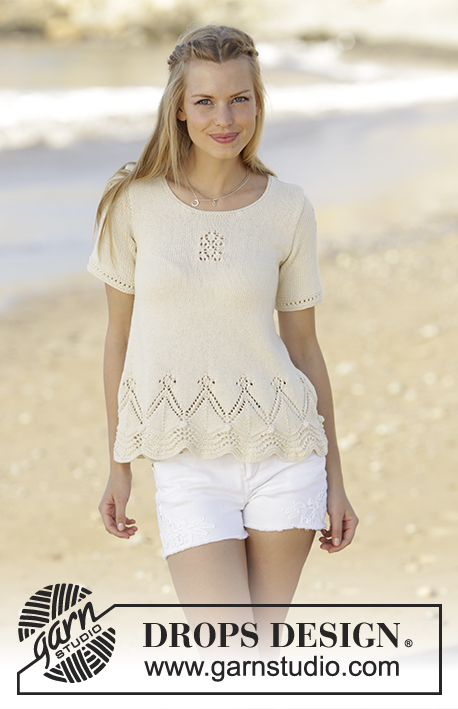
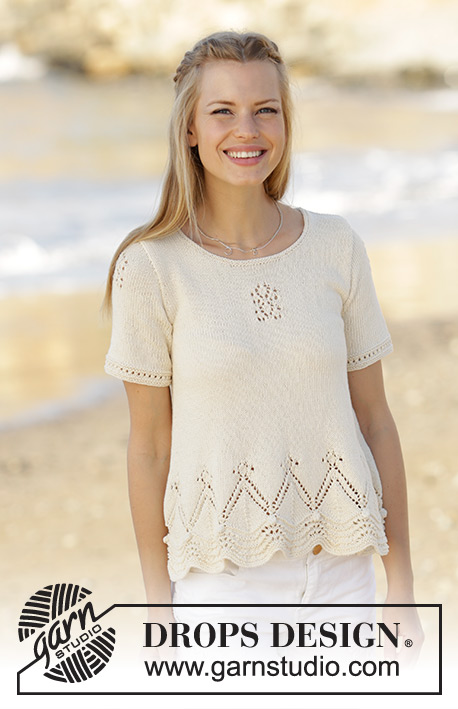
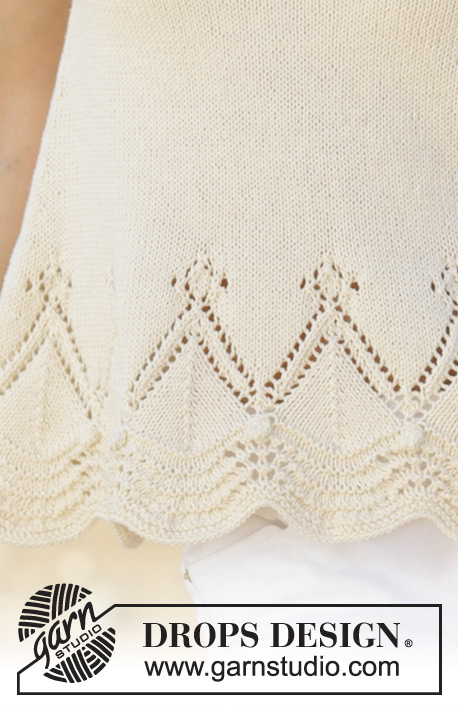
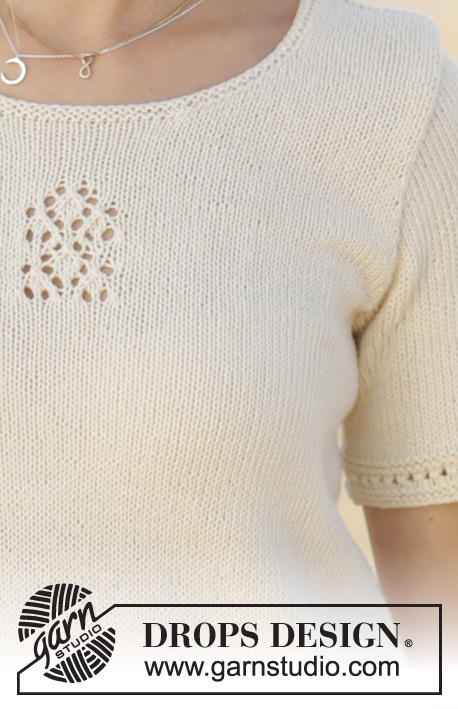
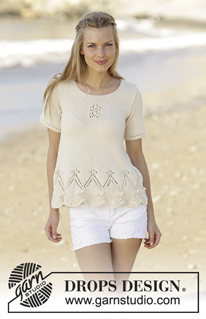
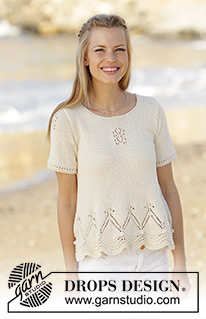
Top with wave pattern and lace pattern, worked bottom up in DROPS Safran. Sizes S - XXXL.
DROPS 178-63 |
||||||||||||||||||||||
|
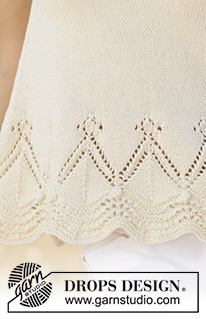
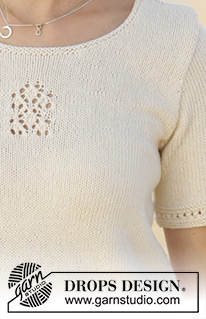
RIDGE/GARTER STITCH (worked in the round): 1 ridge = 2 rounds. Knit 1 round and purl 1 round. PATTERN: See diagrams A.1 to A.5. The diagrams show all the rows in the pattern seen from the right side. DECREASE TIP (for the sides on the body): Start 4 stitches before the marker thread, knit 2 together, knit 4 (the marker thread sits in the middle of these stitches), slip 1 stitch as if to knit, knit 1, pass the slipped stitch over (= 2 stitches decreased). ---------------------------------------------------------- TOP: The piece is worked in the round with circular needle up to the armhole, then the front and back pieces are worked back and forth separately. The sleeves are worked in the round with double pointed needles and the sleeve cap is worked back and forth. BODY: Loosely cast on 336-360-384-408-432-456 stitches with circular needle size 3 mm and Safran. Work 2 RIDGES – see description above. The next round is worked as follows: A.1A (= 13 stitches), work A.1B (= 24 stitches) 13-14-15-16-17-18 times in width, A.1C (= 11 stitches). Continue the pattern in this way. When A.1 has been completed, there are 280-300-320-340-360-380 stitches on the round. The next round is worked as follows: A.2A (= 11 stitches), work A.2B (= 20 stitches) 13-14-15-16-17-18 times in width, A.2C (= 9 stitches). Continue the pattern in this way. REMEMBER THE KNITTING TENSION! When A.2 has been completed there are 308-330-352-374-396-418 stitches on the round. The next round is worked as follows: A.3A (= 12 stitches), work A.3B (= 22 stitches) 13-14-15-16-17-18 times in width, A.3C (= 10 stitches). Continue the pattern in this way. When the diagrams have been completed in height there are 252-270-288-306-324-342 stitches. The piece measures approx. 17 cm in all sizes. Insert a marker thread at the beginning of the round and after 126-135-144-153-162-171 stitches (= in the sides) – allow the marker threads to follow in the piece upwards. Continue by working stocking stitch and on the first round decrease 2 stitches in each side – READ DECREASE TIP (= 4 stitches decreased). Decrease in this way approx. every 3rd-3rd-3rd-4th-6th-9th round a total of 12-12-11-10-7-5 times in each side. After all the decreases, there are 204-222-244-266-296-322 stitches. Knit one round where you decrease 2-0-2-0-2-0 stitches evenly on the round = 202-222-242-266-294-322 stitches. Continue with stocking stitch until the piece measures 35-37-38-40-41-43 cm. Now work A.4 over the middle 11 stitches on the front piece (arrow in the diagram shows the middle stitch on the front piece), AT THE SAME TIME, when the piece measures 38-39-40-41-42-43 cm cast off the middle 8-8-10-10-12-12 stitches in each side (= 4-4-5-5-6-6 stitches on each side of the marker threads) for the armholes. Place the 93-103-111-123-135-149 stitches for the back piece on a thread. The front and back pieces are now worked back and forth and worked separately. FRONT PIECE: = 93-103-111-123-135-149 stitches. Continue with stocking stitch, A.4 and work 1 edge stitch in garter stitch in each side. AT THE SAME TIME cast off stitches in each side of the piece for the armholes. Cast off stitches at the beginning of each row in each side as follows: Cast off 3 stitches 0-1-1-1-1-2 times, 2 stitches 2-2-3-5-7-7 times and 1 stitch 1-1-2-3-4-6 times = 83-87-89-91-93-97 stitches remaining. When A.4 has been completed in height, work stocking stitch over these stitches. When the piece measures 44-46-47-49-50-52 cm place the middle 19-19-21-21-23-23 stitches on 1 thread for the neck and each shoulder is finished separately. Continue to cast off for the neck at the beginning of each row from the neck as follows: Cast off 2 stitches 3 times and 1 stitch 4 times = 22-24-24-25-25-27 stitches left on the shoulder. Continue working until the piece measures 54-56-58-60-62-64 cm, knit 1 row from the wrong side and loosely cast off in knit from the right side. Repeat on the other shoulder. BACK PIECE: = 93-103-111-123-135-149 stitches. Continue with stocking stitch and work 1 edge stitch in garter stitch in each side. AT THE SAME TIME cast off stitches in each side for the armholes as for the front piece = 83-87-89-91-93-97 stitches. AT THE SAME TIME when the piece measures 44-46-48-50-52-54 cm work pattern according to diagram A.4 over the middle 11 stitches (arrow in the diagram shows the middle stitch on the back piece – the remaining stitches are worked in stocking stitch with 1 edge stitch in garter stitch in each side). When A.4 has been completed work stocking stitch over these stitches to finished length. When the piece measures 52-54-56-58-60-62 cm cast off the middle 35-35-37-37-39-39 stitches for the neck and each shoulder is finished separately. Continue to cast off for the neck at the beginning of each row from the neck as follows: Cast off 1 stitch 2 times = 22-24-24-25-25-27 stitches left on the shoulder. Continue working until the piece measures approx. 54-56-58-60-62-64 cm, knit 1 row from the wrong side and loosely cast off while knitting from the right side. Repeat on the other shoulder. SLEEVE: Cast on 67-73-81-87-95-101 stitches with double pointed needles size 2.5 mm and work pattern in the round according to diagram A.5 (On the 7th round in the diagram, knit the last stitch on the round). After A.5 change to double pointed needles size 3 mm. Work stocking stitch in the round. Now work pattern and cast off for the armholes and sleeve cap as follows: NOTE: In sizes S and M start pattern A.4 before casting off for the sleeve cap. In sizes L, XL, XXL and XXXL start pattern A.4 after you have started casting off for the sleeve cap! When the piece measures 12-13-14-15-15-16 cm work pattern according to diagram A.4 over the middle 11 stitches (arrow in the diagram shows the middle stitch on the round) – the remaining stitches are worked in stocking stitch. AT THE SAME TIME when the piece measures 14-14-13-13-12-11 cm cast off the middle 8-8-10-10-12-12 stitches mid under the sleeve and the sleeve cap is worked back and forth with circular needle size 3 mm. Continue with stocking stitch and A.4 over the middle 11 stitches and cast off for the sleeve cap in each side as follows (NOTE: When A.4 has been completed work stocking stitch over these stitches): Cast off 3 stitches 1 time in all sizes, 2 stitches 3-3-3-4-4-5 times and 1 stitch 3-3-3-5-6-6 times in each side, continue by casting off 2 stitches in each side until the piece measures 20-21-21-22-22-22 cm, then cast off 3 stitches 1 time in each side. Cast off the remaining stitches, the sleeve measures approx. 21-22-22-23-23-23 cm. Work the other sleeve in the same way. ASSEMBLY: Sew the shoulder seams. Sew the sleeves to the body. Sew inside the 1 edge stitch in garter stitch on the front and back pieces and inside the cast-off edge on the sleeves. NECK: Knit up from the right side approx. 110 to 120 stitches around the neck with short circular needle size 2.5 mm. Purl 1 round, knit 1 round and purl 1 round. Then cast off in knit (make sure the casting off is not tight). |
||||||||||||||||||||||
Diagram explanations |
||||||||||||||||||||||
|
||||||||||||||||||||||
 |
||||||||||||||||||||||
 |
||||||||||||||||||||||
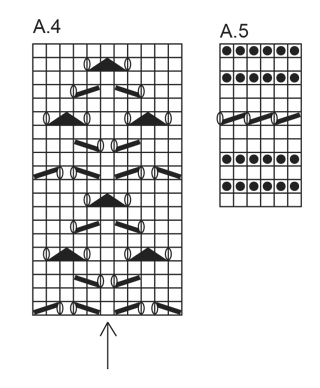 |
||||||||||||||||||||||
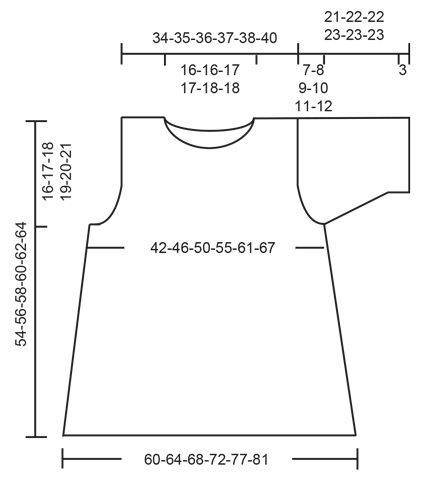 |
||||||||||||||||||||||
Have you finished this pattern?Tag your pictures with #dropspattern #istanbultop or submit them to the #dropsfan gallery. Do you need help with this pattern?You'll find 27 tutorial videos, a Comments/Questions area and more by visiting the pattern on garnstudio.com. © 1982-2026 DROPS Design A/S. We reserve all rights. This document, including all its sub-sections, has copyrights. Read more about what you can do with our patterns at the bottom of each pattern on our site. |
||||||||||||||||||||||







Post a comment to pattern DROPS 178-63
We would love to hear what you have to say about this pattern!
If you want to leave a question, please make sure you select the correct category in the form below, to speed up the answering process. Required fields are marked *.