
Popular categories
Looking for a yarn?


Comments / Questions (69)
![]() Giovanna wrote:
Giovanna wrote:
È possibile avere le spiegazioni per lavorare con i ferri normali? Grazie
02.04.2019 - 14:23DROPS Design answered:
Buogiorno Giovanna. Purtroppo in questa sede non riusciamo a darle un aiuto così personalizzato. In questa pagina trova qualche indicazione su come adattare ai ferri dritti un modello pensato per essere lavorato in tondo. Per un’assistenza migliore, può rivolgersi, anche via mail, al suo rivenditore Drops di fiducia. Buon lavoro!
02.04.2019 - 15:07
![]() Ann De Clerck wrote:
Ann De Clerck wrote:
Na de opzet van de steken moet er aan de 4 markeerders aan beide kanten gemeerderd worden met een omslag! meerderen om de nld? Is dit dan dat je in elke naald, zowel in de rechtste als de averrechtse nld moet meerderen, of wordt er enkel in de averrechtse nld gemeerderd?
01.03.2019 - 15:36DROPS Design answered:
Dag Ann,
Je meerdert elke keer aan beide kanten van alle markeerdraden en je doet dit om de naald, dus de ene naald wel en de andere naald niet. Je meerdert dus steeds in een naald met recht en je breit de omslagen gedraaid in een naald met averecht.
05.03.2019 - 20:52
![]() Regina Hapka wrote:
Regina Hapka wrote:
Zum Anfang habe ich zwischen den Makierungen gerade-ungerade-gerade- ungerade Maschenanzahl. Beim ersten Abnehmen soll ich aber plötzlich ungerade abnehmen, gerade stricken, ungerade abnehmen und gerade Maschenzahl stricken. Dann stimmt es doch nicht mehr mit der Raglanschräge überein. Was soll ich machen? Ich stricke die größte Größe.
29.07.2018 - 21:34DROPS Design answered:
Liebe Frau Hapka, bei der Raglan nehmen Sie immer 1 Masche auf beiden Seiten jeder Markierung zu, dh 8 M werden pro Zunahmenrunde zugenommen. Die Markierung bleibt immer an der gleichen Stelle und die Zunahmmen sind immer vor der Maschen mit der Markierung und nach der Maschen mit der Markierung gestrickt (es wird immer 2 M mehr zwischen jeder Markierung sein). Viel Spaß beim stricken!
31.07.2018 - 09:23
![]() Susanne wrote:
Susanne wrote:
Ich komme bald beim Musterabschnitt an und frage mich, wie die Zunahmen in das Muster eingearbeitet werden sollen. Bleibt dann auf der Seite ein immer breiter werdender Streifen aus glatt gestrickten Maschen und es gibt immer die gleiche Anzahl M1 pro Reihe, bis zum Ende der Arbeit? Das würde in meinem Fall (S) bedeuten ich hätte am Schluss auf jeder Seite 32 glatte Maschen... vielen Dank!
24.07.2018 - 10:44DROPS Design answered:
Liebe Susanne, die Aufnahmen auf den Seiten werden im Muster eingestrickt, sobald Sie genügend Maschen für 1 Rapport M.1 haben - siehe TIPP ZUM AUFNEHMEN. viel Spaß beim stricken!
24.07.2018 - 14:37
![]() Annab wrote:
Annab wrote:
E' possibile realizzare il modello con safran? Grazie per la risposta e complimenti per il sito.
28.05.2017 - 16:02DROPS Design answered:
Buongiorno Annab. Muskat appartiene al gruppo filati B, mentre Safran appartiene al gruppo filati A quindi più sottile. Dovrebbe ricalcolare il numero delle maglie per la sua taglia in base al campione che ottiene lavorando con Safran. Buon lavoro!
28.05.2017 - 18:48
![]() A.M.C. Claessens wrote:
A.M.C. Claessens wrote:
Heb hem af maar is veel te diep onder de armen. BH is volledig in zicht. Ik ga de top niet uithalen. Eens denken over een gehaakt inzet stukje...
26.09.2016 - 21:13
![]() Tiziana Albanesi wrote:
Tiziana Albanesi wrote:
Ciao e complimenti per il sito bellissimo! La mia domanda riguarda l'inizio delle istruzioni dove si indica "lavorare a punto legaccio in tondo....(attenzione: 1 giro rovescio)" . Devo lavorare i punti del primo ferro a rovescio o devo intendere che mi trovo sul rovescio del lavoro? Quindi, se è vero il primo caso, devo fare tutti gli aumenti (gettati) durante un ferro che lavoro a punti a rovescio? Grazie dell'attenzione che vorrete dedicarmi
05.04.2016 - 19:23DROPS Design answered:
Buonasera Tiziana. Nel corso del primo giro le m vengono lavorate a rov. Gli aumenti avvengono sui giri lavorati a rov e le m gettate verranno lavorate a dir ritorto al giro successivo. Buon lavoro!
05.04.2016 - 20:04
![]() Susanne wrote:
Susanne wrote:
Kan denne tunika også strikkes i Belle?
01.04.2016 - 04:05DROPS Design answered:
Hej Susanne. Ja, du kan (Belle er samme kategori som Muskat - se garnalternativer), men husk at strikke en pröve saa din strikkefasthed er korrekt. God fornöjelse!
01.04.2016 - 10:07
![]() Sanny wrote:
Sanny wrote:
Me gustaría tejer este jersey con do aguja. Podrían enviarme las instrucciones por favor?
29.06.2014 - 16:44DROPS Design answered:
Hola Sanny. El patrón está traducido al español. Mira el apartado seleccionar idioma bajo la foto.
01.07.2014 - 13:00
![]() Merja Ek wrote:
Merja Ek wrote:
Mitä minun pitäisi tehdä, että muskat-lanka ei kiertyisi koko ajan kierteelle/syttyrälle, kun otan langan kerän sisältä? Tuo kierteellemeno haittaa neulomista ja ärsyttää tosi paljon.
04.05.2014 - 19:38DROPS Design answered:
Kehottaisin sinua ottamaan langan kerän ulkoa. Tällöin lanka ei kierry yhtä paljon. Voit myös yrittää kiertää langan uudestaan kerälle.
06.05.2014 - 13:07
|
||||||||||
Prudence#prudencetunic |
||||||||||
 |
 |
|||||||||
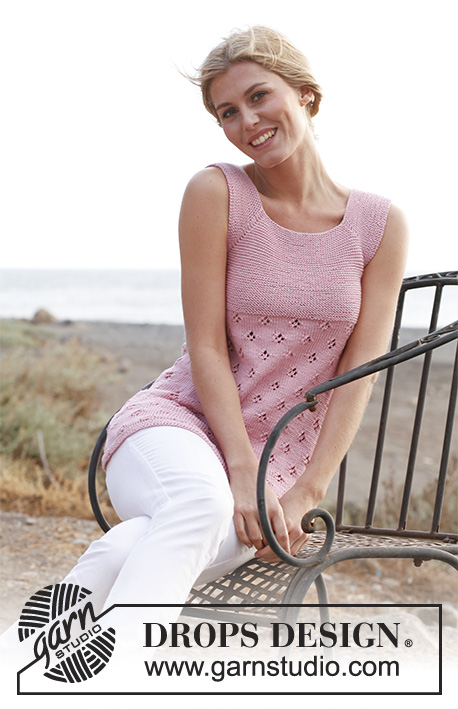
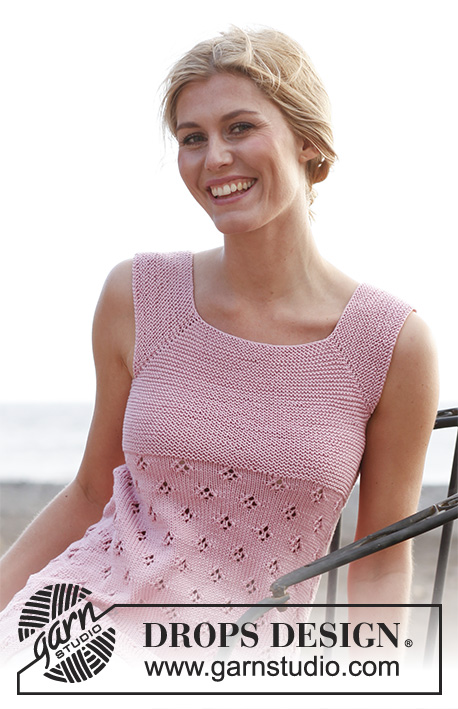
Knitted DROPS tunic in garter st and with lace pattern, worked top down in ”Muskat”. Size: S - XXXL.
DROPS 138-2 |
||||||||||
|
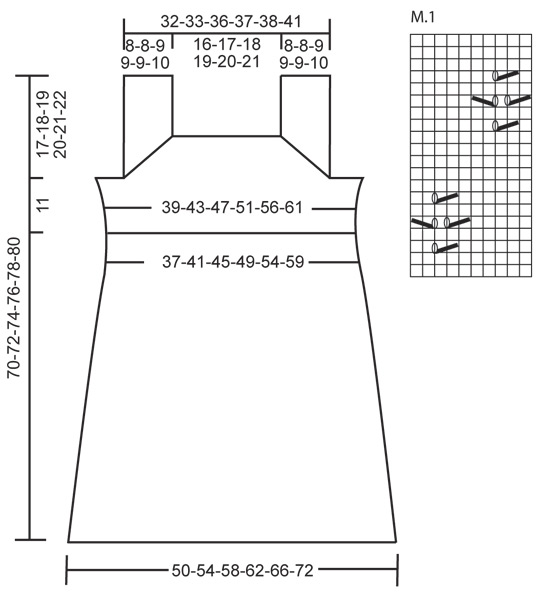
GARTER ST (in the round on circular needle): * K 1 round and P 1 round *, repeat from *-*. PATTERN: See diagram M.1 – the diagram shows 1 repetition of the pattern. DECREASE TIP (applies to side dec): Dec as follows when 2 sts remain before marker: K 2 tog. Dec as follows after marker: K 2 twisted tog (i.e. work in back loop of st instead of front). INCREASE TIP (applies to side inc): Work until 1 st remains before marker, make 1 YO, work 2 sts and make 1 YO. On next round K YOs twisted to avoid holes (i.e. work in back loop of st instead of front). Work inc sts in stocking st until they can be worked in one whole repetition of diagram M.1. -------------------------------------------------------- TUNIC: Worked in the round, top down. The garment is the same depth around the neck both on back and front piece. Cast on 150-162-168-180-194-198 sts on circular needle size 3 mm with Muskat. Insert 4 markers in the corner sts as follows: 1st marker in the 40th-44th-45th-49th-54th-54th st, 2nd marker in the 75th-81st-84th-90th-97th-99th st, 3rd marker in the 115th-125th-129th-139th-151st-153rd st and 4th marker in the last st, (sts between 1st and 2nd marker (34-36-38-40-42-44 sts) = front piece, sts between 3rd and 4th marker (34-36-38-40-42-44 sts) = back piece and sts between 2nd and 3rd marker and between 4th and 1st marker (39-43-44-48-53-53 sts) = straps). READ ALL OF THE FOLLOWING SECTION BEFORE CONTINUING! Work in GARTER ST in the round - see explanation above (NOTE: 1st round = P) - AT THE SAME TIME on 1st round, inc 1 st by making 1 YO on each side of the 4 sts with markers (= 8 inc) – NOTE: Round beg by making 1 YO which will be the inc on one side of the last marker, the other YO at this marker is made at the end of round when only 1 st remains (= corner st with marker). This is done to make the transitions between rounds in the middle of a corner. On next round K YOs twisted (i.e. work in back loop of st instead of front) to avoid holes. Repeat inc every other round a total of 18-18-20-20-20-22 times = 294-306-328-340-354-374 sts. K 1 round after last inc. REMEMBER THE KNITTING TENSION! Work next round as follows: LOOSELY cast off the first 75-79-84-88-93-97 sts for strap - cast off with P, P the next 72-74-80-82-84-90 sts (= front piece, the first of these sts is already on the right needle), LOOSELY cast off the next 75-79-84-88-93-97 sts for strap - cast off with P and P the last 72-74-80-82-84-90 sts (= back piece, the first of these sts is already on the right needle). Work next round as follows: Cast on 14-20-24-30-38-44 new sts (= under sleeve, insert a marker in the middle of these), K 72-74-80-82-84-90 sts, cast on 14-20-24-30-38-44 new sts (= under the other sleeve, insert a marker in the middle of these) and K 72-74-80-82-84-90 sts = 172-188-208-224-244-268 sts. Remove the 4 corner markers. NOW MEASURE PIECE FROM HERE! K until first marker (i.e. 7-10-12-15-19-22 sts) – now round beg here. Continue in garter st in the round – AT THE SAME TIME when piece measures 4 cm, dec 1 st on each side of markers in the sides - READ DECREASE TIP! Repeat dec when piece measures 8 cm = 164-180-200-216-236-260 sts. When piece measures 11 cm, switch to circular needle size 3.5 mm. Continue to work as follows: 1-0-0-4-4-0 sts in stocking st, diagram M.1 over 80-90-100-100-110-130 sts, 2-0-0-8-8-0 sts in stocking st, diagram M.1 over 80-90-100-100-110-130 sts and 1-0-0-4-4-0 sts in stocking st. When piece measures 14 cm (from armhole incl rounds in garter st), inc 1 st on each side of markers in each side - READ INCREASE TIP! Repeat inc every 2½ cm a total of 14 times = 220-236-256-272-292-316 sts. When piece measures approx. 51-52-53-54-55-56 cm from armhole - adjust after 1 whole repetition of diagram M.1 – switch to circular needle size 3 mm. Work in garter st in the round for 2 cm, then LOOSELY cast off; use circular needle 3.5 mm for cast off - it is very important that the cast off edge is not too tight. |
||||||||||
Diagram explanations |
||||||||||
|
||||||||||
 |
||||||||||
Have you finished this pattern?Tag your pictures with #dropspattern #prudencetunic or submit them to the #dropsfan gallery. Do you need help with this pattern?You'll find 8 tutorial videos, a Comments/Questions area and more by visiting the pattern on garnstudio.com. © 1982-2026 DROPS Design A/S. We reserve all rights. This document, including all its sub-sections, has copyrights. Read more about what you can do with our patterns at the bottom of each pattern on our site. |
||||||||||


With over 40 years in knitting and crochet design, DROPS Design offers one of the most extensive collections of free patterns on the internet - translated to 17 languages. As of today we count 324 catalogues and 12290 patterns translated into English (UK/cm). 12290
We work hard to bring you the best knitting and crochet have to offer, inspiration and advice as well as great quality yarns at incredible prices! Would you like to use our patterns for other than personal use? You can read what you are allowed to do in the Copyright text at the bottom of all our patterns. Happy crafting!
Post a comment to pattern DROPS 138-2
We would love to hear what you have to say about this pattern!
If you want to leave a question, please make sure you select the correct category in the form below, to speed up the answering process. Required fields are marked *.