
Popular categories
Looking for a yarn?


Comments / Questions (14)
![]() Ľudmila Hoffmanová wrote:
Ľudmila Hoffmanová wrote:
Older knitting patterns cannot be printed. The printer is OK. When printing it reports an error and that it is encrypted. Please, can you do something about this? Thank you very much.
18.11.2024 - 10:13
![]() Marirke wrote:
Marirke wrote:
Zeer goed patroon. De pink viel bij mij wat krap uit. Ik heb tussen de pink en de ringvinger twee steken extra bijgemaakt
16.10.2024 - 12:21
![]() Karine wrote:
Karine wrote:
Bonjour. Je ne comprends pas comment intégrer les augmentations pour le pouce à l'intérieur du motif. Je suis consciente que le motif sera «déformé» sous le pouce, mais je ne sais pas comment établir le comptage des mailles à ce niveau.
06.12.2015 - 02:13DROPS Design answered:
Bonjour Karine, tricotez le pouce en suivant le diagramme, et continuez le diagramme sur les mailles du dos et du devant pour que le motif continue sur chaque partie (avec la démarcation des augmentations de part et d'autre). Bon tricot!
07.12.2015 - 10:22
![]() Ramona wrote:
Ramona wrote:
Sollen bei der ersten Abnahme im M1 6 Maschen abgenommen werden (also dann = 54 M) oder 12 M um auf die gesamten 48 M zu kommen?
18.10.2014 - 14:13DROPS Design answered:
Die Anleitung enthielt einen Fehler, er wurde gerade korrigiert. Schauen Sie sich die entsprechende Stelle noch einmal an, nun dürfte es klar sein. Weiterhin gutes Gelingen!
19.10.2014 - 10:57
![]() Victoria wrote:
Victoria wrote:
Bonjour je suis en train de tricoter ces gants mais je bloque au niveau des augmentations pour le pouce je ne comprends pas comment procéder? Et comment relever les mailles et apres prendre les 13 mailles mais sur le devant ou le dos du gant ? Merci par avance
28.01.2013 - 14:49DROPS Design answered:
Bonjour Victoria, on augmente de part et d'autre de la m avec le marqueur (+ les augm). Quand vous avez un total de 13 m pour le pouce, vous les mettez en attente sur un fil ou arrêt de mailles et montez 1 m au-dessus des m en attente pour continuer la main. - cf vidéo "Moufle- tricoter le pouce". Bon tricot!
28.01.2013 - 15:14
![]() Victoria wrote:
Victoria wrote:
Bonjour je suis en train de tricoter ces gants mais je bloque au niveau des augmentations pour le pouce je ne comprends pas comment procéder? Et comment relever les mailles et apres prendre les 13 mailles mais sur le devant ou le dos du gant ? Merci par avance
28.01.2013 - 14:49
![]() Lismeitli wrote:
Lismeitli wrote:
Bei der Anleitung in Deutsch muss sich ein Fehler eingeschlichen haben. Nachdem ich die englische Anleitung gelesen habe müsste es wohl heissen "Während man M1 zum ersten Mal stricken bei der 14. und letzten Runde gleichmässig verteilt 6 M. abn. = 48 M. Während man M1 zum zweiten Mal stricken bei der letzten Runde gleichmässig verteilt 6 M. abn. = 42 M. Während man M1 zum dritten Mal stricken bei der letzten Runde gleichmässig verteilt 6 M. zunehmen = 48 M"
02.11.2012 - 00:45DROPS Design answered:
Hallo Lismeitli, Sie haben völlig Recht, es war ein Fehler in der Überetzung. Es ist jetzt korrigiert und wir danken Ihnen für den Hinweis!
04.11.2012 - 12:04
![]() Drops Design wrote:
Drops Design wrote:
Udtagningerne på de første pinde er jo ensfarvet, efter det må du tælle så mønsteret passer på hver side af kilen (altså over de første m du tog ud) God fornøjesel!
17.10.2011 - 14:31
![]() Malene wrote:
Malene wrote:
Hvordan får man mønsteret til tommelfingeren passet ind, så det bliver pænt i forbindelse med de 6 udtagninger man laver?
15.10.2011 - 16:24
![]() Mna wrote:
Mna wrote:
Fine!
22.06.2011 - 12:09
|
|||||||
Nordic Night#nordicnightgloves |
|||||||
 |
 |
||||||
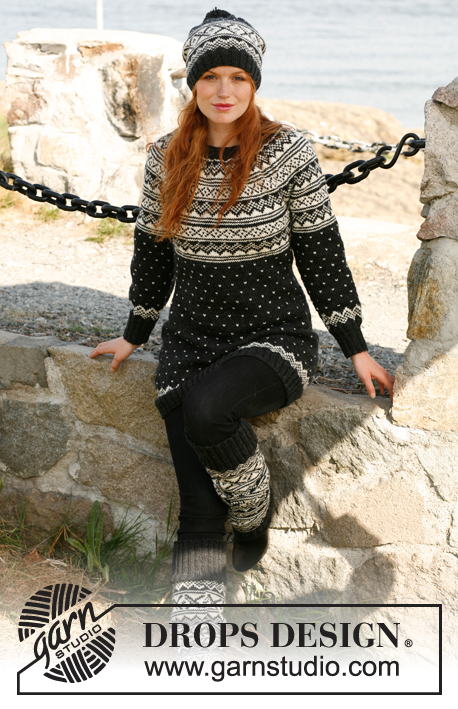
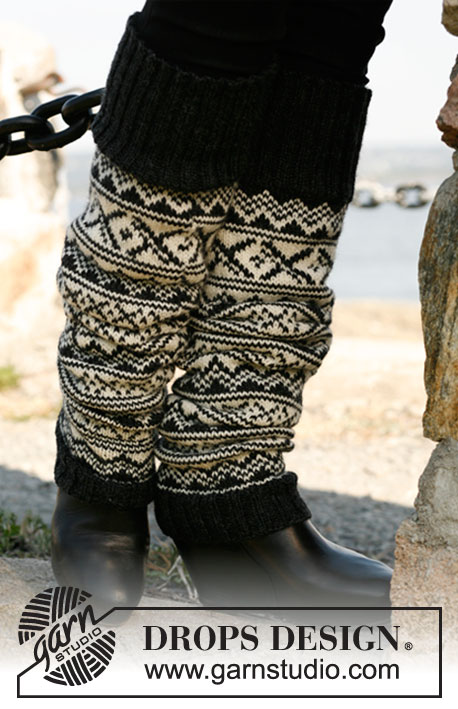
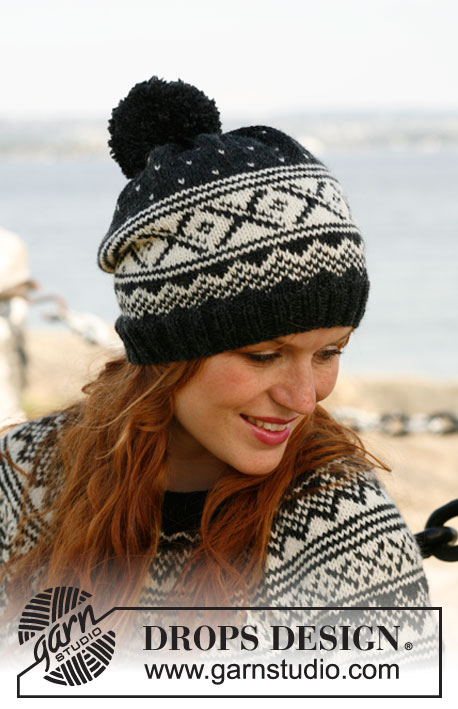
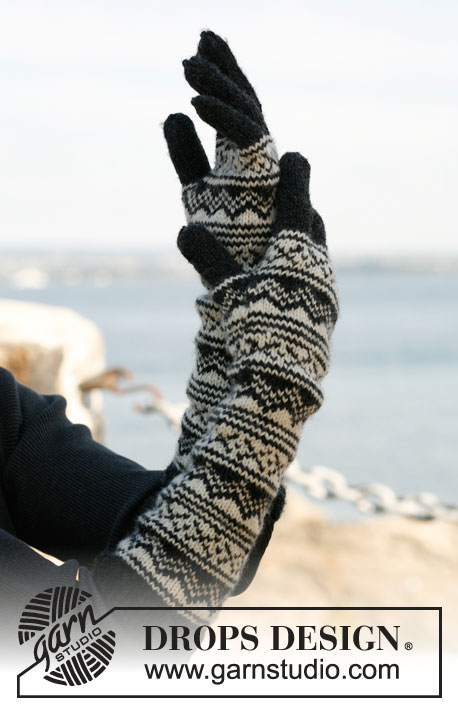
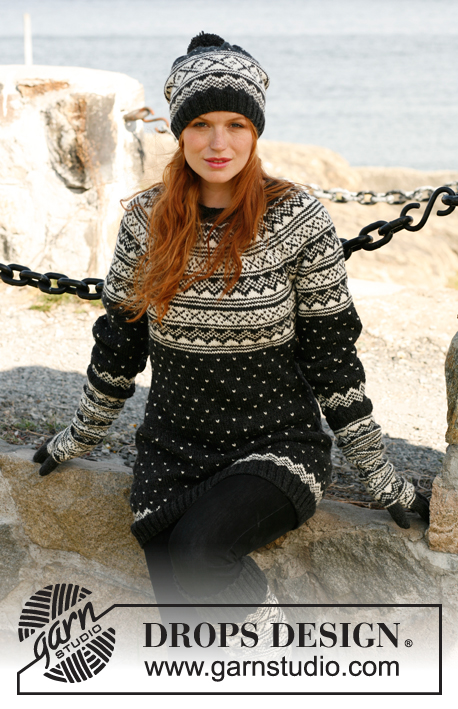
Knitted DROPS gloves with Norwegian pattern in ”Karisma”.
DROPS 131-14 |
|||||||
|
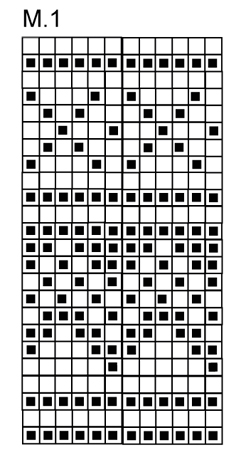
PATTERN: See diagram M.1 - diagram is worked in stocking st. -------------------------------------------------------- RIGHT GLOVE: Worked in the round on double pointed needles. Cast on 64 sts on double pointed needles size 2.5 mm with anthracite. Work rib = K 2/P 2 for 8 rounds. Switch to circular needle size 3 mm, K 1 round while at the same time dec 4 sts evenly = 60 sts. READ ALL OF THE FOLLOWING SECTION BEFORE CONTINUING! Continue diagram M.1 upwards. REMEMBER THE KNITTING TENSION! When working diagram M.1 the first time, dec 6 sts evenly on the 14th round and on the last round = 48 sts. When working diagram M.1 the second time, dec 6 sts evenly only on the last round = 42 sts. When working diagram M.1 the third time, inc 6 sts evenly on the last round = 48 sts. The piece measures approx. 25 cm. Insert a marker in 2nd st on round (= thumb st). READ ALL OF THE FOLLOWING SECTION BEFORE CONTINUING! Work diagram M.1 one more time vertically – at the same time inc for thumb gusset as follows: Make 1 YO on each side of st with marker, on next round K YO twisted (i.e. in back loop of st instead of front) to avoid holes. Repeat inc every other round a total of 6 times - NOTE: Inc on each side of st with marker + the sts already inc so that there a 2 sts more between inc every time. Work the inc sts in base colour of pattern (i.e. sometimes they are worked in anthracite and sometimes in off white). After all inc, there are 13 thumb sts and 60 sts in total. When piece measures 5 cm from beg of thumb gusset, slip the 13 thumb sts on a stitch holder. On next round, cast on 1 new st behind thumb sts = 48 sts in total. Continue diagram M.1 until the diagram has been worked. Then work in anthracite until finished measurements. When piece measures 3.5 cm from where thumb sts where slipped on a stitch holder, slip the first 19 sts on a stitch holder (= inside the hand), keep the next 10 sts on the needle and slip the last 19 sts on a stitch holder (= top of hand). LITTLE FINGER = 10 sts, in addition cast on 2 new sts towards the hand = 12 sts. Work in stocking st in the round with anthracite for approx. 6 cm, then K all sts tog 2 by 2. Cut the thread and pull it through the remaining 6 sts and tighten tog. HAND: Slip sts from stitch holder back on double pointed needles size 3 mm, knit in addition up 2 sts towards the little finger = 40 sts. Work 2 rounds in stocking st with anthracite. Keep the 2 sts knitted up towards the little finger + 6 sts on each side of these sts on the needle. Slip the remaining 26 sts back on the stitch holders. RING FINGER = 14 sts, cast on 1 new st towards sts on stitch holders = 15 sts. Work in stocking st in the round with anthracite for approx. 7½ cm, then K all sts tog 2 by 2. Cut the thread and pull it through the remaining 8 sts and tighten tog. MIDDLE FINGER: Slip 6 sts on top of hand and 6 sts inside the hand back on double pointed needles size 3 mm, knit in addition up 2 sts towards the ring finger and cast on 1 new st towards sts on stitch holder = 15 sts. Work in stocking st in the round with anthracite for approx. 8½ cm, then K all sts tog 2 by 2. Cut the thread and pull it through the remaining 8 sts and tighten tog. INDEX FINGER: Slip the remaining 14 sts from stitch holder back on double pointed needles size 3 mm, knit in addition up 2 sts towards the middle finger = 16 sts. Work in stocking st in the round with anthracite for approx. 7 cm, then K all sts tog 2 by 2. Cut the thread and pull it through the remaining 8 sts and tighten tog. THUMB: Slip the 13 sts over thumb gusset on double pointed needles size 3 mm and knit in addition up 5 sts along the edge behind the thumb sts = 18 sts. Work in stocking st in the round with anthracite for approx. 6 cm, then K all sts tog 2 by 2. Cut the thread and pull it through the remaining 9 sts and tighten tog. LEFT GLOVE: Work as right glove but reversed, i.e. inc for thumb gusset are done on each side of next to last st on the round. When working the little finger, work as follows: Slip the first 19 sts on a stitch holder (= top of hand), keep the next 10 sts on the needle and slip the last 19 sts on a stitch holder (= inside the hand). |
|||||||
Diagram explanations |
|||||||
|
|||||||
 |
|||||||
Have you finished this pattern?Tag your pictures with #dropspattern #nordicnightgloves or submit them to the #dropsfan gallery. Do you need help with this pattern?You'll find 11 tutorial videos, a Comments/Questions area and more by visiting the pattern on garnstudio.com. © 1982-2026 DROPS Design A/S. We reserve all rights. This document, including all its sub-sections, has copyrights. Read more about what you can do with our patterns at the bottom of each pattern on our site. |
|||||||


With over 40 years in knitting and crochet design, DROPS Design offers one of the most extensive collections of free patterns on the internet - translated to 17 languages. As of today we count 324 catalogues and 12290 patterns translated into English (UK/cm). 12290
We work hard to bring you the best knitting and crochet have to offer, inspiration and advice as well as great quality yarns at incredible prices! Would you like to use our patterns for other than personal use? You can read what you are allowed to do in the Copyright text at the bottom of all our patterns. Happy crafting!
Post a comment to pattern DROPS 131-14
We would love to hear what you have to say about this pattern!
If you want to leave a question, please make sure you select the correct category in the form below, to speed up the answering process. Required fields are marked *.