
Popular categories
Looking for a yarn?


Comments / Questions (102)
![]() Sara wrote:
Sara wrote:
In the first round of the edging, it says ch 56 on each side. Why chain so many when in the next round I’m only supposed to do 42 dc over those 56 chains. Either I will have ugly gaps between each dc which also makes the armholes very bubbly, or a 7 cm chain left after the 42 dc. How can I fix this?
16.04.2016 - 12:53DROPS Design answered:
Dear Sara, when crocheting a chain most of the time chains are more tight than your sts will be on next row, to avoid that the first row to be too tight on armholes, you work more chains (56) but will then crochet only 42 dc on 1st row skipping ch evenly. That way, your armholes won't be too tight. If your chains are loose enough, you can then crochet the correct number of sts, or then work more and add a small crochet edge to finish armholes. Happy crocheting!
18.04.2016 - 09:10
![]() Maya wrote:
Maya wrote:
I´v made the size S/M. But, the other thing is, with crocheting of the hook 4 you do need 350 g of the yarn, NOT only 300, what is written. I was going to make the size L and thank of it I had 350 g and I could fortunately end it. I hope, this will help:)
26.09.2015 - 03:25DROPS Design answered:
Thank you for this info! Crocheting is so individual technique that is not very easy to count yarn amount correct for everyone - so every feed-back is helpful :-)
30.09.2015 - 09:57
![]() Maya wrote:
Maya wrote:
Hello:) i´ve just finished this wonderfull piece. I´d like to mention , that the shape of the pattern at the bottom is incorrect. Back piece is actual longer, because during making the beginning of the edge you add 2 rows of tr extra, don´t you?
26.09.2015 - 03:22DROPS Design answered:
Hello, this piece is really very nice :-)! At the beginning of edge you only make the armholes, there are no extra rows, whole edge is made as one piece. Happy crocheting! Hana
30.09.2015 - 09:52Cris wrote:
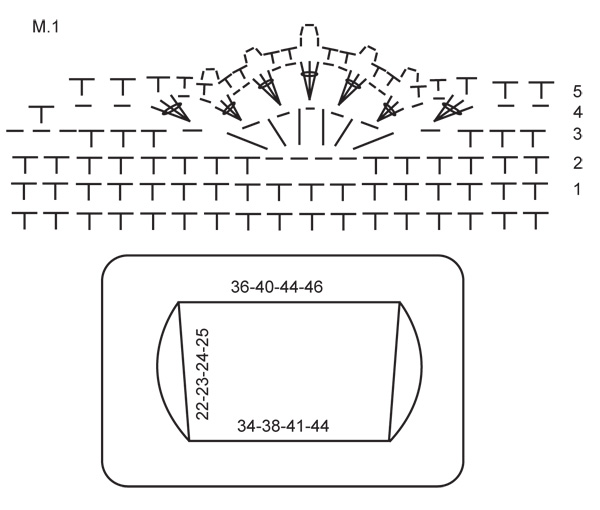
Hello, on row 2 of the m.1.... how many sc in between each set of ch stitches? The diagram is a little confusing because there are more on one side than the other? Thank you again
25.09.2015 - 09:17DROPS Design answered:
Dear Cris, on row 2, work: *6 sc, ch 4, skip 3 sc, 8 sc*, and repeat from *-*, you will work around over 17 sc all the round. Happy crocheting!
25.09.2015 - 09:48Cris wrote:
I need more help with this patter. I'm on the edge, I just did a set of the 3 rows and I see that it says, "when edge measures 5, 10 and 15 cm / 2", 4" and 6'' (adjust to a row of sc) inc 34-34-34-36 sc evenly on round" after I begin R1 again, it will then be 5 cm, or do I increase in r2? also, how do I do the increase of 34 sc in the round, is there certain places I need to place them? I also wondered if there is a better explanation of M.1 ? Thank you for all your help.
22.09.2015 - 09:47DROPS Design answered:
Dear Cris, the increase should be done when working a sc row, so when your piece measures 5, 10 and then 15 cm again (3 rounds with inc) - make sure you have to crochet either row 2 or 3 (= sc-row), inc evenly 34 sc. See here how to inc evenly. M.1 is the name of the diagram for the edge - see above measurement chart. Happy crocheting!
22.09.2015 - 11:20Cris wrote:
Ok so I'm struggling with the beginning of this pattern. I'm doing the s/m so I chain 78, in the end I am supposed to end with 2 in the last remaining chains, do I skip a ch st after the 3 dc and then the 2 or 5 in total ? Also I did a swatch and am using a smaller hook but my piece already measures just over 40 cm. I don't think that's correct ? Do I need to go with smaller hook still ?
18.09.2015 - 19:49DROPS Design answered:
Dear Chris, at the end of row you should skip 1 ch (as stated under from *-*) and finish with 1 dc in the last 2 ch. remember to check and keep the correct tension, ie 17 dc x 10 rows = 10 x 10 cm / 4'' x 4''. Happy crocheting!
19.09.2015 - 09:58
![]() Cobie wrote:
Cobie wrote:
Goedemorgen, Ik wil graag de patronen drops 119-22 en drops 153-10 gaan maken maar ik wil ze graag iets langer hebben, hoe moet ik dat doen, kunt u mij dat uit leggen, ik heb namelijk geen barbie figuur. Alvast bedankt vr.gr. Cobie
23.07.2015 - 11:21DROPS Design answered:
Hoi Cobie. Ik kan je helaas niet helpen met individuele aanpassingen op de gratis patronen. Let op dat deze modellen gaan tot maat XXXL.
28.07.2015 - 15:51Cris wrote:
I would like to know how to determine which size. I noticed other patterns have bust measurements to find out which size to crochet but I don't see that with this pattern. Will it work if I use the bust size info from anther drops bolero pattern ? Than you in advance.
21.07.2015 - 22:47DROPS Design answered:
Dear Cris, you will find at the bottom of the pattern a measurement chart with all measurements in cm taken flat from side to side, compare these to a similar garment you have and like the shape to find out the matching size (compare back piece measurements to get the correct size). Happy crocheting!
27.07.2015 - 16:26
![]() Linda wrote:
Linda wrote:
Goedendag, Ik ben met dit vestje bezig en moet 56 l haken en volgende toer 42 l op die 56 l haken, Wat doe ik dan met de overige 14 l.? Ik begrijp wel dat dat het armsgat is, maar blijft er dan een ketting van 14 l gewoon los hangen? bvd.
09.07.2015 - 08:28DROPS Design answered:
Hoi Linda. Je haakt om de l-ketting, dus niet in. Ik heb het even aangepast van in naar om zodat het duidelijker is.
30.07.2015 - 13:50
![]() ChristinFindIchGur wrote:
ChristinFindIchGur wrote:
Hallo Leider verstehe ich schon am Anfang nicht was ihr mit "und mit je 1 Stb in die 2-2-2-3 letzten Lm abschliessen = 58-64-70-74 Stb" meint? Danke für eure Hilfe RÜCKENTEIL: Mit Muskat auf Nadel Nr. 4, 78-86-94-99 lockere Lm häkeln. 1 Stb in die 4. Lm von der Nadel, * 1 Stb in jede der 3 nächsten Lm, 1 Lm überspringen *, von *-* wiederholen und mit je 1 Stb in die 2-2-2-3 letzten Lm abschliessen = 58-64-70-74 Stb.
03.07.2015 - 17:39DROPS Design answered:
Sie häkeln so lange den Rapport von * bis *, bis noch 2-2-2-3 Lm übrig sind und häkeln in diese letzten Lm je 1 Stb. "Abschließen" bedeutet lediglich, dass die R mit 2 bzw. 3 Stb endet.
05.07.2015 - 08:49
|
|||||||||||||
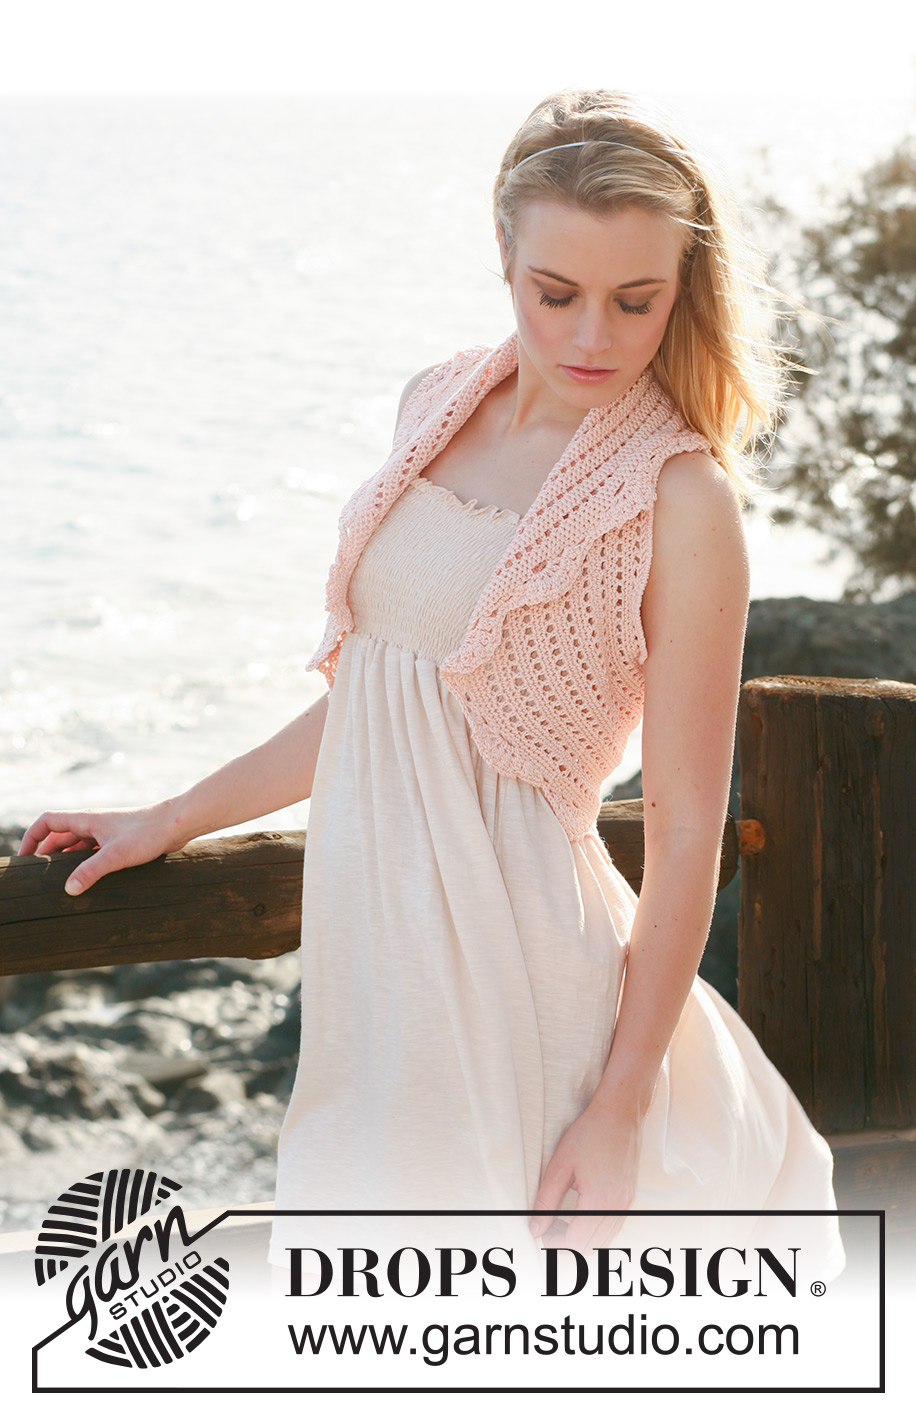
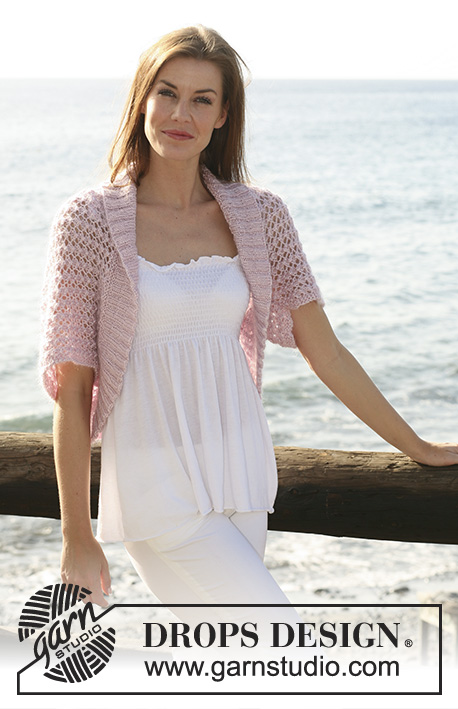
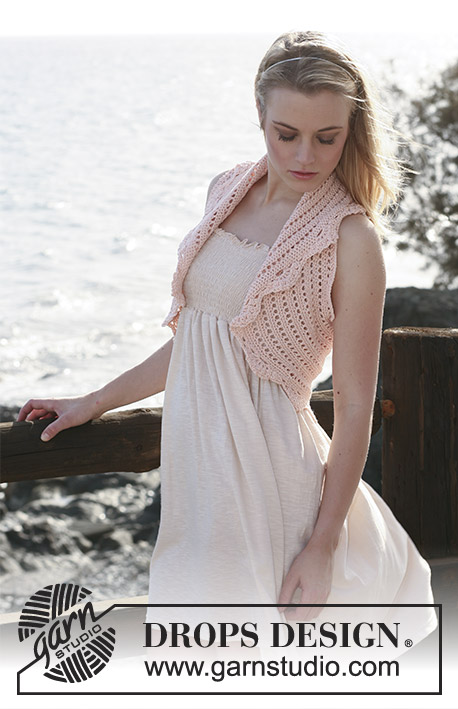
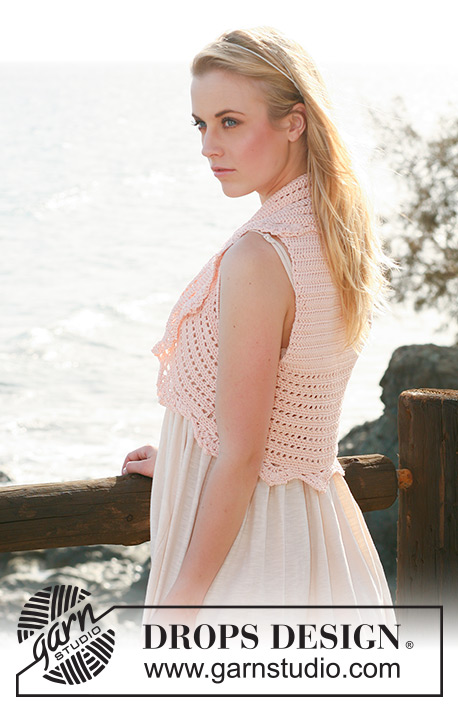
Peach Perfection#peachperfectionbolero |
|||||||||||||
 |
 |
||||||||||||
Crochet DROPS waistcoat in ”Muskat”. Size S - XXXL
DROPS 119-22 |
|||||||||||||
|
CROCHET INFO: Back piece: Replace first tr on each row with 3 ch. Edge piece: Replace first dc on each round with 1 ch. Finish each round with 1 sl st in the last ch from beg of previous round. Replace first tr on each round with 3 ch. Finish each round with 1 sl st in last ch from beg of previous row. INCREASING TIP: Inc by working 2 sts in 1 st. -------------------------------------------------------- -------------------------------------------------------- BACK PIECE: Crochet 78-86-94-99 loose ch with crochet hook size 4 mm and Muskat. Crochet 1 tr in 4th ch from hook, * 1 tr in each of the next 3 ch, skip 1 ch *, repeat from *-* and finish with 1 tr in each of the last 2-2-2-3 ch = 58-64-70-74 tr. Continue with 1 tr in each tr. When piece measures 7 cm inc 1 tr each side – see INCREASING TIP, and repeat the inc when piece measures 15 cm = 62-68-74-78 tr. Continue until piece measures 22-23-24-25 cm. EDGE PIECE: Crochet 1 tr in each tr along top of back piece, crochet 56-58-60-64 ch, 1 tr in each tr along bottom of back piece, crochet 56-58-60-64 ch and finish with 1 sl st in first tr on the top of back piece. Now crochet 1 tr in each tr from back piece and around each ch band crochet 42-44-46-48 tr = 204-220-236-248 tr in total. Continue in the round as follows: ROUND 1: 1 tr in first tr, *1 ch, skip 1 tr, 1 tr in next tr *, repeat from *-* and finish with 1 ch, skip 1 tr and 1 sl st in tr at beg of round. ROUND 2: 1 dc in each tr and 1 dc in each ch. ROUND 3: 1 dc in each dc. Repeat these 3 rounds, AT THE SAME TIME when edge measures 5, 10 and 15 cm (adjust to a row of dc) inc 34-34-34-36 dc evenly on round – see INCREASING TIP = 306-322-338-356 dc. When edge measures 17-18-19-20 cm (adjust so that next row is a row of dc) crochet 1 row with dc, AT THE SAME TIME inc 0-1-2-1 dc evenly = 306-323-340-357 dc. Now continue in M.1. NOTE! Beg on row marked with 1 in diagram. Work 1 vertical repeat of M.1, cut and fasten thread. |
|||||||||||||
Diagram explanations |
|||||||||||||
|
|||||||||||||
 |
|||||||||||||
Have you finished this pattern?Tag your pictures with #dropspattern #peachperfectionbolero or submit them to the #dropsfan gallery. Do you need help with this pattern?You'll find 8 tutorial videos, a Comments/Questions area and more by visiting the pattern on garnstudio.com. © 1982-2026 DROPS Design A/S. We reserve all rights. This document, including all its sub-sections, has copyrights. Read more about what you can do with our patterns at the bottom of each pattern on our site. |
|||||||||||||


With over 40 years in knitting and crochet design, DROPS Design offers one of the most extensive collections of free patterns on the internet - translated to 17 languages. As of today we count 324 catalogues and 12290 patterns translated into English (UK/cm). 12290
We work hard to bring you the best knitting and crochet have to offer, inspiration and advice as well as great quality yarns at incredible prices! Would you like to use our patterns for other than personal use? You can read what you are allowed to do in the Copyright text at the bottom of all our patterns. Happy crafting!
Post a comment to pattern DROPS 119-22
We would love to hear what you have to say about this pattern!
If you want to leave a question, please make sure you select the correct category in the form below, to speed up the answering process. Required fields are marked *.