
Popular categories
Looking for a yarn?


Comments / Questions (3)
![]() Annie wrote:
Annie wrote:
I am now proceeding with the LEFT FRONT PIECE. After picking up 30sts, the 1st row worked is a wrong side row, the 2nd row is a right side row. I have repeated these 2 rows for 10cms as instructed with ends with right side row. The next row is the increase row but it states that this is a right side row as well. How can this be?
09.03.2026 - 10:19DROPS Design answered:
Dear Annie, the last row worked before increasing for neck should be a row from wrong side, ie adjust the number of row (work 1 more or 1 less) til you get the requested height, finishing with a row from wrong side. Happy knitting!
09.03.2026 - 16:25
![]() Malena wrote:
Malena wrote:
Jag har stickat vänster och höger axel. Sedan har jag lagt upp nya maskor till hals (framstycke). Jag förstår inte hur jag går vidare efter detta. Det står att jag ska sticka maskorna från vänster axel, men de sitter ju på tråd. Som jag förstår instruktionerna ska jag inte sticka runt förrän senare. Vad är mitt nästa steg? Hur går jag vidare? Hälsningar Malena
20.01.2026 - 10:51DROPS Design answered:
Hei Malena. Ta en titt på videoen: Europeiskt ok - kort översikt. Halsen är färdig efter att ärmmaskorna har stickats upp her. Så får du kanskje en bedre oversikt over hvordan plagget strikkes. Se gjerne flere videoer under: Videor (til høyre/eller under bildet). mvh DROPS Design
30.01.2026 - 09:38
![]() Soulet wrote:
Soulet wrote:
Bonjour. Qu'appelez-vous le "le long de l'emmanchure à partir du haut de l'épaule"? Il me semble (mais je peux me tromper) que le long de l'emmanchure part du point le plus bas de l'épaule, le point le plus haut étant à l'encolure. Merci d'avance.
03.11.2025 - 12:57DROPS Design answered:
Bonjour Mme Soulet, c'est bien cela, la hauteur de la manche correspond au nombre de rangs tricotés depuis que l'on a relevé les mailles de la manche, mais la hauteur d'emmanchure est ici mesurée au plus haut de l'épaule quand le pull est plié en double aux épaules (cf schéma) - la différence est due au fait que la "ligne" d'épaule n'est pas exactement au milieu de l'épaule mais en biais dans le dos. Bon tricot!
03.11.2025 - 16:24
|
|||||||
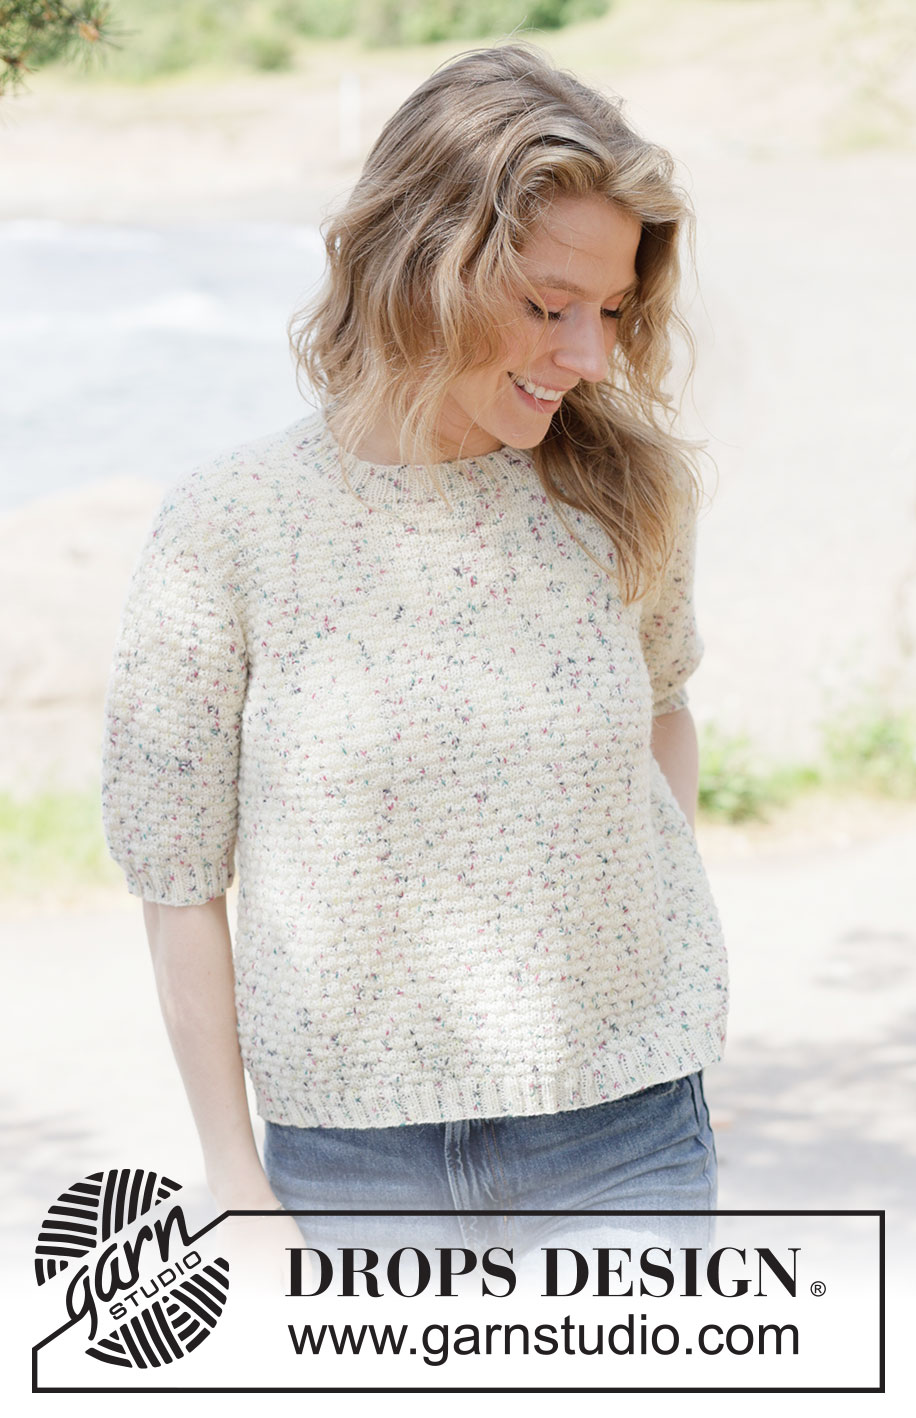
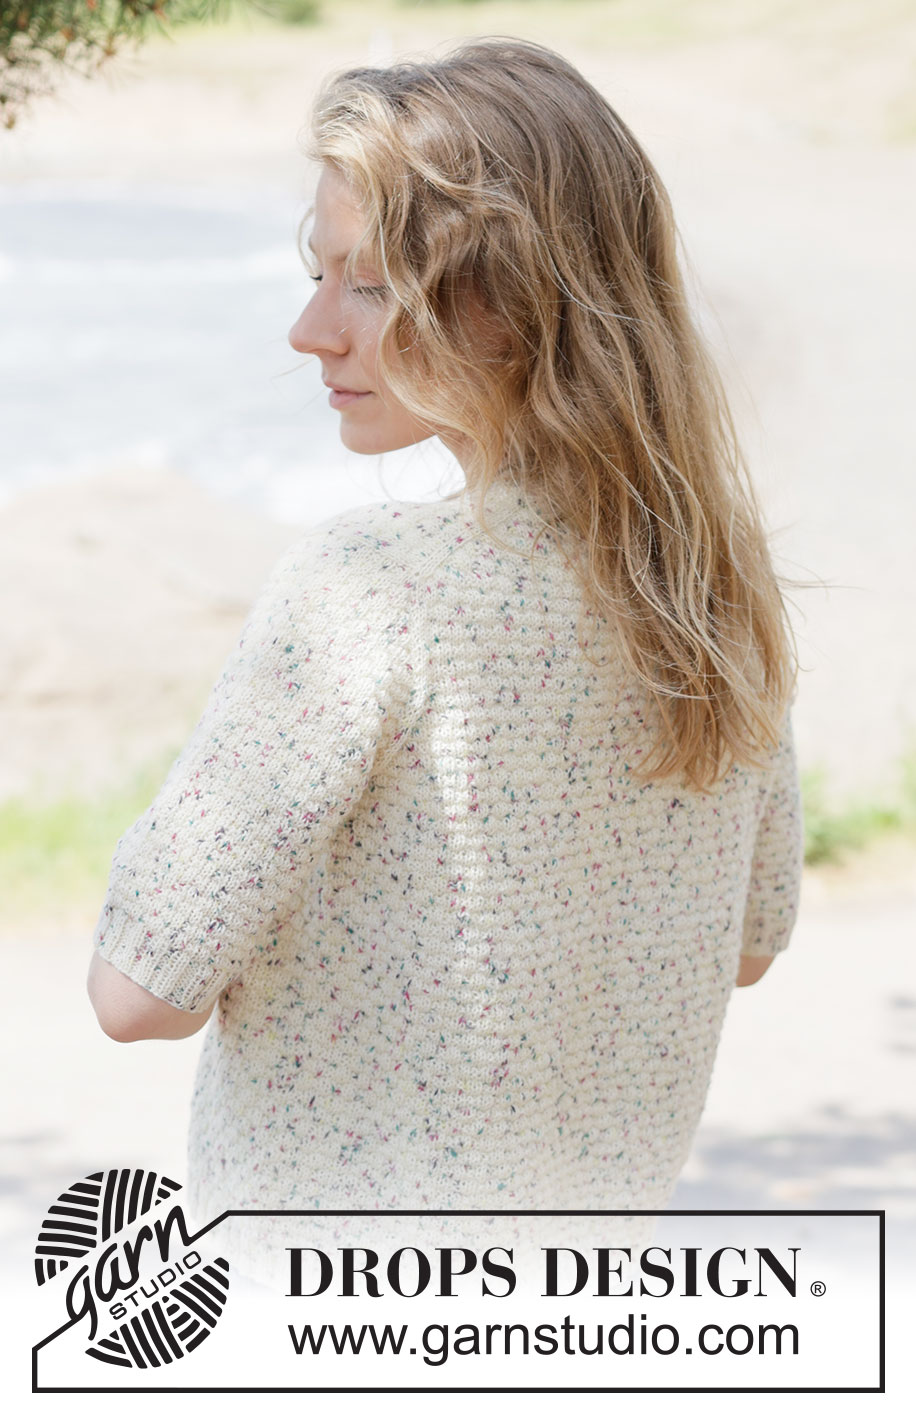
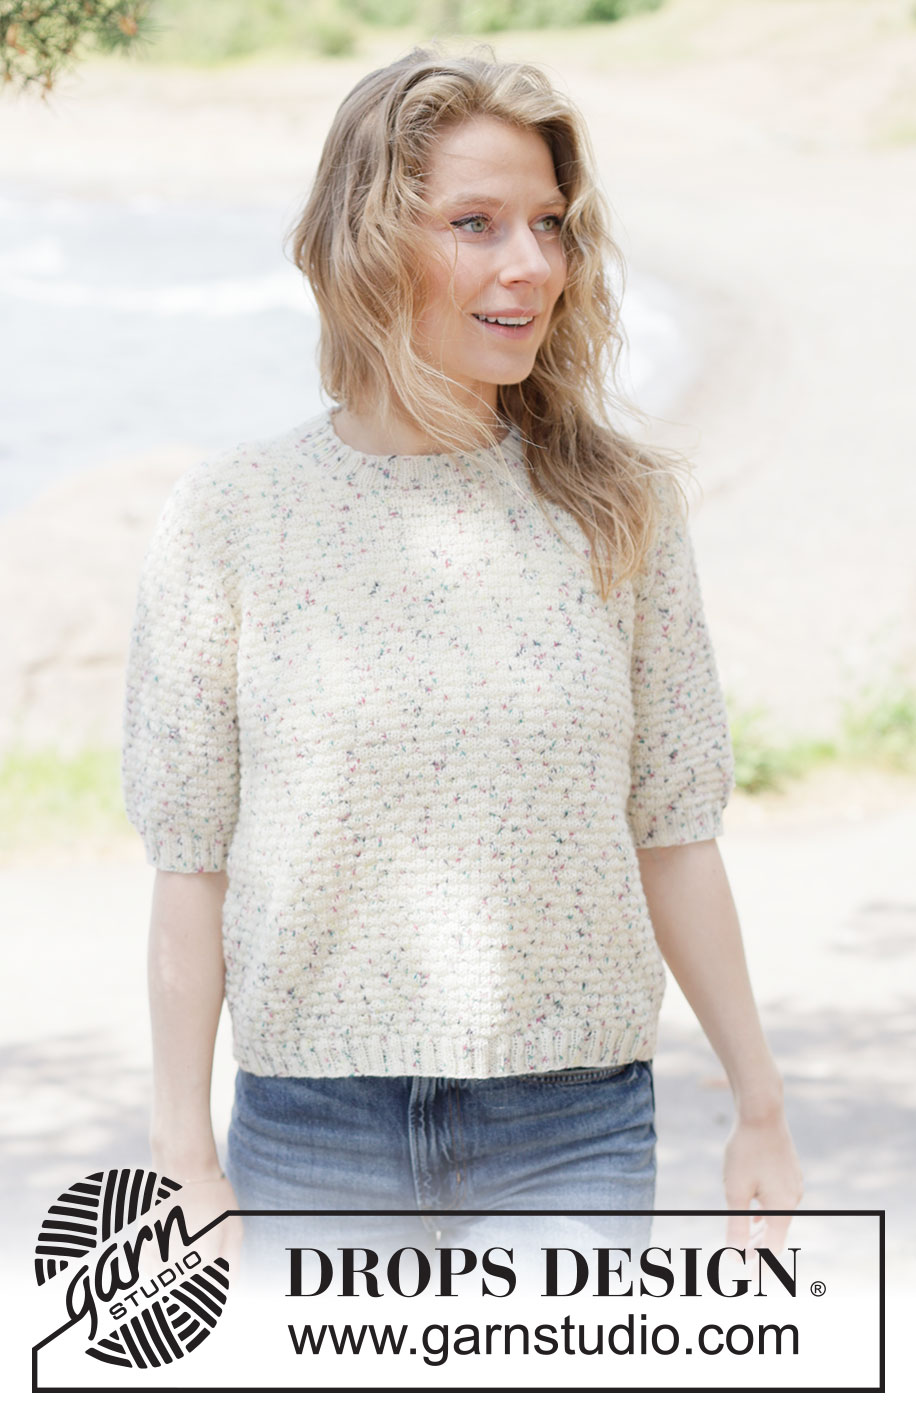
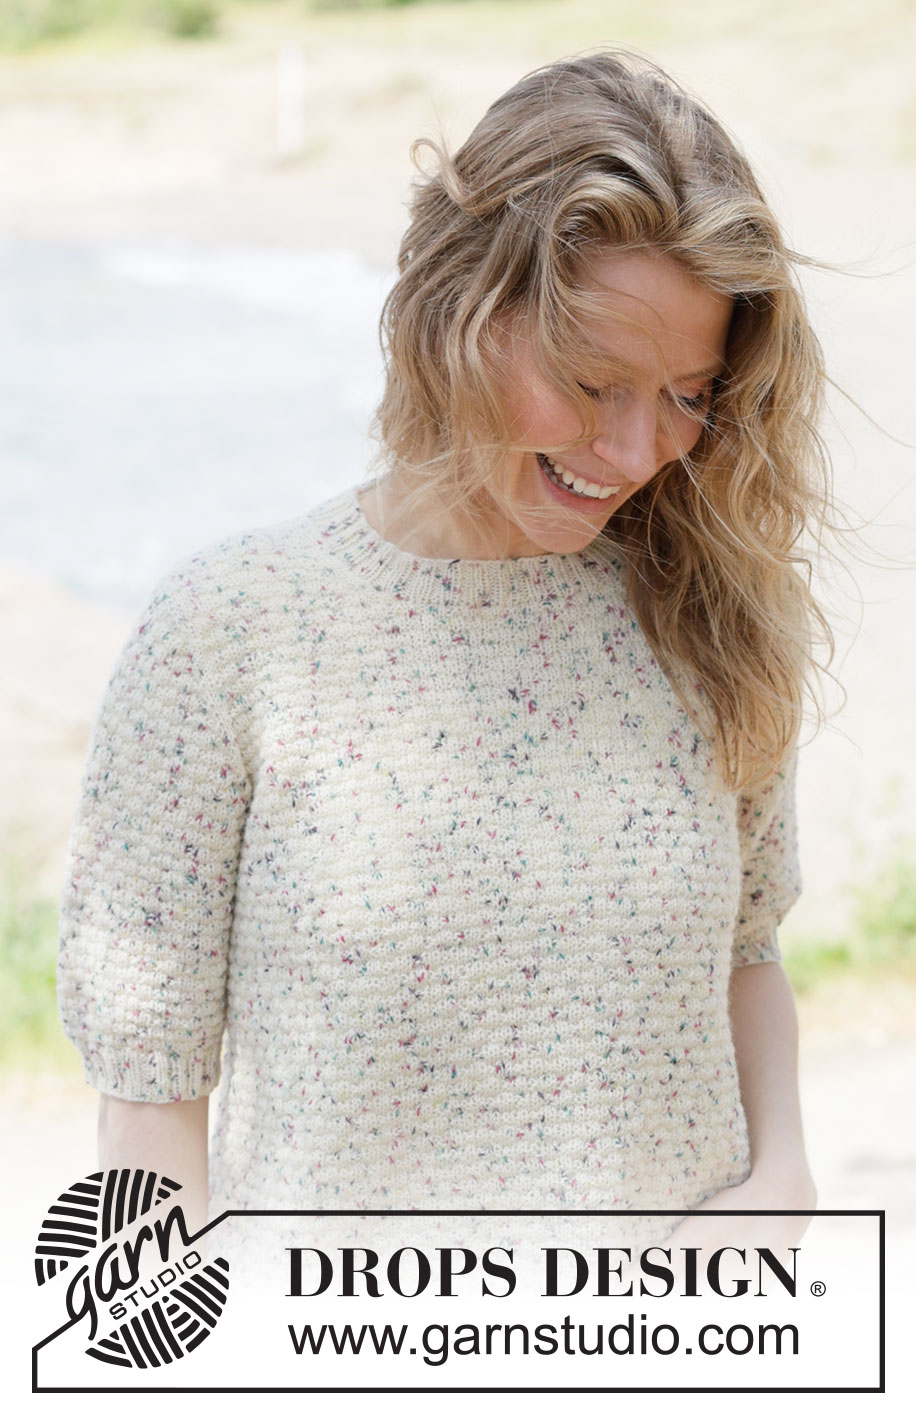
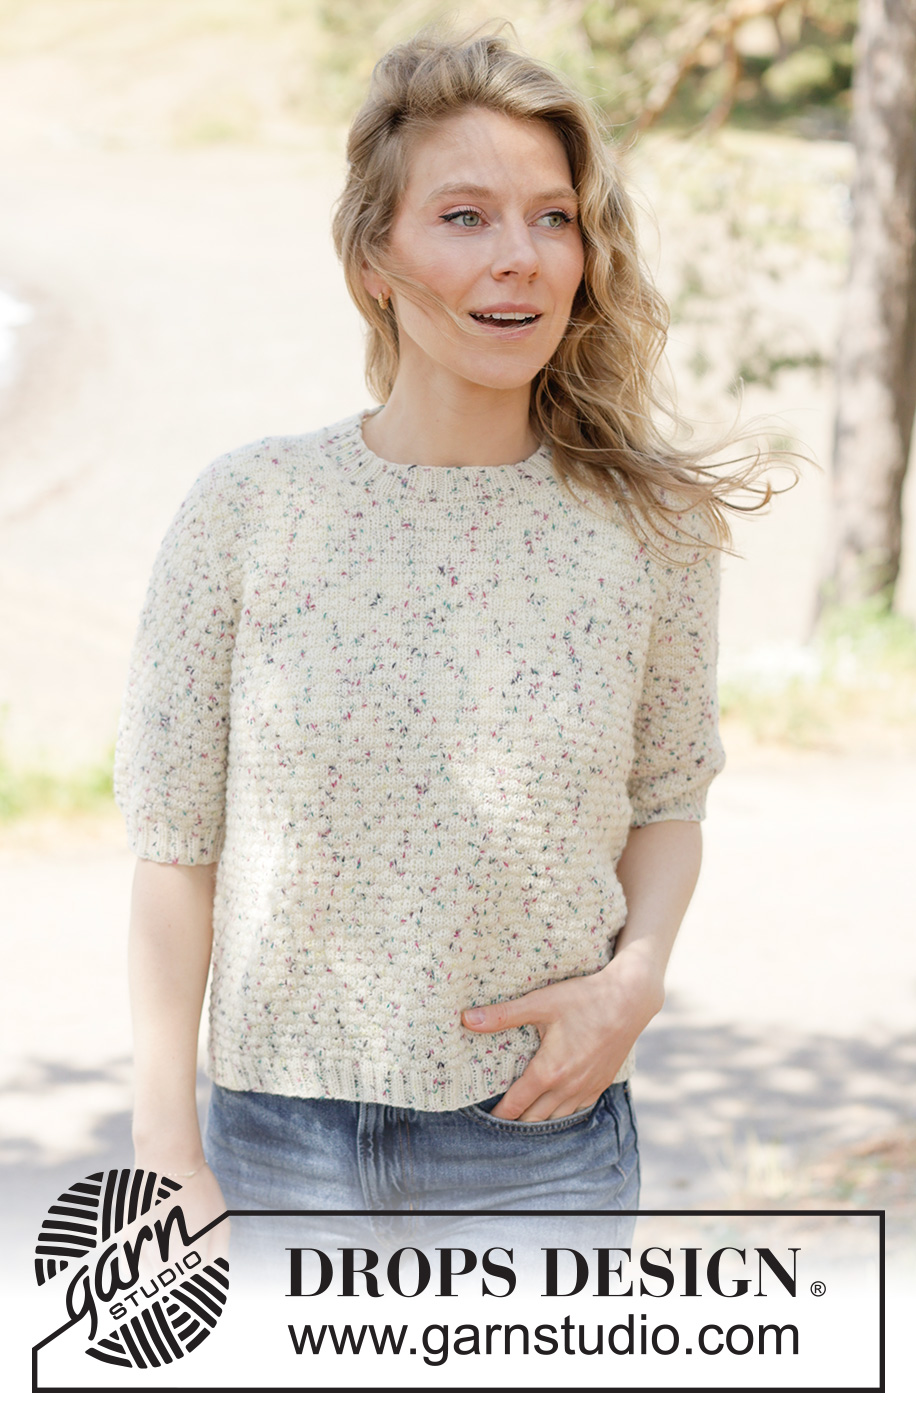
Vanilla Dusk#vanilladusksweater |
|||||||
 |
 |
||||||
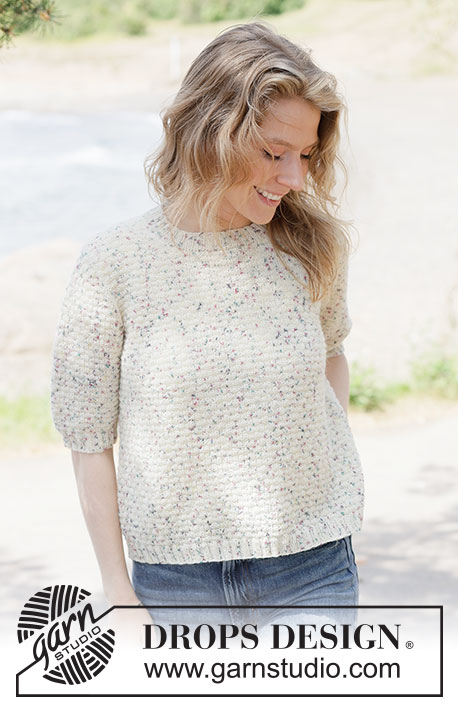
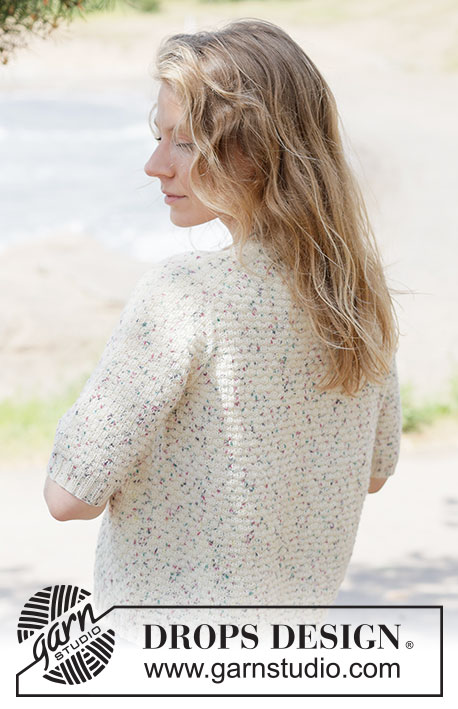
Knitted short-sleeved jumper in DROPS Fabel. The piece is worked top down with European yoke and double moss stitch. Sizes XS - XXXL.
DROPS 264-35 |
|||||||
|
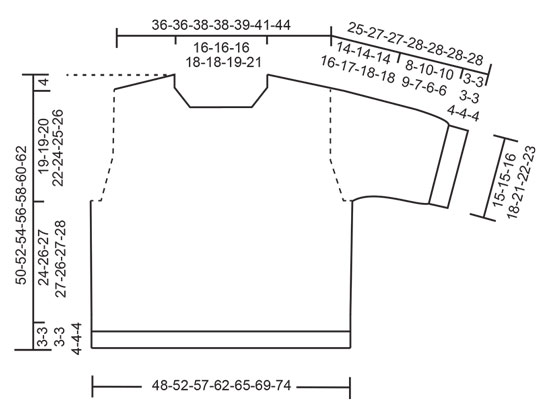
------------------------------------------------------- EXPLANATIONS FOR THE PATTERN: ------------------------------------------------------- PATTERN: See diagrams A.1 and A.2. The diagrams show the pattern from the right side. NOTE: Increased stitches are worked in stocking stitch until there are enough stitches for a complete square (= 2 stitches). INCREASE TIP-1: INCREASE 1 STITCH TOWARDS THE LEFT - from RIGHT SIDE: Use left needle to pick up yarn between 2 stitches from row below, pick up yarn from the front and knit in the stitch loop that is on the back of the needle. INCREASE 1 STITCH TOWARDS THE RIGHT - from RIGHT SIDE: Use left needle to pick up yarn between 2 stitches from row below, pick up yarn from the back and knit in the stitch loop that is on the front side of the needle. . INCREASE TIP-2: INCREASE 1 STITCH TOWARDS THE RIGHT - from WRONG SIDE: Use left needle to pick up yarn between 2 stitches from row below, pick up yarn from the back and purl in the stitch loop that is on the front side of the needle. INCREASE 1 STITCH TOWARDS THE LEFT - from WRONG SIDE: Use left needle to pick up yarn between 2 stitches from row below, pick up yarn from the front and purl in the stitch loop that is on the back side of the needle. SLEEVE TIP: When knitting up stitches under the sleeve, you can get a small hole in the transition between stitches on the body and sleeve. This hole can be closed by picking up the strand between 2 stitches and working this strand twisted together with the first stitch between body and sleeve. DECREASE TIP: Decrease 1 stitch on each side of the marker-thread as follows: Work until there are 3 stitches left before the marker-thread, knit 2 together, continue A.1 across the next 2 stitches (marker-thread sits between these 2 stitches), slip 1 stitch knit-wise, knit 1 and pass the slipped stitch over the knitted stitch (2 stitches decreased). ------------------------------------------------------- START THE PIECE HERE: ------------------------------------------------------- JUMPER – SHORT OVERVIEW OF THE PIECE. The pattern uses both long and short needles; start with the length which fits the number of stitches and change when necessary. Work according to points 1 – 5. 1 BACK PIECE: Cast on stitches for the back of the neck. Work the back piece back and forth, increasing stitches on each side until the shoulder stitch count has been achieved. The back piece has slightly diagonal shoulder. 2 FRONT PIECE: Is worked in 2 sections (each side of neck). Start by knitting up stitches along one back shoulder, working downwards and increasing for the neckline. Repeat on the other shoulder. Then stitches are cast on for the front neckline and the 2 shoulders are joined. The front piece is worked back and forth to the correct measurement. 3 YOKE: Place the front and back pieces on the same needle, working first the front piece, knitting up stitches for one sleeve along the side of the front piece, then working the back piece and knitting up stitches for the second sleeve along the other side of the front piece. Continue in the round. 4 INCREASE FOR BODY AND SLEEVES: While working the yoke, increase stitches first for the sleeves and later for the body. 5 BODY AND SLEEVES: When the yoke is finished, it is divided and the body is continued in the round while the sleeves wait. Then the sleeves are worked top down. Stitches are knitted up around the neckline and the neck is worked to finish. If there is a «0» in your chosen size, skip the information and go straight to the next instruction. BACK PIECE: The piece is worked back and forth with PATTERN – read explanation above. Cast on 44-44-44-48-48-52-56 stitches with circular needle size 3 mm and 1 strand DROPS Fabel. ROW 1 (wrong side): Purl. ROW 2 (right side): Read INCREASE TIP-1. Knit 3, increase 1 stitch towards the left, work A.1 until there are 5 stitches left on the row, work A.2, increase 1 stitch towards the right, knit 3. ROW 3 (wrong side): Read INCREASE TIP-2. Purl 3, increase 1 stitch towards the right, continue the pattern (see PATTERN for how the increased stitches are worked) until there are 3 stitches left, increase 1 stitch towards the left, purl 3. Work ROWS 2 and 3 a total of 13-13-14-13-14-14-15 times (26-26-28-26-28-28-30 rows worked) = 96-96-100-100-104-108-116 stitches. Remember to maintain the knitting tension. Cut the strand, place the stitches on a stitch holder. LEFT FRONT PIECE: Find the left back shoulder as follows: Lay the back piece flat, right side up, with the stitch holder towards you; left side of piece = left shoulder. Start from the right side by the neck on the left back shoulder and knit up 1 stitch in each row worked (inside 1 stitch) towards the armhole, then 1 stitch in the outermost stitch by the armhole = 26-26-28-26-28-28-30 shoulder-stitches Insert 1 marker by the neckline. All length measurements for the front piece are taken from this marker. Work pattern as follows: ROW 1 (wrong side): Purl 3, work A.2, 0-0-1-0-1-1-0 times, work A.1 until there are 3 stitches left, purl 3. ROW 2 (right side): Knit 3, work A.1 until there are 3-3-5-3-5-5-3 stitches left, work A.2 0-0-1-0-1-1-0 times, knit 3. Repeat ROWS 1 and 2 until the piece measures 4-4-6-7-9-9-10 cm. Now increase for the neckline as follows: ROW 1 (right side): Remember INCREASE TIP-1. Knit 3, increase 1 stitch towards the left, continue the pattern until there are 3 stitches left, knit 3. ROW 2 (wrong side): Purl 3, continue the pattern (remember how the increased stitches are worked) until there are 3 stitches left, purl 3. Work ROWS 1 and 2 a total of 8-8-8-8-8-8-8 times (16-16-16-16-16-16-16 rows worked) = 34-34-36-34-36-36-38 stitches. The increases for the neckline are finished. The piece measures approx. 9-9-11-12-14-14-15 cm from the marker. Part of the neckline will be on the back piece; length in front approx. 8-8-9-9-10-10-11 cm, length at back 1-1-2-3-4-4-4 cm. Cut the strand, place the stitches on a stitch holder and work the right front piece. RIGHT FRONT PIECE: From the right side, starting by the armhole, knit up 1 stitch in the outermost stitch on the right back shoulder, then knit up 1 stitch in each row worked = 26-26-28-26-28-28-30 shoulder-stitches. Insert 1 marker by the neckline. All length measurements for the front piece are taken from this marker. Work pattern as follows: ROW 1 (wrong side): Purl 3, work A.1 until there are 3-3-5-3-5-5-3 stitches left, work A.2, 0-0-1-0-1-1-0 times, purl 3. ROW 2 (right side): Knit 3, work A.2, 0-0-1-0-1-1-0 times, then A.1 until there are 3 stitches left, knit 3. Repeat ROWS 1and 2 until the piece measures 4-4-6-7-9-9-10 cm. Increase for the neckline as follows: ROW 1 (right side): Knit 3, continue the pattern until there are 3 stitches left, increase 1 stitch towards the right, knit 3 - remember INCREASE TIP-1. ROW 2 (wrong side): Purl 3, continue the pattern until there are 3 stitches left (remember how the increased stitches are worked), purl 3. Work ROWS 1 and 2 a total of 8-8-8-8-8-8-8 times (16-16-16-16-16-16-16 rows worked) = 34-34-36-34-36-36-38 stitches. The increases for the neckline are finished. The piece measures approx. 9-9-11-12-14-14-15 cm from the marker. Part of the neckline will be on the back piece; length in front approx. 8-8-9-9-10-10-11 cm, length at back 1-1-2-3-4-4-4 cm. FRONT PIECE: On the next row (right side), the shoulders are joined as follows: Work across the 34-34-36-34-36-36-38 stitches from the right shoulder as before, cast on 28-28-28-32-32-36-40 stitches for the neckline, work the 34-34-36-34-36-36-38 stitches from the left shoulder as before = 96-96-100-100-104-108-116 stitches. Continue the pattern back and forth with 3 stocking stitches on each side until the piece measures 10-10-12-13-15-15-16 cm from the marker and with the last row from the wrong side. NOTE: Adjust so you finish on the same row in the diagram as on the back piece, so the pattern matches when the front and back pieces are joined. In addition, stitches are now knitted up for the sleeves as follows: ROW 1 (right side): Knit together the first 2 stitches on the front piece (1 stitch decreased), knit 1, continue the pattern until there are 3 stitches left on the front piece, knit 1, slip 1 stitch, knit 1 and pass the slipped stitch over (1 stitch decreased), insert 1 marker, knit up 26-26-30-34-38-38-42 stitches along the left side of the front piece (= sleeve – knit up the stitches inside the outermost stitch), insert 1 marker, knit together the first 2 stitches on the back piece (1 stitch decreased), knit 1, continue the pattern until there are 3 stitches left on the back piece, knit 1, slip 1 stitch, knit 1 and pass the slipped stitch over (1 stitch decreased), insert 1 marker, knit up 26-26-30-34-38-38-42 stitches along the right side of the front piece (= sleeve – knit up the stitches inside the outermost stitch), insert 1 marker = 240-240-256-264-280-288-312 stitches. YOKE: The piece is continued in the round. ROUND 1: Remember INCREASE TIP-1. Knit 2, continue the pattern until there are 2 stitches left before the first marker, knit 2, move the marker onto the right needle, increase 1 stitch towards the left, work A.1 until there is 1 stitch left before the next marker, knit 1, increase 1 stitch towards the right, move the marker onto the right needle, knit 2, continue the pattern until there are 2 stitches left before the next marker, knit 2, move the marker onto the right needle, increase 1 stitch towards the left, work in the same way as the first sleeve to the next marker, increase 1 stitch towards the right, move the marker onto the right needle. Work this round 3 times – remember to work the increased stitches as described in PATTERN. There are 32-32-36-40-44-44-48 stitches on each sleeve and 94-94-98-98-102-106-114 stitches on the front and back pieces = 252-252-268-276-292-300-324 stitches. Continue as follows: ROUND 1: Continue the pattern with 2 knitted stitches on each side of the front and back pieces, increasing 1 stitch on each side of each sleeve as before – remember INCREASE TIP-1, the stitch count on the sleeves increases but remains the same on the body. ROUND 2: Work as before without increasing. Work ROUNDS 1 and 2 a total of 11-7-3-1-3-1-1 times (22-14-6-2-6-2-2 rounds worked; a total of 14-10-6-4-6-4-4 increases in height on the sleeves, 54-46-42-42-50-46-50 stitches on each sleeve and 94-94-98-98-102-106-114 stitches on the front and back pieces) = 296-280-280-280-304-304-328 stitches. Now increase on both the body and sleeves, increasing on the body 2 stitches inside the marker so there are 2 stitches between the increases on the body and sleeves. Work as follows: ROUND 1: Knit 2, increase 1 stitch towards the left, continue the pattern until there are 2 stitches left on the front piece before the marker, increase 1 stitch towards the right, knit 2, move the marker onto the right needle, increase 1 stitch towards the left, continue the pattern to the next marker, increase 1 stitch towards the right, move the marker onto the right needle, knit 2, increase 1 stitch towards the left, continue the pattern until there are 2 stitches left on the back piece before the next marker, increase 1 stitch towards the right, knit 2, move the marker onto the right needle, increase 1 stitch towards the left, continue the pattern to the next marker (= sleeve), increase 1 stitch towards the right, move the marker onto the right needle (= 8 increased stitches, 1 increased stitch on each side of 2 knitted stitches in the transition between the body and sleeves). ROUND 2: Work as before without increasing. Work ROUNDS 1 and 2 a total of 12-16-20-24-24-28-28 times (24-32-40-48-48-56-56 rounds worked; a total of 26-26-26-28-30-32-32 increases in height on the sleeves and 12-16-20-24-24-28-28 increases in height on the body. There are 78-78-82-90-98-102-106 stitches on each sleeve and 118-126-138-146-150-162-170 stitches on the front and back pieces) = 392-408-440-472-496-528-552 stitches. The sleeve measures approx. 14-14-14-16-17-18-18 cm – NOTE: If the jumper is folded double at the shoulder, the piece measures approx. 19-19-20-22-24-25-26 cm from the top of the shoulder down the armhole. If the piece is shorter than this, continue working to the correct length without further increases. Cut the yarn. Now divide for the body and sleeves. DIVIDE FOR BODY AND SLEEVES: Start by casting on 3-5-5-7-9-9-11 stitches (half the stitches under the sleeve), work across the 118-126-138-146-150-162-170 stitches on the front piece as before, place the next 78-78-82-90-98-102-106 stitches on a thread for the sleeve, cast on 6-10-10-14-18-8-22 stitches (mid-under the sleeve), work across the 118-126-138-146-150-162-170 stitches on the back piece as before, place the next 78-78-82-90-98-102-106 stitches on a thread for the sleeve, cast on 3-5-5-7-9-9-11 stitches (mid-under the sleeve). The body and sleeves are finished separately. BODY: = 248-272-296-320-336-360-384 stitches. Continue the pattern in the round for a further 24-26-27-27-26-27-28 cm, finishing after 2 rounds of stocking stitch. Change to circular needle size 2.5 mm. Work rib (knit 2, purl 2), AT THE SAME TIME increase 44-48-52-60-64-64-68 stitches evenly on the first round = 292-320-348-380-400-424-452 stitches. When the rib measures 3-3-3-3-4-4-4 cm, cast off with rib. The jumper measures approx. 50-52-54-56-58-60-62 cm from the top of the shoulder. SLEEVES: Place the 78-78-82-90-98-102-106 sleeve-stitches from one thread on circular needle size 3 mm and knit up 1 stitch in each of the 6-10-10-14-18-18-22 stitches cast on under the sleeve – read SLEEVE TIP = 84-88-92-104-116-120-128 stitches. Insert a marker-thread in the middle of the 6-10-10-14-18-18-22 stitches under the sleeve- the round starts by the marker-thread. Work pattern in the round (the pattern will not fit mid-under the sleeve in some sizes). AT THE SAME TIME, when the sleeve measures 1-1-1-1-1-1-1 cm from the division, decrease mid-under the sleeve – read DECREASE TIP as follows: Decrease 2 stitches every 2nd round 2-2-2-2-2-3-3 times, then decrease 2 stitches every 2-3-3-2-2-2-2 cm a total of 2-2-2-2-2-1-1 times = 76-80-84-96-108-112-120 stitches. Continue working until the sleeve measures 8-10-10-9-7-6-6 cm from the division. Change to double pointed needles size 2.5 mm. Work rib (knit 2, purl 2), AT THE SAME TIME increase 12-16-16-16-20-20-20 stitches evenly on the first round = 88-96-100-112-128-132-140 stitches. When the rib measures 3-3-3-3-4-4-4 cm, cast off with rib. The sleeve measures approx. 11-13-13-12-11-10-10 cm from the division. NECK: Use circular needle size 2.5 mm. Start from the right side by one shoulder-line and knit up 124-124-132-144-152-160-172 stitches around the neckline, inside 1 stitch. Knit 1 round. Then work rib (knit 2, purl 2, adjusting the beginning of the rib so it matches mid-front, with knit above knit and purl above purl). When the rib measures 3-3-3-3-4-4-4 cm, cast off with rib. |
|||||||
Diagram explanations |
|||||||
|
|||||||
 |
|||||||
 |
|||||||
Have you finished this pattern?Tag your pictures with #dropspattern #vanilladusksweater or submit them to the #dropsfan gallery. Do you need help with this pattern?You'll find 33 tutorial videos, a Comments/Questions area and more by visiting the pattern on garnstudio.com. © 1982-2026 DROPS Design A/S. We reserve all rights. This document, including all its sub-sections, has copyrights. Read more about what you can do with our patterns at the bottom of each pattern on our site. |
|||||||


With over 40 years in knitting and crochet design, DROPS Design offers one of the most extensive collections of free patterns on the internet - translated to 17 languages. As of today we count 325 catalogues and 12298 patterns translated into English (UK/cm). 12298
We work hard to bring you the best knitting and crochet have to offer, inspiration and advice as well as great quality yarns at incredible prices! Would you like to use our patterns for other than personal use? You can read what you are allowed to do in the Copyright text at the bottom of all our patterns. Happy crafting!
Post a comment to pattern DROPS 264-35
We would love to hear what you have to say about this pattern!
If you want to leave a question, please make sure you select the correct category in the form below, to speed up the answering process. Required fields are marked *.