Comments / Questions (136)
![]() Mira Luna wrote:
Mira Luna wrote:
Hej, Jeg forstår ikke delen i halsen hvor der står “luk 2 masker af 1 gang og 1 maske af 2 gange i hver side” - hvor mange omgange skal jeg strikke frem og tilbage og er det meningen at jeg derefter skal slå flere masker op på rundpind når jeg samler de hvilende masker op, for så derefter at tage masker ind igen?
17.12.2022 - 23:22DROPS Design answered:
Hej Mira, næste pind du strikker fra halsen lukker du 2 masker af, fortsætter pinden ud, vender og strikker tilbage, næste pind fra halsen lukker du 1 maske af, fortsætter pinden ug ot strikker tilbage og så lukker du 1 sidste maske af osv... Ja du slår det antal masker op som står i opskriften og tager ind igen ifølge opskriften :)
20.12.2022 - 08:39
![]() Tuula wrote:
Tuula wrote:
Hallo, ich habe eine Frage zum Halsausschnitt: Welche Maschen sind hier mit den "mittleren 24 bzw. 32 Maschen der vorderen Mitte", über die gleichmäßig verteilt abgenommen werden soll, gemeint? Vielen Dank für Ihre Mühe! Liebe Grüße
14.12.2022 - 17:17DROPS Design answered:
Liebe Frau Tuula, diese 24 bzw 32 Maschen sind die mittleren beim Vorderteil, dh A.7 (= 24 M) bzw + 4 Maschen von den beidseitigen A.6 (= 4 A.6+24 A.7+4 A.6 sind 32). Viel Spaß beim stricken!
15.12.2022 - 08:33
![]() Marie-Jeanne LEININGER wrote:
Marie-Jeanne LEININGER wrote:
Bonjour, il me semble qu'il y ait une erreur dans les explications , je ne retrouve pas le nombre de mailles prévu pour ma taille soit 254 mailles si je suis les indications. juste après les côtes je dois faire le motif A4 sur 21 mailles ... est-ce que ce n'est pas plutôt sur 41 mailles comme il est indiqué plus loin dans le rang, après le marqueur quand on se trouve sur l'autre face du pull ? merci.
05.12.2022 - 15:39DROPS Design answered:
Bonjour Mme Leininger, vous aviez 288 mailles, vous allez diminuer des mailles dans celles tricotées en jersey mais également dans le 3ème rang des diagrammes autrement dit, vous allez diminuer 6 m + diminuer 1 m dans A.2 + 2 m dans A.3 + 1 m end A.2 + diminuer 13 m + diminuer 1 m dans A.2 + 2 m dans A.3 + 1 m dans A.2 et enfin diminuer 7 m soit: 288-6-1-2-1-13-1-2-1-7=254 mailles. Bon tricot!
06.12.2022 - 10:39
![]() Susanne wrote:
Susanne wrote:
Jeg strikker Ice Island sweater, Jeg skal i gang med ribben (det allerførste), jeg forstår ikke jeg skal i gang med A2 og A3? Er det ikke “ bare” rib i 5 cm? Og derefter indtagninger? Susanne
04.12.2022 - 21:07DROPS Design answered:
Hei Susanne. For å få en fin-fin overgang mellom vrangbord og bolen så strikkes vrangborden også etter diagram. Om du ser på bildene ser du f.eks at overgangen mellom vrangborden og flettene blir veldig pen. Så følg forklaringen til hvordan vrangborden strikkes for å få en like pen overgang. mvh DROPS Design
05.12.2022 - 14:07
![]() Kirsten Morfeld wrote:
Kirsten Morfeld wrote:
Jeg strikker Ice Island genser, oppskrift nr 224-10. Synes bolen virker kort med 36cm i alle størrelser. Mun mann er ganske lang i ryggen. Er det en grunn at bolen er så kort? Mvh Kirsten
08.11.2022 - 10:57DROPS Design answered:
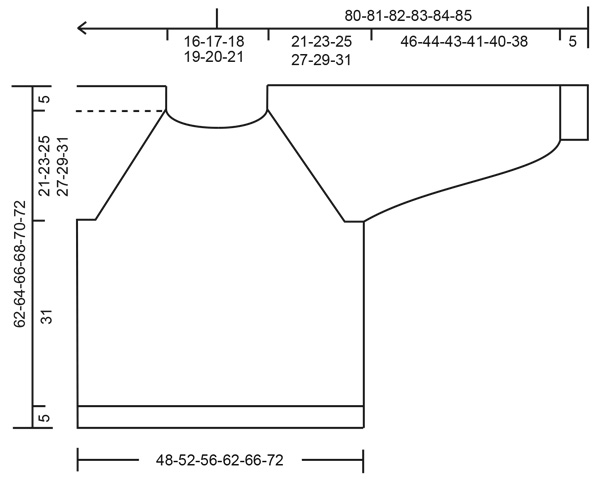
Hej Kirsten, selve bærestykket er længere, du ser længden i måleskitsen nederst i opskriften. Vil du have den længere end det, er det de 31 cm du forlænger :)
08.11.2022 - 14:25
![]() Kirsten Morfeld wrote:
Kirsten Morfeld wrote:
Hei. Jeg strikker Ice Island genser, oppskrift nr. 224-10. Synes bolen er ganske kort med 36cm i alle størrelser. Min mann er ganske lang i ryggen. Har det en grunn at bolen er så kort? Mvh Kirsten
08.11.2022 - 10:52
![]() De Smet Dominique wrote:
De Smet Dominique wrote:
Bonjour, Serait-il possible de tricoter ce pull irlandais avec 2 aiguilles au lieu des aiguilles circulaires ? Merci beaucoup Dominique
22.10.2022 - 20:17DROPS Design answered:
Bonjour Mme De Smet, vous trouverez ici quelques astuces pour adapter ce modèle sur aiguilles droites, il est parfois bien plus simple de tricoter en rond, comme dans les explications, n'hésitez pas à essayer, nombreuses sont celles qui ont finalement adopté les aiguilles circulaires après les avoir essayées. Bon tricot!
24.10.2022 - 08:22
![]() Michèle wrote:
Michèle wrote:
Bonjour Madame Pour les manches c'est indiqué enfiler la manche et tricoter jusqu'à la longueur souhaitée. Donc je l'enfile jusque sous l aisselle c est cela ? Je vous pose cette question car mon mari mesure 1.80 et il manque au moins 6 cm alors que d habitude vos mesures sont fiables pour une taille moyenne. Je ne comprends pas cet écart. Merci d avance.
02.10.2022 - 16:36DROPS Design answered:
Bonjour Michèle, mesurez un pull que votre mari porte volontiers et qui lui va et comparez ces mesures à celles du schéma, la partie manche doit faire (en M): 5 cm de côtes + 46 cm + les 23 cm de l'empiècement + environ 9 cm pour la moitié de l'encolure = 81 cm ou 162 cm d'une manche à l'autre. Ajustez ainsi en fonction de sa longueur de bras/de torse etc.. Bon tricot!
03.10.2022 - 09:33
![]() Julie-Ann wrote:
Julie-Ann wrote:
I may be misinterpereting this pattern, but why are there so many decreases in the rib at the bottom of the work? I thought cables required extra stitches. Also, what and where does the correction belong to? 7th symbol in which set/diagram?
11.09.2022 - 07:07DROPS Design answered:
Dear Julie-Ann, correct, the cables require more stitches than stocking stitch, but not than that mucht than the ribbing edge (and you will also swicth to larger needle after the decrease round). Make sure your tension is right and decrease over rib and in diagrams as explained Happy knitting!
12.09.2022 - 10:03
![]() Bente Ane Nilsen wrote:
Bente Ane Nilsen wrote:
Hva er mål på overvidde og lengde i cm på denne oppkrift
30.08.2022 - 12:20DROPS Design answered:
Hej Bente, du finder tøjets mål i måleskitsen nederst i opskriften. Her finder du også "Slik leser du en målskisse" :)
31.08.2022 - 13:57
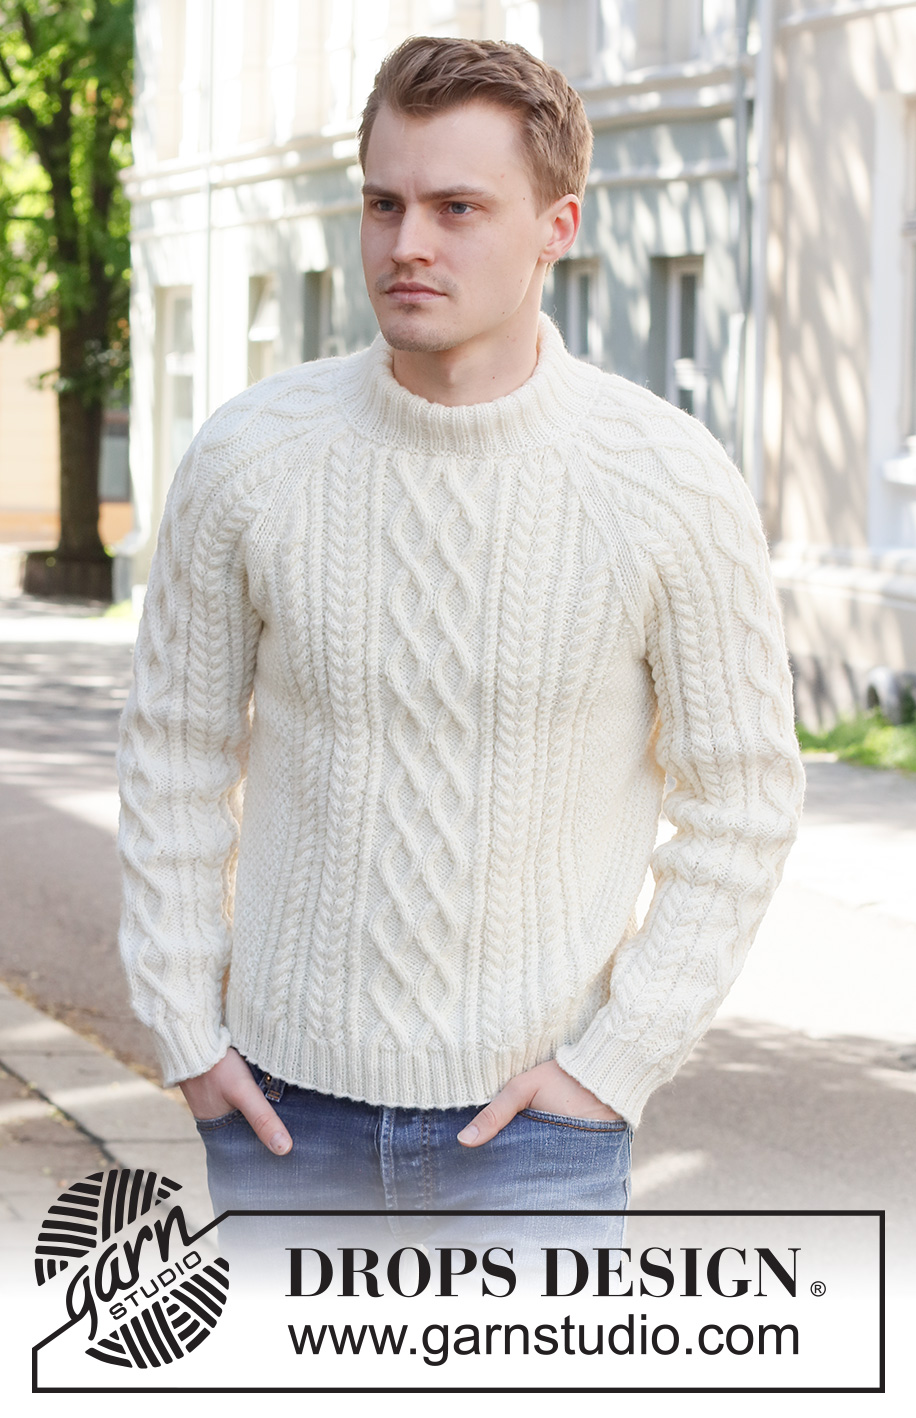
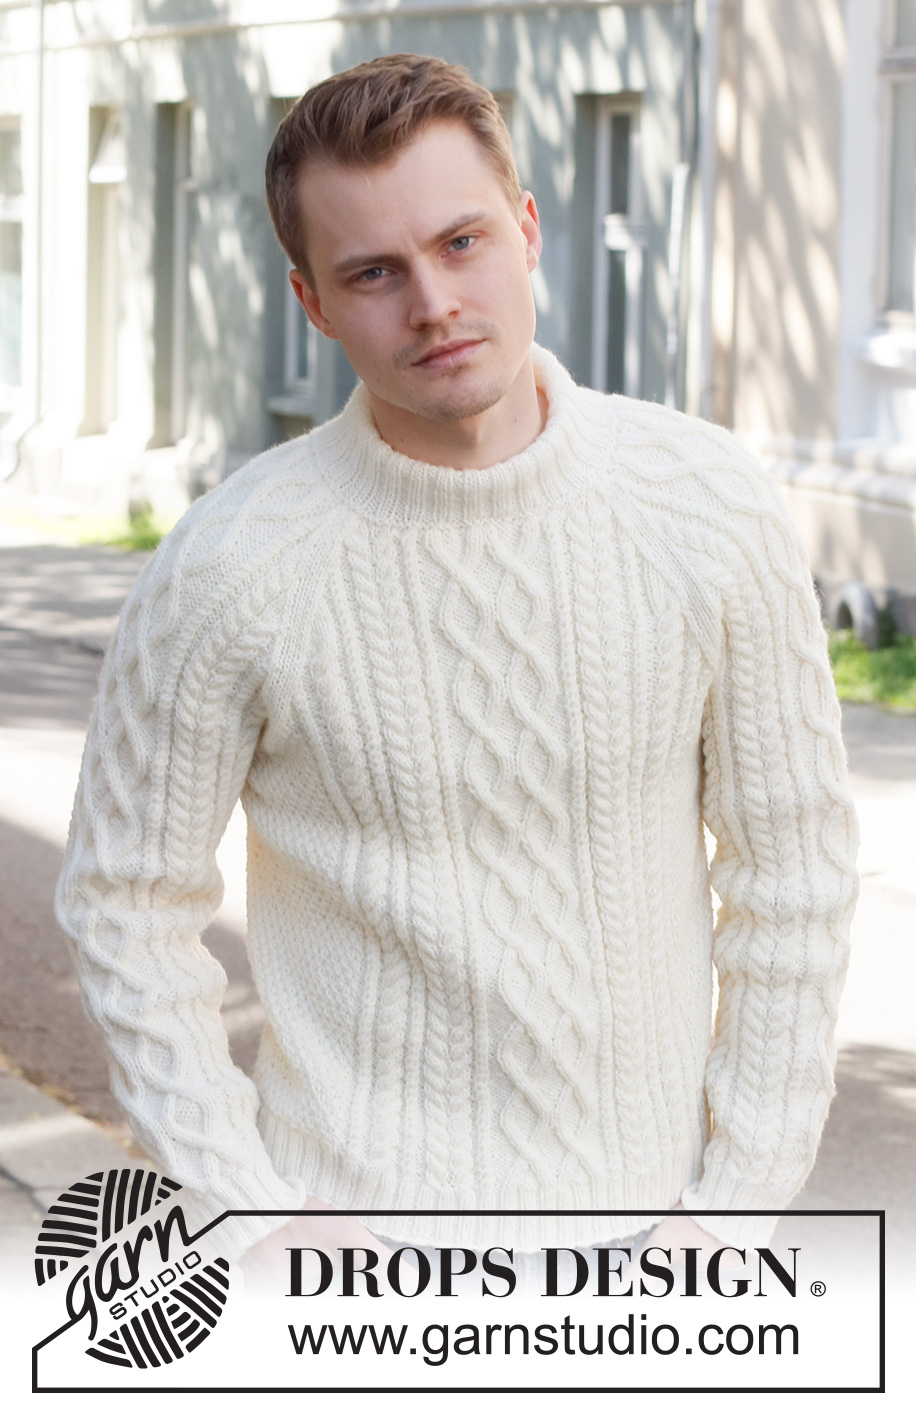
Ice Island#iceislandsweater |
|||||||||||||||||||||||||||||||
 |
 |
||||||||||||||||||||||||||||||
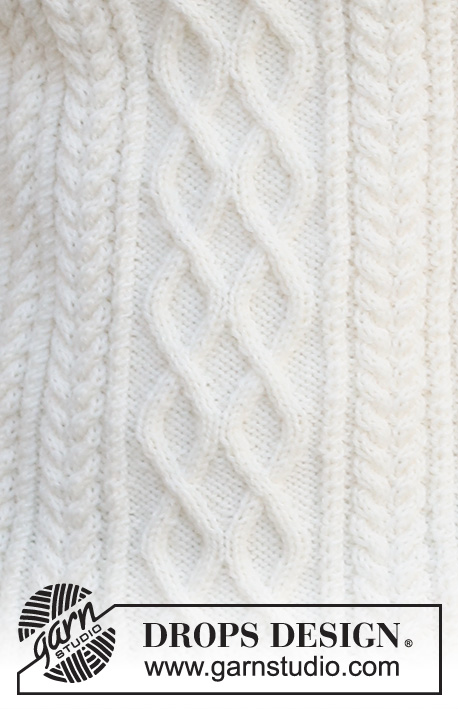
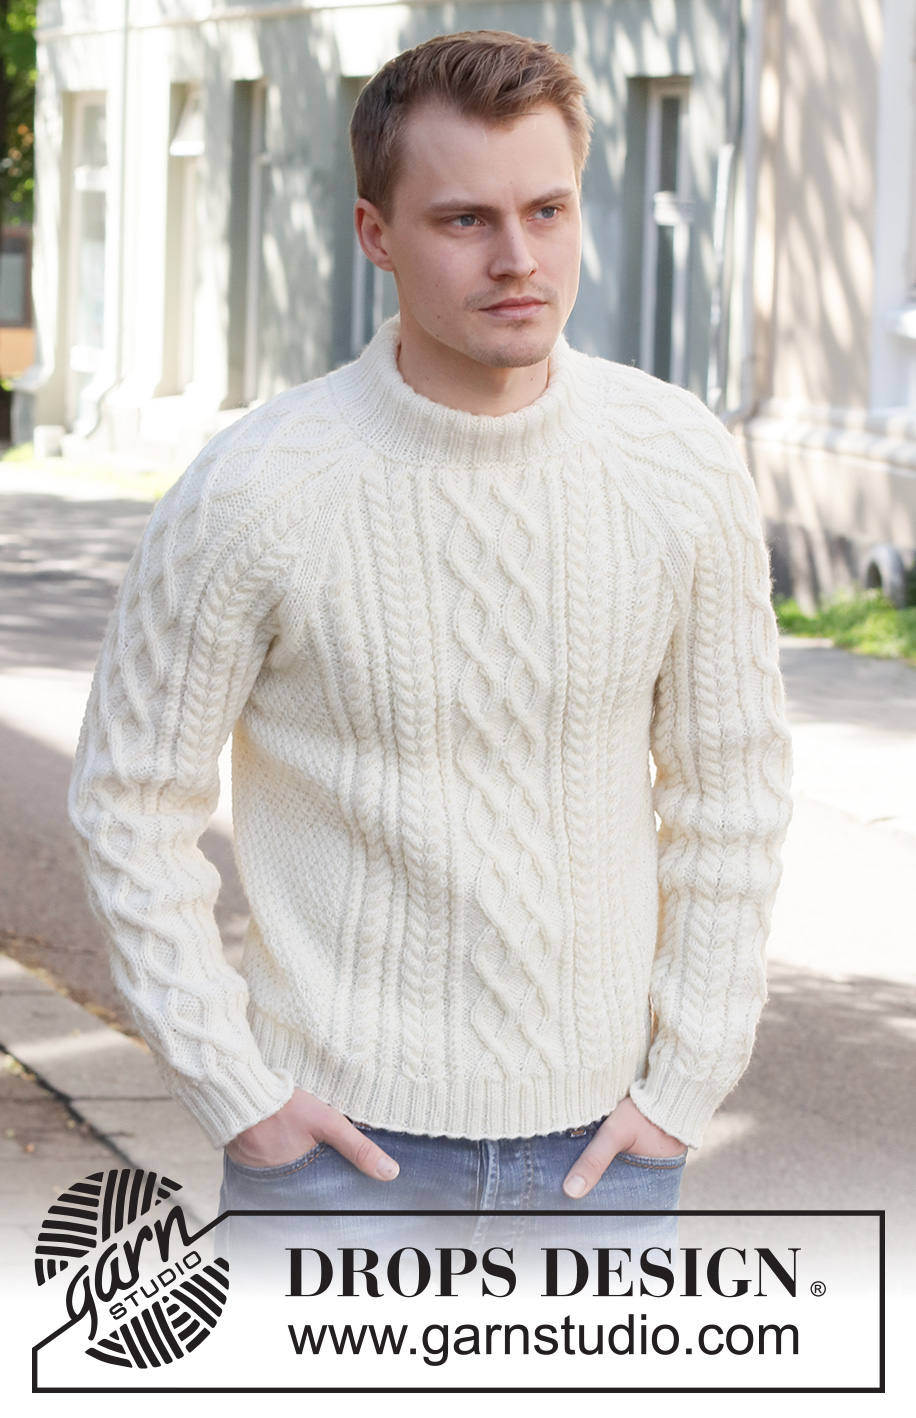
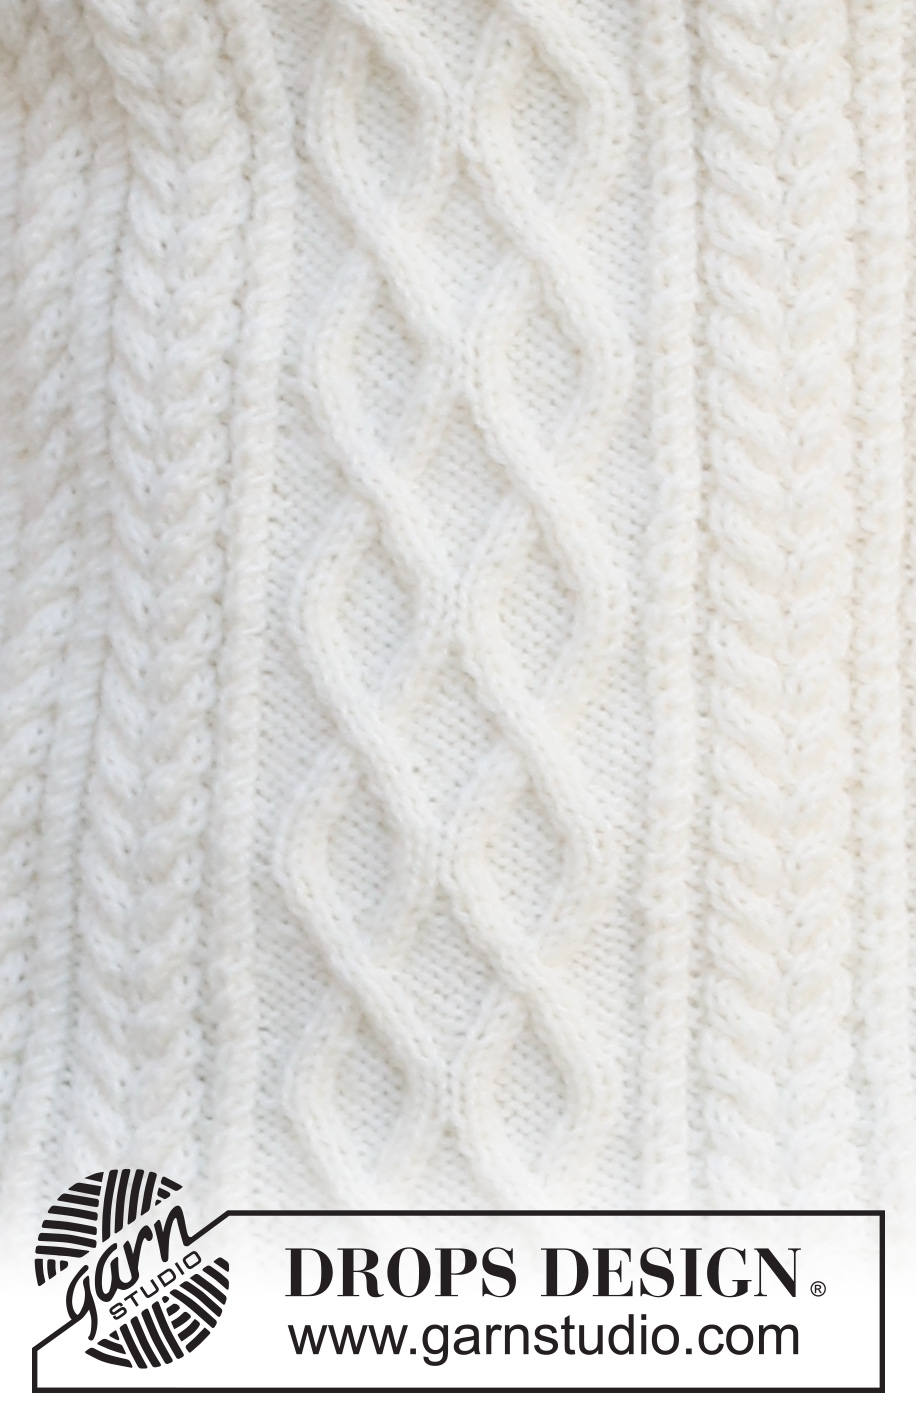
Knitted jumper for men in DROPS Karisma. The piece is worked with raglan, cables and double neck. Sizes S - XXXL.
DROPS 224-10 |
|||||||||||||||||||||||||||||||
|
------------------------------------------------------- EXPLANATIONS FOR THE PATTERN: ------------------------------------------------------- KNITTING TIP: In sizes XL, XXL and XXXL, there will be 4 purl stitches next to each other when A.1 is worked 2 times in width. So the rib will match under A.5/A.8, which is worked after the rib. PATTERN: See diagrams A.1 to A.10. The diagrams show all rows in the pattern from the right side. DECREASE/INCREASE TIP (evenly spaced): To work out how to decrease/increase evenly, count the number of stitches to be decreased/increased over (e.g. 23 stitches), and divide by the number of decreases/increases to be made (e.g. 6) = 3.8. In this example, decrease by knitting together approx. each 3rd and 4th stitch. When increasing, make 1 yarn over after approx. each 4th stitch. On the next round work the yarn overs twisted to avoid holes. INCREASE TIP (sleeves): Increase 2 stitches under the sleeve by making 1 yarn over on each side of the marker-stitch as follows: Work the marker-stitch (always the first stitch in A.4), 1 yarn over, pattern as far as the marker-stitch, 1 yarn over (= 2 stitches increased). On the next round work the yarn overs twisted to avoid holes. Then work the new stitches into A.9/A.10 until you have room for a complete repeat, then work the stitches in A.4. RAGLAN: Decrease to raglan on each side of the marker, in each transition between body and sleeves as follows. FROM RIGHT SIDE: AFTER THE MARKER: Knit 1, slip 1 stitch as if to knit, knit 1 and pass the slipped stitch over the knitted stitch (= 1 stitch decreased) BEFORE THE MARKER: Work until there are 3 stitches left before the marker, knit 2 together, knit 1 (= 1 stitch decreased). FROM WRONG SIDE: AFTER THE MARKER: Purl 1, purl 2 together (= 1 stitch decreased) BEFORE THE MARKER: Work until there are 3 stitches left before the marker, purl 2 twisted together, purl 1 (= 1 stitch decreased). ------------------------------------------------------- START THE PIECE HERE: ------------------------------------------------------- JUMPER – SHORT OVERVIEW OF THE PIECE: The body is worked in the round with circular needle as far as the armholes. The sleeves are worked in the round with double pointed needles/short circular needle, bottom up. The body and sleeves are placed on the same circular needle and the yoke worked, decreasing to raglan at the same time. Stiches are cast off for the neck mid-front and the piece continued back and forth. The neck is worked to finish. BODY: Cast on 272-288-304-344-360-392 stitches with circular needle size 3.5 mm and DROPS Karisma. Knit 1 round. Then work the following rib: Purl 1, knit 2, * purl 2, knit 2 *, work from *-* over the next 20-24-28-24-28-36 stitches, work A.1 over the next 14-14-14-28-28-28 stitches (= 1-1-1-2-2-2 repeats of 14 stitches – read KNITTING TIP), A.2 (= 18 stitches), A.3 (= 26 stitches), A.2, A.1 over the next 14-14-14-28-28-28 stitches (= 1-1-1-2-2-2 repeats of 14 stitches – read KNITTING TIP), * knit 2, purl 2 *, work from *-* over the next 44-52-60-52-60-76 stitches, knit 2, A.1 over the next 14-14-14-28-28-28 stitches – remember KNITTING TIP, A.2, A.3, A.2, A.1 over the next 14-14-14-28-28-28 stitches – remember KNITTING TIP, * knit 2, purl 2 *, work from *-* over the next 20-24-28-24-28-36 stitches, knit 2 and purl 1. Continue this rib – NOTE: In diagrams A.2 and A.3 repeat the first 2 rounds onwards. When 1 round remains before the piece measures 5 cm, decrease stitches as follows: Work stocking stitch over the first 23-27-31-27-31-39 stitches and decrease 6-6-6-6-6-8 stitches evenly over these stitches – read DECREASE/INCREASE TIP, work A.1 as before over the next 14-14-14-28-28-28 stitches, work the last round in A.2 (= 18 stitches, 1 stitch decreased), work the last round in A.3 (= 26 stitches, 2 stitches decreased), work the last round in A.2 (= 18 stitches, 1 stitch decreased), A.1 as before over the next 14-14-14-28-28-28 stitches, work stocking stitch over the next 46-54-62-54-62-78 stitches and decrease 13-13-13-13-13-17 stitches evenly over these stitches, A.1 as before over the next 14-14-14-28-28-28 stitches, work the last round in A.2 (= 18 stitches, 1 stitch decreased), work the last round in A.3 (= 26 stitches, 2 stitches decreased), work the last round in A.2 (= 18 stitches, 1 stitch decreased), A.1 as before over the next 14-14-14-28-28-28 stitches, work stocking stitch over the last 23-27-31-27-31-39 stitches and decrease 7-7-7-7-7-9 stitches evenly over these stitches = 238-254-270-310-326-350 stitches. The rib is now finished. Insert 1 marker in the first stitch and 1 marker in the 120th-128th-136th-156th-164th-176th stitch (= sides). Allow these markers to follow your work onwards; they are used when casting off for the armholes. Change to circular needle size 4.5 mm. Work the next round as follows: A.4 over the first 17-21-25-21-25-31 stitches, A.5 over the next 14-14-14-28-28-28 stitches (= 1-1-1-2-2-2 repeats of 14 stitches), A.6 (= 17 stitches), A.7 (= 24 stitches), A.6, A.8 over the next 14-14-14-28-28-28 stitches (= 1-1-1-2-2-2 repeats of 14 stitches), A.4 over the next 33-41-49-41-49-61 stitches (marker sits in the middle of these stitches), A.5 over the next 14-14-14-28-28-28 stitches, A.6, A.7, A.6, A.8 over the next 14-14-14-28-28-28 stitches and A.4 over the last 16-20-24-20-24-30 stitches. Continue this pattern. REMEMBER THE KNITTING TENSION! When the piece measures 36 cm in all sizes, cast off for the armholes as described below. There is approx. 26-28-30-32-34-36 cm left to finished length. Adjust so that next round is an odd numbered row in the diagrams, and cast off the first 6-6-7-7-8-8 stitches, continue the pattern until there are 5-5-6-6-7-7 stitches left before the second marker-stitch, cast off 11-11-13-13-15-15 stitches, work until there are 5-5-6-6-7-7 stitches left on the round and cast off 5-5-6-6-7-7 stitches = 108-116-122-142-148-160 stitches on the front piece and 108-116-122-142-148-160 stitches on the back piece. Cut the strand. Lay the piece to one side and work the sleeves. SLEEVES: Cast on 56-60-60-64-64-68 stitches with double pointed needles size 3.5 mm and DROPS Karisma. Knit 1 round, then work rib in the round (knit 2, purl 2) for 5 cm. Knit 1 round where you increase 19-15-15-19-19-15 stitches evenly spaced – remember DECREASE/INCREASE TIP = 75-75-75-83-83-83 stitches. Insert 1 marker in the first stitch – allow the marker to follow your work onwards; it is used when increasing under the sleeve. Change to double pointed needles size 4.5 mm. Work the next round with pattern as follows: A.4 over the first stitch (marker-stitch), A.9 (= 8-8-8-12-12-12 stitches – start the diagram by the mark for your size and work from right to left), A.6 (= 17 stitches), A.7 (= 24 stitches), A.6, A.10 (= 8-8-8-12-12-12 stitches – start at the first stitch in A.10 and work from right to left as far as the mark for your size). Continue this pattern. When the piece measures 8-10-7-8-9-6 cm, increase 2 stitches under the sleeve – read INCREASE TIP. Increase like this every 4-2½-2½-2½-2-2 cm a total of 11-15-17-15-17-19 times = 97-105-109-113-117-121 stitches – NOTE: The increased stitches are first worked in A.9/A.10 until there is room for a complete repeat, then worked in A.4. Continue working until the sleeve measures approx. 51-49-48-46-45-43 cm (shorter measurements in larger sizes due to wider neck and longer yoke). Try the sleeve on and work to desired length. Adjust so that the next round is an odd numbered row in the diagrams and cast off for the armhole as follows: Cast off the first 6-6-7-7-8-8 stitches, work as before until there are 5-5-6-6-7-7 stitches left and cast off the last 5-5-6-6-7-7 stitches = 86-94-96-100-102-106 stitches. Cut the strand. Work the other sleeve in the same way. YOKE: Place the sleeves on the same circular needle size 4.5 mm as the body, where stitches were cast off for the armholes (without working the stitches) = 388-420-436-484-500-532 stitches. Insert a marker thread in each transition between the body and sleeves = 4 marker threads. Allow the threads to follow your work onwards; they are used when decreasing to raglan. Start at the transition between the back piece and the left sleeve – you can insert a marker here to show the start of the round. Continue the pattern as before, with 2 stitches in stocking stitch on each side of all 4 marker threads. OVERVIEW OF THE NEXT SECTION: On the next round start to decrease to raglan; you will also cast off stitches for the neck mid-front and finish working back and forth from mid-front. When there are not enough stitches for the cables, work stocking stitch over these stitches. Read RAGLAN and NECK before continuing. RAGLAN: Decrease to RAGLAN on each side of all 4 marker threads – read description above. Decrease every 2nd round a total of 24-27-30-32-36-38 times, then every round 7-7-6-7-4-4 times. NECK: When the piece measures 55-57-59-60-62-64 cm (adjust so the next round is an odd round in the diagrams), decrease 6-6-6-10-10-10 stitches evenly over the middle 24-24-24-32-32-32 in front – remember DECREASE/INCREASE TIP. Then place the middle 30-32-34-42-46-54 stitches on a thread for the neck. Work to the beginning of the round. Cut the strand. Start from the wrong side, by the neck and continue the pattern back and forth. AT THE SAME TIME cast off at the beginning of each row from the neck as follows: 2 stitches 1 time and 1 stitch 1-1-1-2-2-2 times on each side. After all the decreases to raglan and neck there are 98-104-102-112-116-124 stitches on the needle. Cut the strand. DOUBLE NECK: Start mid-back and knit up 134-142-142-162-170-186 stitches around the neck (including the stitches on the thread and on the needle) with short circular needle size 3.5 mm and DROPS Karisma. On the next round decrease stitches to avoid the neck being too loose – knit 1 round and decrease to 104-108-112-116-120-124 stitches evenly spaced. Purl 1 round and knit 1 round. Work the next round as follows: Knit 1, * purl 2, knit 2 *, work from *-* until there are 3 stitches left, purl 2 and knit 1. Continue this rib until the neck measures 8-8-8-10-10-10 cm. On the next round increase all purl-2 to purl-3 by making 1 yarn over after each purled section (the yarn overs are purled twisted on the next round to avoid holes). Continue working until the neck measures 11-11-11-13-13-13 cm. Switch to circular needle size 4.5 mm and cast off loosely with knit over knit and purl over purl. Fold the neck double to the inside and sew down. To avoid the neck being tight and rolling outwards, it is important that the seam is elastic. ASSEMBLY: Sew the opening under each sleeve. |
|||||||||||||||||||||||||||||||
Diagram explanations |
|||||||||||||||||||||||||||||||
|
|||||||||||||||||||||||||||||||
 |
|||||||||||||||||||||||||||||||
 |
|||||||||||||||||||||||||||||||
 |
|||||||||||||||||||||||||||||||
Have you finished this pattern?Tag your pictures with #dropspattern #iceislandsweater or submit them to the #dropsfan gallery. Do you need help with this pattern?You'll find 28 tutorial videos, a Comments/Questions area and more by visiting the pattern on garnstudio.com. © 1982-2025 DROPS Design A/S. We reserve all rights. This document, including all its sub-sections, has copyrights. Read more about what you can do with our patterns at the bottom of each pattern on our site. |
|||||||||||||||||||||||||||||||







Post a comment to pattern DROPS 224-10
We would love to hear what you have to say about this pattern!
If you want to leave a question, please make sure you select the correct category in the form below, to speed up the answering process. Required fields are marked *.