
Popular categories
Looking for a yarn?


Comments / Questions (9)
![]() Cande wrote:
Cande wrote:
Bonjour avoir coupé le fil de la pointe peut-on continuer avec une aiguille circulaire plutôt que 4 aiguilles double pointe? mille mercis pour votre réponse 6
08.12.2023 - 19:36DROPS Design answered:
Bonjour Mme Cande, tout à fait, mais il vous faudra alors utiliser la technique du magic loop. Bon tricot!
11.12.2023 - 07:22
![]() Laura Stel wrote:
Laura Stel wrote:
Ik ben hieraan begonnen en begrijp eigenlijk niet waarom ik zoveel toeren moet breien voordat ik het rond kan gaan breien. Kunt u dit uitleggen?
23.02.2023 - 16:30
![]() YOLANDE wrote:
YOLANDE wrote:
COMMENT SE FAIT-IL QUE QUAND J'IMPRIME UN PATRON DE TRICOT, JE RETROUVE EN BAS DE PAGE LES DEUX DERNIERES LIGNE EN IMPRESSION SUR LES DEUX LIGNE DU BAS ANNONCANT L'UTILISATION DE COOKIES. JE NE VOIS JAMAIS BIEN LES DIRECTIVES DU MODELE DEMANDER. MERCI BEAUCOUP A L'AVANCE POUR LE RENSEIGNEMENT.
25.07.2020 - 00:59DROPS Design answered:
Bonjour Yolande, utilisez-vous bien le bouton "Imprimer" pour lancer l'impression des explications? Pensez ensuite à bien vérifier les paramètres de votre imprimante, mais en procédant ainsi, vous devriez être en mesure de pouvoir imprimer l'intégralité des explications. Bon tricot!
29.07.2020 - 10:00
![]() Bärbel wrote:
Bärbel wrote:
Tolle Socken , wäre schön , wenn es so was auch ab Bund , Schaft , Ferse , Spitze , gestrickt geben würde liebe Grüsse
13.05.2020 - 15:15
![]() Davina wrote:
Davina wrote:
I’m stuck - what does it mean to move stitches from the right side to right needle? Also how does moving the stitches make it mid foot? And if I cut the yarn how do I continue knitting? Pls help!
20.03.2020 - 22:28DROPS Design answered:
Dear Davina, move the stitches means that you slip the stitches of the right side of teh piece to the needle that is in your right hand. If you cut the yarn, you can make a slipknot, put it on the needle and knit together with the first stitch. Or simply just hold thightly against the knitted piece. it will be a bit loose at first, but you can thighten it up when you weave in teh ends. Happy Knitting!
22.03.2020 - 11:45
![]() Berta wrote:
Berta wrote:
¿Se traduciràn las instrucciones al Español?
03.03.2020 - 17:02DROPS Design answered:
Hola Berta. Todos los patrones se traducen al español. Este en concreto se publicará antes del jueves.
03.03.2020 - 23:22
![]() Ute wrote:
Ute wrote:
Namensvorschlag: "Schräge Sache"
25.01.2020 - 09:17
![]() Carmen wrote:
Carmen wrote:
Geniales, los tricoto seguro!!!
20.12.2019 - 10:03
![]() Reina Groen wrote:
Reina Groen wrote:
Interesting short row pattern on the feet
10.12.2019 - 20:09
|
|||||||
Horizon Trekkers#horizontrekkerssocks |
|||||||
 |
 |
||||||
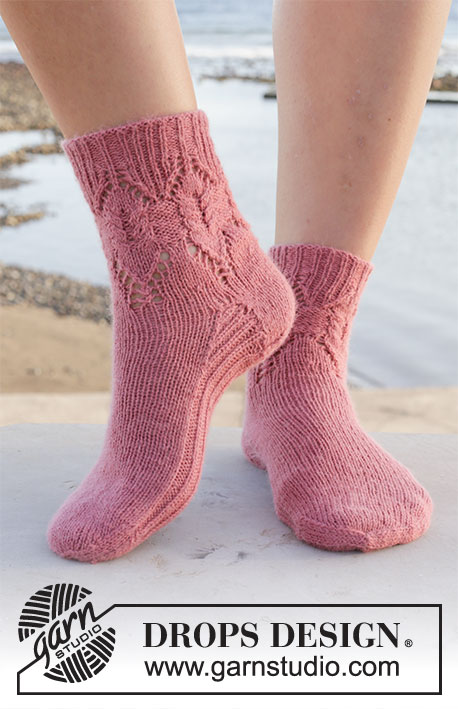
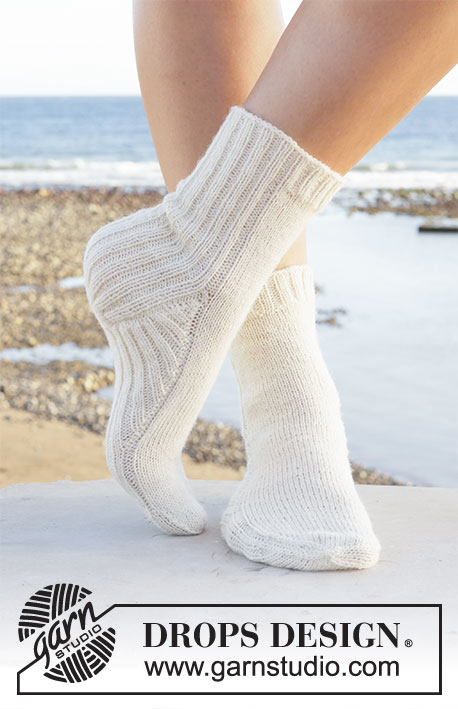
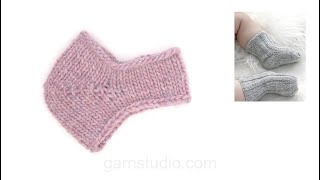
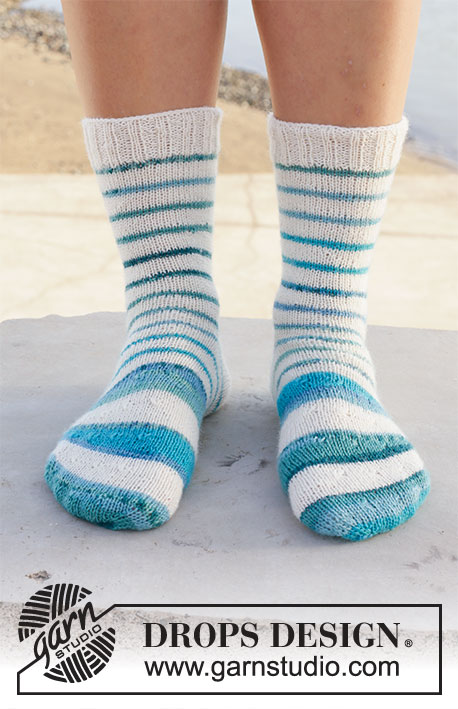
Knitted socks in DROPS Fabel. The piece is worked at an angle and with stripes, from the toe upwards. Sizes 35 – 43.
DROPS 209-24 |
|||||||
|
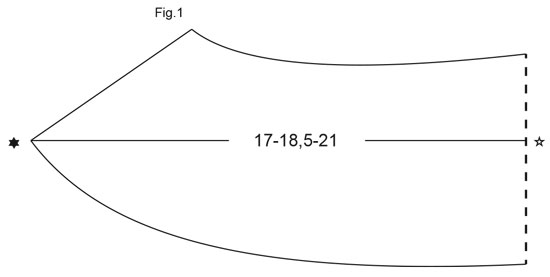
------------------------------------------------------- EXPLANATIONS FOR THE PATTERN: ------------------------------------------------------- RIDGE/GARTER STITCH (worked back and forth): Knit all rows. INCREASE TIP: Increase by making 1 yarn over between 2 stitches. The yarn over is worked twisted on the next next row to avoid holes! STRIPES: The piece is worked in stripes as follows: Work 6 rounds with off-white. Work 2 rounds with blue lagoon. CASTING-OFF TIP: To avoid the cast-off edge being tight you can cast off with a larger size needle. If the edge is still tight, make 1 yarn over after approx. each 4th stitch at the same time as casting off and cast off the yarn overs as normal stitches. HEEL: Work stocking stitch back and forth with off-white as follows: ROW 1 (= right side): Work until there is 1 stitch left on the row, turn. ROW 2 (= wrong side): Slip the first stitch as if to purl, tighten the strand and work until there is 1 stitch left, turn. ROW 3 (= right side): Slip the first stitch as if to knit, tighten the strand and work until there are 2 stitches left, turn. ROW 4 (= wrong side): Slip the first stitch as if to purl, tighten the strand and work until there are 2 stitches left, turn. Continue to turn in the same way until there are 14 stitches left in the middle of the row. Continue back and forth but now work 1 more stitch on each row (i.e. both from right and wrong side) over the heel. To avoid a hole when turning, lift the horizontal strand before the stitch to be worked and place it twisted on the needle. Work this strand together with the next stitch on the left needle (from the right side the strand and stitch are knitted together, from the wrong side they are purled together). Work like this until you have worked over all stitches on the needle. ------------------------------------------------------- START THE PIECE HERE: ------------------------------------------------------- SOCKS – SHORT OVERVIEW OF THE PIECE: The piece is worked from the toe upwards. It is first worked with circular needle back and forth at an angle with short rows, before continuing in the round with double pointed needles. The heel is worked back and forth with short rows. The leg is worked in the round with double pointed needles. RIGHT SOCK: Cast on 48-52-56 stitches (including 1 edge stitch on each side of the piece) with circular needle size 2.5 mm and blue lagoon. ROW 1: (= wrong side): Work 1 edge stitch in GARTER STITCH – read description above, purl 23-25-27, insert 1 marker (between the stitches), purl 23-25-27 and finish with 1 edge stitch in garter stitch. Now increase stitches on each side of the marker. ROW 2 (= right side): Knit until there are 2 stitches left before the marker, 1 yarn over – read INCREASE TIP (= 1 stitch increased), knit 4 (= marker sits in the middle of these stitches), 1 yarn over (= 1 stitch increased), knit until there are 2 stitches left on the row, turn (= a total of 50-54-58 stitches on the needle). ROW 3 (= wrong side): Slip 1 stitch onto the right needle as if to purl, purl until there are 2 stitches left on the row, turn. ROW 4 (= right side): Slip 1 stitch onto the right needle as if to knit, knit until there are 2 stitches left before the marker, 1 yarn over (= 1 stitch increased), knit 4 (= marker sits in the middle of these stitches), 1 yarn over (= 1 stitch increased), knit until there are 5-7-9 stitches left on the row, turn (= a total of 52-56-60 stitches on the needle). ROW 5 (= wrong side): Slip 1 stitch onto the right needle as if to purl, purl until there are 5-7-9 stitches left on the row, turn. ROW 6 (= right side): Slip 1 stitch onto the right needle as if to knit, knit until there are 2 stitches left before the marker, 1 yarn over (= 1 stitch increased), knit 4 (= marker sits in the middle of these stitches), 1 yarn over (= 1 stitch increased), knit until there are 10-12-14 stitches left on the row, turn (= a total of 54-58-62 stitches on the needle). ROW 7 (= wrong side): Slip 1 stitch onto the right needle as if to purl, purl until there are 10-12-14 stitches left on the row, turn. ROW 8 (= right side): Slip 1 stitch onto the right needle as if to knit, knit until there are 15-17-19 stitches left on the row, turn. ROW 9 (= wrong side): Slip 1 stitch onto the right needle as if to purl, purl until there are 15-17-19 stitches left on the row, turn. ROW 10 (= right side): Slip 1 stitch onto the right needle as if to knit, knit until there are 20-22-24 stitches left on the needle, turn. ROW 11 (= wrong side): Slip 1 stitch onto the right needle as if to purl, purl until there are 20-22-24 stitches left on the row, turn. REMEMBER THE KNITTING TENSION! ROW 12 (= right side): Slip 1 stitch onto the right needle as if to knit, knit until there is 1 stitch left on the row and finish with 1 edge stitch in garter stitch, turn. ROW 13 (= wrong side): Work 1 edge stitch in garter stitch, purl until there is 1 stitch left on the row and finish with 1 edge stitch in garter stitch. ROW 14 (= right side): Knit. ROW 15 (= wrong side): Work 1 edge stitch in garter stitch, purl until there is 1 stitch left and finish with 1 edge in garter stitch. Change to off white. ROW 16 (= right side): Knit until there are 2 stitches left, turn. ROW 17 (= wrong side): Slip 1 stitch onto the right needle as if to purl, purl until there are 2 stitches left on the row, turn. ROW 18 (= right side): Slip 1 stitch onto the right needle as if to knit, knit until there are 5-7-9 stitches left on the row, turn. ROW 19 (= wrong side): Slip 1 stitch onto the right needle as if to purl, purl until there are 5-7-9 stitches left on the row, turn. ROW 20 (= right side): Slip 1 stitch onto the right needle as if to knit, knit until there are 10-12-14 stitches left on the row, turn. ROW 21 (= wrong side): Slip 1 stitch onto the right needle as if to purl, purl until there are 10-12-14 stitches left on the row, turn. ROW 22 (= right side): Slip 1 stitch onto the right needle as if to knit, knit until there are 15-17-19 stitches left on the row, turn. ROW 23 (= wrong side): Slip 1 stitch onto the right needle as if to purl, purl until there are 15-17-19 stitches left on the row, turn. ROW 24 (= right side): Slip 1 stitch onto the right needle as if to knit, knit until there are 20-22-24 stitches left on the row, turn. ROW 25 (= wrong side): Slip 1 stitch onto the right needle as if to purl, purl until there are 20-22-24 stitches left on the row, turn. ROW 26 (= right side): Slip 1 stitch onto the right needle as if to knit, knit until there is 1 stitch left on the row and finish with 1 edge stitch in garter stitch, turn. ROW 27 (= wrong side): Work 1 edge stitch in garter stitch, purl until there is 1 stitch left on the row and finish with 1 edge stitch in garter stitch. ROW 28 (= right side): Knit. ROW 29 (= wrong side): Work 1 edge stitch in garter stitch, purl until there is 1 stitch left and finish with 1 edge stitch in garter stitch. Change to blue lagoon. Work rows 16 to 29 one more time. Change to off-white. Work rows 16 to 29 one more time. Change to blue lagoon. Work rows 16 to 29 one more time but on the last 2 rows cast off the first edge stitch on each side of the piece = 52-56-60 stitches. Now displace the round by slipping the first 39-42-45 stitches from the right side onto the right needle. Beginning of the round = mid under foot. Cut the strands. Then put the piece together and continue in the round with double pointed needles. Work STRIPES in stocking stitch – read description above. When the piece measures 17-18½-21 cm, see Fig.1 (when measuring, lay the piece flat with the cast-on edge at the side and measure along the middle from the point/toe). Now divide the piece for the heel; adjust so the last row was worked with off-white. Leave the middle 22 stitches on the top of the foot on the needle (i.e. 11 stitches on needles 2 and 3). Divide the remaining 30-34-38 stitches between needles 1 and 4 with 15-17-19 stitches on each needle. Work HEEL – read description above (the heel is worked in stocking stitch). When the heel is finished, continue with stripes and stocking stitch – NOTE: To avoid a hole in the corner of the heel when the first round after the heel is worked, lift up the horizontal strand before the next stitch on the left needle to be worked and place it twisted back on the needle. Work the strand together with the next stitch on the left needle. When the piece measures 4 cm from the heel, increase 2 stitches evenly spaced = 54-58-62 stitches. Repeat the increase when the piece measures 8 cm from the heel = 56-60-64 stitches. When the piece measures 12-14-16 cm from the heel (adjust so the next round is worked with off-white) increase 4 stitches evenly spaced = 60-64-68 stitches. Work rib (= knit 2 / purl 2) with off-white for 4 cm. Loosely cast off with knit – read CASTING-OFF TIP. ASSEMBLY: Fold the cast-on edge and sew together; sew using off-white as far as the point where the piece was put together and continued in the round. LEFT SOCK: Work as for the right sock but when the beginning of the round is displaced to mid under foot, slip the first 13-14-15 stitches from the right side onto the right needle. |
|||||||
Diagram explanations |
|||||||
|
|||||||
 |
|||||||
Have you finished this pattern?Tag your pictures with #dropspattern #horizontrekkerssocks or submit them to the #dropsfan gallery. Do you need help with this pattern?You'll find 21 tutorial videos, a Comments/Questions area and more by visiting the pattern on garnstudio.com. © 1982-2026 DROPS Design A/S. We reserve all rights. This document, including all its sub-sections, has copyrights. Read more about what you can do with our patterns at the bottom of each pattern on our site. |
|||||||


With over 40 years in knitting and crochet design, DROPS Design offers one of the most extensive collections of free patterns on the internet - translated to 17 languages. As of today we count 324 catalogues and 12290 patterns translated into English (UK/cm). 12290
We work hard to bring you the best knitting and crochet have to offer, inspiration and advice as well as great quality yarns at incredible prices! Would you like to use our patterns for other than personal use? You can read what you are allowed to do in the Copyright text at the bottom of all our patterns. Happy crafting!
Post a comment to pattern DROPS 209-24
We would love to hear what you have to say about this pattern!
If you want to leave a question, please make sure you select the correct category in the form below, to speed up the answering process. Required fields are marked *.