
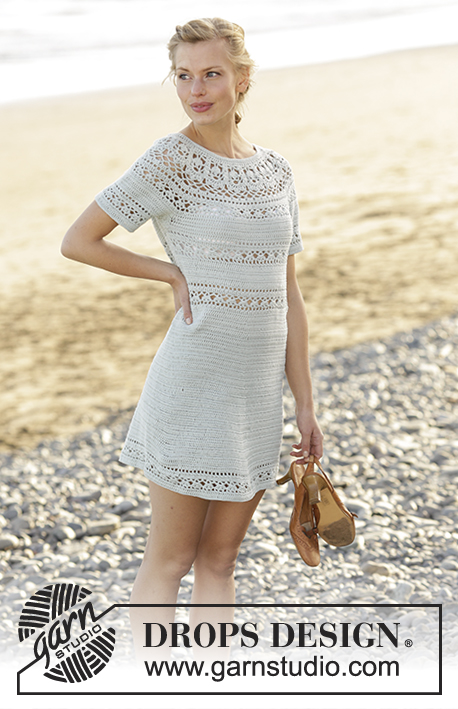
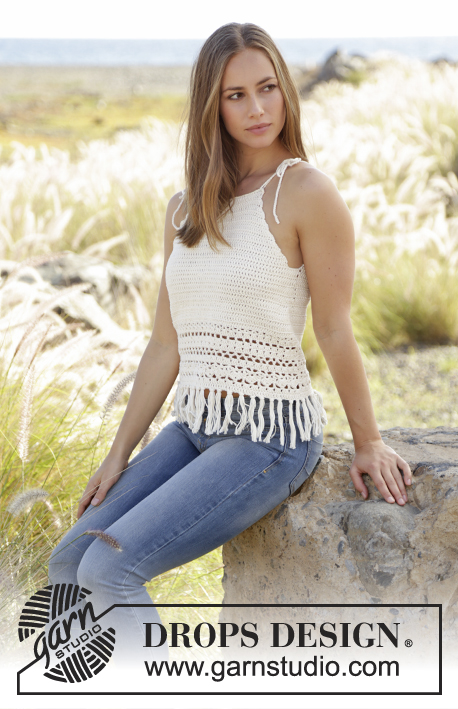
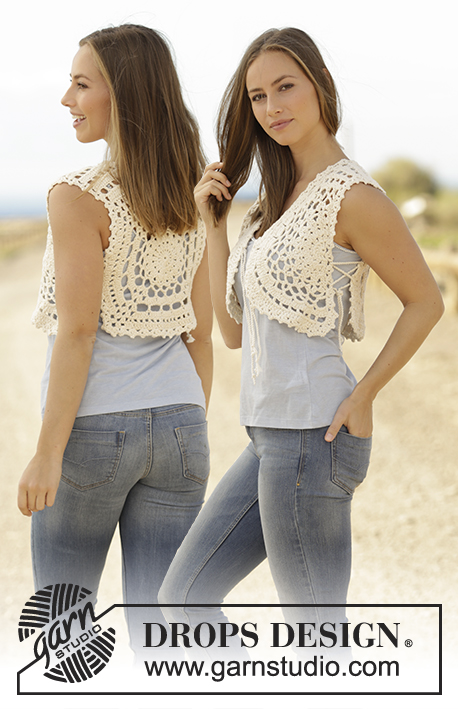
Popular categories
Looking for a yarn?


Comments / Questions (27)
![]() Karin wrote:
Karin wrote:
Ärmhålet på tröjan är mycket vidare än ärmhålet på själva ärmen. Det skiljer 10-15cm. Ska jag behöva repa upp ärmarna och börja om på nytt? Eller ska det vara så stor skillnad?
23.02.2026 - 10:20DROPS Design answered:
Hej Karin, har du talt de første aflukkede masker med, hvis du lukker løst af, så når selve ærmet hele vejen rundt om ærmegabet :)
16.03.2026 - 15:08
![]() Barb wrote:
Barb wrote:
Do you use 1 or 2 strands of drops melody yarn for this pattern?
24.05.2024 - 04:16DROPS Design answered:
Hi Barb, You use 1 strand of Drops Melody for this pattern. Happy knitting!
24.05.2024 - 06:31
![]() Outi Valo wrote:
Outi Valo wrote:
Hihan ohjeessa on vain 21 silmukkaa koon S puseroon. Onko se yhdellä puikolla vai 4 X 21 silmukkaa? Tuntuu todella kapealta hihansuulta. 84 silmukkaa on taas valtavan leveä...
09.04.2024 - 19:23DROPS Design answered:
Hei, hihaa varten luodaan yhteensä 21 silmukkaa. Hihasta tulee kuitenkin tarpeeksi leveä, koska lanka on paksu ja työ neulotaan paksuilla puikoilla.
10.04.2024 - 18:50
![]() Rosa Blanco wrote:
Rosa Blanco wrote:
Buenos días! Al tejer en aguja circular con esta lana estoy teniendo muchos problemas a la hora de mover los puntos en la aguja de la izquierda, ya que se retuercen y me cuesta mucho deslizarlos. Qué puedo hacer? Gracias.
23.10.2023 - 11:26DROPS Design answered:
Hola Rosa, eso implica que los puntos están demasiado prietos. Los puntos tienen que ser del tamaño de la aguja, no más estrechos, como el tamaño del cable, por ejemplo. Así nos aseguramos de que se pueda trabajar con comodidad y la tensión se mantenga uniforme.
29.10.2023 - 19:24
![]() Pascale wrote:
Pascale wrote:
Bonjour, Que signifie \"sauter 53 mailles\" au tout début des explications, quand il s\'agit de placer des marqueurs ? Merci d\'avance pour votre réponse !
26.02.2023 - 09:55DROPS Design answered:
Bonjour Pascale, en tricotant le tour en mailles envers placez vos marqueurs ainsi: 1 marqueur dans la 1ère maille, tricotez 53 mailles et placez votre 2ème marqueur dans la maille suivante; si ce tour est déjà tricoté, placez le 1er marqueur dans la 1ère maille du tour, comptez 53 mailles et placez votre 2ème marqueur dans la maille suivante ( = vous avez sauté 53 mailles entre les 2 marqueurs). Bon tricot!
27.02.2023 - 11:33
![]() Elena wrote:
Elena wrote:
Dear Garnstudio-Team, will you please tell, whether it is possible to adapt the pattern for 8 stitches in width using 1 strand of Alpaca Boucle and 1 strand of Brushed Alpaca Silk. If possible will you please give an advice how to. Thank you!
06.03.2021 - 15:37DROPS Design answered:
Dear Elena, we don't make personalized patterns, you need to make the calculations needed to adapt the pattern yourself. In any case, the difference between 8 stitches and the 10 stitches is not too relevant; you could use the calculations for another size to get the desired measurements. Happy knitting!
07.03.2021 - 20:26
![]() Christine wrote:
Christine wrote:
Bonjour, Je suis en train de tricoter la première manche. Je suis arrivée à 49 cms. J'ai rabattu 7 m. au milieu sous la manche. Je n'arrive pas à comprendre la suite des explications. Que voulez-vous dire par "Tricoter ensuite un petit arrondi en allers et retours en jersey. " ? Merci bcp pour votre aide.
08.12.2019 - 17:14DROPS Design answered:
Bonjour Christine, après avoir rabattu les 7 m au milieu sous la manche, continuez en allers et retours en rabattant au début de chaque rang de chaque côté: 1 x 5 m et 1 x 4 m, puis rabattez les mailles restantes. En tricotant ces rangs supplémentaires, vous créez un léger arrondi de la manche, pour la coudre le long des emmanchures dos/devant. Bon tricot!
09.12.2019 - 09:44
![]() Catherine MORA wrote:
Catherine MORA wrote:
Merci de bien vouloir m'indiquer la finition du col car elle ne figure pas sur le site. Merci d'avance de votre réponse. Bien cordialement,
15.11.2019 - 23:31
![]() Catherine MORA wrote:
Catherine MORA wrote:
Pourriez-vous m'indiquer la finition du col car elle n'est pas expliquée Merci pour votre réponse. Cordialement
15.11.2019 - 23:29DROPS Design answered:
Bonjour Mme Mora, il n'y a aucune finition particulière pour le col, les mailles de l'encolure dos et celles du de l'encolure devant sont simplement rabattues lorsque l'on tricote le dos et le devant. Libre à vous de choisir de tricoter une petite bordure d'encolure si vous le souhaitez. Bon tricot!
18.11.2019 - 08:45
![]() Darshita Shukla wrote:
Darshita Shukla wrote:
Can i beocome a raand Call me jaanu
30.09.2019 - 15:43DROPS Design answered:
Dear Mrs Shukla, should you need any help, please feel free to ask your question here, remember you can also contact your DROPS store, even per mail or telephone for any individual assistance. Happy knitting!
30.09.2019 - 17:03
|
|
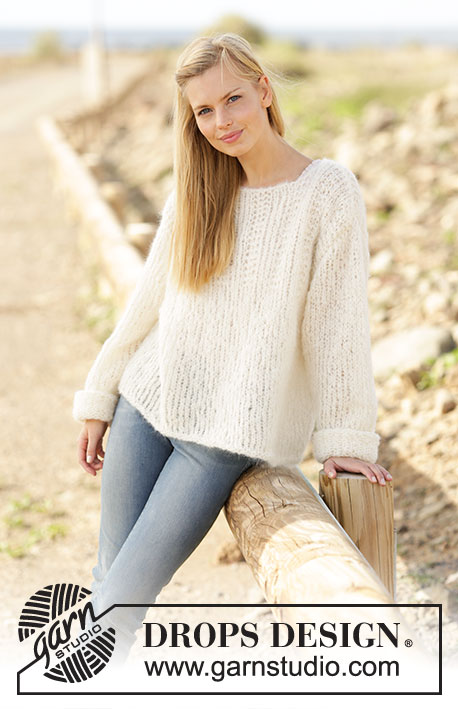
Randi#randisweater |
|
 |
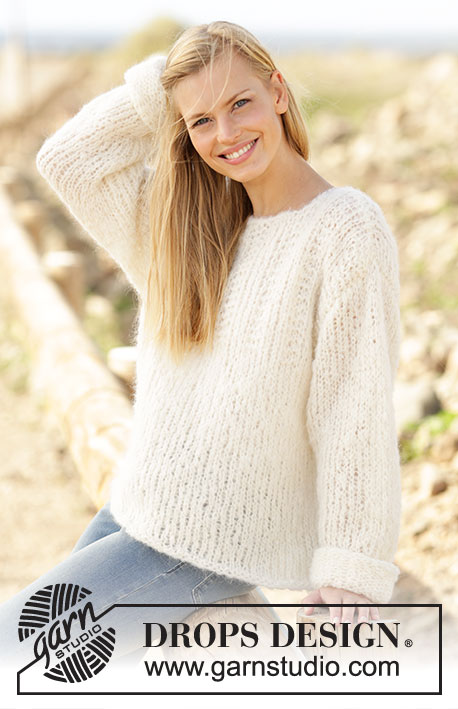 |
Knitted jumper with textured pattern on yoke and folded sleeve edges, worked bottom up in DROPS Melody. Size: S - XXXL
DROPS 175-26 |
|
|
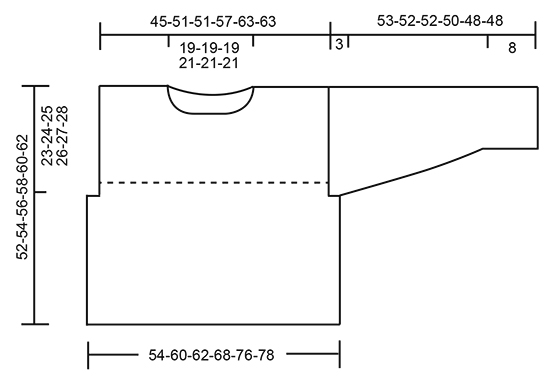
GARTER STITCH (back and forth): Knit all rows. 1 ridge = Knit 2 rows. INCREASE TIP: Increase as follows before stitch with marker: Work until 1 stitch remains before stitch with marker, make a yarn over. Increase as follows after stitch with marker: Work 1 stitch, make a yarn over. On next round knit yarn overs twisted to avoid holes. ---------------------------------------------------------- JUMPER: Body is first worked in the round on circular needle, then divide the piece and finish front and back piece separately back and forth. Sleeves are worked in the round on double pointed needles and sleeve cap is worked back and forth. Cast on 108-120-124-136-152-156 stitches on circular needle size 9 mm with Melody. Purl 1 round. Insert 1 marker in first stitch, skip 53-59-61-67-75-77 stitches and insert 1 marker in next stitch. Work in stocking stitch. REMEMBER THE KNITTING TENSION! When piece measures 29-30-31-32-33-34 cm, cast off 7-7-9-9-11-13 stitches in each side for armholes (i.e. stitch with marker and 3-3-4-4-5-6 stitches on each side of both markers). Work front and back piece back and forth separately. BACK PIECE: Worked back and forth. = 47-53-53-59-65-65 stitches. Work 2 rows in stocking stitch. Work next row from right side as follows: Work 1 edge stitch in GARTER STITCH - see explanation above, work 3 stitches in garter stitch, * 3 stitches in stocking stitch, 3 stitches in garter stitch *, repeat from *-* until 1 stitch remains on row, 1 edge stitch in garter stitch. Continue pattern like this. When piece measures 50-52-54-56-58-60 cm, cast off the middle 17-17-17-19-19-19 stitches for neck and finish each shoulder separately. Then cast off 1 stitch on next row from neck =14-17-17-19-22-22 stitches remain for shoulder. Cast off when piece measures 52-54-56-58-60-62 cm. FRONT PIECE: Worked back and forth. = 47-53-53-59-65-65 stitches. Work 2 rows in stocking stitch. Then work pattern as on back piece. When piece measures 44-46-48-48-50-52 cm, cast off the middle 11-11-11-13-13-13 stitches for neck and finish each shoulder separately. Then cast off on every row from neck as follows: 2 stitches 1 time and 1 stitch 2 times = 14-17-17-19-22-22 stitches remain for shoulder. Cast off when piece measures 52-54-56-58-60-62 cm. SLEEVE: Worked in the round on double pointed needles. Cast on 21-22-23-24-25-26 stitches on double pointed needles size 9 mm. Purl 1 round from right side. Insert 1 marker in the first stitch on round. Then work in stocking stitch. When sleeve measures 8 cm in all sizes, increase 1 stitch on each side of marker - READ INCREASE TIP. Increase like this every 4th round 9-11-8-6-1-1 times in total and every 5th-0-3rd-3rd-3rd-3rd round 2-0-4-6-12-12 times in total = 43-44-47-48-51-52 stitches. When piece measures 50-49-49-47-45-45 cm (shorter measurements in the larger sizes because of wider shoulders), cast off 7-7-9-9-11-13 stitches mid under sleeve (i.e. stitch with marker and 3-3-4-4-5-6 stitches on each side of stitch with marker). Then work a small sleeve cap back and forth in stocking stitch. Cast off stitches at beginning of every row in each side as follows: Cast off 5 stitches 1 time and 4 stitches 1 time = 18-19-20-21-22-21 stitches. Cast off. Piece measures approx. 53-52-52-50-48-48 cm. Work another sleeve the same way. ASSEMBLY: Sew shoulders together with grafting/kitchener stitches inside cast-off edge. Then sew sleeves in body: Sew inside edge stitch in garter stitch on body and cast-off edge on sleeves. Fold the sleeve edges up 2 times and fasten with a small stitch in each side. |
|
 |
|
Have you finished this pattern?Tag your pictures with #dropspattern #randisweater or submit them to the #dropsfan gallery. Do you need help with this pattern?You'll find 23 tutorial videos, a Comments/Questions area and more by visiting the pattern on garnstudio.com. © 1982-2026 DROPS Design A/S. We reserve all rights. This document, including all its sub-sections, has copyrights. Read more about what you can do with our patterns at the bottom of each pattern on our site. |
|


With over 40 years in knitting and crochet design, DROPS Design offers one of the most extensive collections of free patterns on the internet - translated to 17 languages. As of today we count 324 catalogues and 12290 patterns translated into English (UK/cm). 12290
We work hard to bring you the best knitting and crochet have to offer, inspiration and advice as well as great quality yarns at incredible prices! Would you like to use our patterns for other than personal use? You can read what you are allowed to do in the Copyright text at the bottom of all our patterns. Happy crafting!
Post a comment to pattern DROPS 175-26
We would love to hear what you have to say about this pattern!
If you want to leave a question, please make sure you select the correct category in the form below, to speed up the answering process. Required fields are marked *.