
Popular categories
Looking for a yarn?


























Comments / Questions (125)
 Marit wrote:
Er det mulig å strikke hele bolen på rundpinne og klippe opp etterpå?
14.10.2026 - 19:48DROPS Design answered:
Hej Marit, ja det kan du godt, men husk at slå ekstra masker op til at klippe i bagefter :)
15.10.2026 - 12:02
 Melanee wrote:
This is an ambitious pattern for me. Which order would you knit it in please?
26.09.2026 - 16:16DROPS Design answered:
Dear Melanee, the pattern is worked altogether; you start at the bottom of the body, then divide for the front piece and the back piece at the armholes. You finish each piece separately and the shawl collar is worked over the stitches around the front / back piece. So you need to work the piece in order. You can start with the sleeves first if you want and then continue with the rest. Happy knitting!
28.09.2026 - 00:20
 Caroline wrote:
Bonjour, j'ai finalement réussi à relever mon nombre de mailles, 40 sur les côtés et 26 sur l'encolure. J'espère que c'est bon et que je ne vais pas devoir recommencer. En attendant votre réponse j'ai avancé, mais je ne comprends pas l'augmentation d'1 maille sur les 12 sections envers, à quoi correspondent ces 12 sections envers s'il vous plaît ? Merci d'avance 🙏🏻
31.07.2026 - 13:39DROPS Design answered:
Bonjour Caroline, vous tricotez en côtes 2 m end, 2 m env, mais pour que le col soit plus joli, vous allez augmenter dans les mailles envers du col (au milieu du col seulement), vous aurez ainsi des côtes 2 m end, 2 m env au début du rang (le long du devant), puis des côtes 2 m end/ 3 ml env autour de l'encolure (= 12 fois 3 m envers) et de nouveau 2 m end/ 2 m env le long de l'autre côté du devant. Bon tricot!
04.08.2026 - 17:42
Caroline wrote:
Bonjour, je suis arrivée au col châle, je tricote mon gilet en XL, je me demande comment je décide du nombre de mailles à relever. Il est indiqué entre 34 à 44 mailles. Est-ce que c'est en fonction de la taille du gilet? Merci d'avance pour votre réponse.
29.07.2026 - 14:59DROPS Design answered:
Bonjour Caroline, en fonction de votre tension en hauteur, vous allez relever plus ou moins de mailles, veillez à en avoir suffisamment pour éviter que les côtes ne resserrent l'ouvrage. Retrouvez ici comment on relève les mailles le long d'un côté et là le long d'un bord (type encolure dos par ex.). Bon tricot!
04.08.2026 - 17:16
Caroline wrote:
Bonjour, je suis arrivée au côté gauche, est-ce que vous pouvez m'expliquer pour les diminutions de l'encolure devant en xl ça dit, 4 fois tous les 4 rangs et 3 fois tous les 8 rangs. Je ne comprends pas ce que je dois faire exactement. Est-ce que c'est 1mailles pendant 4 rangs? Si oui je diminue donc 1m pendant 4 rangs sur l'endroit 4 fois, puis 1 mailles pendant 3 rangs endroit tous les 8 rangs? Merci d'avance
18.07.2026 - 10:46
Caroline wrote:
Bonjour, je suis arrivée au côté gauche, est-ce que vous pouvez m'expliquer pour les diminutions de l'encolure devant en xl ça dit, 4 fois tous les 4 rangs et 3 fois tous les 8 rangs. Je ne comprends pas ce que je dois faire exactement. Est-ce que c'est 1mailles pendant 4 rangs? Si oui je dinie donc 1m pendant 4 rangs sur l'endroit 4 fois, puis 1 mailles pendant 3 rangs endroit tous les 8 rangs? Merci d'avance
17.07.2026 - 12:17DROPS Design answered:
Bonjour Caroline, en XL vous allez diminuer pour l'encolure ainsi: *1 rang en diminuant 1 m pour l'encolure, 3 rangs sans diminuer*, tricotez 4 fois ces 4 rangs au total (16 rangs au total), puis tricotez *1 rang en diminuant 1 m pour l'encolure, 7 rangs sans diminuer*, tricotez 3 fois ces 8 rangs (24 rangs au total). Vous avez ainsi diminué 7 mailles et tricoté 16+24=40 rangs. Bon tricot!
03.08.2026 - 16:49
Caroline wrote:
Bonjour, j'en suis à la partie où on rabat pour les emmanchures. Il est indiqué que l'on doit tricoter chaque partie séparément. Si je comprends bien on mets chaque partie en attente sur des câbles et on tricote jusqu'à la fin , devant droit, devant gauche et enfin le dos? C'est pour être sûre et ne pas faire d'erreur. Merci beaucoup pour votre réponse
05.07.2026 - 10:23DROPS Design answered:
Bonjour Caroline, c'est exact, on termine maintenant chaque partie séparément en commençant par le dos, puis on va tricoter le devant droit et enfin le devant gauche. Bon tricot!
06.07.2026 - 07:38
Caroline wrote:
Bonjour, merci pour vos réponses. J'ai une nouvelle question concernant les boutonnières. Elles se font bien sûr 2 rangs? Endroit on tricote ensembles la 5eme et 6eme maille plus un jeté et envers on tricote le jeté à l'endroit. Mais le trou de passage du bouton est tout petit je ne comprends pas comment on peut avoir une ouverture assez grande pour un bouton sur ces deux rangs là.... Merci d'avance pour votre réponse 🤗
07.05.2026 - 13:51DROPS Design answered:
Bonjour Caroline, les boutonnières ne se font que sur un seul rang: vous tricotez 2 m ens à l'envers (les mailles des côtes) et vous faites 1 jeté (pour remplacer la maille diminuée et former ainsi un trou) - comme dans cette vidéo par ex (notez que l'on tricote 2 m ens à l'end dans la vidéo) - pour une boutonnière plus grande vous pouvez par exemple faire 1 double jeté (cf cette autre vidéo. Bon tricot!
07.05.2026 - 16:23
Caroline Pabst wrote:
Bonjour, je pense savoir pourquoi je ne comprends pas la construction, c'est un modèle qui se tricote de bas en haut c'est ça?
05.05.2026 - 07:37DROPS Design answered:
Bonjour Mme Pabst, tout à fait, vous tricotez d'abord le bas du gilet en un seul morceau en commençant par le devant droit, puis le dos puis le devant gauche (vu sur l'endroit), jusqu'aux emmanchures, puis on rabat les mailles des emmanchures et on termine chaque partie (dos, devant droit et devant gauche) séparément en allers et retours jusqu'aux épaules. On tricote ensuite les manches en rond jusqu'à la tête de manche que l'on tricote en allers et retours. On fait la couture des épaules, on assemble les manches et, tout à la fin, on relève les mailles du col autour de l'encolure. Est-ce un peu plus clair aini?
05.05.2026 - 09:59
Caroline Pabst wrote:
Peut être avez vous une vidéo qui expliquerait cette étape?
04.05.2026 - 16:48DROPS Design answered:
Bonjour Mme Pabst, nous n'avons pas de vidéo pour cette étape, suivez simplement les indications pas à pas, cf également réponse ci-dessous.
05.05.2026 - 08:36
|
||||||||||
Harald#haraldjacket |
||||||||||
 |
 |
|||||||||
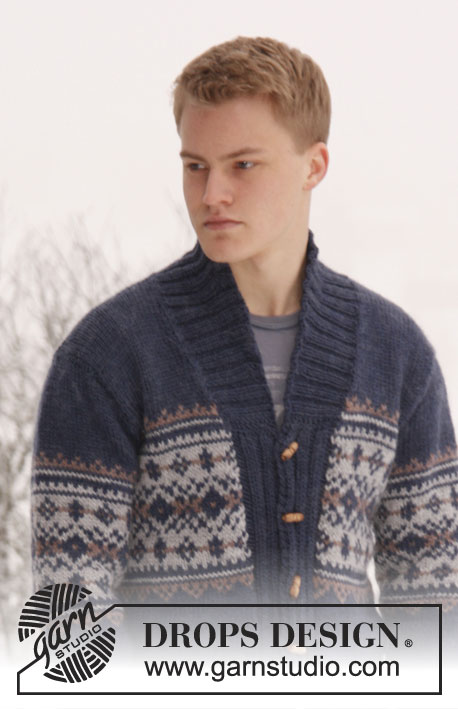
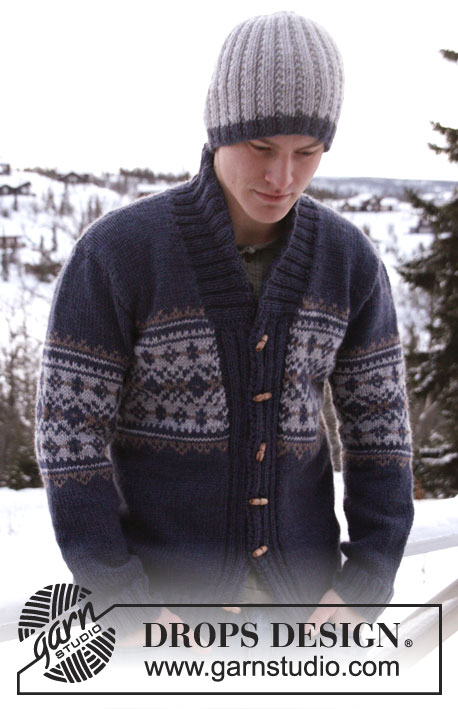
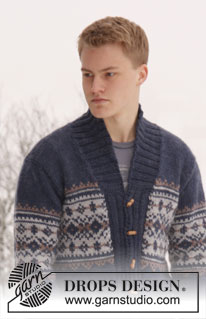
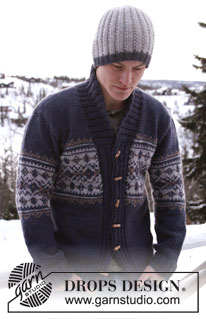
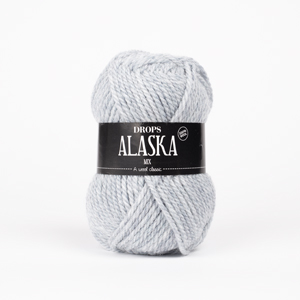
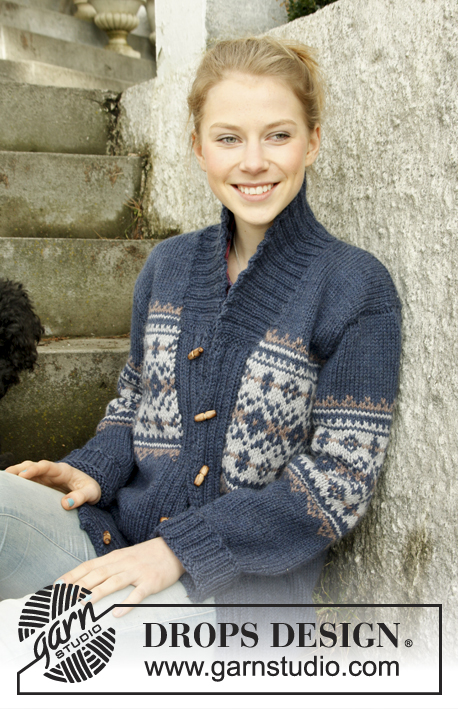
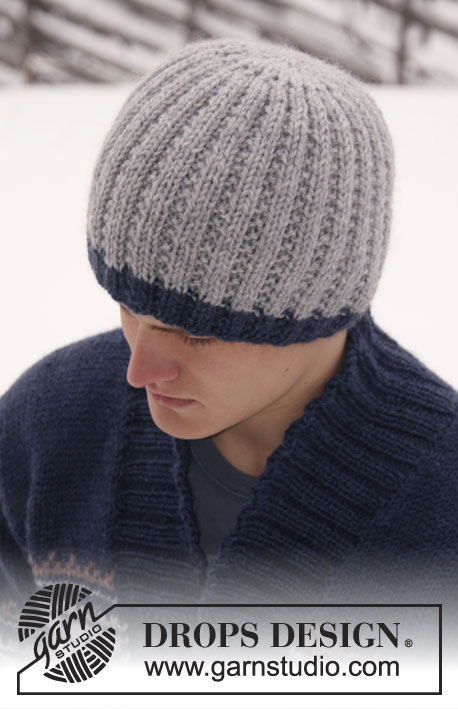
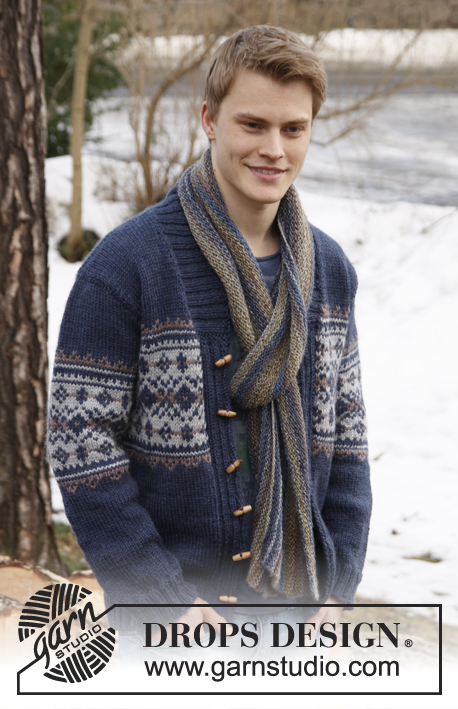
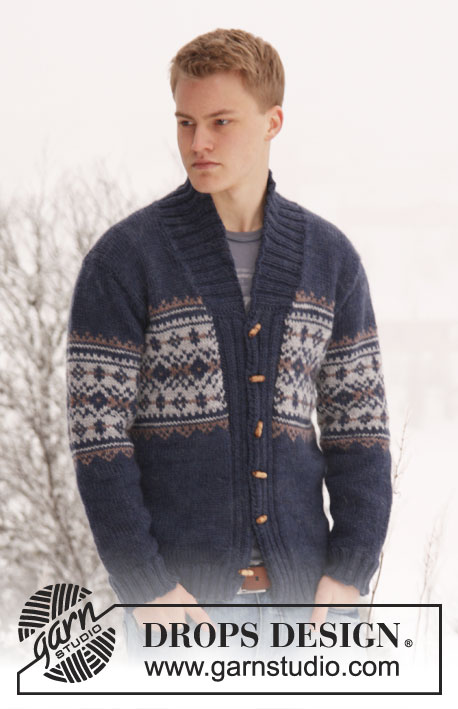
Men's knitted jacket in DROPS Alaska, with pattern and shawl collar. Size: S - XXXL.
DROPS Extra 0-813 |
||||||||||
|
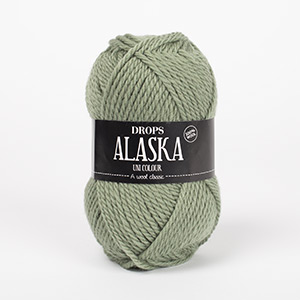
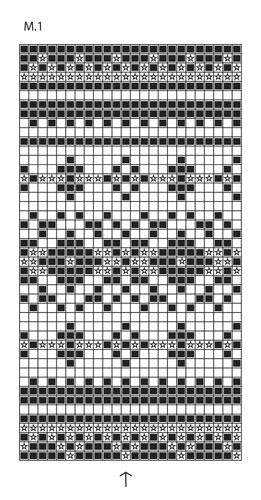
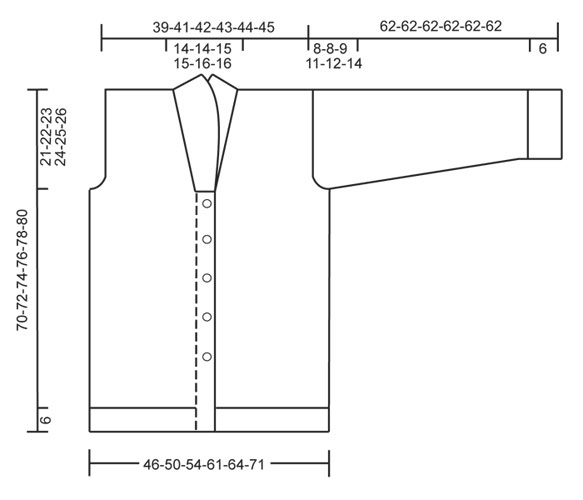
GARTER ST (back and forth on needle): K all rows. BUTTON HOLES: Cast off for button holes on left band, all cast offs are done from RS. 1 button hole = P tog 5th and 6th st from mid front and make 1 YO. On next row K the YO. Cast off for button holes when piece measures: SIZE S: 6, 14, 23, 31, 40 and 48 cm. SIZE M: 6, 15, 24, 32, 41 and 49 cm. SIZE L: 6, 15, 24, 33, 42 and 50 cm. SIZE XL: 6, 13, 21, 28, 36, 43 and 51 cm SIZE XXL: 7, 14, 22, 29, 37, 44 and 52 cm SIZE XXXL: 7, 15, 22, 30, 37, 45 and 53 cm PATTERN: See diagram M.1 – the diagram shows 2 repetitions in breadth. Work entire pattern in stocking st. DECREASE TIP (applies to neckline at the front): Dec inside 1 edge st in garter st. All dec are done from RS. Dec after 1 edge st as follows: Slip 1 st as if to K, K 1, psso. Dec before 1 edge st as follows: K 2 tog. -------------------------------------------------------- BODY: Worked back and forth on circular needle from mid front. Cast on 226-246-262-286-302-330 sts on circular needle size 4 mm with dark blue Alaska. P 1 row from WS. Then work next row as follows from RS: 2 edge sts in GARTER ST - see explanation above - * K 2/P 2 *, repeat from *-* until 4 sts remain and finish with K 2 and 2 edge sts in GARTER ST. Continue rib like this until piece measures 6 cm. AT THE SAME TIME when piece measures 6-6-6-6-7-7 cm, cast off for BUTTON HOLES on left band - see explanation above. After rib, switch to circular needle size 5 mm and work next row from RS as follows: 2 sts in garter st, K 2, P 2, K 2, P 2, K 2, P 2 (= 14 band sts), work in stocking st until 14 sts remain while AT THE SAME TIME dec 53-61-65-65-69-73 sts evenly (do not dec over bands), finish with P 2, K 2, P 2, K 2, P 2, K 2 and 2 sts in garter st = 173-185-197-221-233-257 sts. Insert a marker 47-50-53-59-62-68 sts in from each side (= 79-85-91-103-109-121 sts between markers on back piece). Then work in stocking st with 14 band sts in each side towards mid front as before. REMEMBER THE KNITTING TENSION! When piece measures 32-33-34-35-36-37 cm, work diagram M.1 as follows: Work 14 band sts as before with dark blue, work diagram M.1 until 15 sts remain, work 1st st in diagram M.1 (so that pattern beg and ends the same way on each side of band) and finish with 14 band sts in dark blue as before. When piece measures 49-50-51-52-53-54 cm, work next row from RS as follows: Cast off the first 13 sts, insert a marker (this marks where to start the knit up for collar), work 31-34-37-42-45-51 sts (= right front piece), cast off 6-6-6-8-8-8 sts for armhole, work 73-79-85-95-101-113 sts (= back piece), cast off 6-6-6-8-8-8 sts for armhole and work the rest of row (= 44-47-50-55-58-64 sts on left front piece). Turn and cast off the first 13 sts, insert a marker (this marks where to end the knit up for collar), work the rest of row = 31-34-37-42-45-51 sts. Finish each part separately. BACK PIECE: = 73-79-85-95-101-113 sts. Continue diagram M.1 (when diagram M.1 has been worked 1 time vertically, continue with dark blue until finished measurements) – AT THE SAME TIME cast off for armholes at beg of every row in each side: 3 sts 0-0-0-1-1-2 times, 2 sts 1-1-2-2-3-4 times and 1 st 1-3-3-4-4-4 times = 67-69-71-73-75-77 sts remain on needle. When piece measures 68-70-72-74-76-78 cm, cast off the middle 21-21-23-23-25-25 sts for neck. Now finish each shoulder separately. Continue to cast off 1 st on next row from neck = 22-23-23-24-24-25 sts remain on the shoulder. Cast off when piece measures 70-72-74-76-78-80 cm. RIGHT FRONT PIECE: = 31-34-37-42-45-51 sts. Continue diagram M.1 as on back piece with 1 edge st in garter st towards mid front. AT THE SAME TIME cast off for armhole in the side as on back piece. AT THE SAME TIME when piece measures 50-51-52-53-54-55 cm, dec 1 st towards the neck - SEE DECREASE TIP! Repeat dec on every 4th row a total of 3-3-4-4-6-6 times, and on every 8th row a total of 3-3-3-3-2-2 time. After all cast offs and dec are done, 22-23-23-24-24-25 sts remain on shoulder. Cast off when piece measures 70-72-74-76-78-80 cm. LEFT FRONT PIECE: Work as right front piece but reversed. SLEEVE: Worked in the round on double pointed needles, switch to circular needle when needed. Cast on 52-52-56-56-60-60 sts on double pointed needles size 4 mm with dark blue. K 1 round, then work rib = K 2/P 2. When piece measures 6 cm, switch to double pointed needles size 5 mm. K 1 round while AT THE SAME TIME dec 11-9-11-11-13-13 sts evenly = 41-43-45-45-47-47 sts. Insert a marker at beg of round (= mid under sleeve). Then work in stocking st. When piece measures 7-7-7-7-9-10 cm, inc 1 st on each side of marker mid under sleeve. Repeat inc a total of 11-13-14-16-17-19 times in Size S: On every 10th round, Size M: Every 8th round, Size L: Every 7th round, Size XL: Every 6th round, Size XXL: Every 5th round and Size XXXL: Every 4th round = 63-69-73-77-81-85 sts. AT THE SAME TIME when piece measures 30-30-29-27-26-24 cm, insert a marker in the middle st on round (= mid on top of shoulder). Work diagram M.1 – NOTE: St marked with arrow in diagram should be the st with marker mid on top of sleeve. When diagram M.1 has been worked 1 time vertically, continue with dark blue until finished measurements. AT THE SAME TIME when piece measures 54-54-53-51-50-48 cm (shorter measurements in the larger sizes because of longer sleeve cap and broader shoulder width), cast off 6-6-6-8-8-8 sts mid under sleeve. Then work back and forth on needle until finished measurements. AT THE SAME TIME cast off for sleeve cap at beg of every row in each side: 2 sts 3-3-3-3-3-4 times and 1 st 2-2-2-4-4-5 times. Then cast off 2 sts in each side until piece measures 61 cm in all sizes, then cast off 3 sts 1 time in each side. Cast off the remaining sts, the piece measures approx. 62 cm in all sizes. ASSEMBLY: Sew the shoulder seams. SHAWL COLLAR: Knit up sts (inside 1 edge st) on circular needle size 4 mm with dark blue - start mid front at marker on right front piece: Knit up approx. 34 to 44 sts up to shoulder, then 22 to 28 sts along the neck, and 34 to 44 sts down along left front piece until marker = 90 to 116 sts. K 1 row from WS while AT THE SAME TIME inc no of sts to 126-130-138-142-150-154. Then work rib as follows (seen from RS): 2 sts in garter st, * K 2, P 2 *, repeat from *-* and finish with K 2 and 2 sts in garter st. Continue like this until collar measures approx. 5 cm. Now inc 1 st in each of the middle 12 P-sections, seen from RS (= back of neck) = 138-142-150-154-162-166 sts. Then work K over K and P over P until collar measures approx. 7 cm. Now work as follows: Work 1 row as before and slip the first 10 sts worked on a stitch holder, turn piece, work the rest of row and slip the first 10 sts worked at the beg of row on another stitch holder. Turn piece, work the rest of row and slip the first 10 sts worked at the beg of row on the first stitch holder, turn piece, work the rest of row and slip the first 10 sts worked at the beg of row on the other stitch holder. Continue like this until there are a total of 40 sts on the stitch holders in each side. Then slip sts from stitch holders back on needle and work 1 row as before over all the 138-142-150-154-162-166 sts – NOTE: To avoid holes in every transition where piece was turned, slip loop before next st twisted on needle and work tog with first st on needle. Cast off with K over K and P over P. Neatly fasten collar with stitches in each side towards band – sew edge to edge to avoid a chunky seam. MORE ASSEMBLY: Sew in sleeves and sew on buttons. |
||||||||||
Diagram explanations |
||||||||||
|
||||||||||
 |
||||||||||
 |
||||||||||
Have you finished this pattern?Tag your pictures with #dropspattern #haraldjacket or submit them to the #dropsfan gallery. Do you need help with this pattern?You'll find 19 tutorial videos, a Comments/Questions area and more by visiting the pattern on garnstudio.com. © 1982-2026 DROPS Design A/S. We reserve all rights. This document, including all its sub-sections, has copyrights. Read more about what you can do with our patterns at the bottom of each pattern on our site. |
||||||||||






With over 40 years in knitting and crochet design, DROPS Design offers one of the most extensive collections of free patterns on the internet - translated to 17 languages. As of today we count 333 catalogues and 12525 patterns translated into English (UK/cm). 12525
We work hard to bring you the best knitting and crochet have to offer, inspiration and advice as well as great quality yarns at incredible prices! Would you like to use our patterns for other than personal use? You can read what you are allowed to do in the Copyright text at the bottom of all our patterns. Happy crafting!
Post a comment to pattern DROPS Extra 0-813
We would love to hear what you have to say about this pattern!
If you want to leave a question, please make sure you select the correct category in the form below, to speed up the answering process. Required fields are marked *.