
Popular categories
Looking for a yarn?


Comments / Questions (77)
![]() Zineb wrote:
Zineb wrote:
Merci infiniment pour votre réponse et vos explications.cdt
21.02.2015 - 20:39
![]() Zineb wrote:
Zineb wrote:
Bonjour.Tout d'abord merci pour votre générosité.Je n'arrive pas à réaliser le tour du cou.vous parlez de diagramme vue d endroit et pourtant dans le texte il s agit de l envers(envers:8pts mousse-M1-M2). Autre chose je ne comprends pas la phrase: sur les 2rgs raccourcis.vs ecrivez tous les rgs puis les 17seulement. Pourriez-vous m eclairer j ai commenceé 10 fois le début.merci d avance
17.02.2015 - 14:55DROPS Design answered:
Bonjour Mme Zineb, le 1er rang des diagrammes se tricote ici sur l'envers, donc pour M2, le 1er rang = à l'end sur l'envers, et pour M1, tricotez comme les mailles doivent se présenter sur l'endroit, c'est-à-dire 3 m end, 3 m env, 3 m end, 6 m env, 3 m end, 3 m env, 3 m end. Le rang 2 et tous les rangs impairs seront sur l'endroit (torsades). En même temps, quand vous tricotez le rang 2 (= sur l'endroit), vous tricotez des rangs raccourcis (2 rangs sur toutes les mailles, 2 rangs sur 17 m= les mailles tricotées en M2). Continuez ces rangs raccourcis ainsi, quand vous tricotez toutes les mailles, vous continuez M1 et les torsades. Bon tricot!
17.02.2015 - 15:27
![]() GG wrote:
GG wrote:
Bonjour; Merci de votre réponse rapide, en fait j'ai sélectionné le diagramme (bien qu'il soit incomplet en vue) j'ai fait ensuite un copie/collé sur Word office , et celui -ci apparait comme par magie ! :-) Bonne continuation à vous. Cordialement. Geneviève
07.02.2015 - 12:17
![]() GG wrote:
GG wrote:
Bonsoir Les diagrammes du modèle DROPS 114-5 by DROPS Design ne s'affichent pas :-( j'aimerai tricoter ce modèle, mais difficile sans le croquis, est-il possible de le récupérer SVP ? Merci .:-) Cordialement GG
06.02.2015 - 00:47DROPS Design answered:
Bonjour GG, les diagrammes s'affichent bien en bas de page, c'était peut-être un bug passager, si vous ne les voyez toujours pas, envoyez un mail à france@garnstudio.com - merci. Bon tricot!
06.02.2015 - 11:29Cenia wrote:
Un GRAND et GROS MERCI. Vous êtes généreuse. Wow!. Je vous souhaite une excellente journée!
07.03.2014 - 13:27
![]() Paula wrote:
Paula wrote:
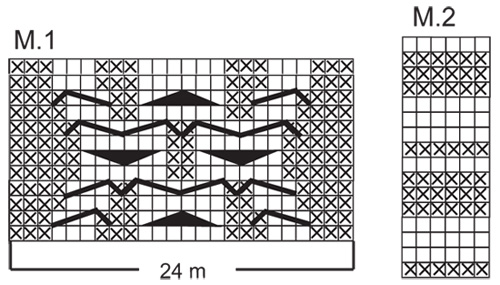
I have a question about the 114-5 neck warmer - it says to follow chart M1 on 24 stitches then m2 on 17 sts. I already made the mittens and followed these two charts with not problem- but looking at the photos - the neck warmer seems to be following only chart m1 on the 24 sts and then just a garter patten on last 17 stitches - but also looks like there is some sort of break in the garter rows giving it a rippling effect -- would appreciate help with this - thanks paula
28.02.2014 - 19:49DROPS Design answered:
The garter pattern you see at the side of neck warmer is what it looks like when following the M.2 chart. When working M.2 make sure to keep track on if you are on RS or WS, and see the X on a RS row are P but if you have X on a WS row then they are K and so on.
01.03.2014 - 00:39
![]() Annika wrote:
Annika wrote:
Det måste vara fel antal m för mössan. 23 m stickas på 2 strumpstickor fram o tillbaka. Ska det vara 123? Förstår inte sen ska 104 m plockas upp från dessa 23. Hjälp mig Tack på förhand
23.02.2014 - 17:36DROPS Design answered:
Hej Annika. Man startar med att sticka kanten nederst på mössan sidledes. Du lägger upp o stickar fram o tillbaka över 23 maskor tills detta bandet mäter 48 cm. Sedan plockas de 104 maskorna upp längs denna 48 cm långa kant.
01.03.2014 - 01:22Cenia wrote:
J'adore ce site. J'ai une question, Pourriez-vous m'expliquer que veut dire dans bordure"... à partir du milieu dos?" Merci pour bien vouloir me répondre.
02.02.2014 - 14:09DROPS Design answered:
Bonjour Cénia et merci. La bordure se tricote à partir de l'arrière du bonnet, c'est-à-dire que la couture sera au milieu dos. Bon tricot!
03.02.2014 - 09:10
![]() Nina wrote:
Nina wrote:
Muss die Kante v.d. Mütze abgekettet werden? Oder mit offenen Maschen zusammengenäht? Stimmt es, dass die letzte Reihe der M1 die Rückseite ist? Ich musste eine Reihe nachstricken, damit die Anleitung stimmt. Vielen Dank
20.11.2013 - 14:53DROPS Design answered:
Liebe Nina, wir haben die Kante abgekettet und zusammengenäht. Und ja, die letzte R von M1 ist eine Rückreihe.
21.11.2013 - 18:36
![]() Nina wrote:
Nina wrote:
Guten Tag, wo nehme ich den zweiten Faden her für die äusserste Masche? ich zitiere: Die äusserste M. an der unteren Kante wird immer mit 2 Fäden gestrickt (das ist die letzte M. der ersten Runde).
10.11.2013 - 23:58DROPS Design answered:
Liebe Nina, Sie können dafür einen kleinen Knäuel Wolle vom Hauptknäuel abwickeln. Wir haben diesen Hinweis in der Anleitung ergänzt.
11.11.2013 - 07:20
|
|||||||||||||||||||
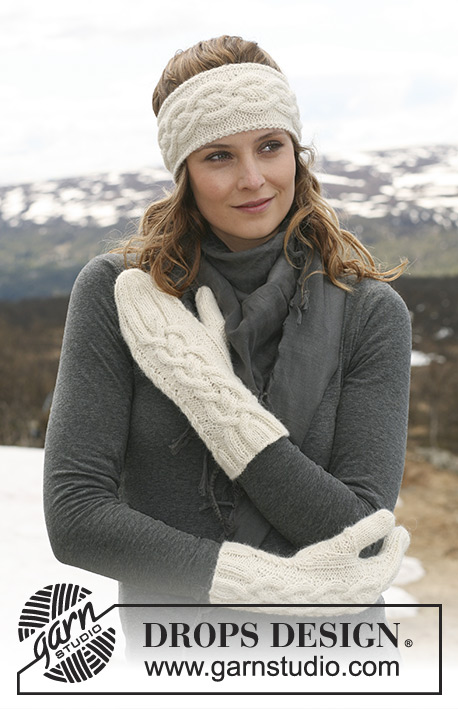
Alpine Twist Set#alpinetwistset |
|||||||||||||||||||
|
|
|||||||||||||||||||
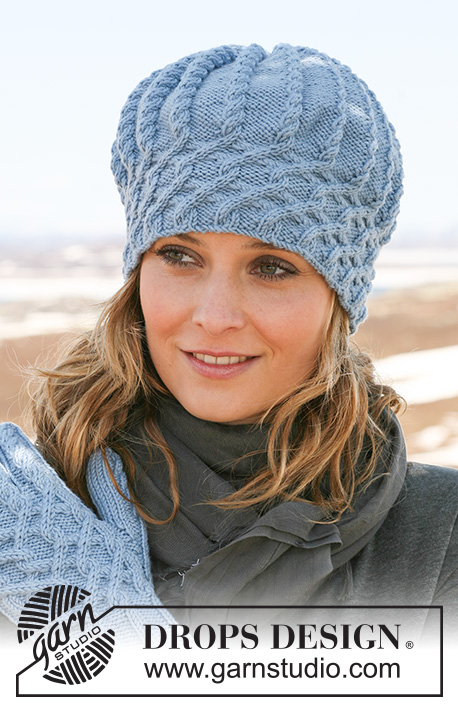
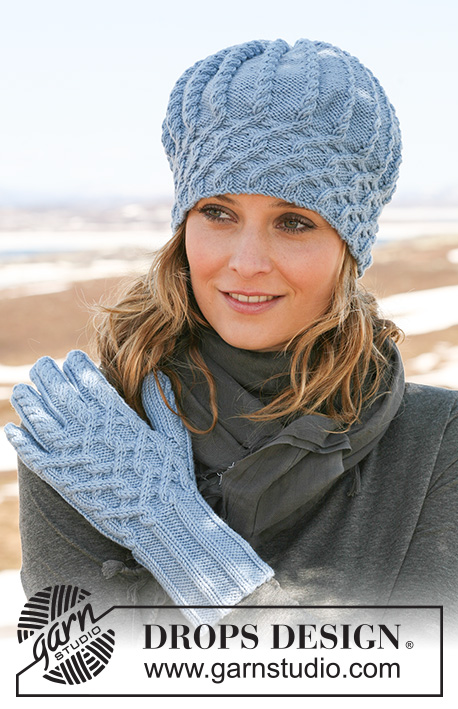
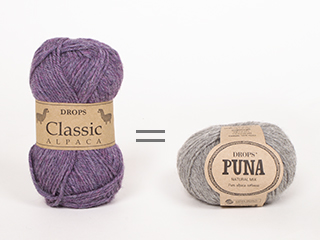
DROPS hat with cables and neck warmer with cables and buttoned at front in ”Classic Alpaca” or "Puna".
DROPS 114-5 |
|||||||||||||||||||
|
GARTER ST (back and forth on needle): K all rows. PATTERN: See diagram M.1 and M.2. Diagram shows the pattern from RS. -------------------------------------------------------- HAT: First work bottom edge back and forth on needle, then pick up sts in edge and continue in the round towards top of hat. EDGE: Worked back and forth on 2 double pointed needles from mid back to mid back. Cast on 23 sts on needle size 4 mm with Classic Alpaca or Puna. K 1 row from WS. NOTE: Work the bottom st (= last st on first row) in double thread throughout to make the edge firmer, i.e. have an extra ball of yarn and use this only for this st. Work next row as follows (from RS): 2 GARTER STS – see above - P3, inc 1 st in next st and K both sts, K1, P3, K1, inc 1 st in each of the next 2 sts and K all 4 sts, K1, P3, K1, inc 1 st in next st and K both sts, P3 and 1 garter st = 27 sts. Continue as follows: 1 garter st, M.1 (first row = WS) and 2 garter sts (= towards bottom edge). Continue in pattern like this until piece measures approx 48 cm, adjust to after the last but one row in M.1 (i.e. row from WS). Work next row as follows from RS: 2 garter sts, P3, K2 tog, K1, P3, K1, K2 tog, K2 tog, K1, P3, K1, K2 tog, P3 and 1 garter st = 23 sts. K 1 row on all sts from WS and then cast off. Sew tog, edge to edge, mid back. HAT: Pick up 104 sts with Classic Alpaca or Puna on circular needle size 4 mm along the side of edge with only 1 garter st – pick up inside this garter st (approx 21 sts on 10 cm). Work stocking st in the round. When piece measures 4 cm from where sts were picked up insert 8 markers in piece with 13 sts between each. On next round dec 1 st before each marker by K2 tog. Repeat the dec on every other round a total of 11 times = 16 sts. Cut the thread, pull through remaining sts, tighten and fasten. Hat measures approx 22 cm in total. -------------------------------------------------------- NECK WARMER: Worked from side to side back and forth on needle. Cast on 45 sts on needle size 4 mm with Classic Alpaca or Puna. Work GARTER ST (first row = RS) on all sts – see above – AT THE SAME TIME on row 5 make 1 buttonhole as follows: Work 37 sts, cast off 3 sts, work 5 sts. On next row cast on 3 new sts over cast off sts. After 10 rows garter st work next row as follows (from RS): 17 garter sts, P3, inc 1 st in next st and K both sts, K1, P3, K1, inc 1 st in each of the next 2 sts and K all 4 sts, K1, P3, K1, inc 1 st in next st and K both sts, P3 and 8 garter sts = 49 sts. Work next row as follows (= WS): 8 garter sts, M.1 (= 24 sts) and M.2 on 17 sts. Continue like this, AT THE SAME TIME (from next row) work shortened rows as follows: * 2 rows on all sts, 2 rows back and forth on the bottom 17 sts (= M.2) only *, repeat from *-* until piece measures approx 52 cm on the shorter side - adjust to after the last but one row in M.1 (i.e row from WS). Work next row as follows (from RS): 17 garter st, P3, K2 tog, K1, P3, K1, K2 tog, K2 tog, K1, P3, K1, K2 tog, P3 and 8 garter sts = 45 sts. Work 10 rows garter st on all sts, cast off. Sew on button mid in M.1 approx 6 cm from the edge. |
|||||||||||||||||||
Diagram explanations |
|||||||||||||||||||
|
|||||||||||||||||||
 |
|||||||||||||||||||
Have you finished this pattern?Tag your pictures with #dropspattern #alpinetwistset or submit them to the #dropsfan gallery. Do you need help with this pattern?You'll find 19 tutorial videos, a Comments/Questions area and more by visiting the pattern on garnstudio.com. © 1982-2026 DROPS Design A/S. We reserve all rights. This document, including all its sub-sections, has copyrights. Read more about what you can do with our patterns at the bottom of each pattern on our site. |
|||||||||||||||||||


With over 40 years in knitting and crochet design, DROPS Design offers one of the most extensive collections of free patterns on the internet - translated to 17 languages. As of today we count 324 catalogues and 12290 patterns translated into English (UK/cm). 12290
We work hard to bring you the best knitting and crochet have to offer, inspiration and advice as well as great quality yarns at incredible prices! Would you like to use our patterns for other than personal use? You can read what you are allowed to do in the Copyright text at the bottom of all our patterns. Happy crafting!
Post a comment to pattern DROPS 114-5
We would love to hear what you have to say about this pattern!
If you want to leave a question, please make sure you select the correct category in the form below, to speed up the answering process. Required fields are marked *.