
Popular categories
Looking for a yarn?


Comments / Questions (24)
![]() Decosterd wrote:
Decosterd wrote:
Bonsoir, je voudrai tricoter le béret et je ne comprends pas la gestion des repères pour placer les augmentations. Faut-il les décaler au fur et à mesure des rangs augmentés?
12.10.2024 - 23:06DROPS Design answered:
Bonjour Mme Decosterd, vous allez devoir faire bien suivre vos marqueurs en hauteur au fur et à mesure de l'avancée du travail pour bien les garder à la bonne place. Quand vous augmentez, vous aurez d'abord toujours plus de mailles entre chaque marqueur, puis quand vous diminuerez vous aurez moins de mailles entre chaque marqueur. Bon tricot!
14.10.2024 - 08:26
![]() Marina Mcdonough wrote:
Marina Mcdonough wrote:
Can I use circular knitting needles for the hat? I am unclear if straight needles mean double pointed, straight one point/circular are ok. Thanks.
12.12.2022 - 02:44DROPS Design answered:
Hi Marina, The hat is worked back and forth, then sewn together to finish. So, yes, you can either use straight or circular needles. Happy knitting!
12.12.2022 - 06:49
![]() Josiane wrote:
Josiane wrote:
Bonjour j'ai commencée le bonnet, je suis arrivée au 10 cm de hauteur après les cotes.et je ne comprends pas les diminutions ts les 2rangs 34 fois =27 mailles combien de rangs ou de mailles diminuées sur un rangs au rang suivant combien reste t'il de mailles pour les diminuer 2par 2 merci de votre réponse
22.12.2014 - 19:39DROPS Design answered:
Bonjour Josiane, vous diminuez à gauche de chaque marqueur (= après chaque marqueur), soit 5 x 2 m ens à l'end par rang de diminution (= tous les rangs sur l'endroit, c'est-à-dire tous les 2 rangs) et ceci 34 fois au total, il reste 27 m. Bon tricot!
23.12.2014 - 18:53
![]() Maria wrote:
Maria wrote:
Hej! Jag stickar mössan, men hittar inte hur många cm som resåren stickas i o om man sedan byter stickor eller fortsätter med 2,5. Tack!
28.10.2013 - 21:06DROPS Design answered:
När arb mäter 6 cm fortsätter du i rätst, och du fortsätter med st 2,5. Lycka till!
30.10.2013 - 09:20
![]() Joline 103 Idées wrote:
Joline 103 Idées wrote:
Je voudrais faire les gants mais je ne lis nulle part s'ils sont fait avec 2 aiguilles ou 4 ?? mais je dois être un peu myope ????
02.09.2013 - 18:21DROPS Design answered:
Bonjour Joline, les gants se tricotent en allers et retours, on fait les coutures sur les côtés et les doigts à la fin. Bon tricot!
03.09.2013 - 10:37
![]() Drops Design France wrote:
Drops Design France wrote:
Bonjour Looklady, après les côtes, on lit : "Tricoter maintenant toutes les m env ens à l’env. = on obtient (47) 53 m" : vous tricotez toutes les mailles envers des côtes ens à l'envers pour diminuer et obtenir (47) 53 m. Bon tricot !
02.01.2012 - 09:08
![]() Looklady wrote:
Looklady wrote:
Il me semble qu'il y a une erreur sur les gants car nous avons au debut (62) 70 mailles et quand on fait les diminutions c marquer tricoter toutes les mailles envers enssemble sur l'enverst et on obtiens (47) 53 je ne pense pas que l'on puisse obtenir ce n'ombre de maille
25.12.2011 - 13:48
![]() Drops Design wrote:
Drops Design wrote:
Bonjour et merci Lorraine, la bordure au crochet est indiquée dans les explications pour les gants et pour le bonnet (les côtes sont repliées au bonnet).
27.01.2010 - 18:06
![]() Lorraine54000 wrote:
Lorraine54000 wrote:
Sur le superbe modèle, il aurait une bordure fantaisie apres les cotes? je trouve pas l explication, quelqu un peut m xpliquer merci
27.01.2010 - 15:45
![]() GretheAndersen wrote:
GretheAndersen wrote:
lige den jeg manglede, den er sød
11.08.2006 - 14:13
|
|
DROPS 98-11 |
|
|
|
|
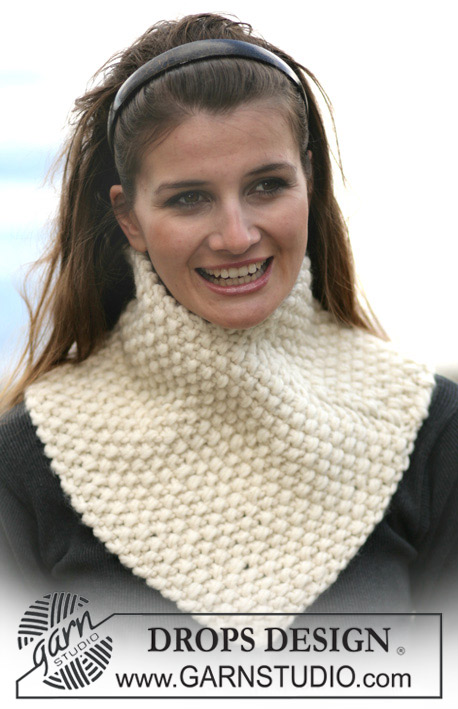
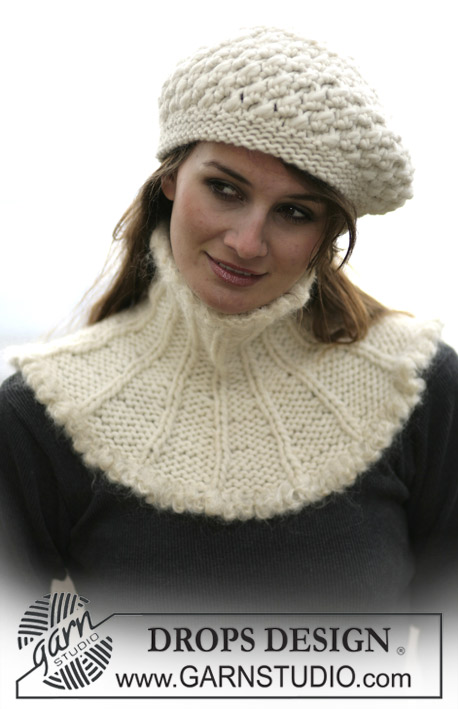
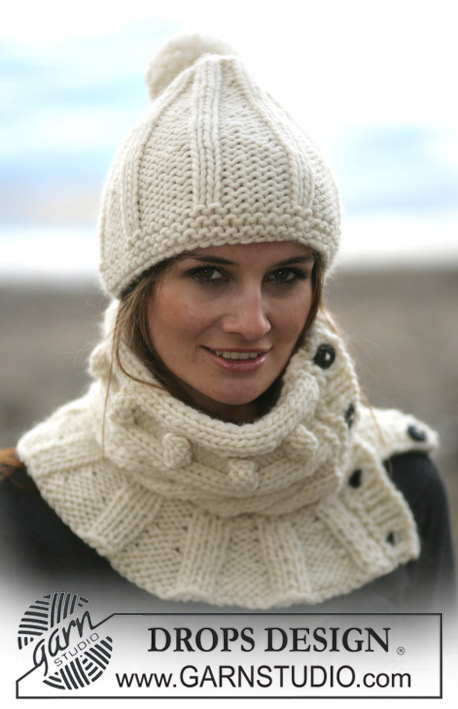
knitted gloves and beret in DROPS Alpaca
DROPS 98-11 |
|
|
Knitting tension: 26 sts x 34 rows on needles size 2.5 mm in stocking stitch = 10x10cm. 26 sts x 52 rows in garter sts = 10 x 10 cm. Garter sts: knit all rows. Rib: *K2, P2*, repeat from *-* GLOVES: Right glove: The glove is knitted back and forth on pointed needles and sewn tog at the side afterwards. Cast on 62-70 using two 2.5mm needles and Alpaca (to make sure the edge becomes elastic). Remove 1 needle and knit 5 rows garter sts. Knit next row as follows from the WS: 1 st in garter sts, *P2, K2*, repeat from *-* and finish with 1 st in garter sts. Continue in Rib until piece measures 11-12 cm – adjust so that next row is from the RS. Now P all P2 tog to P1 = 47-53 sts. P 3 rows and continue in garter sts until finished measurements. At the same time on the first row after the Rib dec 5-3 sts evenly = 42-50 sts. Insert a marking thread in the 22-26 st (seen from the RS). Thumb: At the same time when piece measures 13-14 cm inc 1 st on each side of the MT on every 4th row a total of 3-4 times = 7-9 thumb sts (inc by making a yo and knit into back of yo on the returning row to avoid making a hole). When piece measures 18-20 cm put the 7-9 thumb sts on a thread and cast on 1 new st over the thread = 42-50 sts. Continue in garter sts as before. When piece measures 22-24 cm knit the fingers as follows from the RS: Littlefinger: K1, inc 1 st, K 3-4, put the middle 34-40 sts on a thread, inc 1 st, K 3-4 sts, inc 1 st, K1 = 11-13 sts on needle. Knit garter sts until finger measures approx 5-7 cm. Now knit all sts tog 2 by 2, cut the thread and pull it through remaining sts. Put the 34-40 sts from thread back on needle and knit 4 rows garter sts over all sts. Make sure the first row is from the RS. Ring Finger: K1, inc 1 st, K 4-5, put 23-27 sts on a thread, inc 1 st, K 5-6 sts, inc 1 st, K1 = 14-16 sts on needle. Knit garter sts until finger measures approx 7.5-9 cm. Now knit all sts tog 2 by 2, cut the thread and pull it through remaining sts. Put the 23-27 sts from thread back on needle. Middle finger: K1, inc 1 st, K 5-6, put 11-13 sts on a thread, inc 1 st, K 5-6 sts, inc 1 st, K1 = 15-17 sts on needle. Knit garter sts until finger measures approx 7.5-9 cm. Now knit all sts tog 2 by 2, cut the thread and pull it through remaining sts. Index finger: Put the last 11-13 sts from thread back on needle. Knit garter sts, at the same time inc 4 sts evenly = 25-27 sts. When finger measures approx 6-7.5 cm knit all sts tog 2 by 2, cut the thread and pull it through remaining sts. Thumb: Put the 7-9 thumb sts back on needle and pick up 7-9 sts behind these = 14-18 sts. Knit approx 5.5-6 cm garter sts, knit all sts 2 and 2, cut the thread and pull it through remaining sts. Assembly: Sew fingers tog in the outer loops and sew tog glove at side. Crochet border: Crochet a border round the glove opening with crochet hook size 7 mm and Snow as follows: 1 dc in first st (beg in the middle of 2 knitted sts), *1 ch, 1 dc in next 2 K sts*, repeat from *-* and finish with 1 ch and 1 sl st in dc from beg of row. Knit another glove, but mirrored – i.e. insert a MT in the 21-25 st and inc for thumb on both sides of MT. BERET: Knitted back and forth on needle and sewn tog at the side afterwards. Loosely cast on 122-142 sts on needle size 2.5 mm with Alpaca. P 1 row from WS and continue in Rib (K2, P2) with 1 edge st in garter sts each side. When piece measures 6 cm insert 5 marking threads as follows: the first after 1 st, the remaining 4 with 24-28 sts between each. There are 25-29 sts after the last MT. Now continue in garter sts and inc to the left of all MT (seen from the RS) on every other row: 4 times and then on every 4th row: 7 times = 177-197 sts (inc by making a yo, K into back of yo on returning row to avoid making a hole). When piece measures 9-10 cm from the Rib dec to the left of all MT (seen from the RS) on every other row: 31-34 times = 22-27 sts (dec by K2 tog). Knit remaining sts tog 2 by 2, cut the thread and pull it through remaining sts. Sew hat tog mid back inside 1 edge st. Crochet border: Crochet a border round the opening with crochet hook size 7 mm and Snow as follows: 1 dc in first st (beg in the middle of 2 knitted sts), *1 ch, 1 dc in next 2 K sts*, repeat from *-* and finish with 1 ch and 1 sl st in dc from beg of row. Pompon: Make a pompon with a diameter of approx 5 cm with Snow and attach to the top of hat. Please see Garnstudio’s Technique Pages in the School of Handcraft on the pattern front page. |
|
Have you finished this pattern?Tag your pictures with #dropspattern or submit them to the #dropsfan gallery. Do you need help with this pattern?You'll find 28 tutorial videos, a Comments/Questions area and more by visiting the pattern on garnstudio.com. © 1982-2026 DROPS Design A/S. We reserve all rights. This document, including all its sub-sections, has copyrights. Read more about what you can do with our patterns at the bottom of each pattern on our site. |


With over 40 years in knitting and crochet design, DROPS Design offers one of the most extensive collections of free patterns on the internet - translated to 17 languages. As of today we count 324 catalogues and 12290 patterns translated into English (UK/cm). 12290
We work hard to bring you the best knitting and crochet have to offer, inspiration and advice as well as great quality yarns at incredible prices! Would you like to use our patterns for other than personal use? You can read what you are allowed to do in the Copyright text at the bottom of all our patterns. Happy crafting!
Post a comment to pattern DROPS 98-11
We would love to hear what you have to say about this pattern!
If you want to leave a question, please make sure you select the correct category in the form below, to speed up the answering process. Required fields are marked *.